
Vault of Glass Guide
Done by: Kenai#2066 | Jan 7th 2023
Drop Table
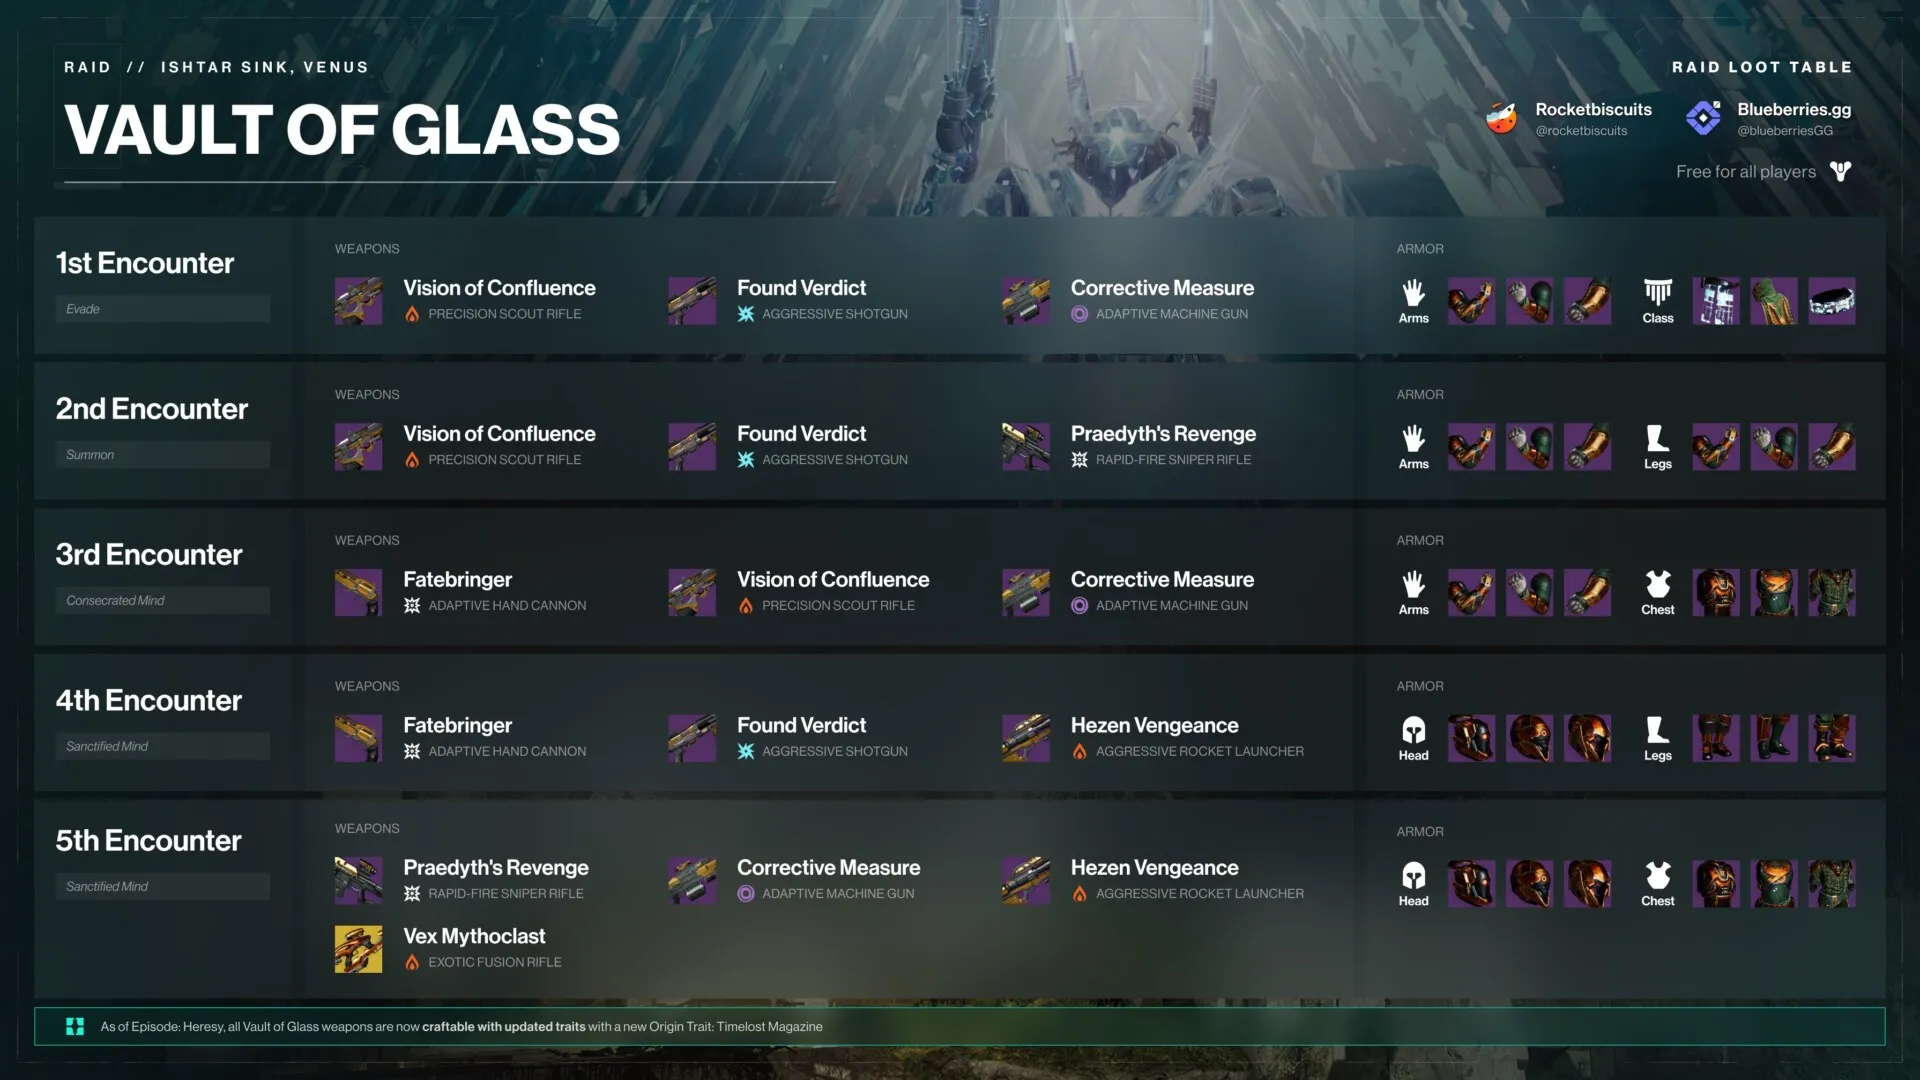
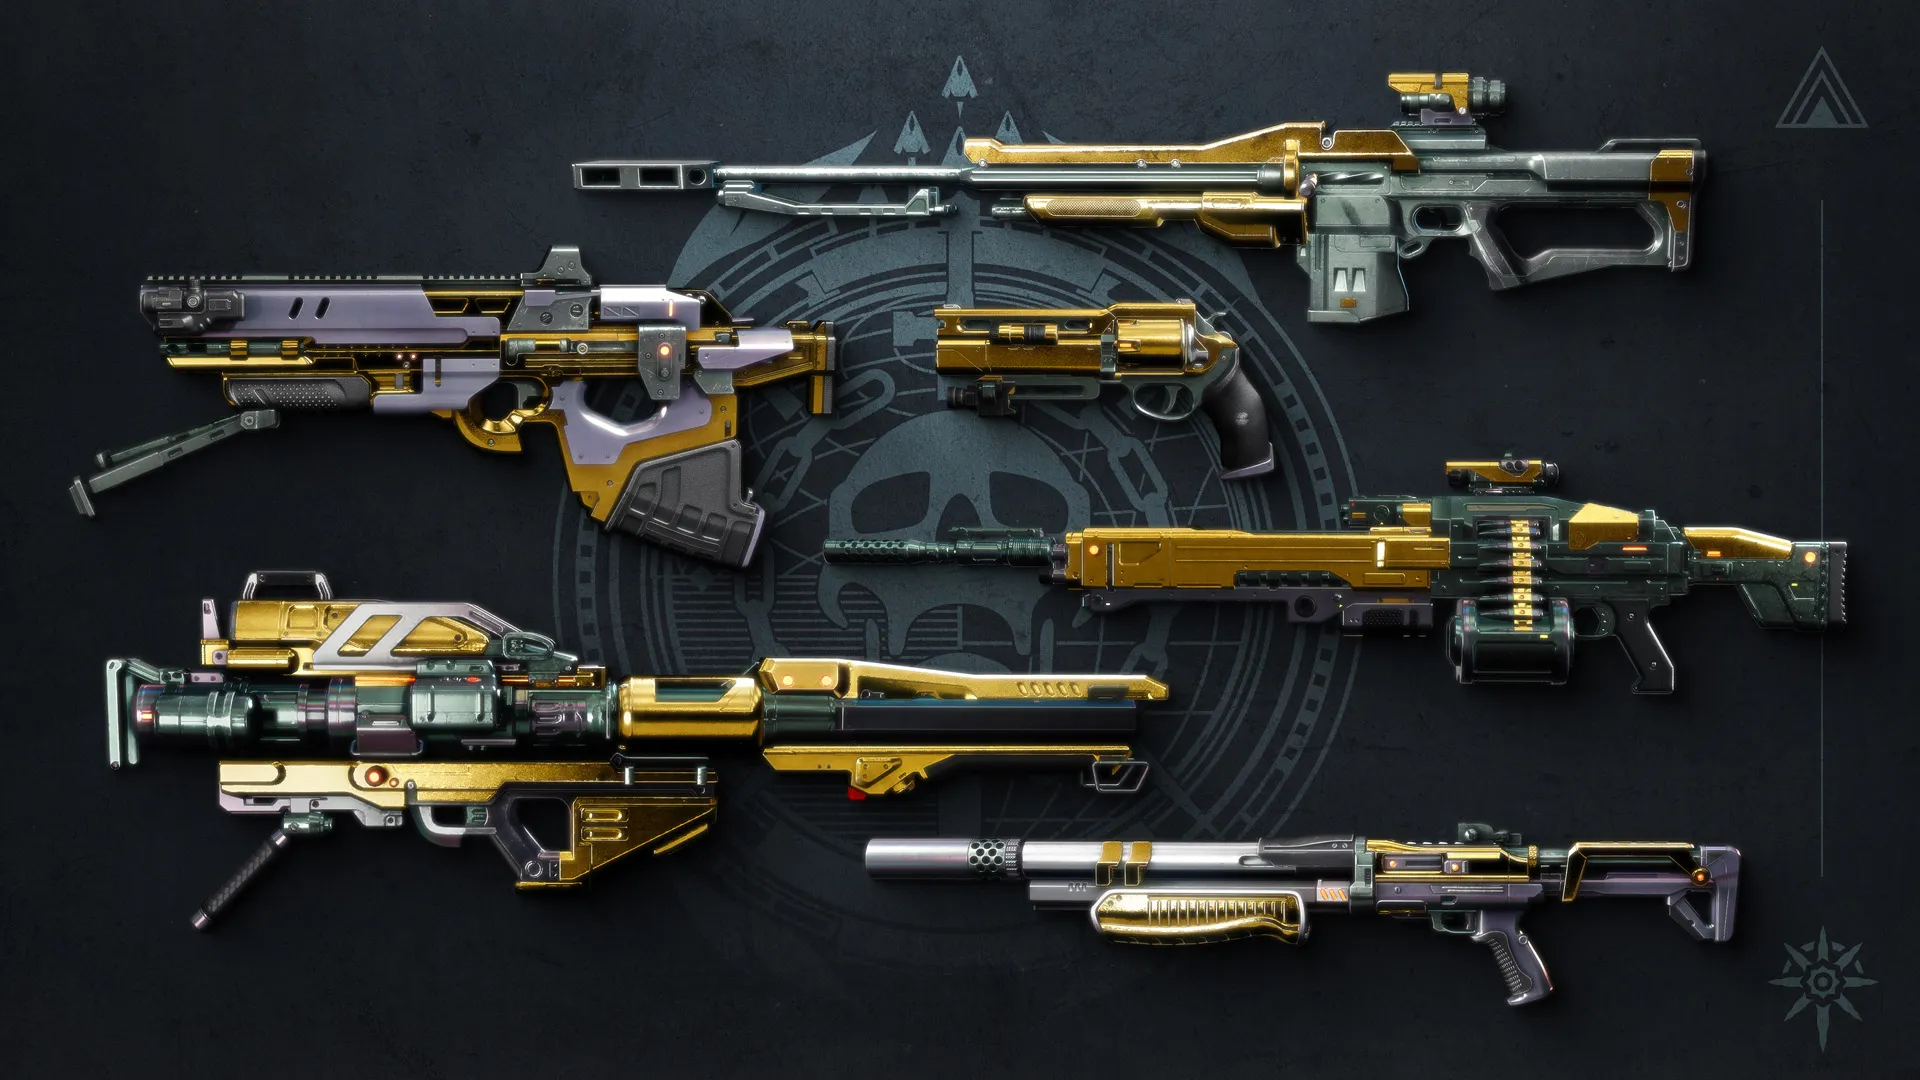
Weapons

Timelost Magazine - Final blows with this weapon grant bonus Super energy. When your Super expires, this weapon's magazine size is doubled for a long duration and reloads from reserves.
 Fatebringer
Legendary //
Adaptive Frame // Hand Cannon
Desirable Perks
- Barrel:
- Corkscrew Rifling
- Magazine:
- Accurized Rounds
- Column 1 Perks:
- Explosive Payload
- Column 2 Perks:
- Firefly
Masterwork: Range
Mod Slot: Minor Spec, Adept Range, Adept Big Ones Spec

One of the most popular weapons back in Destiny 1, Fatebringer in Destiny 2 continues to carry the mantle of being one of the best Hand Cannons in the game. In PvE, it is able to roll double damage perks, which is very rare. It helps that the damage perks are good ones as well-Explosive Payload adds free damage to your weapon for no cost at all, as well as giving your weapon “infinite” range. Frenzy can be used in the second column for a more passive buff to damage, handling and reload. Firefly can also be picked to give this Hand Cannon additional ad-clear viability.
In PvP, Fatebringer remains a competitive Hand Cannon, with Explosive Payload giving a near unbearable amount of flinch to opponents as well as a certain extent of splash damage to your weapon. Opening Shot and Eye of the Storm are competitive second column perks, adding consistency to the weapon.
 Vision of Confluence
Legendary // Precision Frame // Scout
Rifle
Desirable Perks
- Barrel:
- Arrowhead Brake
- Corkscrew Rifling
- Magazine:
- Ricochet Rounds
- High-Caliber rounds
- Column 1 Perks:
- Rewind Rounds
- Zen Moment
- Column 2 Perks:
- Firefly
- Frenzy
Masterwork: Range
Mod Slot: Major Spec, Adept Big Ones Spec
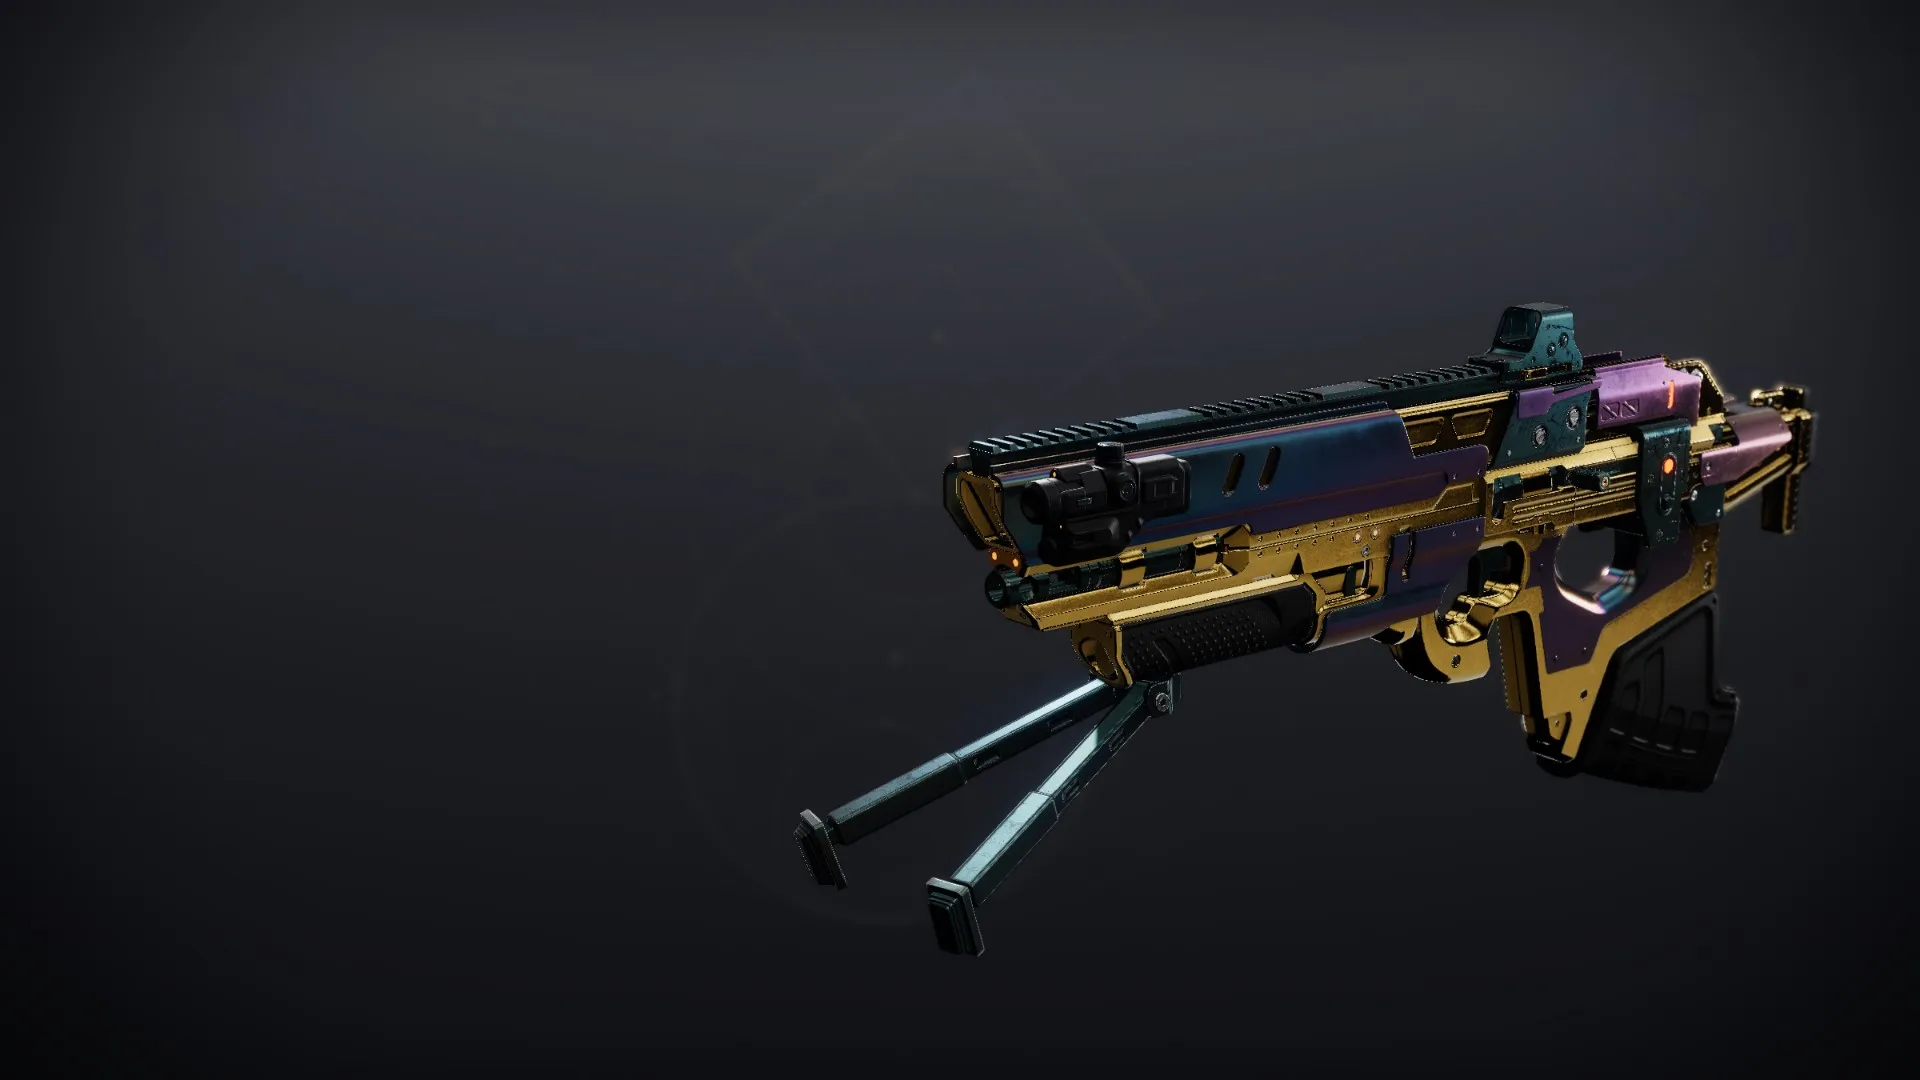
Simply put, this weapon's archetype and perk pool do not justify even having it in one's inventory. The Staccato world drop or Trustee from Deep Stone Crypt do its job better as solar scouts.
Praedyth's Revenge
Legendary
// Rapid-Fire Frame // Sniper Rifle
Desirable Perks
- Barrel:
- Arrowhead Brake
- Corkscrew Rifling
- Magazine:
- Accurized Rounds
- Tactical Mag
- Column 1 Perks:
- Rewind Rounds
- Quickdraw
- Moving Target
- Column 2 Perks:
- Firefly
- High-Impact Reserves
- Opening Shot
Masterwork: Range
Mod Slot: Boss Spec, Targeting Adjuster, Adept Range, Adept Big
Ones Spec, Adept Targeting
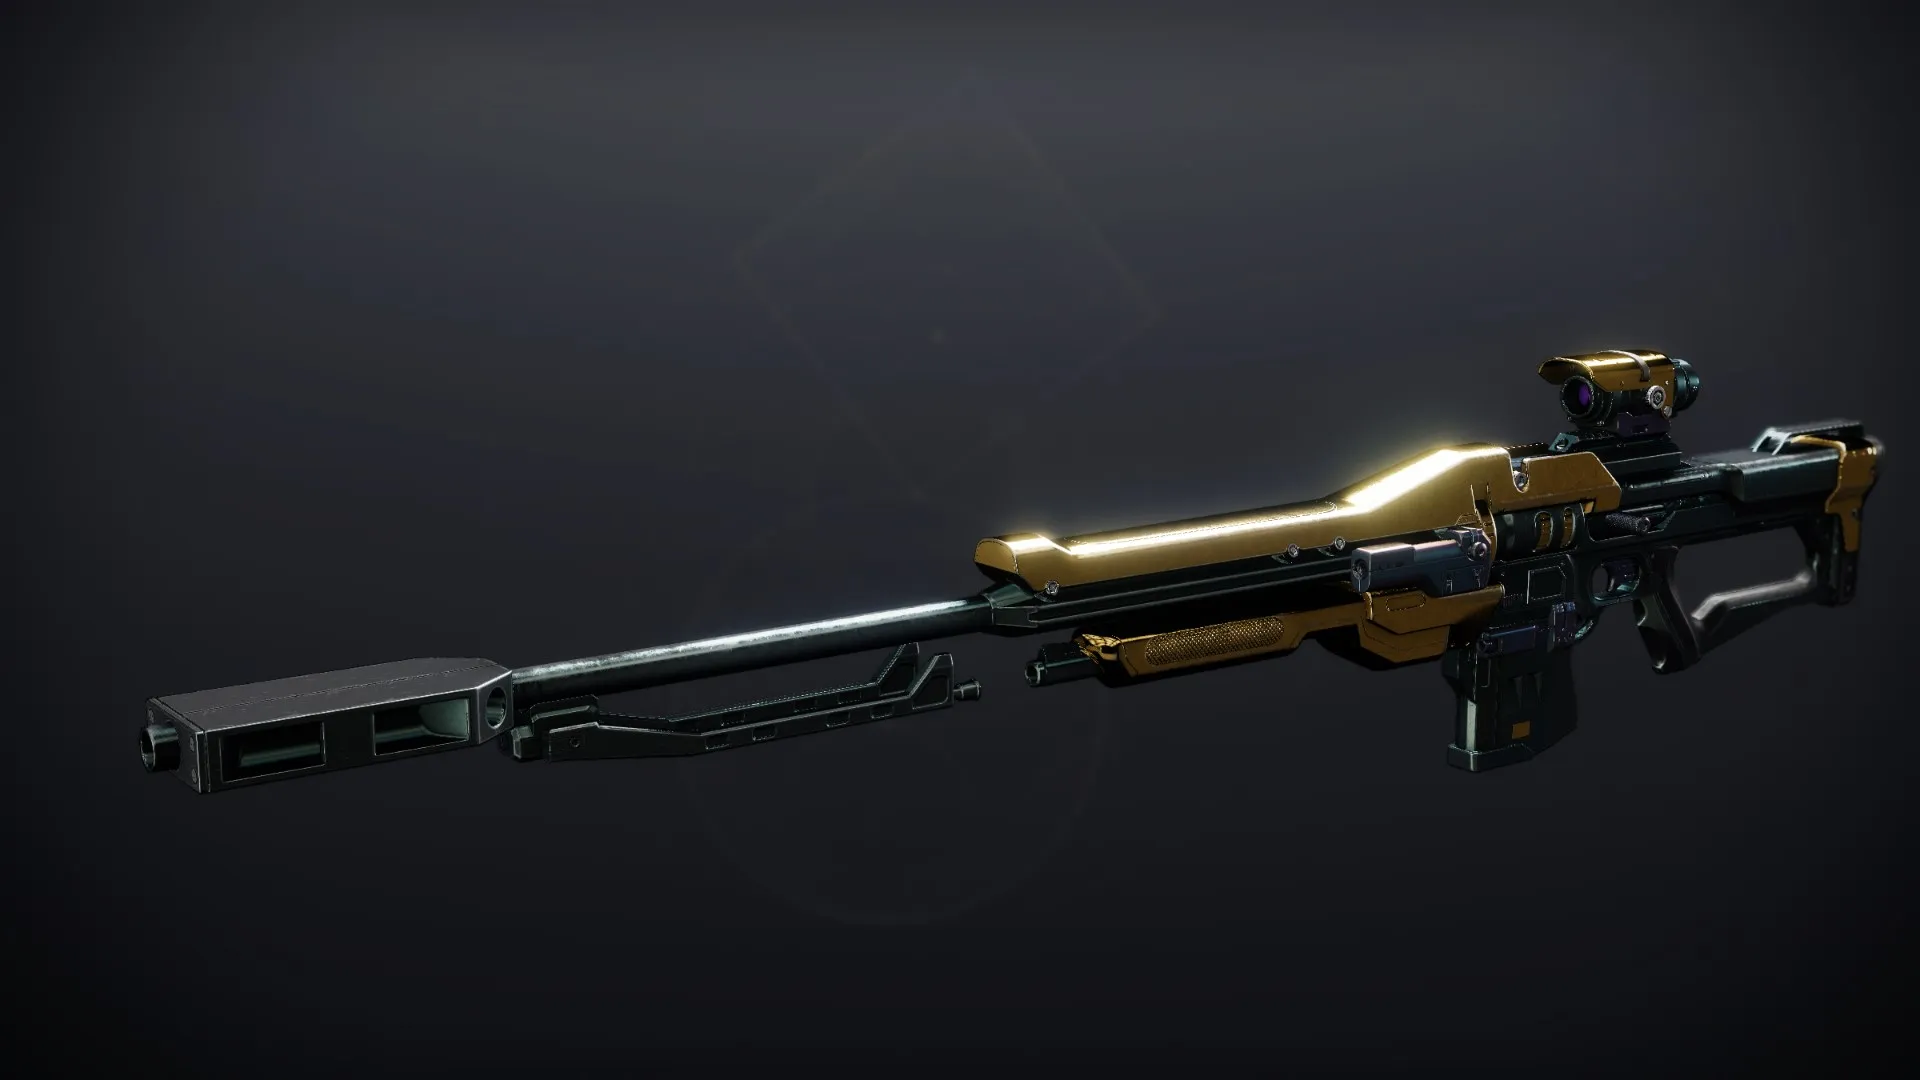
In PvE, Praedyth's is a good special DPS option for when one runs out of heavy, since rewind rounds feeds ammo into your magazine, while high-impact rounds adds extra damage. This weapon is not too useful in PvP due to being a Rapid-Fire Frame.
 Found Verdict
Legendary //
Aggressive Frame // Shotgun
Desirable Perks
- Barrel:
- Rifled Barrel
- Smallbore
- Magazine:
- Accurized Rounds
- Assault Mag
- Column 1 Perks:
- Slideshot
- Column 2 Perks:
- Opening Shot
Masterwork: Range
Mod Slot: Quick Access Sling, Icarus Grip, Adept Range
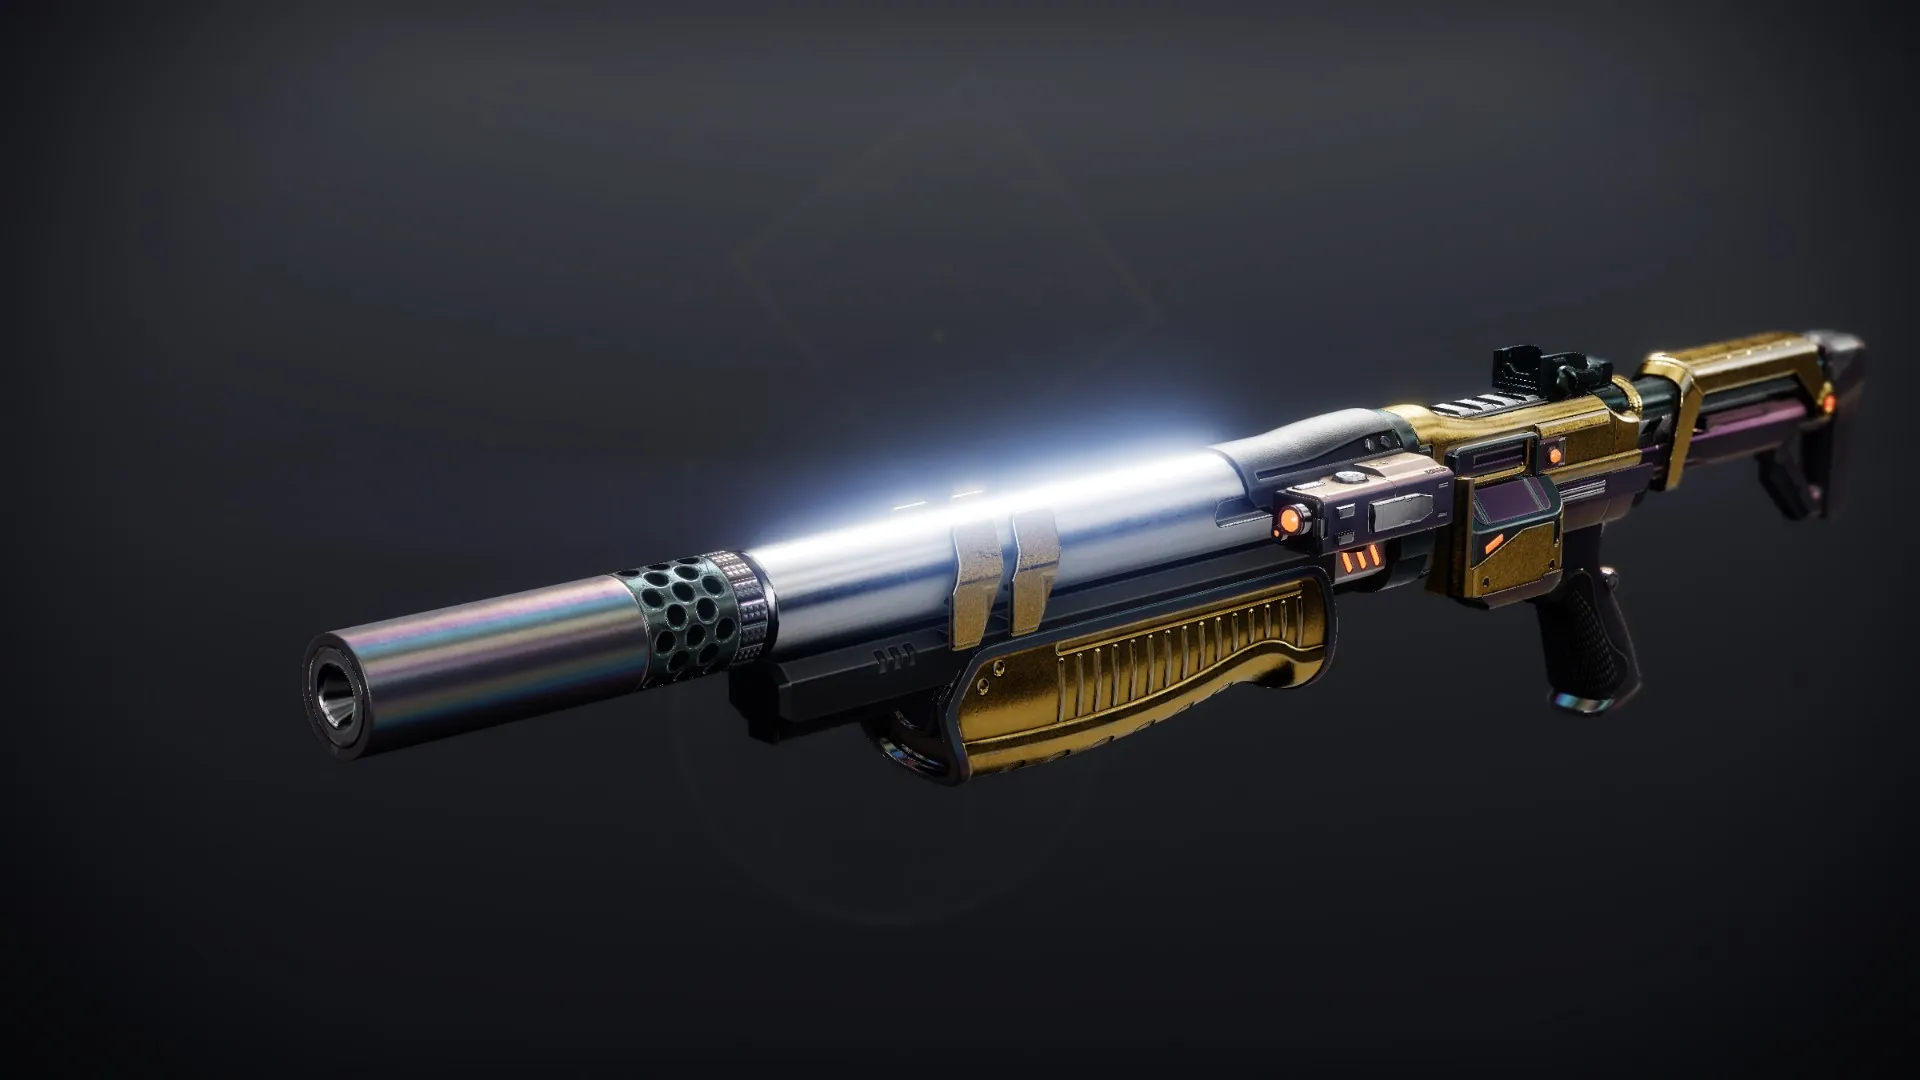
In PvE, this gun is not really worth using; its only worth comes from potential melee builds in which it is used for the melee damage increase from One-Two Punch. In PvP, this weapon remains fairly competitive, and a good alternative for the Matador 64, which is commonly regarded as the best pellet shotgun in PvP.
 Corrective Measure
Legendary
// Adaptive Frame // Machine Gun
Desirable Perks
- Barrel:
- Arrowhead Brake
- Corkscrew Rifling
- Magazine:
- Accurized Rounds
- Tactical Mag
- Column 1 Perks:
- Rewind Rounds
- Subsistence
- Feeding Frenzy
- Demolitionist
- Column 2 Perks:
- Firefly
Masterwork: Range
Mod Slot: Boss Spec, Major Spec, Adept Big Ones Spec, Adept
Range
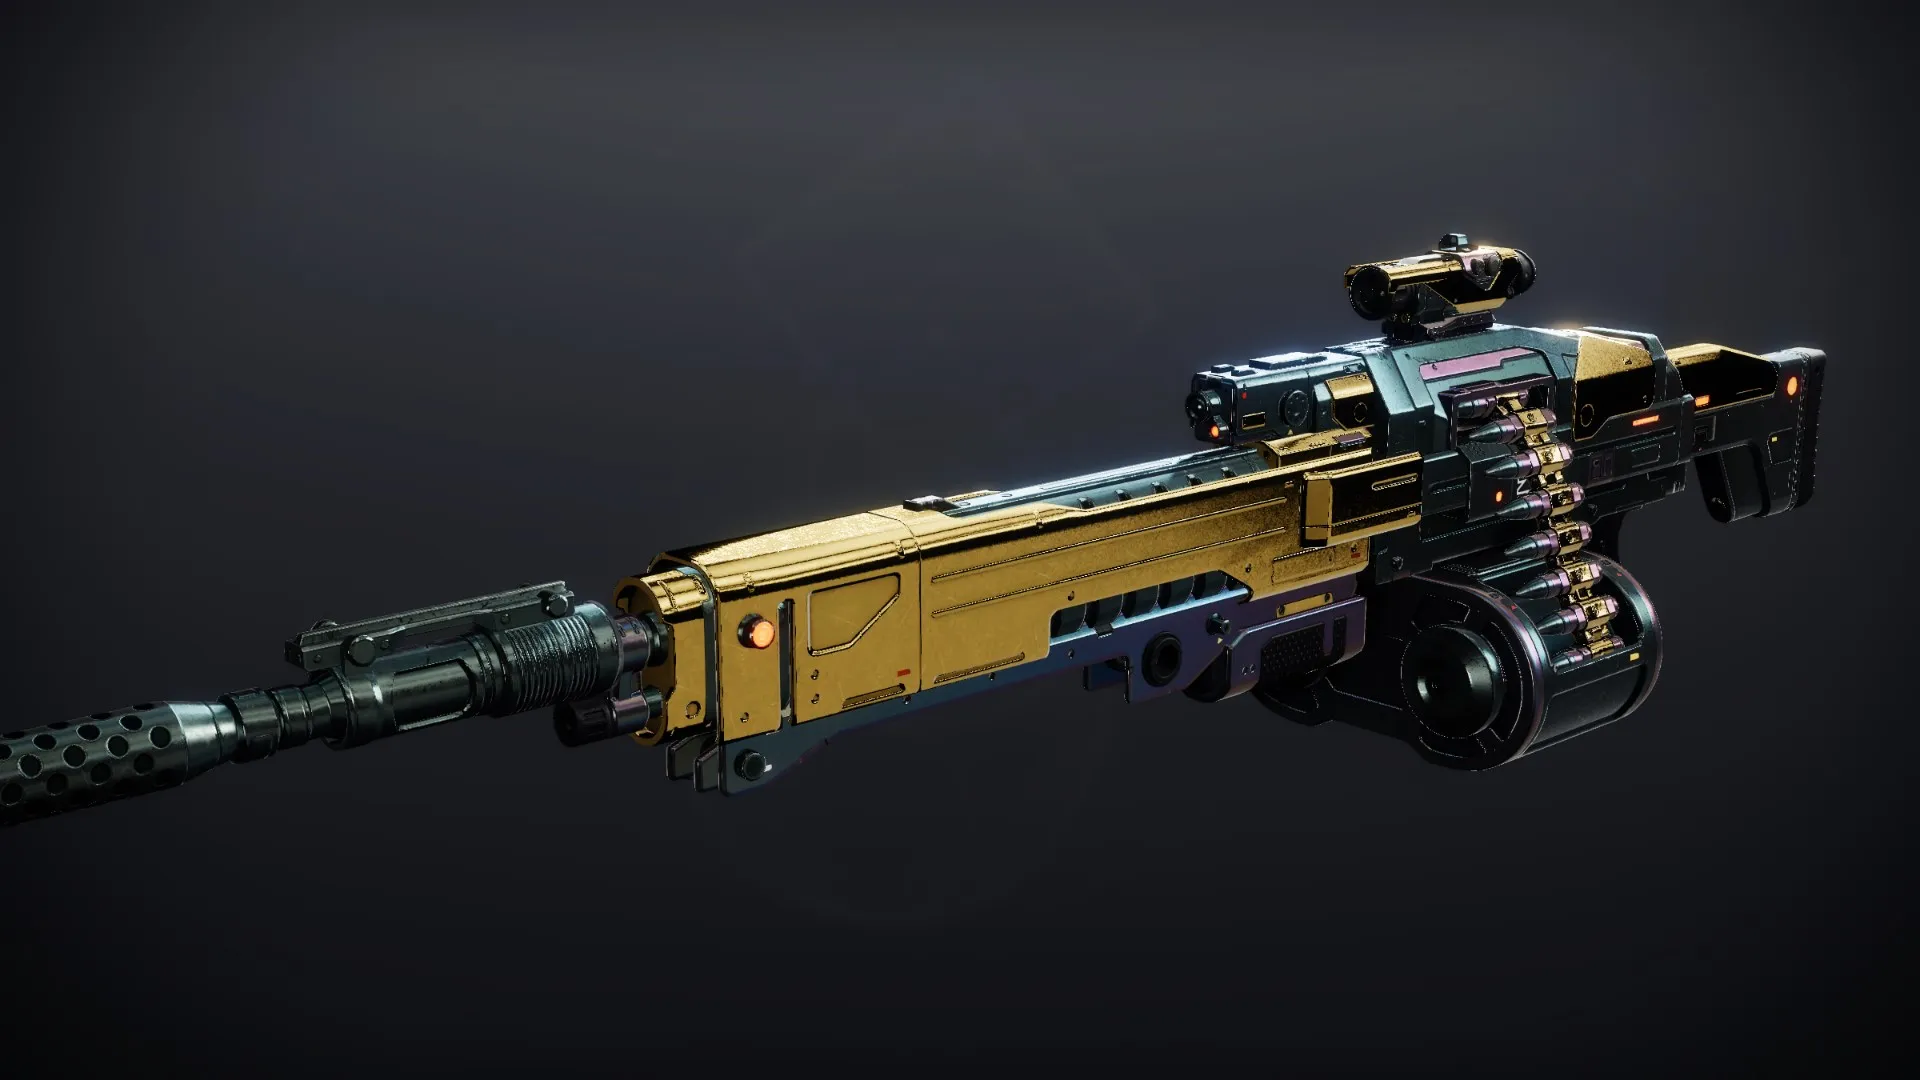
Commonly seen as the Commemoration's ever-so-slightly worse twin, the Corrective Measure is a fairly good Machine Gun. While most tend toward the Commemoration, those who are unable to get their hands on it may use this weapon as well. Thanks to Demolitionist, this weapon is actually able to outshine the Commemoration in certain builds where Grenades are used more.
Hezen Vengeance
Legendary //
Aggressive Frame // Rocket Launcher
Desirable Perks
- Barrel:
- Volatile Launch
- Confined Launch
- Magazine:
- Impact Casing
- Alloy Casing
- Column 1 Perks:
- Auto-Loading Holster
- Overflow
- Column 2 Perks:
- Vorpal Weapon
- Cluster Bombs
Masterwork: Blast Radius, Velocity
Mod Slot: Boss Spec, Adept Big Ones Spec
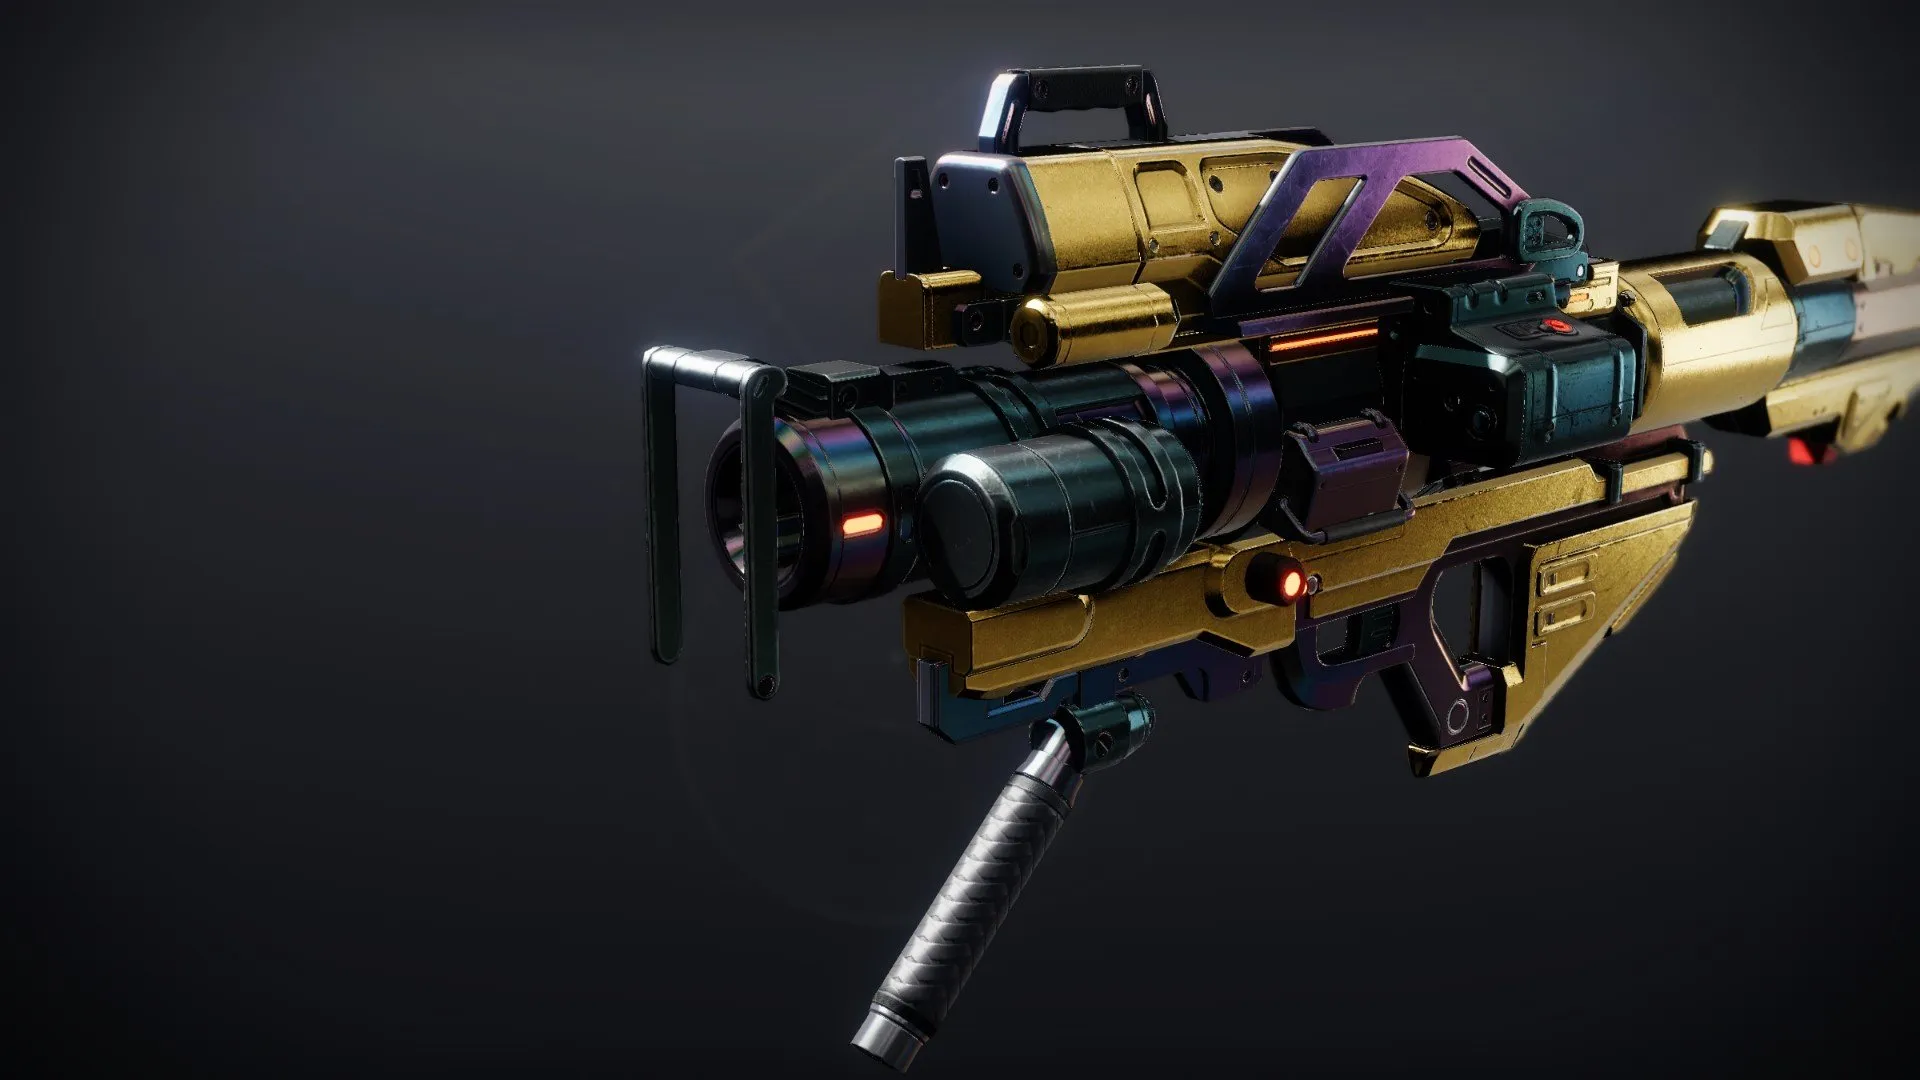
The Hezen Vengeance is a very powerful weapon in its own right. With desirable perks in either column and the best damage frame, the only reason this weapon is not used more is due to the existence of ever-so-slightly more powerful weapons like The Hothead and Blowout. Definitely a weapon worth acquiring if you do not have either of the alternatives, especially when it comes to Solar Surge content.
Vex Mythoclast
Exotic //
Fusion Rifle
Details
Despite being a fusion rifle, the Mythoclast fires hitscan bullets at 390 RPM, slightly faster than a high-impact auto rifle. It is capable of headshots, and uses primary ammo. Defeating targets builds up stacks of Overcharge. With Overcharge, using alt-fire switches firing mode to shoot linear fusion bolts.
The catalyst is acquired from unique puzzles inside the Vault of Glass raid. Upon completion, the weapon gains the Calculated Balance perk. Kills in the full-auto mode grant increased damage, accuracy and stability.
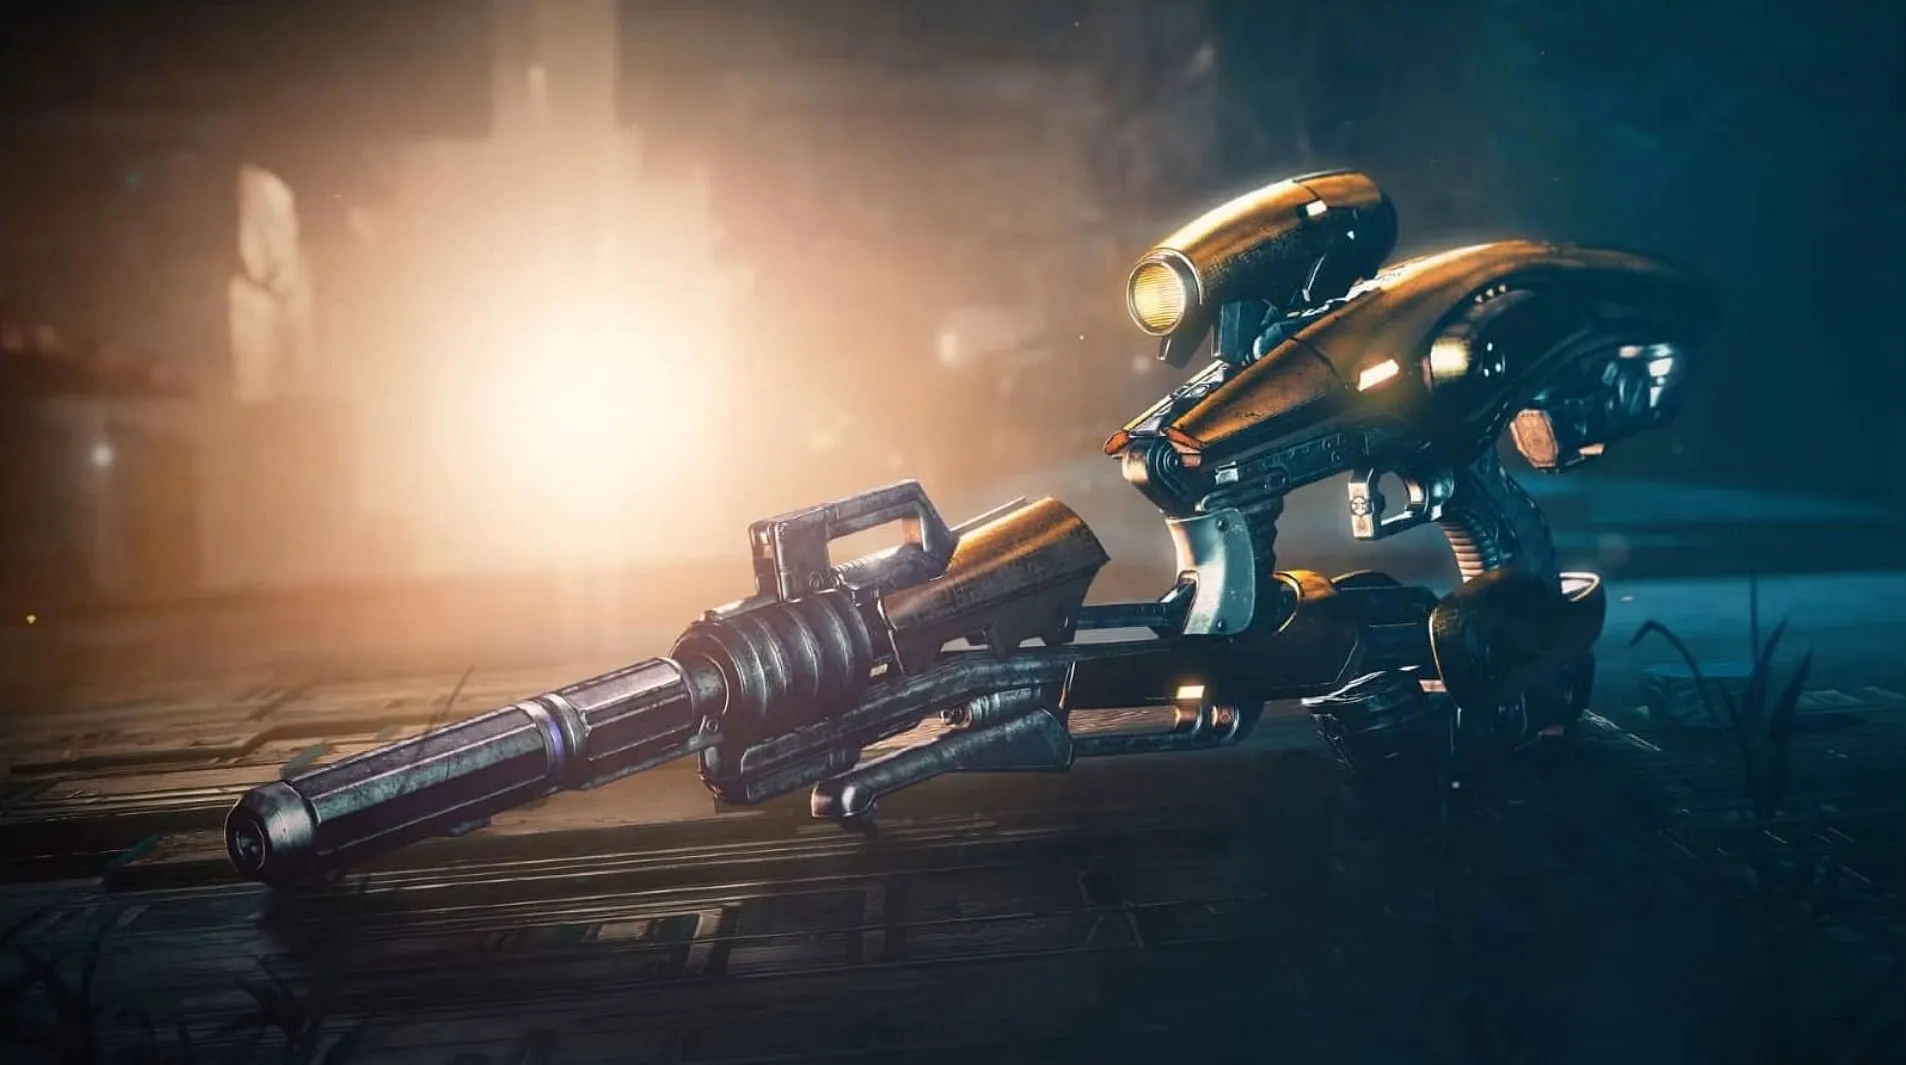
The Mythoclast is a fusion rifle with two firing modes, neither of which are actually a fusion's. Even without the catalyst, the full-auto bullets deal high damage to combatants at good distances, allowing you to store linear shots for elites. It's no slouch in the Crucible either. Mytho can comfortably duel in the longer ends of auto rifle ranges, getting stronger after every kill, and surprise sniper lanes with linear fusion bolts. Mythoclast continues to impress outside of the ranges of the common SMG meta.
This is one of the best exotics in the game, and may become your best friend wherever you decide to bring it. Do you know how difficult it is for the writer to praise such a fantastic gun that refuses to drop for him? I'm losing my mind here.
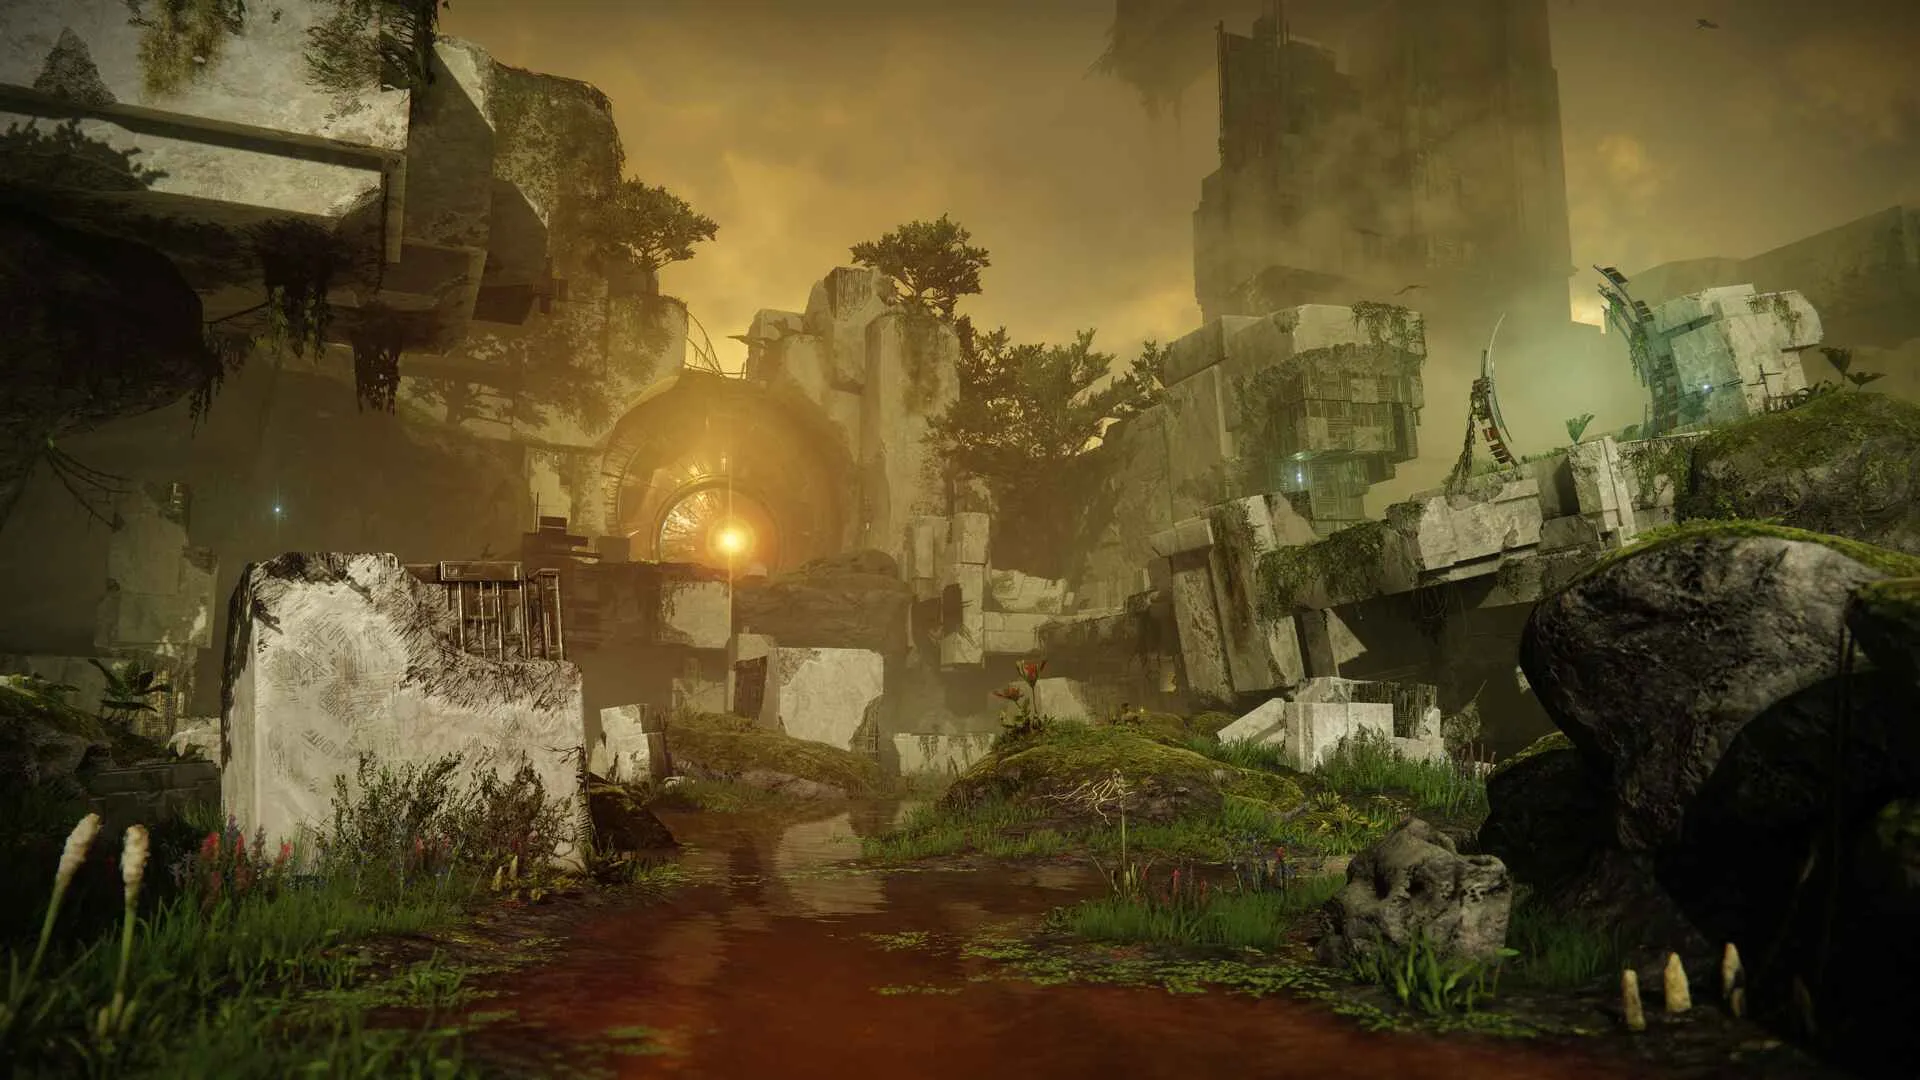
Raise the Spire
- 3 plates - 2 players per plate.
- Ad-Clear weapons.
- Linear fusions/Snipers/Xenophage to deal with Cyclops.
- Class and subclass don't matter here.
Map
The goal of this encounter is to raise a spire in the middle of the area.
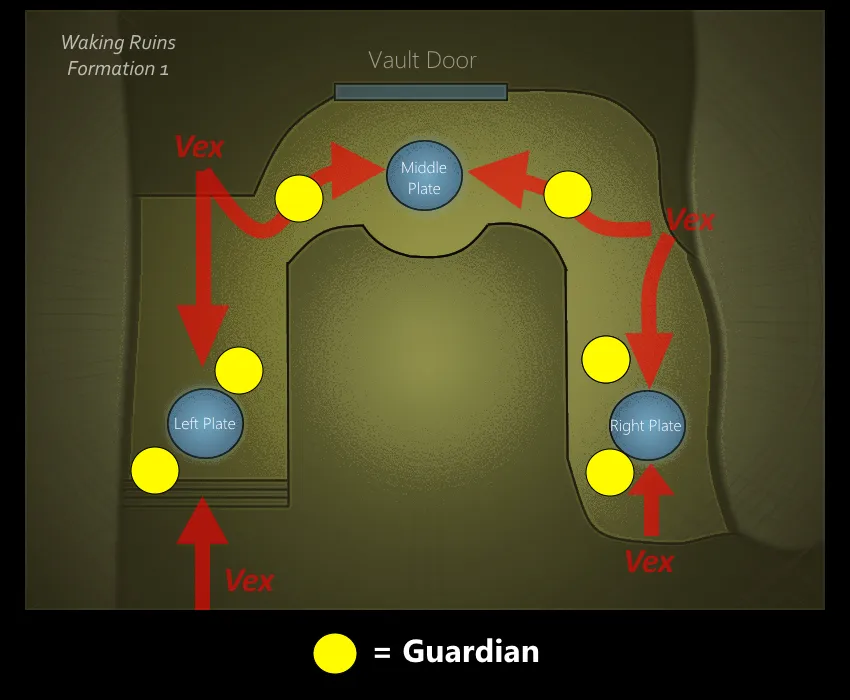
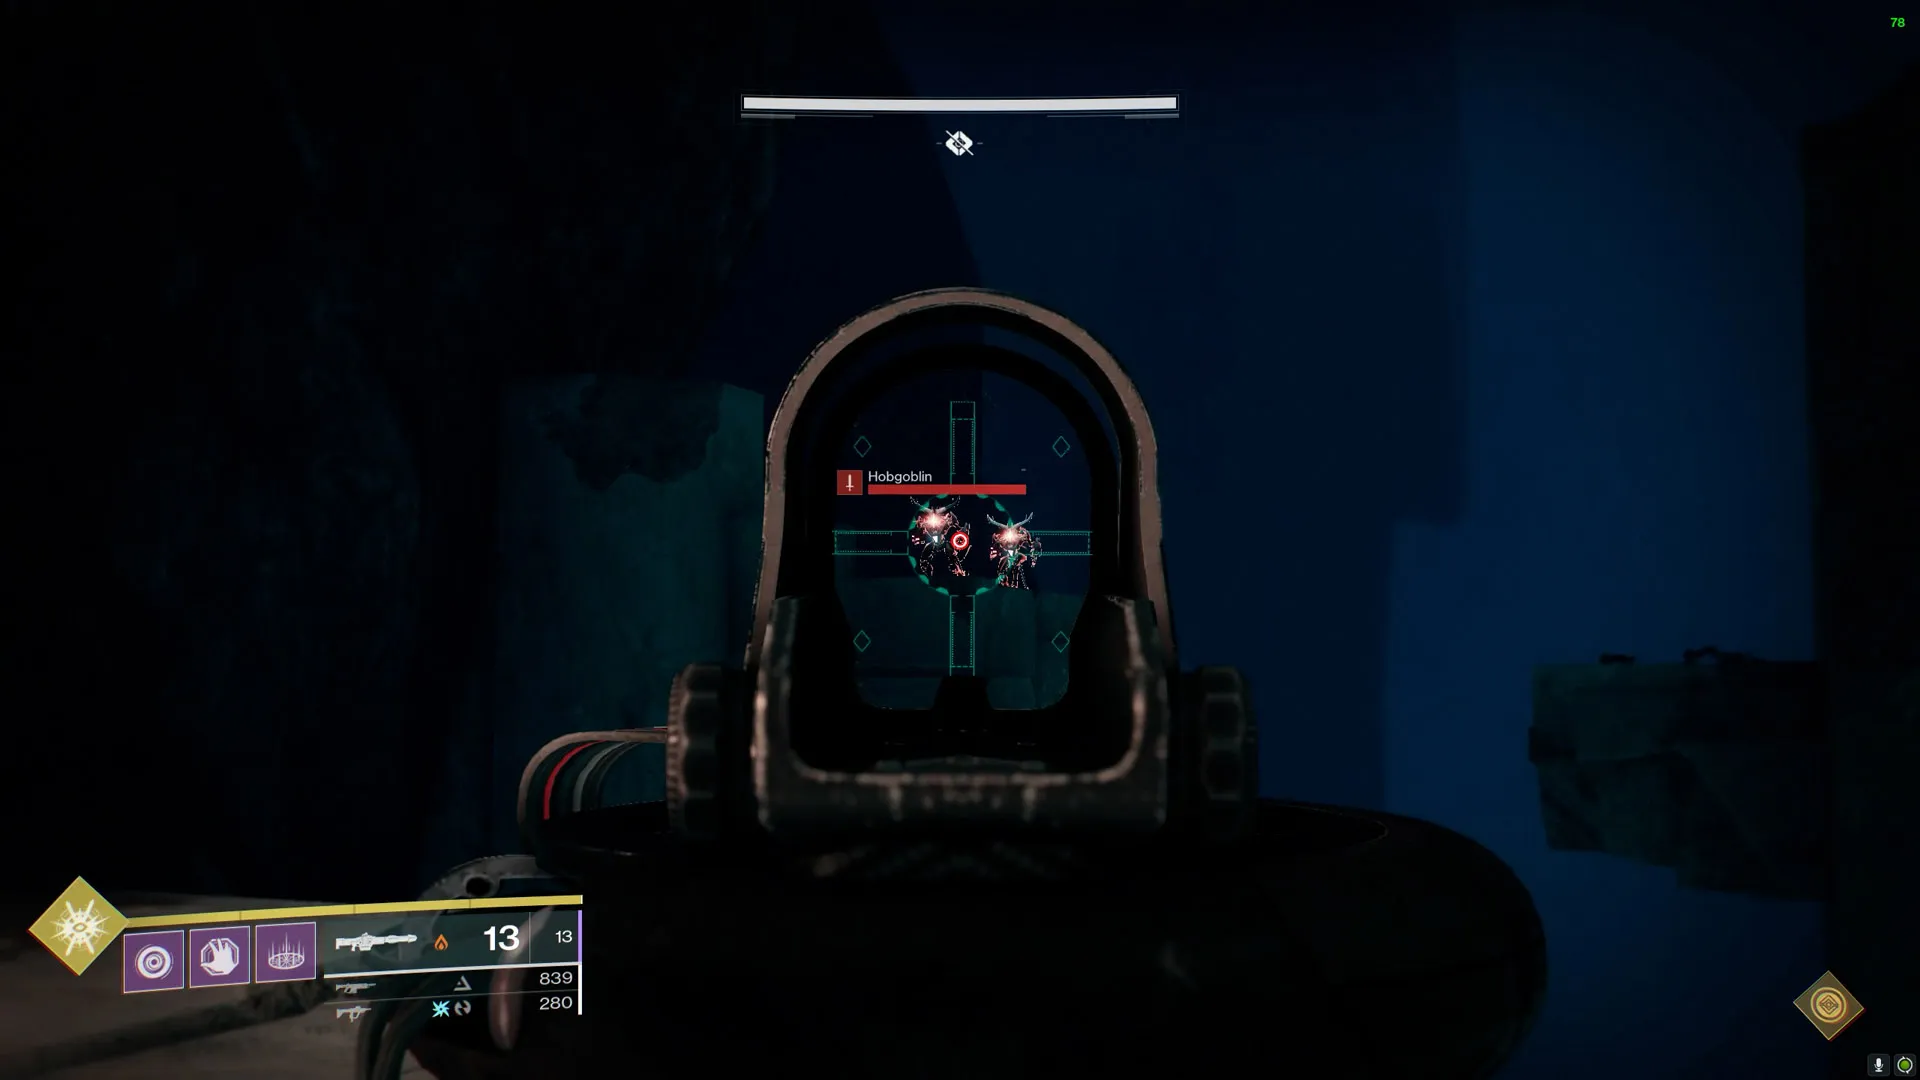
Players will have to capture 3 plates located around the map. Vex will continuously spawn throughout the encounter. These will mainly be smaller enemies like goblins and hobgoblins. Every 2-3 waves, a void-shielded minotaur named a “Praetorian” will spawn. These Praetorians will target the plates you are trying to capture, and if it reaches your plate, the progress on that plate will be reset. Occasionally, cyclops will spawn in the locations marked on the map. Try to kill them quickly, as they do quite a bit of damage. Once the spire is fully raised, the vault door will open, completing the encounter.
Tips
- Regular Vex touching the plate will not affect the progress of raising the spire.
- Only one Praetorian can exist per plate.
- As with other Vex enemies, the Praetorians' heads can be shot off, which makes them target the player instead of the plates. By shooting all Praetorians' heads off and luring them to a spot, it is possible to keep them there indefinitely, allowing you to solo the encounter.
Encounter Triumph:
Break No Plates - Complete the Waking Ruins encounter without losing a single sync plate to the Vex.
Master Difficulty:
- Overload Minotaurs are added.
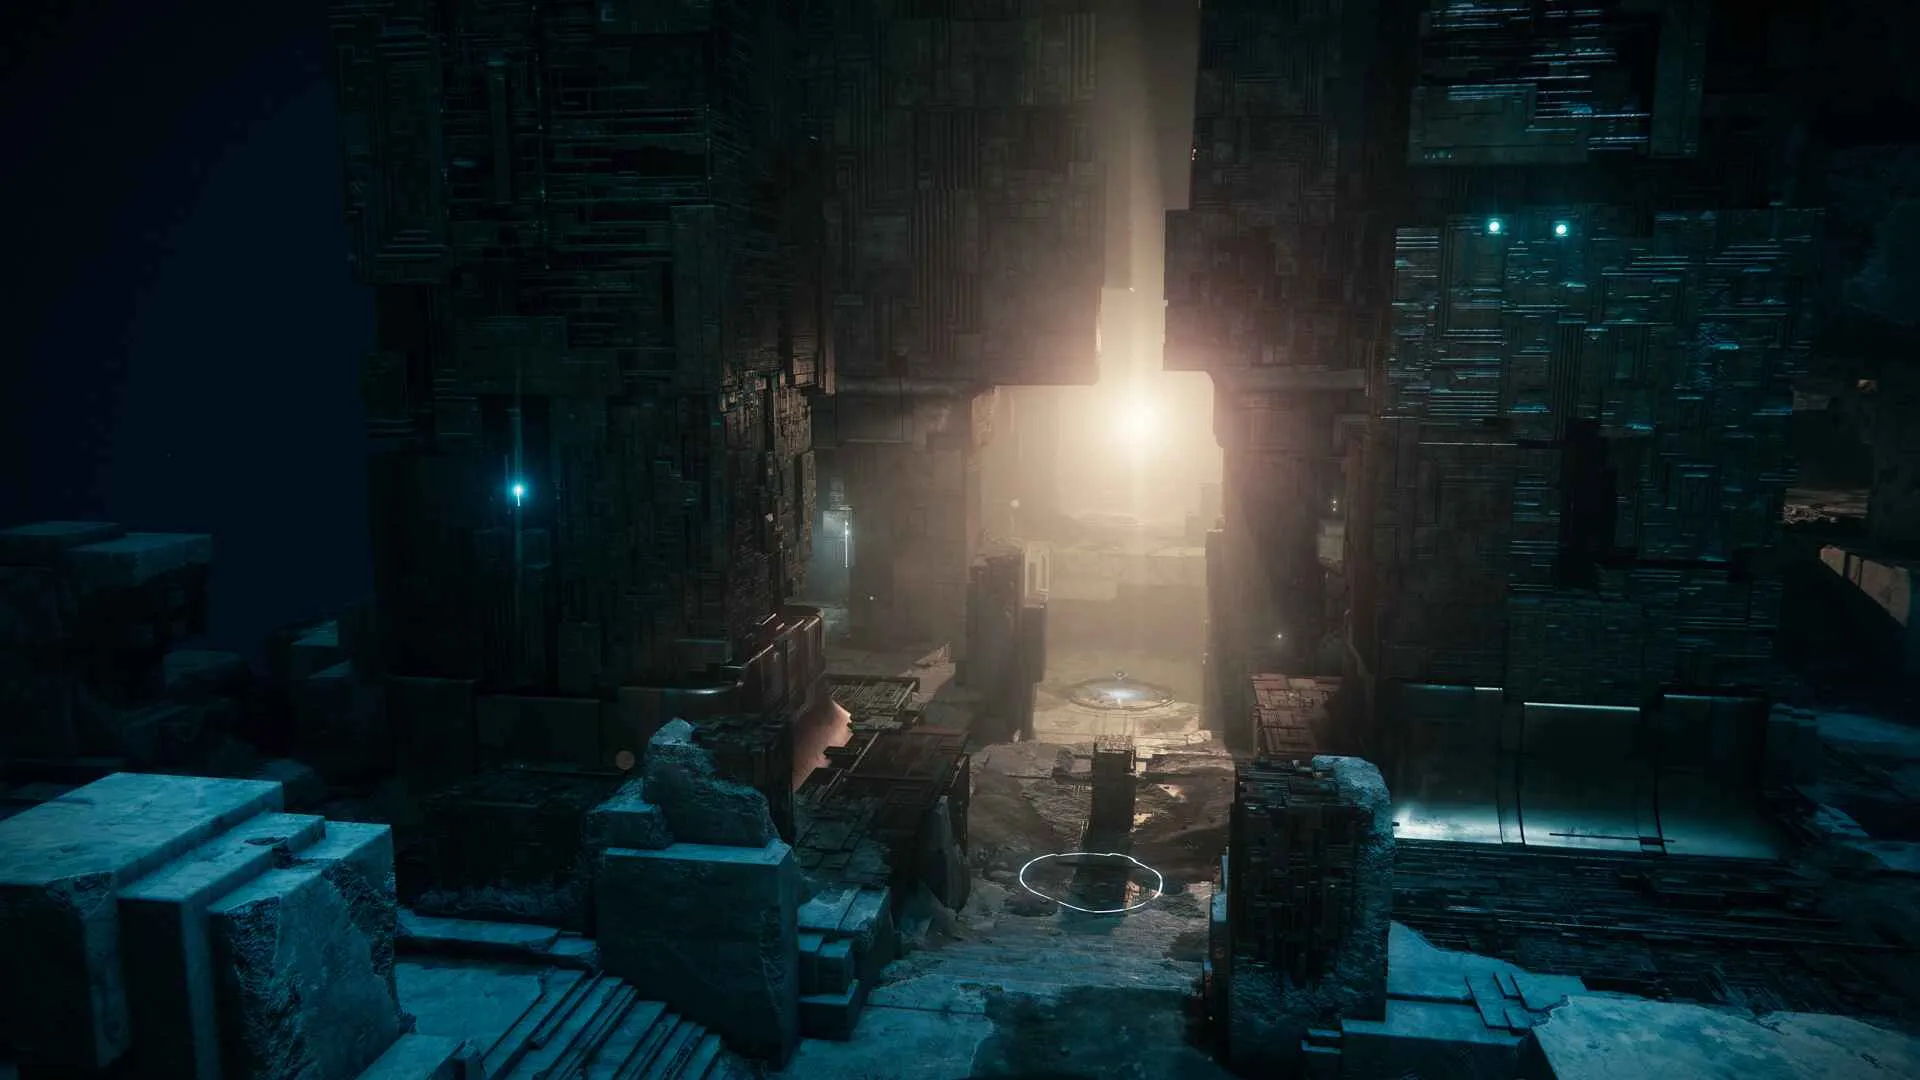
Defend the Confluxes
- 3 confluxes, 2 Players per conflux (left, middle, right).
- Ad-Clear weapons.
- Rockets/Swords for Wyverns.
- Anti-Overload.
- Class and subclass don't matter here either.
The goal of this encounter is to defend confluxes by preventing the Vex from sacrificing themselves on it.
When the encounter starts, 1 conflux will spawn just in front and below the ledge where you rally for ammo. Waves of ads will spawn, including Fanatics, which will drop puddles of Radiolaria Fluid on the ground when killed. Thus, it is important to watch out for these puddles.
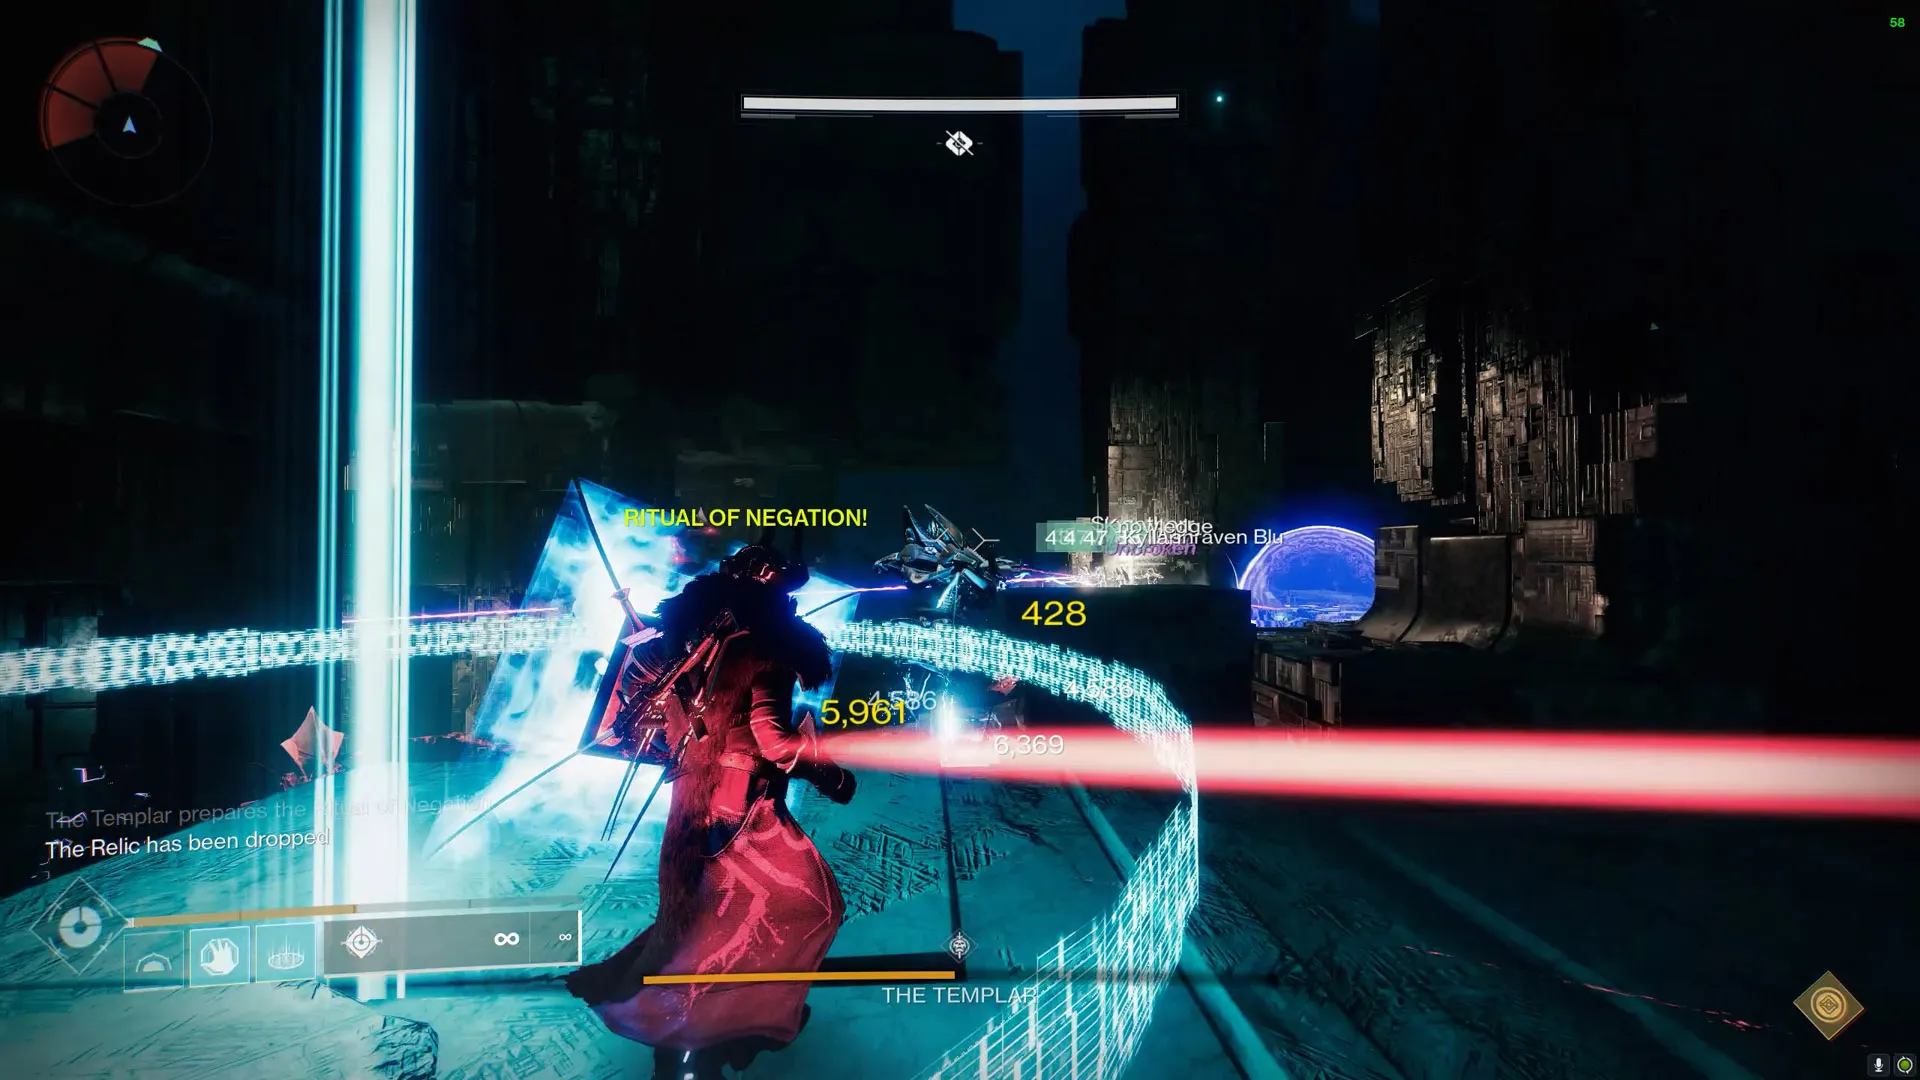
These puddles are fanatic puddles; they are smaller than a Witherhoard shot and has little Vex effects around it. If one steps into the puddle, they will be “Marked for Negation”, and will be killed by the templar the next time it carries out the Ritual of Negation. In order to remove this mark, the player must step into the pool of light in the middle of the arena. Do note that this pool has limited uses and takes time to recharge, so teams should coordinate when to cleanse, if multiple people are marked.
After a few waves, a Wyvern will spawn in the middle. This wyvern will seek out the conflict and attempt to sacrifice itself. At most 3-4 of them will spawn in this phase. The first phase ends when this conflux disappears. This will cause an Overload Minotaur to spawn in the middle.
The next phase begins when this minotaur is killed. 2 Confluxes will spawn instead, at the left and right. Similarly, waves of ads will continue to spawn, and the Wyverns will spawn on the left and right and will target the confluxes there. It's pretty much identical to what happens in the middle. After all the Wyverns there have spawned and the overload champions have been killed, the final phase begins. Now all 3 confluxes will be present, and the Wyverns will spawn in all 3 areas. After a while, this phase, and the encounter will end.
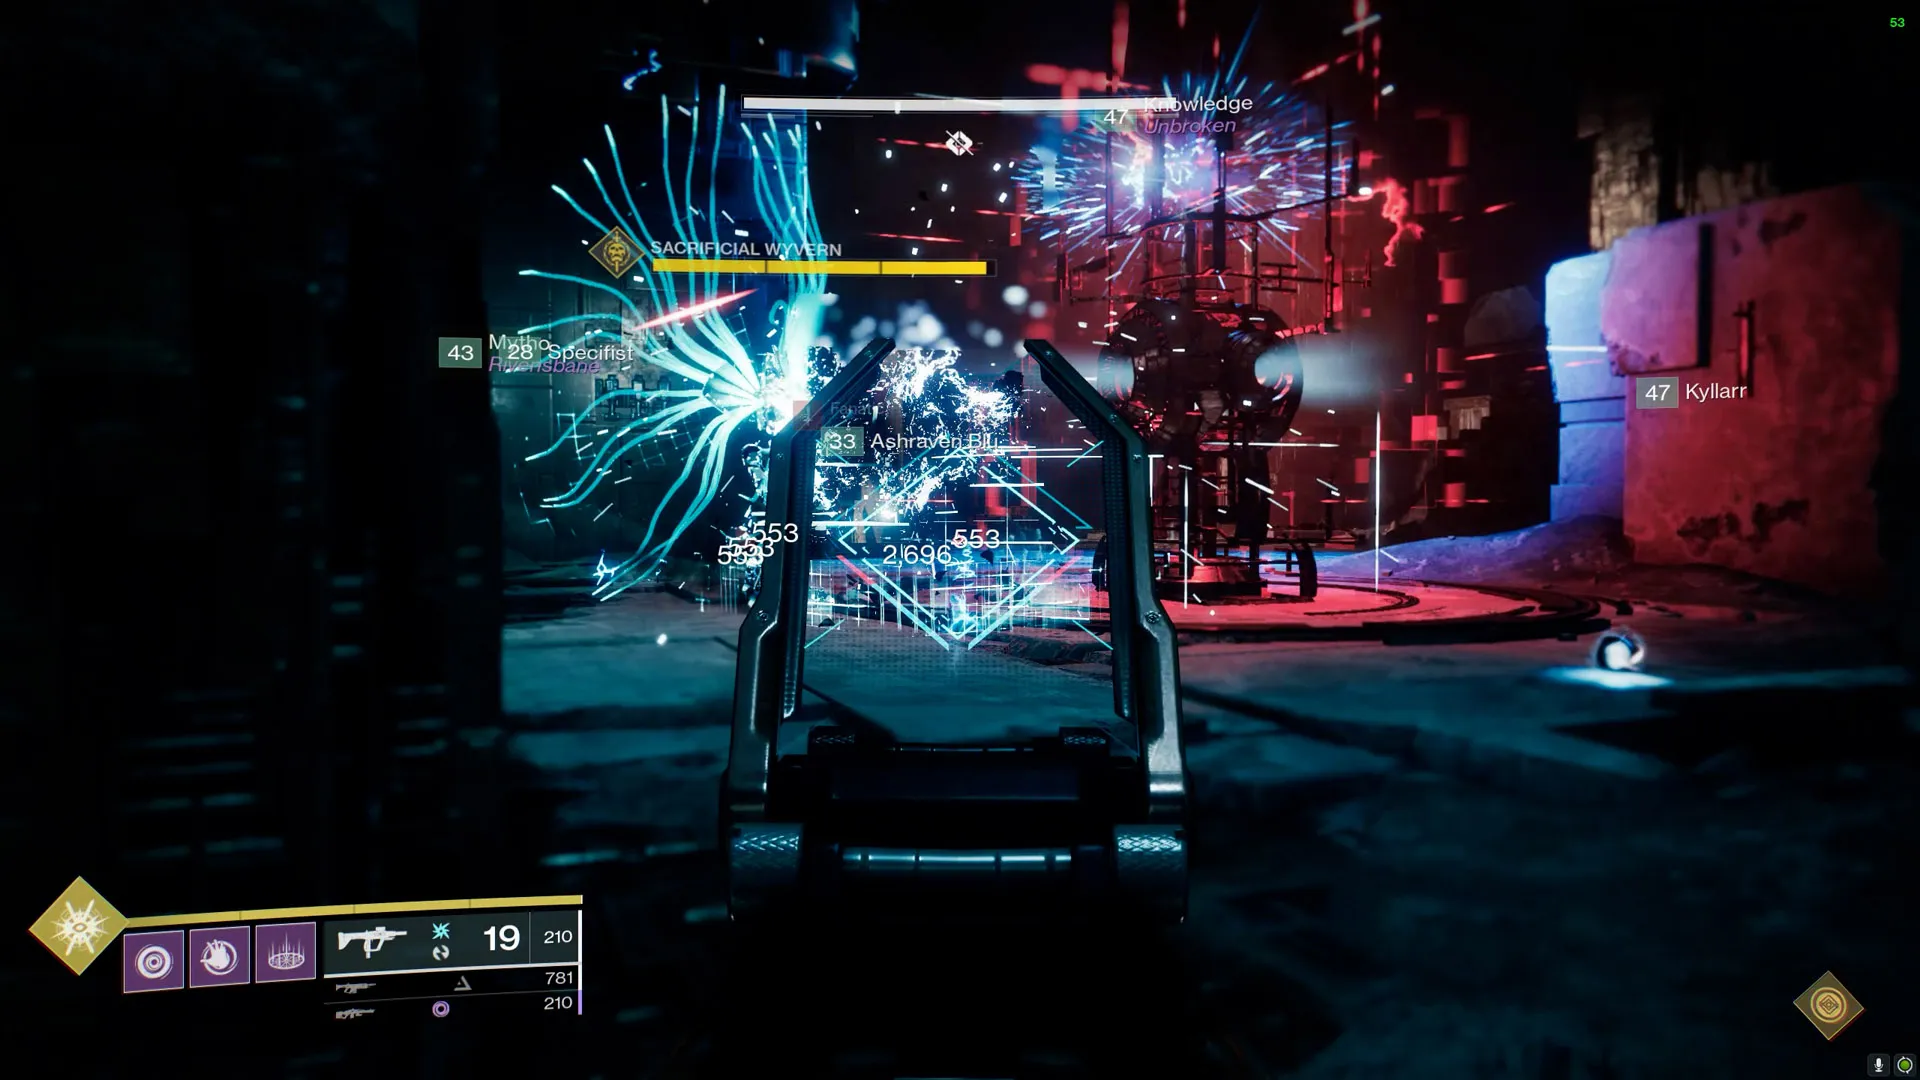 The Confluxes must be protected from waves of enemies.
 Do not jump into the blue/white pools. One that you stand in marks
you for negation. Find the middle well and stand there to remove
this debuff.
Do not jump into the blue/white pools. One that you stand in marks
you for negation. Find the middle well and stand there to remove
this debuff.
Tips
- Just like the Praetorians in the previous encounter, only 1 Wyvern may exist at a time per side. Thus, if the team kills Wyverns in the last possible seconds, this prevents some of the Wyverns from spawning, and if the Wyverns are active when the phase ends, they will despawn.
- Don't stand in a conflux when it's appearing.
- Enemies can very easily be spawn camped, use this encounter to farm weapon levels/catalysts.
Encounter Triumph:
Dragon's Den - Complete the confluxes encounter while defeating Wyverns with only Super damage.
Challenge Mode:
Wait For It - During the confluxes encounter, only defeat Wyverns while they're sacrificing.
Master Difficulty:
- Overloads Taken Hobgoblins replace Taken Knights on platforms.
- Arc shields on Light-Eater Knights and the Vessel of Oryx.
- Void shields on Taken Acolytes.
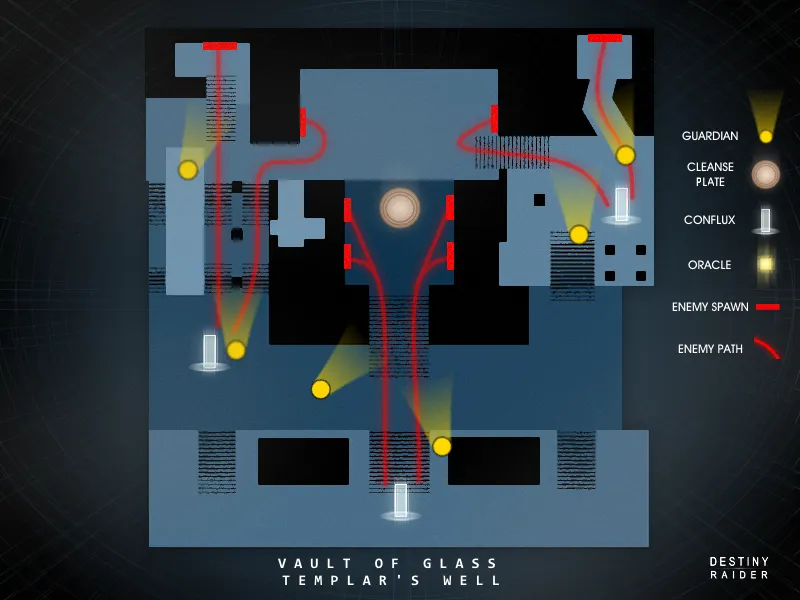
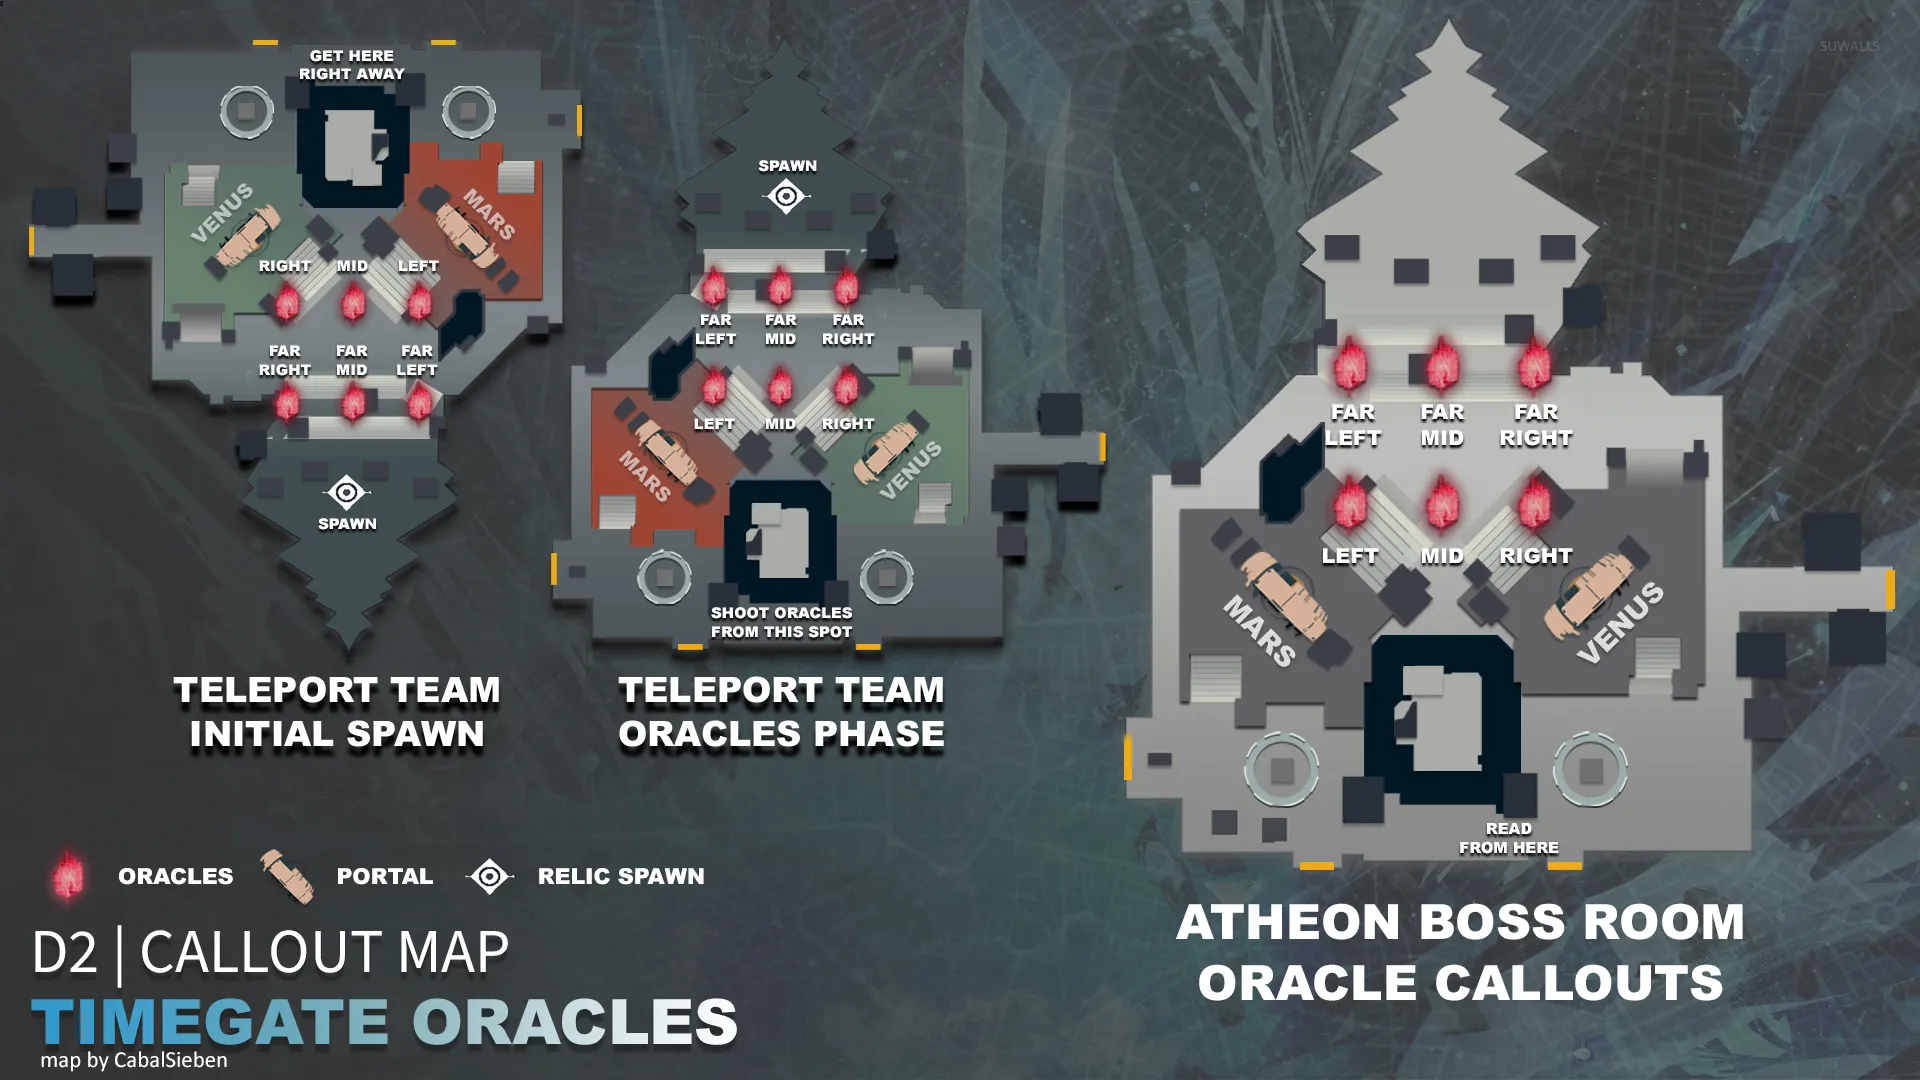
Oracles
Roles:- 3 Players shooting Oracles.
- 3 Players clearing ads and snipers.
- Players shooting oracles to use Xenophage/Rapid-fire fusion rifle.
- Ad-clear players use ad clear weapons and a sniper (trinity ghoul, forbearance, succession etc)
- Warlocks on the team may be interested in using a well with Phoenix Protocol.
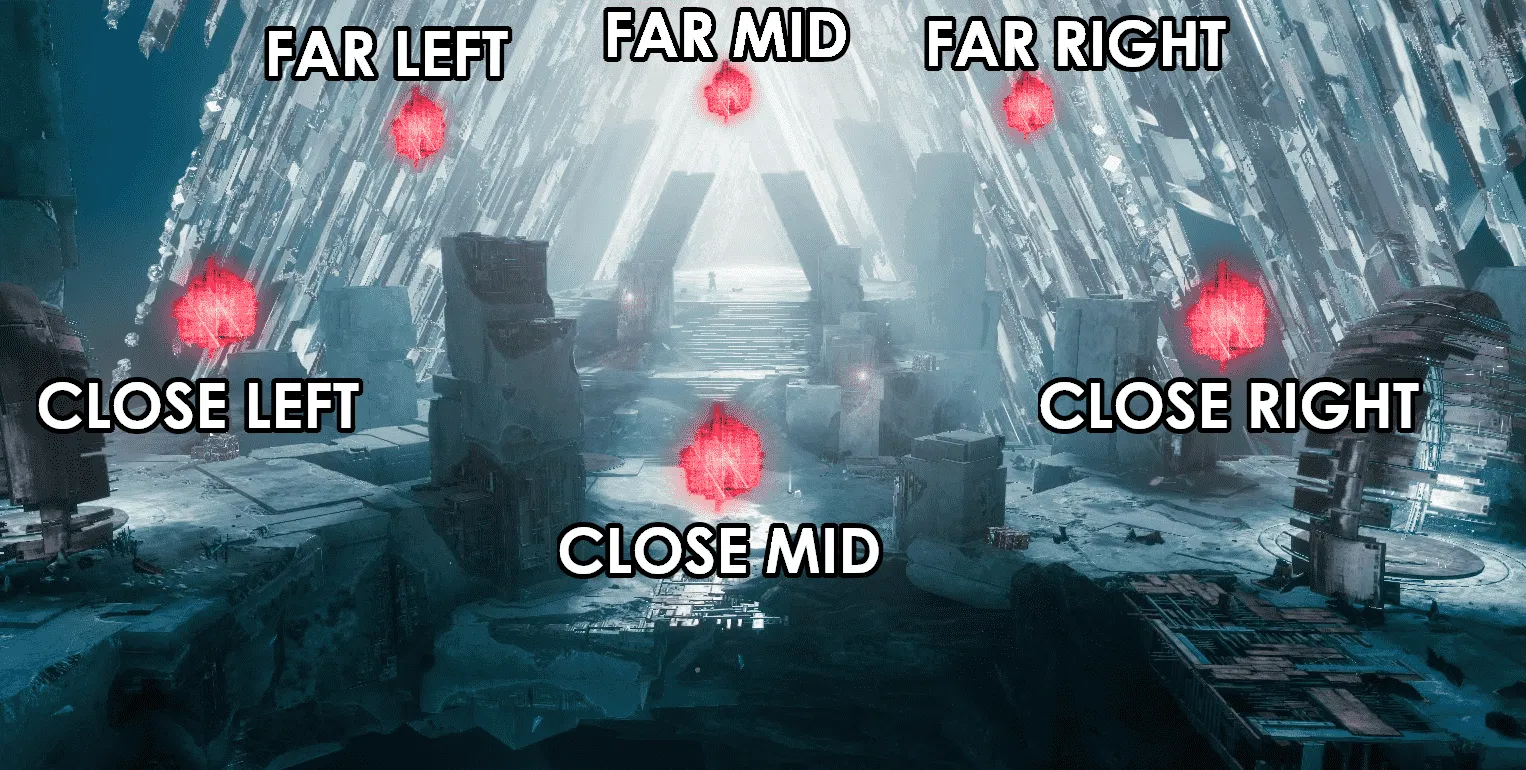
The goal of the encounter is to destroy oracles in the correct order.
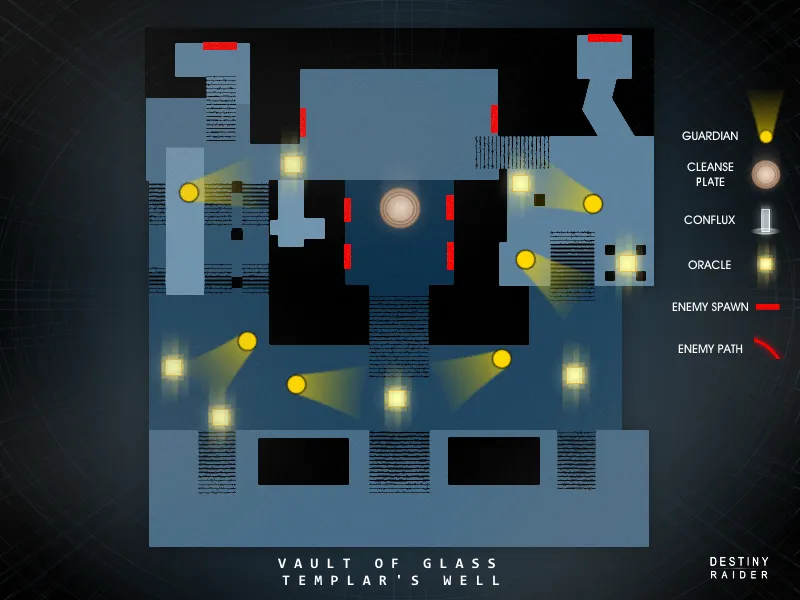
Most teams call the ones closest to where the banner is the 1s (ie L1, middle and R1), the ones in the centre row the 2s (L2 and R2) and the ones furthest are the 3s (L3 and R3).
The first wave of Oracles spawns 3 Oracles. Subsequent waves will spawn 1 additional Oracle + the number of Oracles in the previous round (ie. First wave 3, 2nd wave 4th, 3rd wave 5 and so on). There are a total of 5 rounds, with the last round having all 7 Oracles appear.
The Oracles that appear are completely random. Thus, it is recommended for 3 players to watch over the Oracles:
- Player 1 watches R2 and R3.
- Player 2 watches Middle, L1 and R1.
- Player 3 watches L2 and L3.
The remaining players should clear the large amount of ads that spawn throughout the encounter, along with the snipers that spawn at the sides.
If an Oracle is shot in the wrong order, or is not shot in time, the entire team is marked for negation, meaning that they must come together to the pool of light in the middle and cleanse at the same time.
 An established order will be followed by the Oracles. To complete
the encounter, eliminate them in the order that they initially
emerge.
An established order will be followed by the Oracles. To complete
the encounter, eliminate them in the order that they initially
emerge.
 Keep an eye out for the Hobgoblins that spawn around the arena's
corners.
Keep an eye out for the Hobgoblins that spawn around the arena's
corners.
Tips
There is a spot where you can see all oracles from. Standing here allows you to see all oracles, and if you are able to remember the order that they spawn, it is possible to solo the oracles. It is recommended for at least 1 Warlock with Phoenix Protocol to be there with whoever is soloing oracles, so that you can keep cycling wells.
Encounter Triumph:
Take Cover - Don't defeat any Hobgoblins during the Oracles encounter.
Challenge Mode:
The Only Oracle For You - Complete the Oracle encounter without destroying the same Oracle more than once.
Master Difficulty:
- Overload Minotaurs will spawn among the ads.

The Templar
- 1 Relic Holder.
- 5 DPS.
- DPS weapons (rockets, LFRs)
- Divinity is not required here due to the Templar's fairly large crit spot.
- At least 1 Warlock with Well of Radiance
- Relic holder is encouraged to use a gun with DoT ability (ideally Anarchy) to deal passive damage to the Templar while going around blocking teleports.
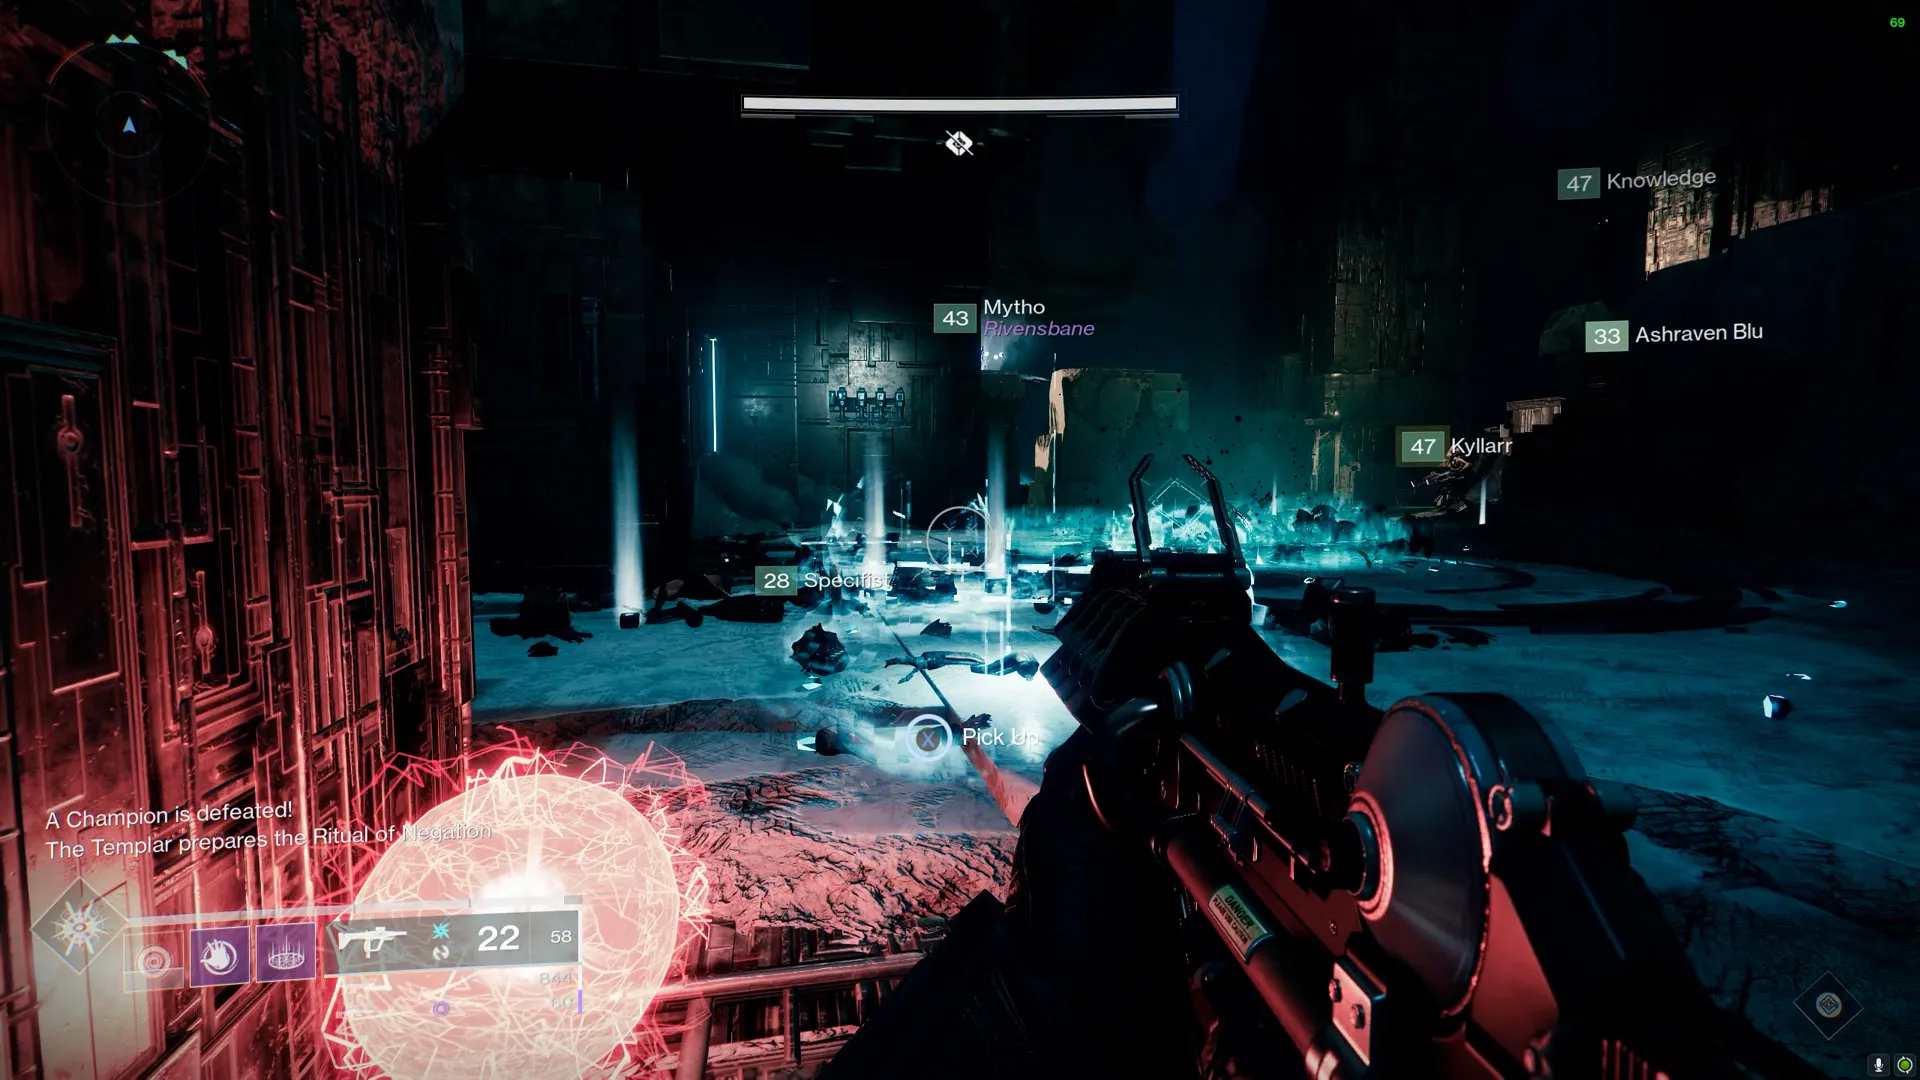
The goal of this encounter is to kill the Templar.
The encounter starts by picking up the Aegis shield relic that has spawned where the pool of light was. This summons the Templar in the middle of the room. At this stage, he is shielded, and will be vulnerable to all attacks.
The Aegis shield has a few mechanics:
- Dropping the relic starts a visible timer that appears on the relic. This time is ~9 seconds. If this time runs out or the relic falls off the map: the team wipes.
- The Relic has a block function that can be used by pressing and holding your block button.
- Using a class ability while holding the relic drops it.
- The relic has a melee and ultimate ability.
- If you have a sprint-reliant melee equipped and charged (shoulder charges, ballistic slam etc), the relic melee will use it if you are sprinting.
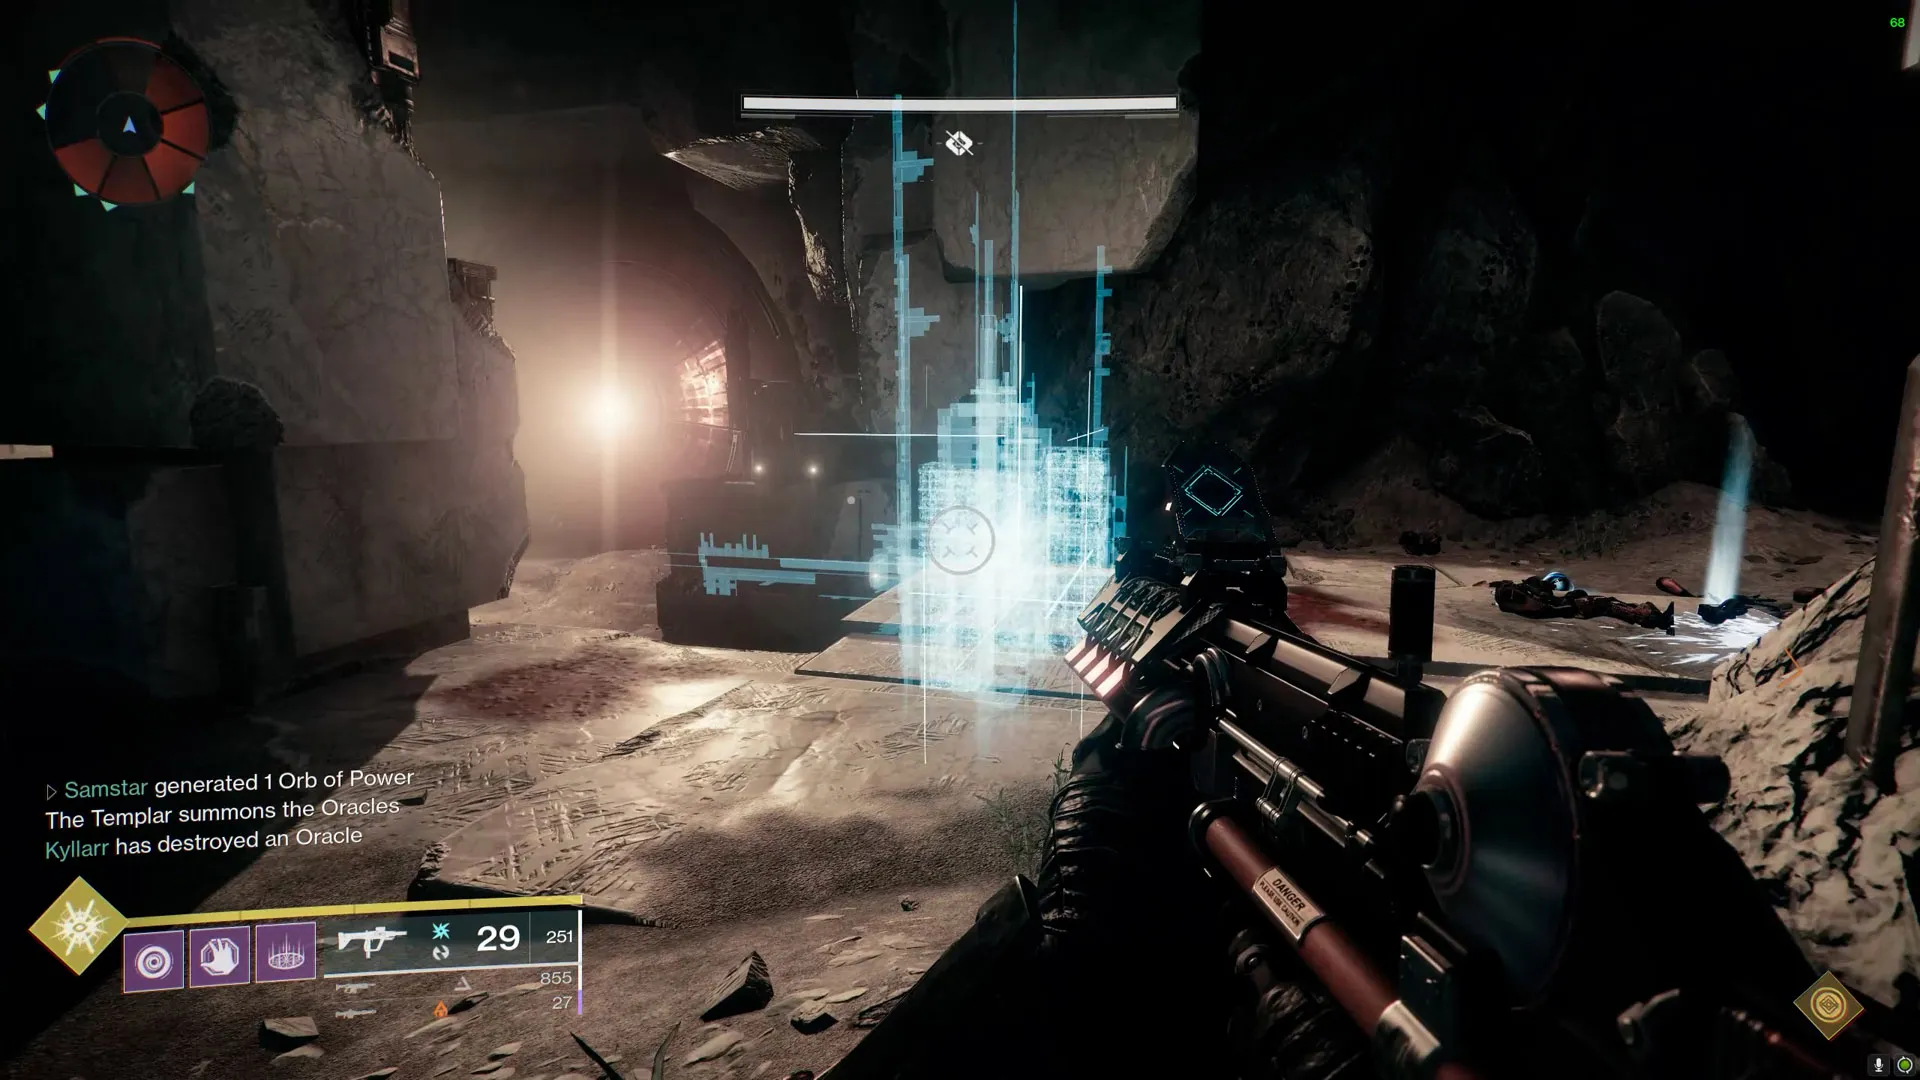
Shortly after the Templar spawns, a wave of 3 Oracles will be summoned in identical fashion to in the previous encounter (appear 3 times, only damageable on the 3rd time, to be destroyed in the order that they spawn).
Once this wave of oracles is destroyed, the team should wait for the player with the Aegis to have the Aegis's super ready. When the team is ready to do damage, the Aegis holder should aim it at the Templar and use the super to fire a projectile that brings the Templar's shield down, beginning DPS.
 The Templar battle will begin with three Oracles, and they will
keep coming back. Every time they occur, they must be eliminated
in the proper sequence.
The Templar battle will begin with three Oracles, and they will
keep coming back. Every time they occur, they must be eliminated
in the proper sequence.
 To remove the Templar's shield, activate the Relic's Super
ability.
To remove the Templar's shield, activate the Relic's Super
ability.
When its shield is brought down, the Templar will do 2 things:
- Detain a random player in a bubble. When this happens, this player should call out that they are detained, and other players will be able to shoot them out of this detain bubble. If the player is detained for too long (~17 seconds), they will die. Freeing the detained player is especially important if the detained player is the relic holder.
- Plan to teleport to 1 of 4 destinations:
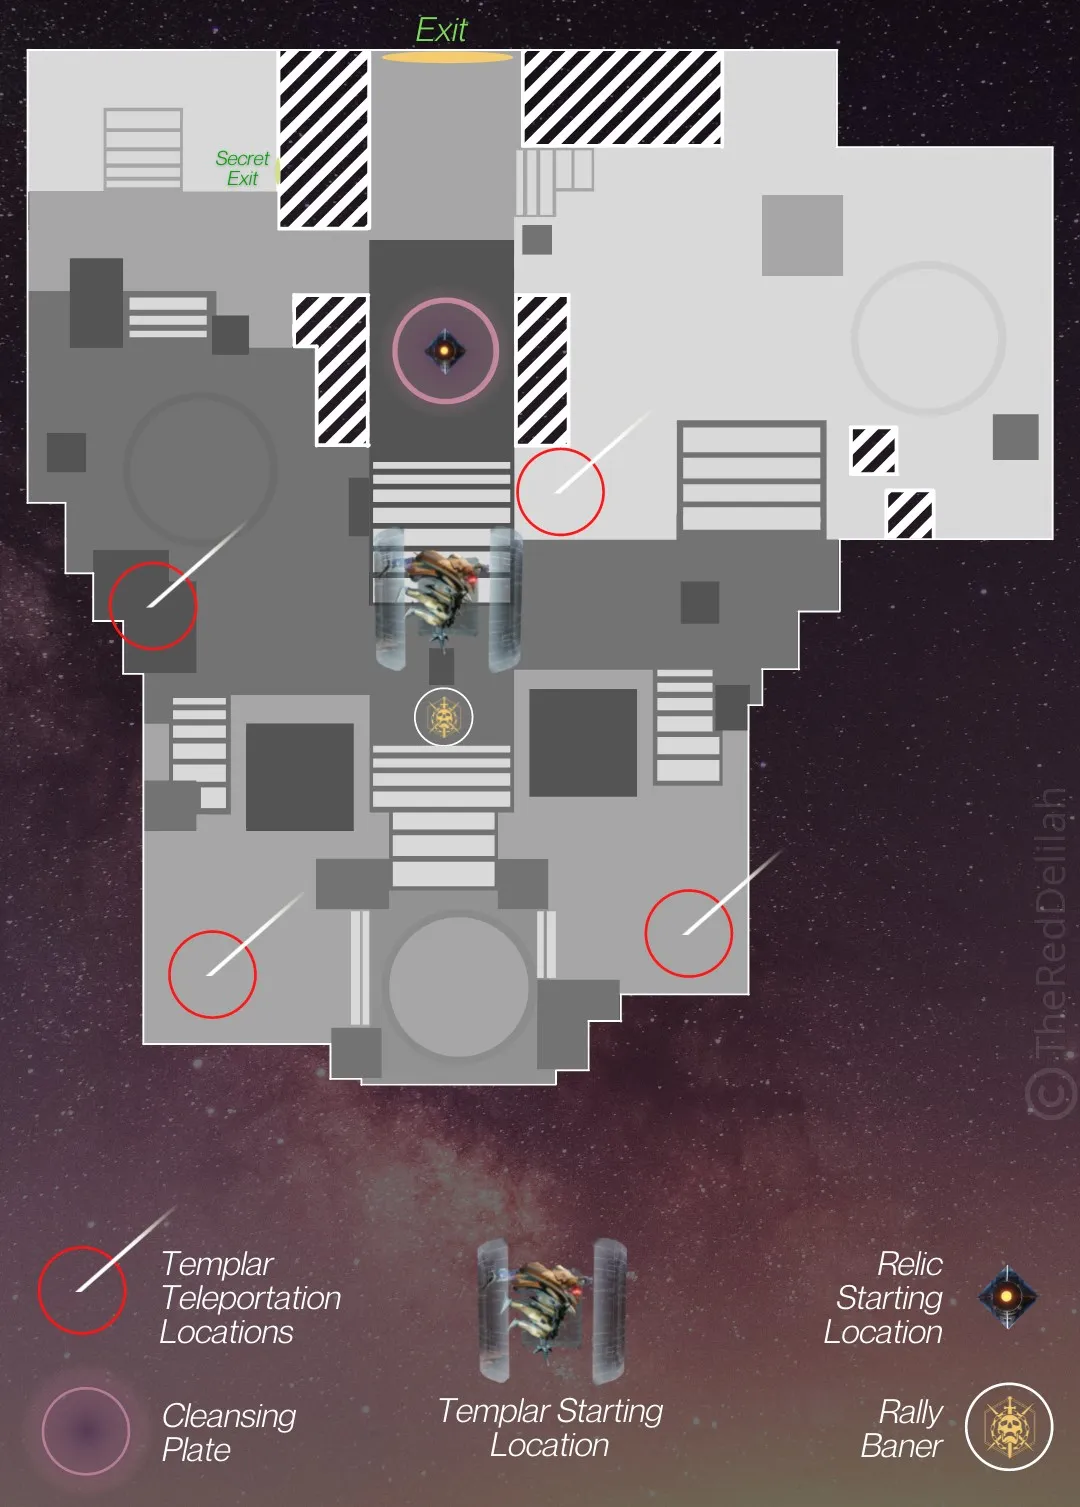
In order to prevent the Templar from teleporting, a player (preferably the relic holder) should look for a beam of light with a ring around it at one of the 4 locations shown in the map above. Standing in this ring turns it from red to blue, indicating that that spot is being blocked. (Note: you must stand in the ring until it disappears; if not, the Templar can teleport if you leave at a bad time.)
Around ~8 seconds after the ring spawns, the Templar will attempt to teleport to the area that the ring is. If the ring is occupied by a guardian, the Templar will be unable to teleport to it, and must remain where it is. This will cause the Templar to “call upon its Minotaurs”. This will cause a decent amount of minotaurs to spawn, but they are little to no threat, especially with a well of radiance.
If the teleport is not blocked, the Templar will teleport to that spot. This will end the DPS phase but not spawn minotaurs.
After a while, oracles will begin to spawn again. These will still be 1 wave of 3 oracles. The team can choose to destroy the oracles as well or continue to damage the Templar. After 6 waves have occurred, the number of Oracles in a wave increases to 5. However, your damage should be more than enough to ever reach this stage.
Whenever the Templar creates a ring to teleport, a random player will be detained. The relic holder may be detained too, so it is important to communicate if this happens so that they may be freed quickly and go to block the teleport.
When the Templar is killed, the encounter ends.
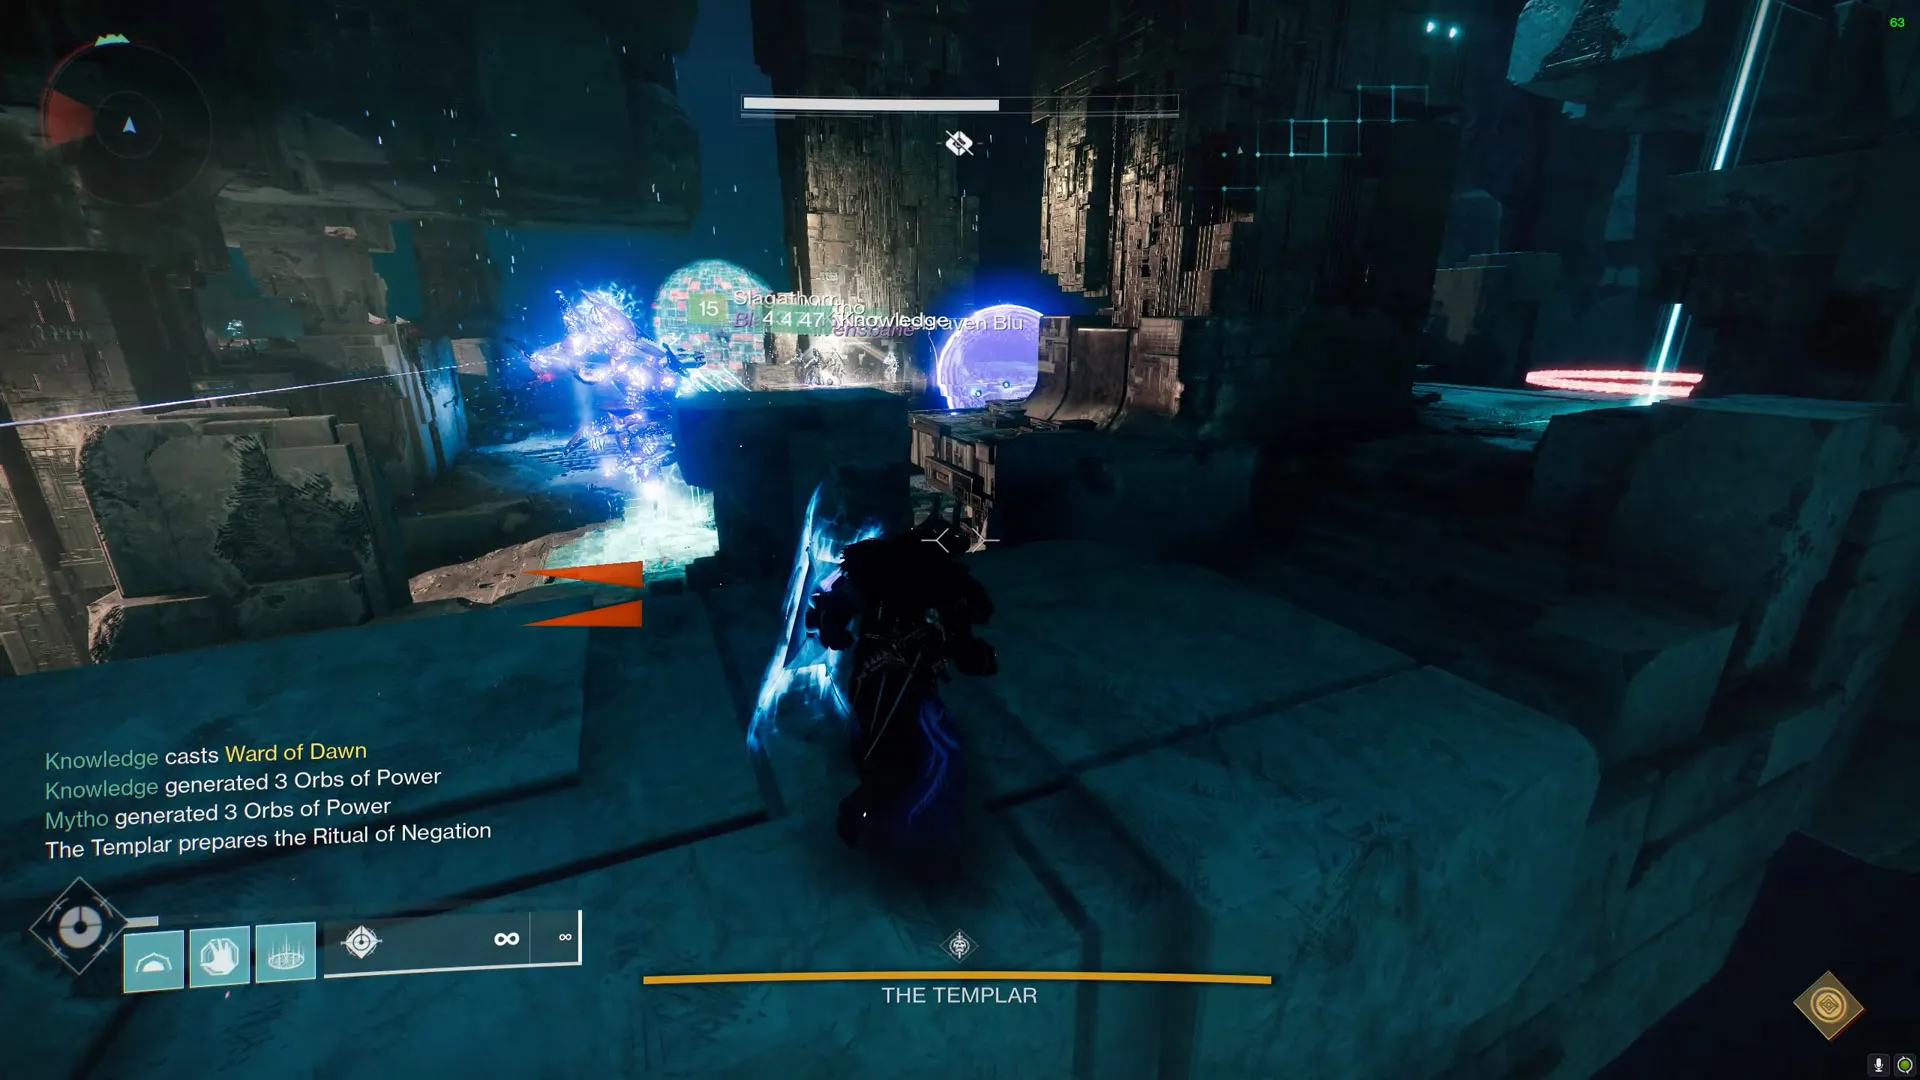 Utilizing one of the shelves close to the Templar's spawn place is
one tactic. For additional defence and damage, use the Well of
Radiance and the Ward of Dawn.
Utilizing one of the shelves close to the Templar's spawn place is
one tactic. For additional defence and damage, use the Well of
Radiance and the Ward of Dawn.
 The Templar can't teleport if you stay in the circle until it
vanishes.
The Templar can't teleport if you stay in the circle until it
vanishes.
Tips
- Killing enemies and oracles charges the Aegis's super faster.
- The team can opt to let the oracles expire and then cleanse your team after they have been marked.
- This removes the need to destroy the oracles.
Encounter Triumph:
Tempered Teleport - Complete the Templar encounter while never blocking the Templar's teleport.
Challenge Mode:
Out Of Its Way - Defeat the Templar without allowing it to teleport.
Master Difficulty:
- Overload Minotaurs are added.
- Arc shields on Harpies.
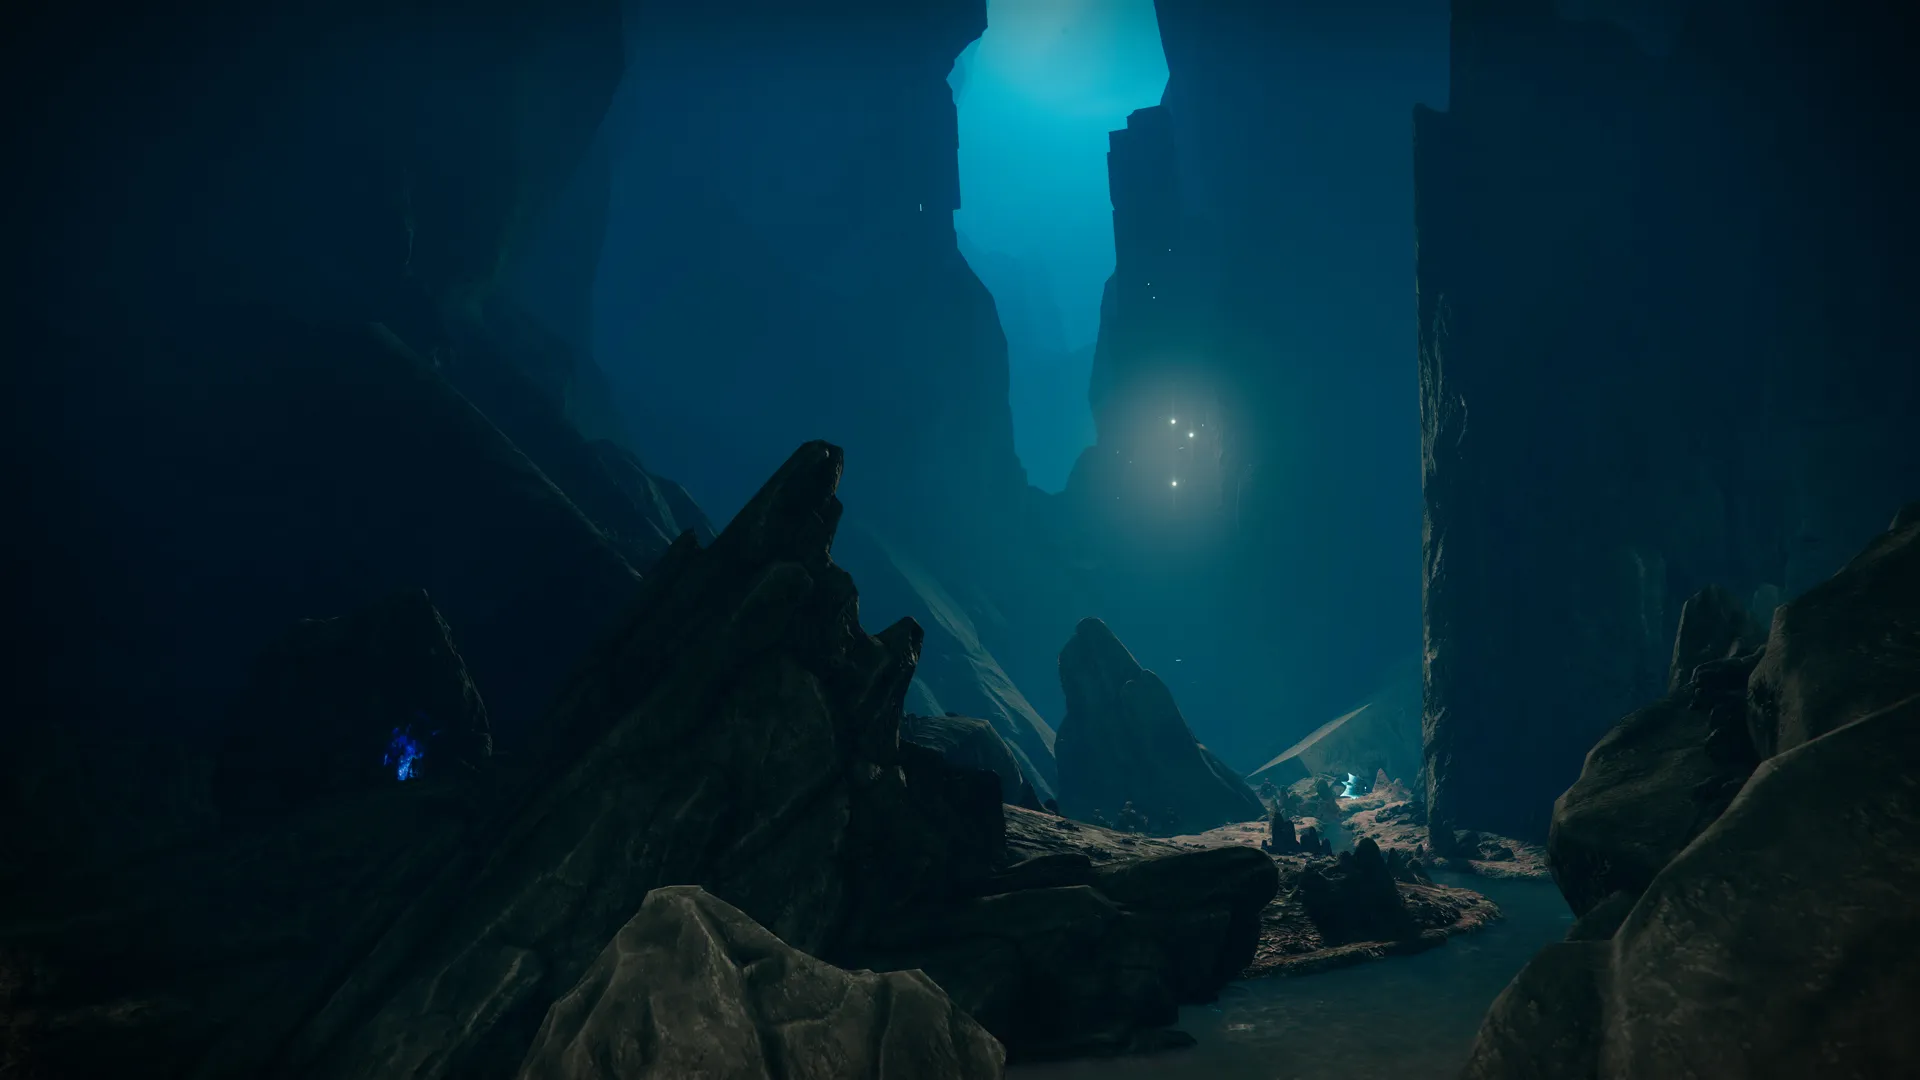
Gorgon's Labyrinth
Objective: Reach the exit. If the Gorgons spot you, you die. Don't be "that Guardian" that gets caught...
The Gorgons will trigger "Gorgon's Gaze," which gives the party 10 seconds until they are all instantaneously killed, if it detects a player (including if they are being shot at). Even if the players are successful in eliminating the Gorgon within that time frame, the other Gorgons get stronger and more intelligent, making it incredibly challenging to eliminate them all. All nine Gorgons can be eliminated at once, though typically only two or three will be. Staring at the ground until they pass on will help you escape their stare.
Similar to those in the Garden of Salvation, there are three floating Confluxes in the Labyrinth. To unlock the secret room, you must shoot all three of them. When you do, even if you wipe, the chest door will remain open.
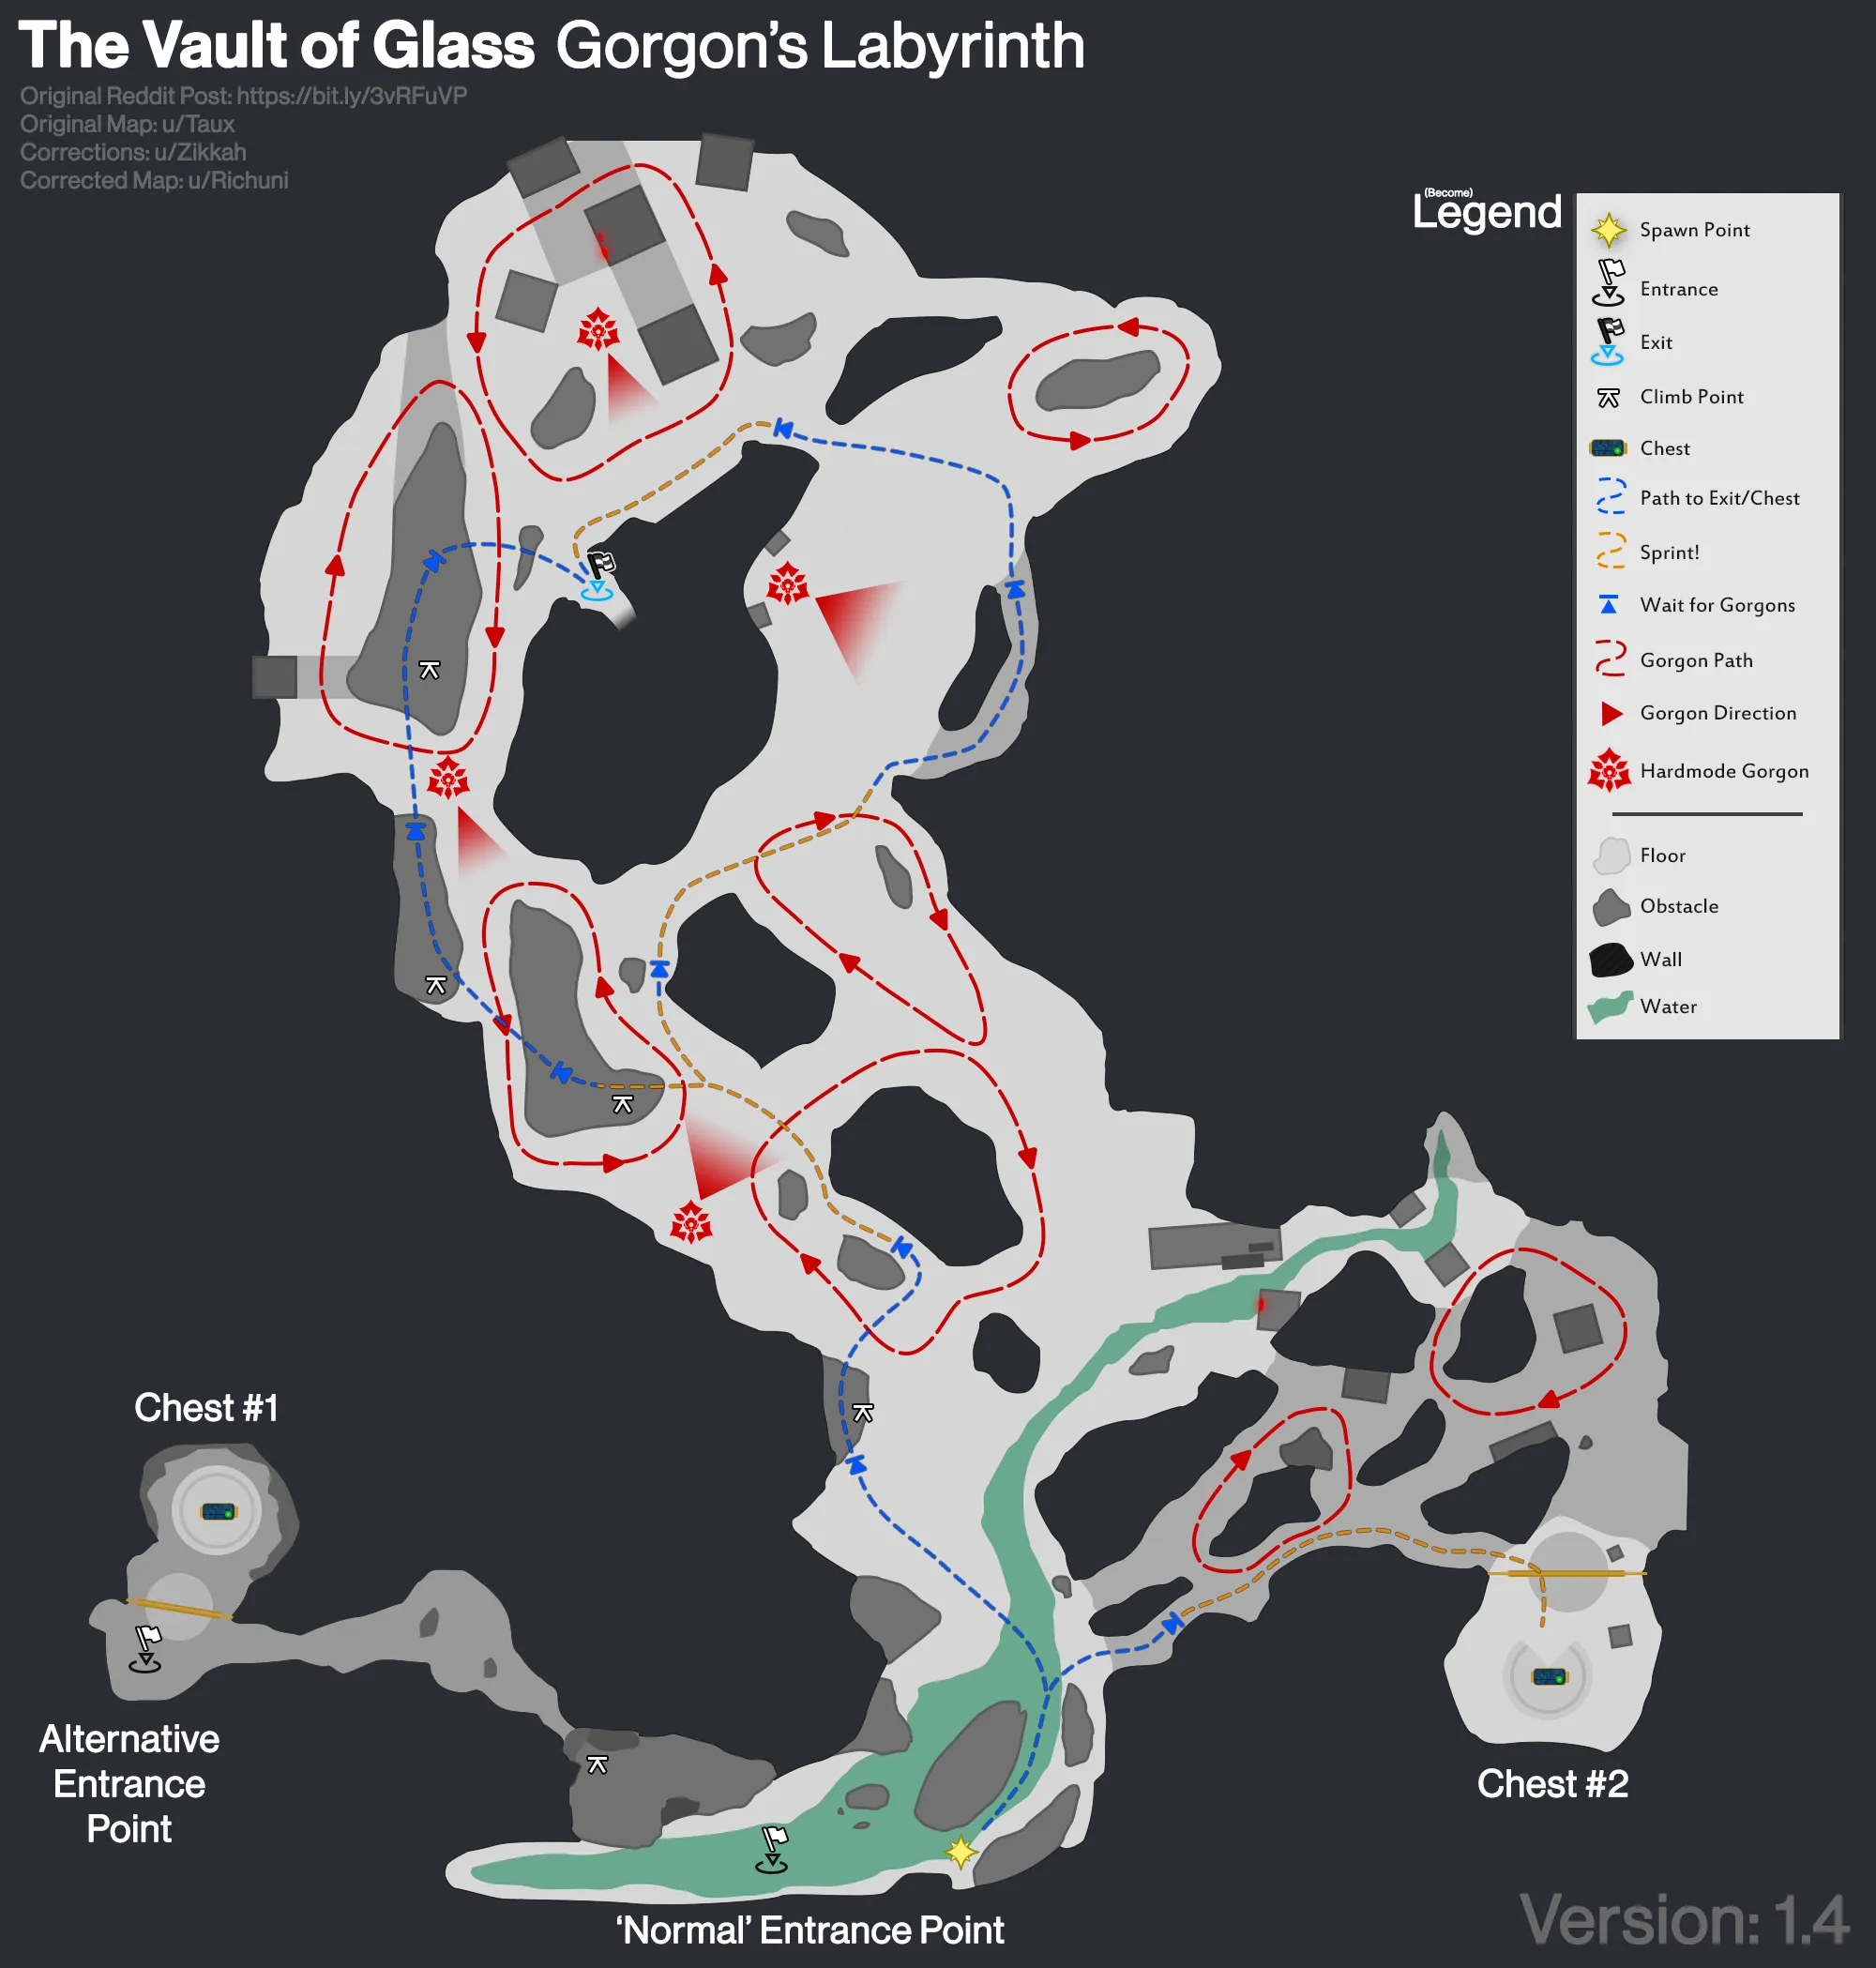 NOTE: The Chest #1 in the map is an old chest spawn location from
Destiny 1, which does NOT spawn in Destiny 2.
NOTE: The Chest #1 in the map is an old chest spawn location from
Destiny 1, which does NOT spawn in Destiny 2.
Encounter Triumph:
Too Fast, Two Gorgons - Complete the Gorgons' Labyrinth encounter while defeating 2 or more Gorgons within 3 seconds of each other.

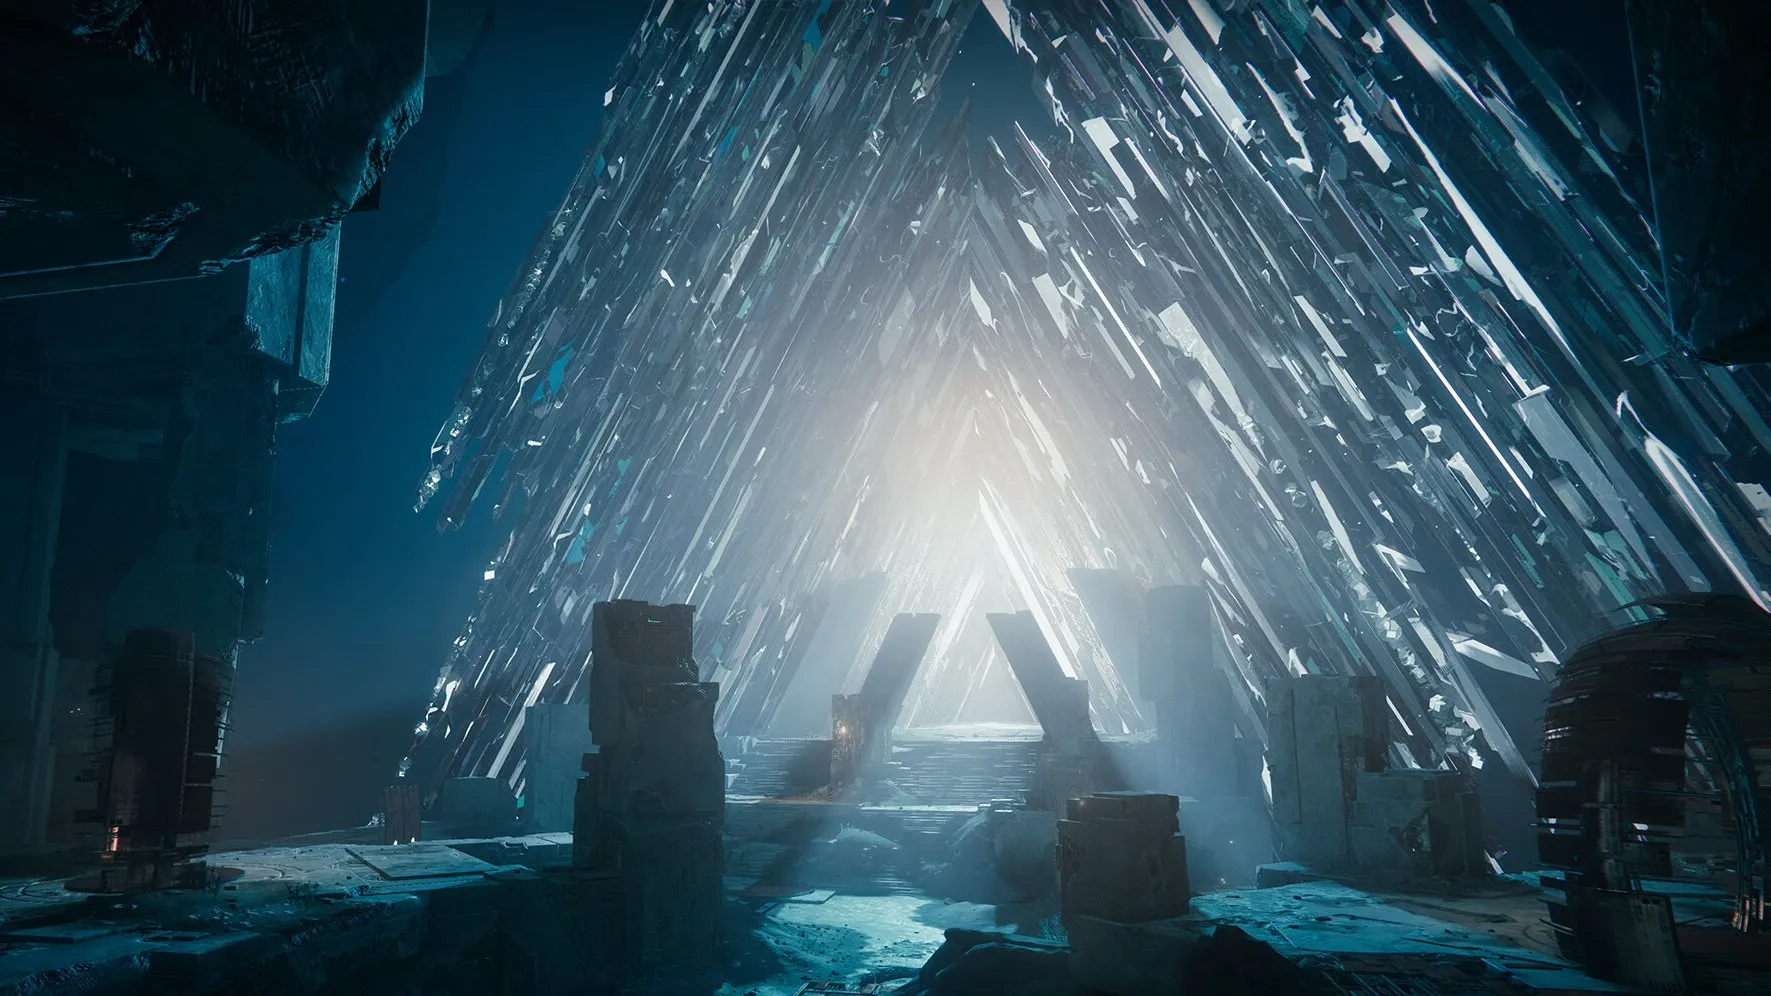
Jumping Puzzle
Floating platforms will spawn and disappear in sequence. Jumping toward the far wall, where you can land on a ledge, will make your parkour life easier. You will eventually come upon a passageway if you keep going down this ledge. Alternatively, if you go into the tunnel to the left, you'll come across a simpler jumping challenge. Either route, a hallway will ultimately be reached. A hidden chest may be found above the left side of the pathway leading to the door to the Vault of Glass.
Tips
- Don't f**king fall off the map.
Gatekeepers
- 2 plate holders.
- 1 Mars defender.
- 1 Venus defender.
- 1 Relic holder.
- 1 floater.
- Relic, Floater, Mars and Venus roles will constantly rotate between players.
- Ad-clear weapons.
- Rockets for Wyverns.
- Anti-Overload
The goal of this encounter is to protect confluxes in two separate areas: Mars and Venus. These areas are accessible via vex portals. The encounter starts when the Vex standing around are attacked.
Killing the Gatekeeper (a Hydra without shields) will drop the Aegis from the Templar encounter. It will also unlock the portals.
Plate Holders
Stand on the plates to open the portals. Waves of vex will spawn near the plates. Every 2-3 waves, an Overload Minotaur will spawn.
A gatekeeper will also spawn on the middle platform once in a while. This gatekeeper will lock the portals and must be killed in order to unlock the portals again.
Mars/Venus Portals
Once the portals are opened, the Mars player will run into the portal on the left, and the Venus player goes into the right portal. This allows the Mars player to enter Mars and the Venus player to enter Venus. The insides of Mars and Venus look different, but the mechanics inside are the same. There will be a Conflux in Mars and Venus. Waves of Vex will spawn repeatedly at the top of the stairs.
Every few waves, a wyvern will spawn on one side and a shielded Praetorian on the other. The Wyvern can be killed using usual abilities and weaponry, but the shielded Praetorians must have their shield taken down using attacks from the Aegis. The initial spawning of the Praetorians and Wyverns is random, meaning it can be the Praetorian that spawns on Mars and the Wyvern on Venus or the other way around. But after this initial spawn, it will keep swapping around, meaning if the Wyvern was initially on Mars, the next turn it will be on Venus.
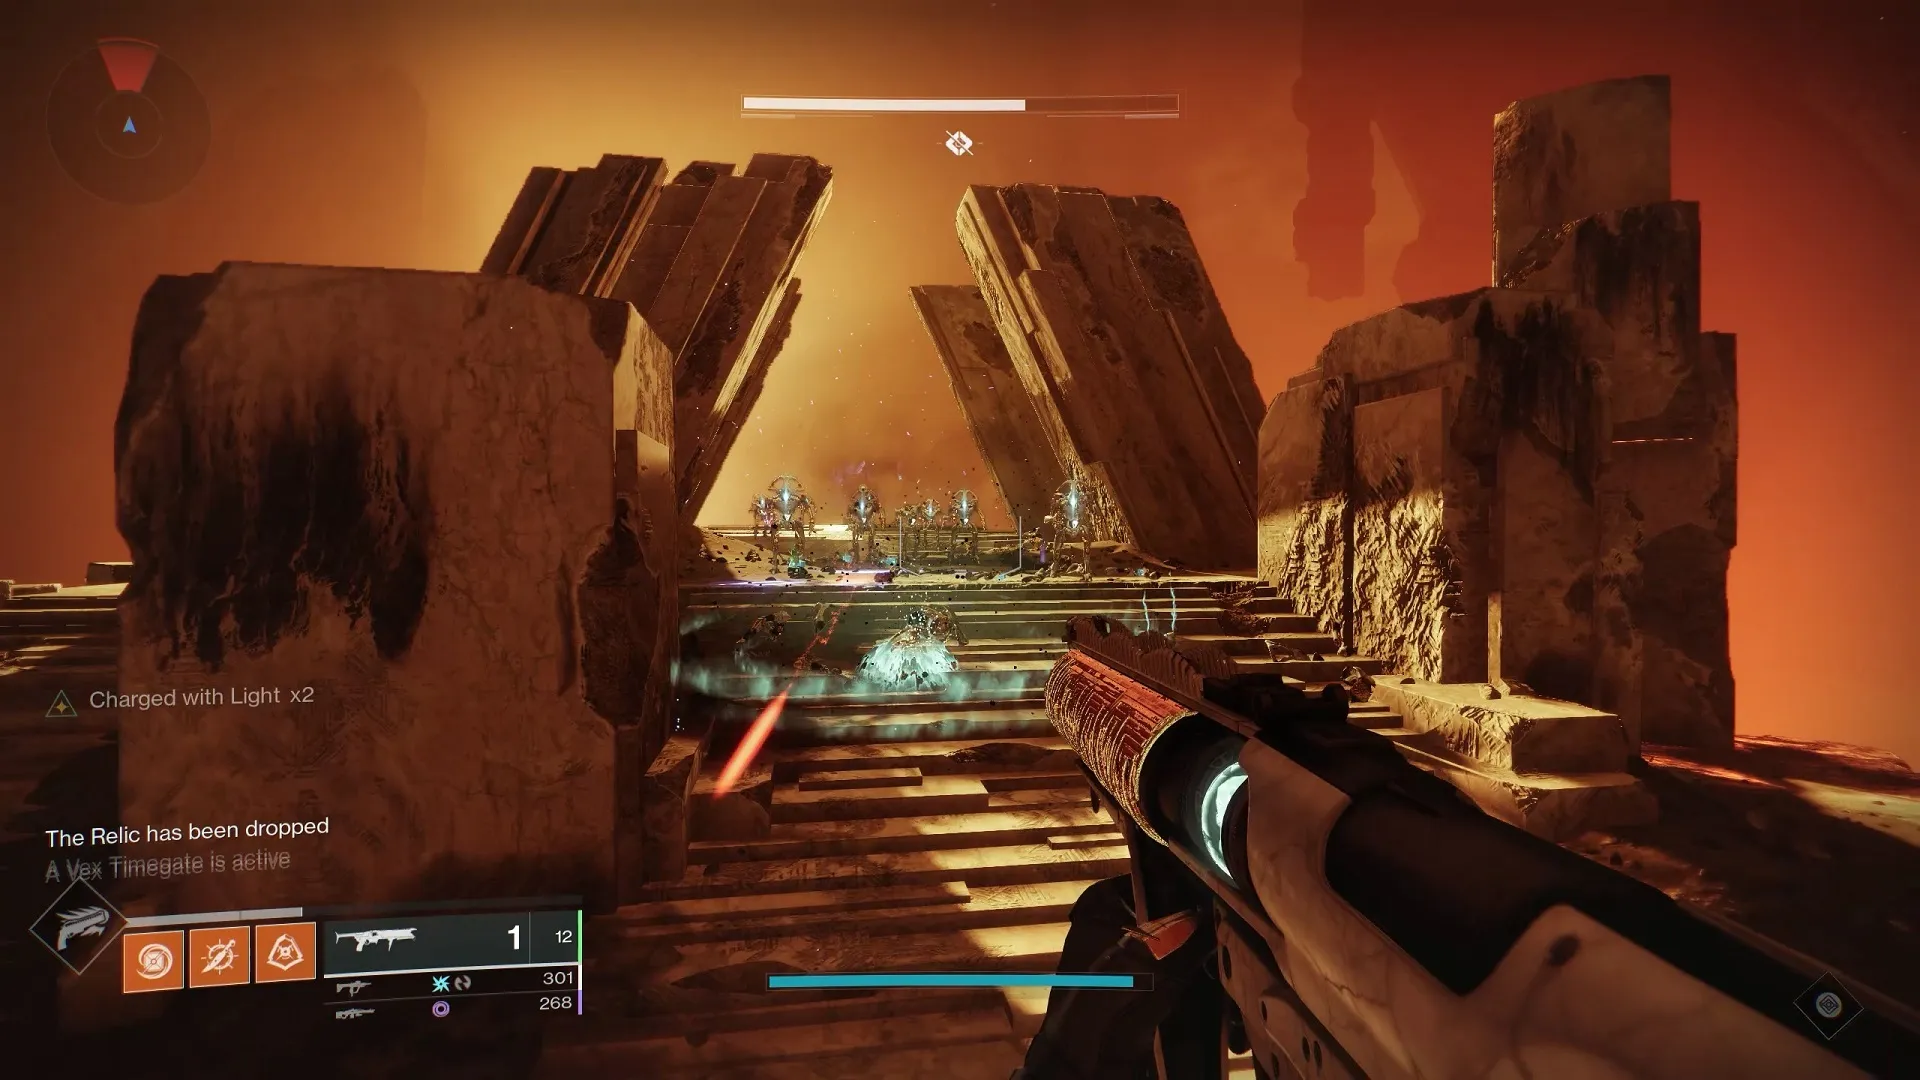 The Mars area is more desert-like, set as the past of the Vault of
Glass during its creation.
The Mars area is more desert-like, set as the past of the Vault of
Glass during its creation.
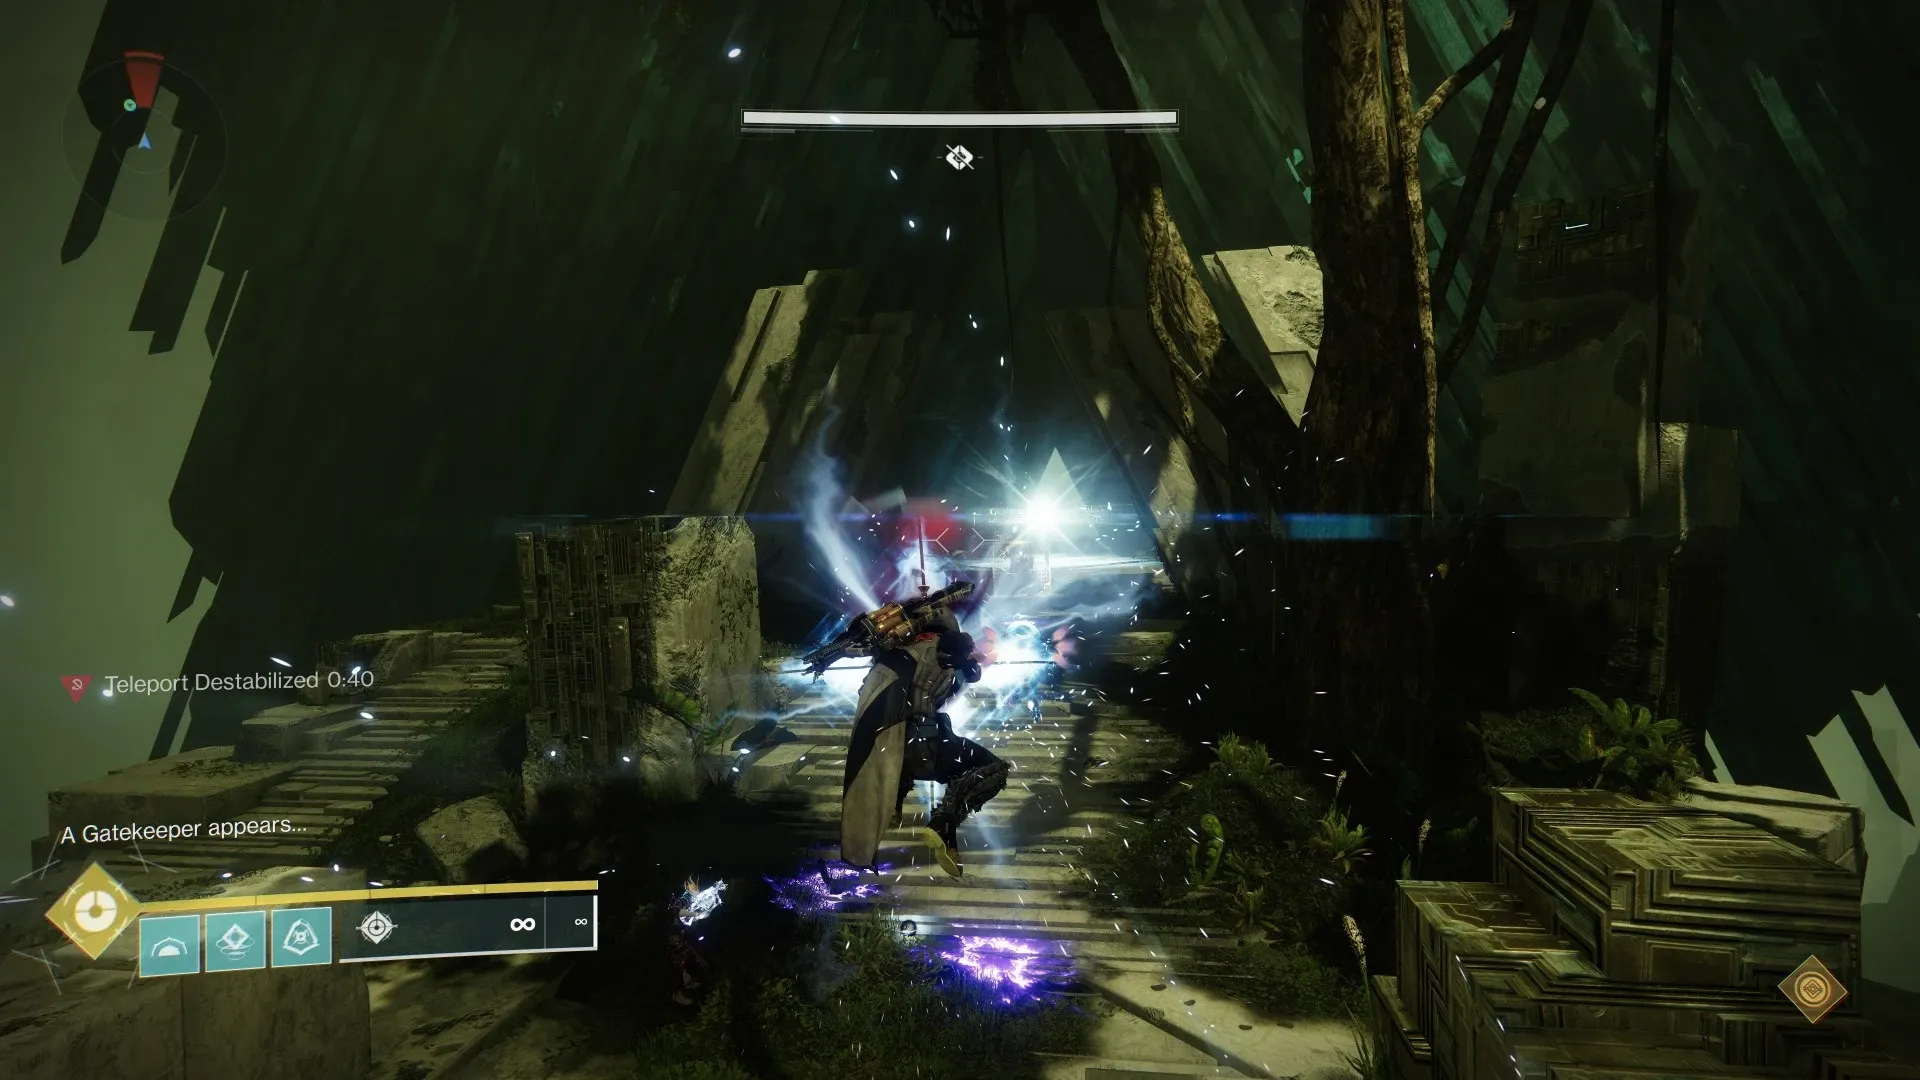 The Venus area is more jungle-like, set as the future of the Vault
of Glass, showing it already been built and covered in moss.
The Venus area is more jungle-like, set as the future of the Vault
of Glass, showing it already been built and covered in moss.
The Aegis Relic
Pick up the Aegis from the gatekeeper when it dies at the start of the round (future gatekeepers do not spawn any relics) The rules mentioned in the Templar guide regarding the Aegis apply here. Your normal attacks are NOT able to break the Praetorian's shield, so when a player on Mars or Venus calls out that there is a Praetorian on their side, you should enter the corresponding portal and kill the Praetorian. After the first Praetorian is called out, the team can accurately predict where the Aegis should go in order to deal with future Praetorians.
When a player enters a portal while wielding the Aegis, they will receive a debuff called “Teleport destabilised." This prevents the player from using a portal. Thus, after stepping onto Mars or Venus, the player should kill the Praetorian, then drop the relic (dropped by swapping weapons) for the other player who was previously on that side. The former relic holder now protects that side, while the new relic holder leaves it. This will cause them to become teleport-destabilised as well. Thus, the floater will need to pick up the relic and enter the other side when necessary. Rinse and repeat until a new message appears in chat: “A new conflux appears before the Glass Throne."
Final Stand
Once this message appears, the confluxes and enemies on Mars and Venus will despawn. Instead, a conflux will appear in the middle of the original map. Enemies will spawn around the map at 3 spawn points:
- Beneath the glass structure at the back of the map.
- Beside the Venus Portal.
- Beside the Mars Portal.
Alongside these enemies, Praetorians will spawn as well. Three waves of enemies will spawn, and with each wave, a Praetorian will spawn, in the order shown above.
Following the death of the Praetorians, Wyverns will spawn at the 3 spawn points at the same time.Once the Wyverns are killed, a message appears in chat: “The timestreams stabilise." This marks the end of the encounter.
Tips
- Players on Mars and Venus can push the Praetorians off the map, eliminating the need for the relic holder to enter the side to kill the Praetorian; as a result, the relic holder only needs to stay on one side until the conflict reappears on the original map.
- It's much easier to push Praetorians on Mars.
- Only Overloads can capture the plates.
Encounter Triumph:
Rabid Relic - Complete the Gatekeepers encounter while only using Relic Super damage to defeat Praetorians.
Challenge Mode:
Strangers in Time - During the Gatekeepers encounter, defeat the Wyvern and Praetorian Minotaur enemies within 3 seconds of each other.
Master Difficulty:
- Barrier Hobgoblins are added to the final stand phase. 3 will spawn at the same time, so be wary.

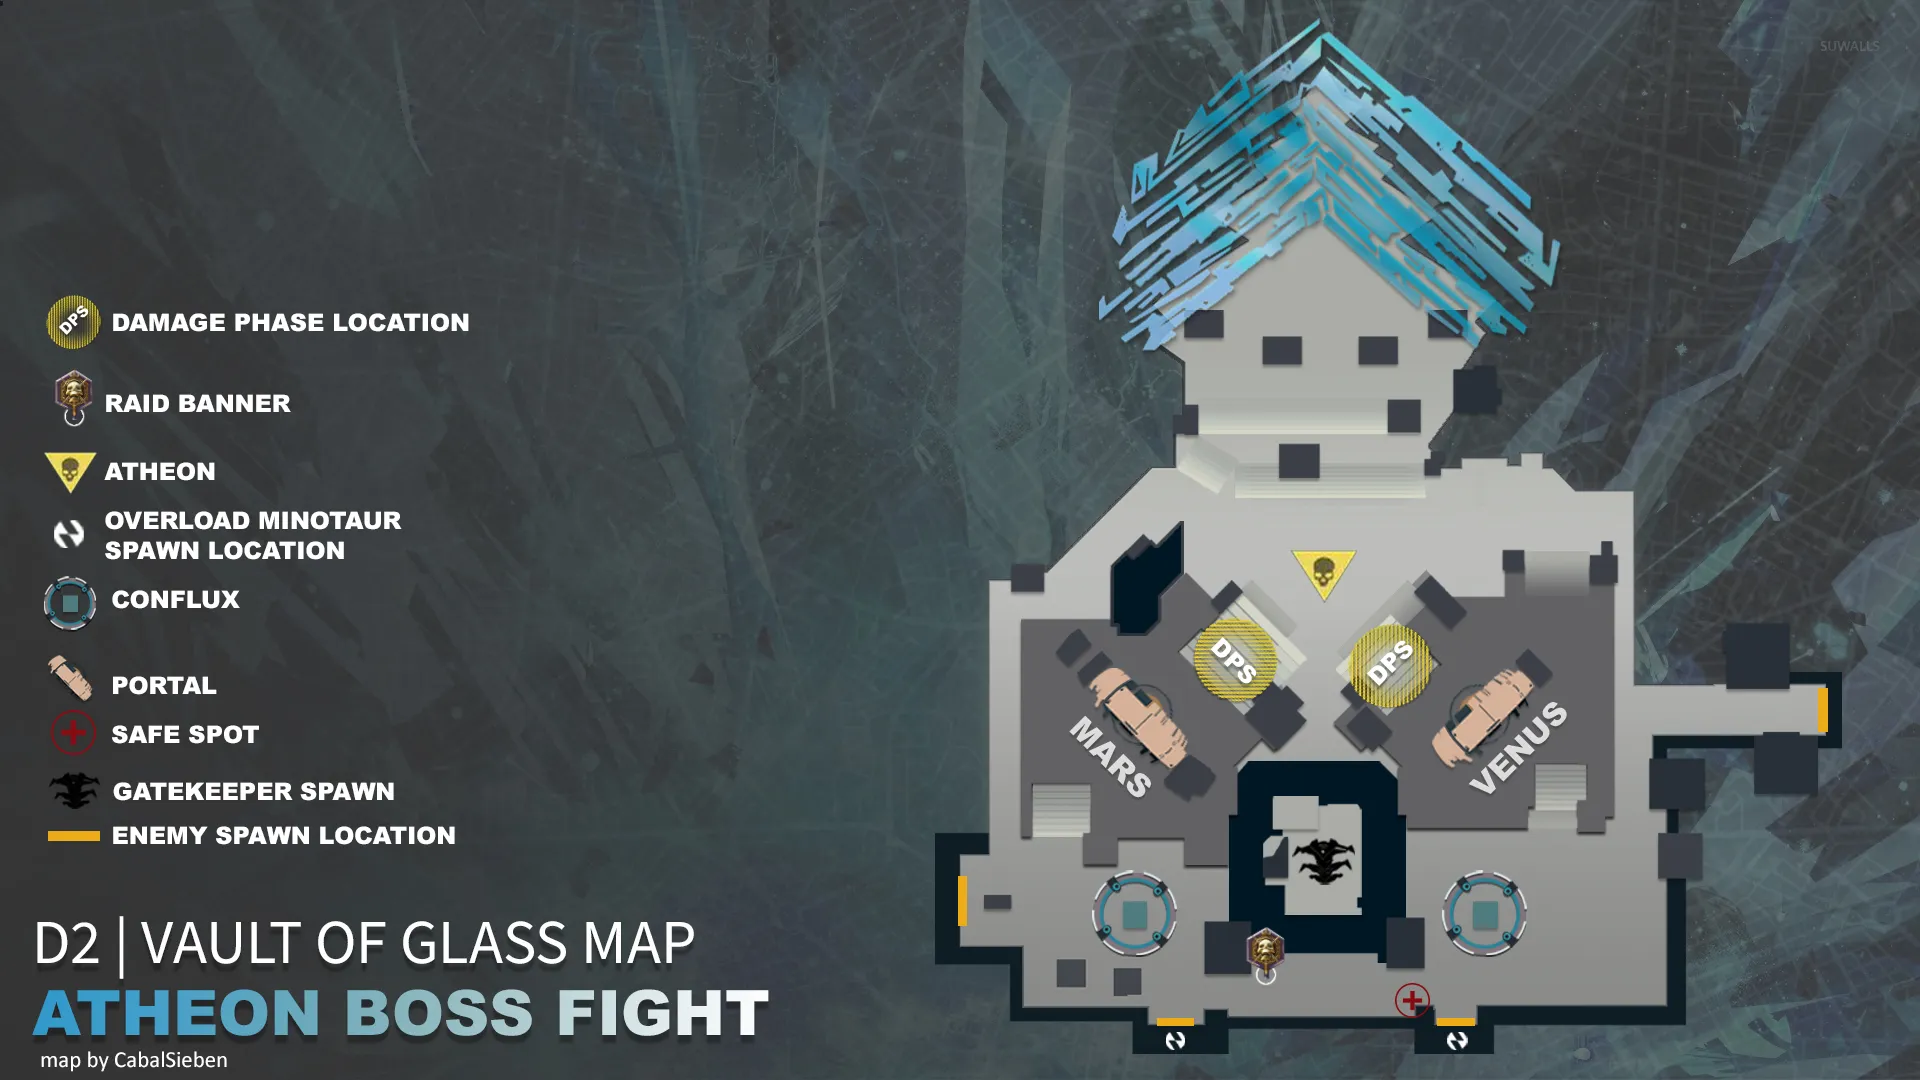
Atheon, Time's Conflux
- 1 reader.
- 1 Aegis relic holder.
- Roles are dependent on who gets teleported.
- At least 1 Well of Radiance.
- Titans with Storm Grenades (Heart of Inmost Light).
- Warlocks with Touch of Flame Fusion Grenades (Verity's brow/Starfire protocol).
- Rockets.
- Eriana's Vow/Sniper.
The goal of this encounter is to kill Atheon. The encounter begins when the vex box in the middle is broken. Atheon will spawn in the middle of the map, where the conflux spawned at the end of the previous encounter. This will cause harpies to flood in, alongside harpies that spawn in the sky.
After a while, Atheon will begin randomly teleporting three players to either Venus or Mars. In case you haven't figured it out by now, the Mars and Venus rooms are actually the same as the original room, just textured differently.
The 3 teleported players will spawn at the back of the room. They will have to:
- Pick up the Aegis, which spawns beside you.
- Kill the gatekeeper.
- Head to the front of the area.
Additionally, while inside, players will receive a debuff called “Marked by the Void." This will continuously make the player's screen darker. This debuff can be removed by being cleansed by the Aegis. In order to be cleansed by the Aegis, the player wielding the Aegis should hold the block button, and players within the field that the Aegis creates will be cleansed of the debuff. However, once you are no longer being cleansed, the debuff will return.
Meanwhile, outside, supplicants will have spawned around the arena. This will not affect mechanics, but can be deadly to your team. Especially on Master difficulty.
Atheon will begin to spawn oracles. He will spawn 3 waves of 3 oracles each. Similarly to the oracles encounter, for each wave, he will show the order twice, then summon the 3 oracles for the players to shoot in the order in which they spawned. However, in this encounter, Atheon will show the order of oracle spawning in the original map, but the oracles that have to be shot will spawn wherever the 3 players were teleported to.
Thus, the players outside should do the following:
- Stand on the plate to open the portal of the side which the players were teleported to.
- Call out the order of Oracle spawns.
The players inside can destroy the oracles in the order that was called out for them once they arrive at the front from where they spawned. Unlike in the Oracles and Templar encounters, shooting the wrong oracle or letting them expire does not mark the team for negation; it will wipe you instead. If the gatekeeper has been killed and the plate stepped on, the portal should open for both the players inside and outside.
After 3 rounds of 3 oracles, a message in chat appears: “Guardians make their own fate." This means 2 things:
- Damage phase has started. Players outside may begin damage on Atheon. The players in the side may leave the side, returning to the original map. They must keep in mind to cleanse their Marked by the Void debuff as/after they have left the side.
- Ability and Super regeneration has been greatly increased.
Players will see a buff on their screen called “Time's Vengeance." This timer indicates how long they will have the increased ability regeneration as well as how long the damage phase lasts.
At around 15 seconds left on Time's Vengeance, Atheon will attempt to detain a player. This player will have a blue and red vex-like effect around them and a debuff called “Imminent Detain” on their screen, accompanied by a ~4 second timer. Once this timer ends, the player will be detained. Any players who happen to be near the player will be detained as well, so the detainee should make their way away from the team. Common spots to stand when detained include behind the portal and running right up to where Atheon is.
Once the Time's Vengeance timer hits zero, the increased regeneration and damage phase will end, and players will have to rinse and repeat until the boss is killed.
Once the boss is killed, the encounter as well as the entire raid are done.
Tips
- The harpies in the sky can be annoying, so killing all of them may be tempting. However, if they are all killed, they will respawn. Thus, it is better to keep one harpy alive per side. Do note that this last harpy can be killed without having all the sky harpies respawn if it is killed when the players have been teleported.
- When a player is going to be detained soon, they can pick up the Aegis and begin swinging it as the timer hits zero. This will allow the player to break out of detainment instantly. This is because the animations for the Aegis attacks must finish before the detain, so the Aegis attack will break the detain.
- This applies to the Templar encounter as well, although it is less uselful for that encounter. It is mainly used in solo Templar runs.
- Using Xenophage can also help you kill the harpies and stack the Death Throes much faster and easier.
- Grenades are a much better choice than linears on this boss due to the increased grenade regeneration.
- If Warlocks with Verity's Brow are present, it may be worth it not to kill ads, leaving them for the warlocks to kill to build up stacks of Death Throes.
This video by Aegis explains how Verity's Brow works and how it increases your team's grenade DPS. It's a guide for Vow of the Disciple, but this part of the video is relevant for grenade DPS phases in general. Granted, you may not be at the grenade throw rate cap due to certain raid mods in Vow not being applicable to this encounter; hence, you can shoot rockets while waiting for your grenade to return.
Relevant part is from 11:45 - 14:20.Encounter Triumph:
Eyes On Atheon - Defeat Atheon without destroying any Supplicants.
Challenge Mode:
Ensemble's Refrain - During the Atheon encounter, destroy no more than one Oracle per Oracle wave.
Master Difficulty:
- Air Superiority is really impactful for this encounter, as all the enemies outside are Harpies or Supplicants.
- Keep your head on a swivel for Supplicants and pay attention to their beeping because you will not have a radar to alert you
- Harpies have Arc shields.
- Barrier Hobgoblins will spawn inside the portal timelines, but you'll most likely be out of their POV and can safely ignore them.
- Atheon deals significantly more damage and can reliably kill you while you stand in a Well.