
The Desert Perpetual Guide
Done by: Vedallion#7774, Luna#8297, Citoxl#8492 | September 13th 2026
Loot Table
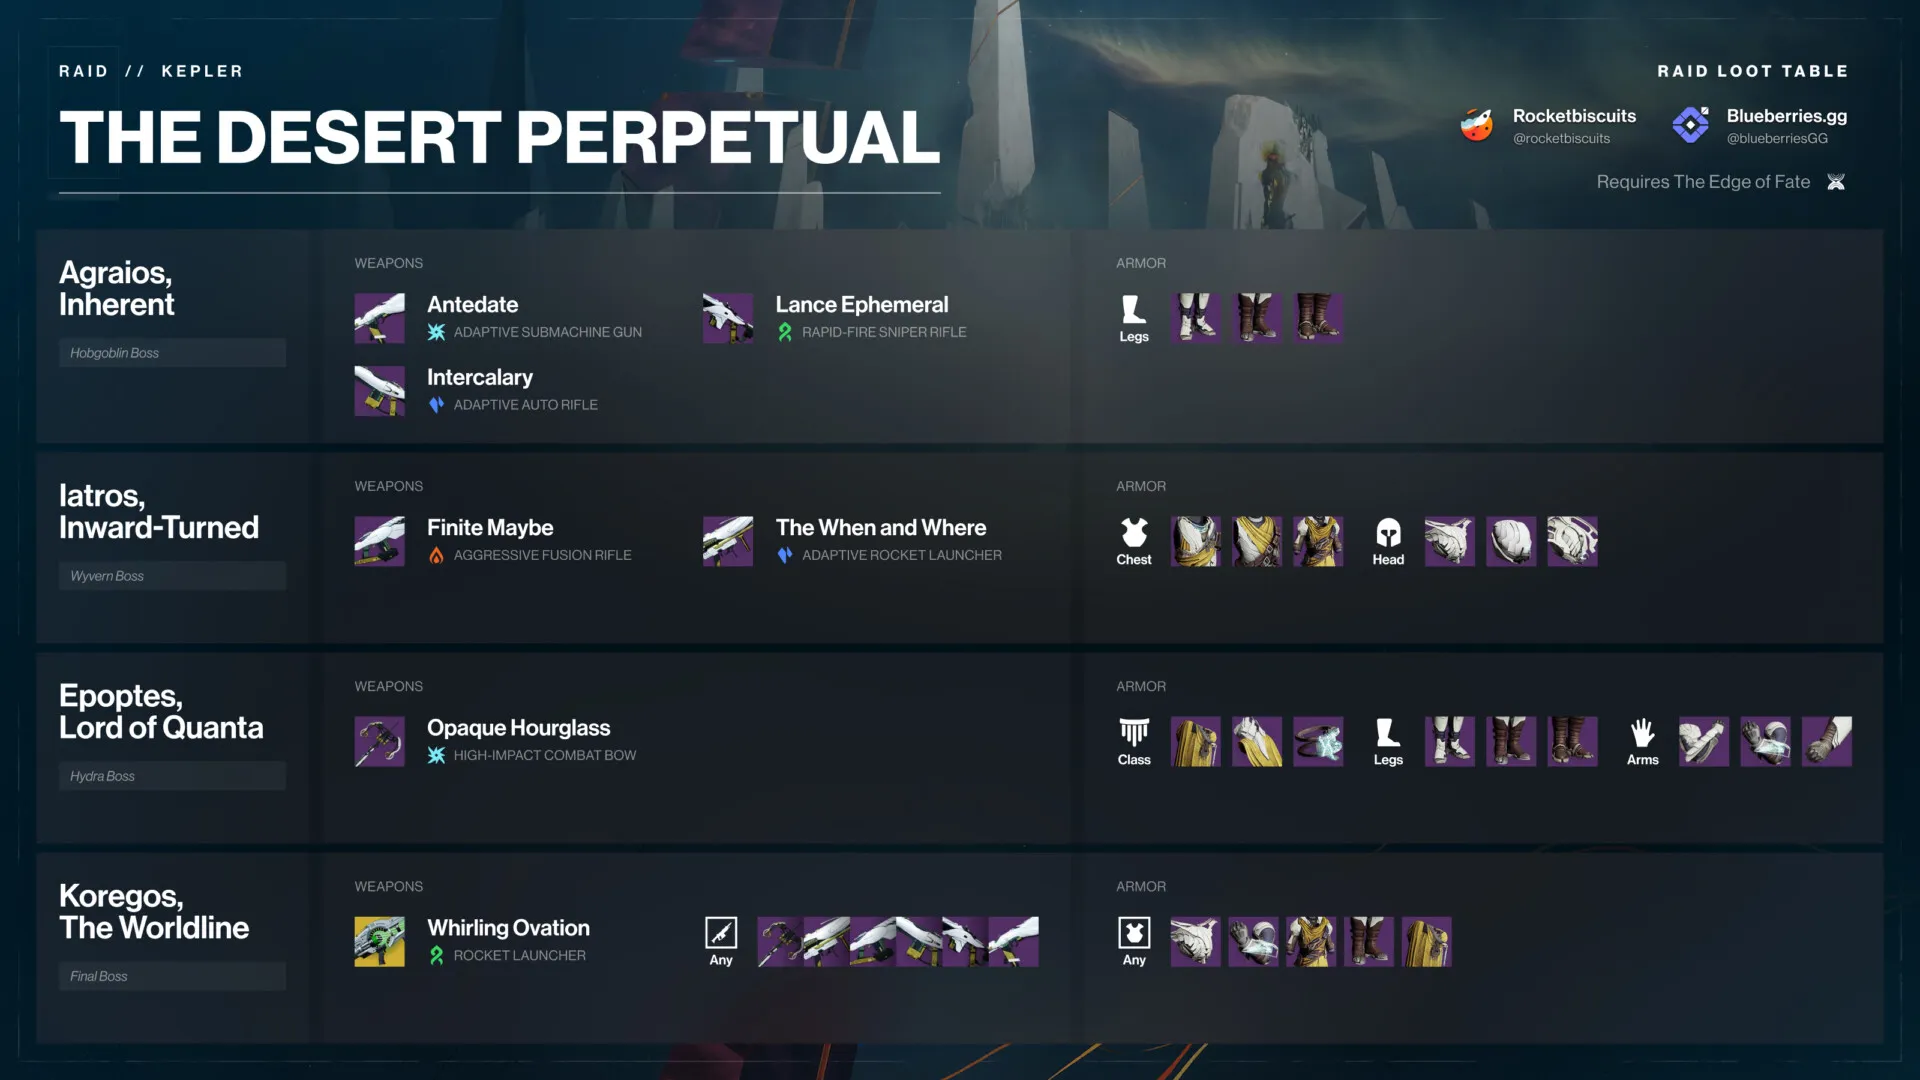
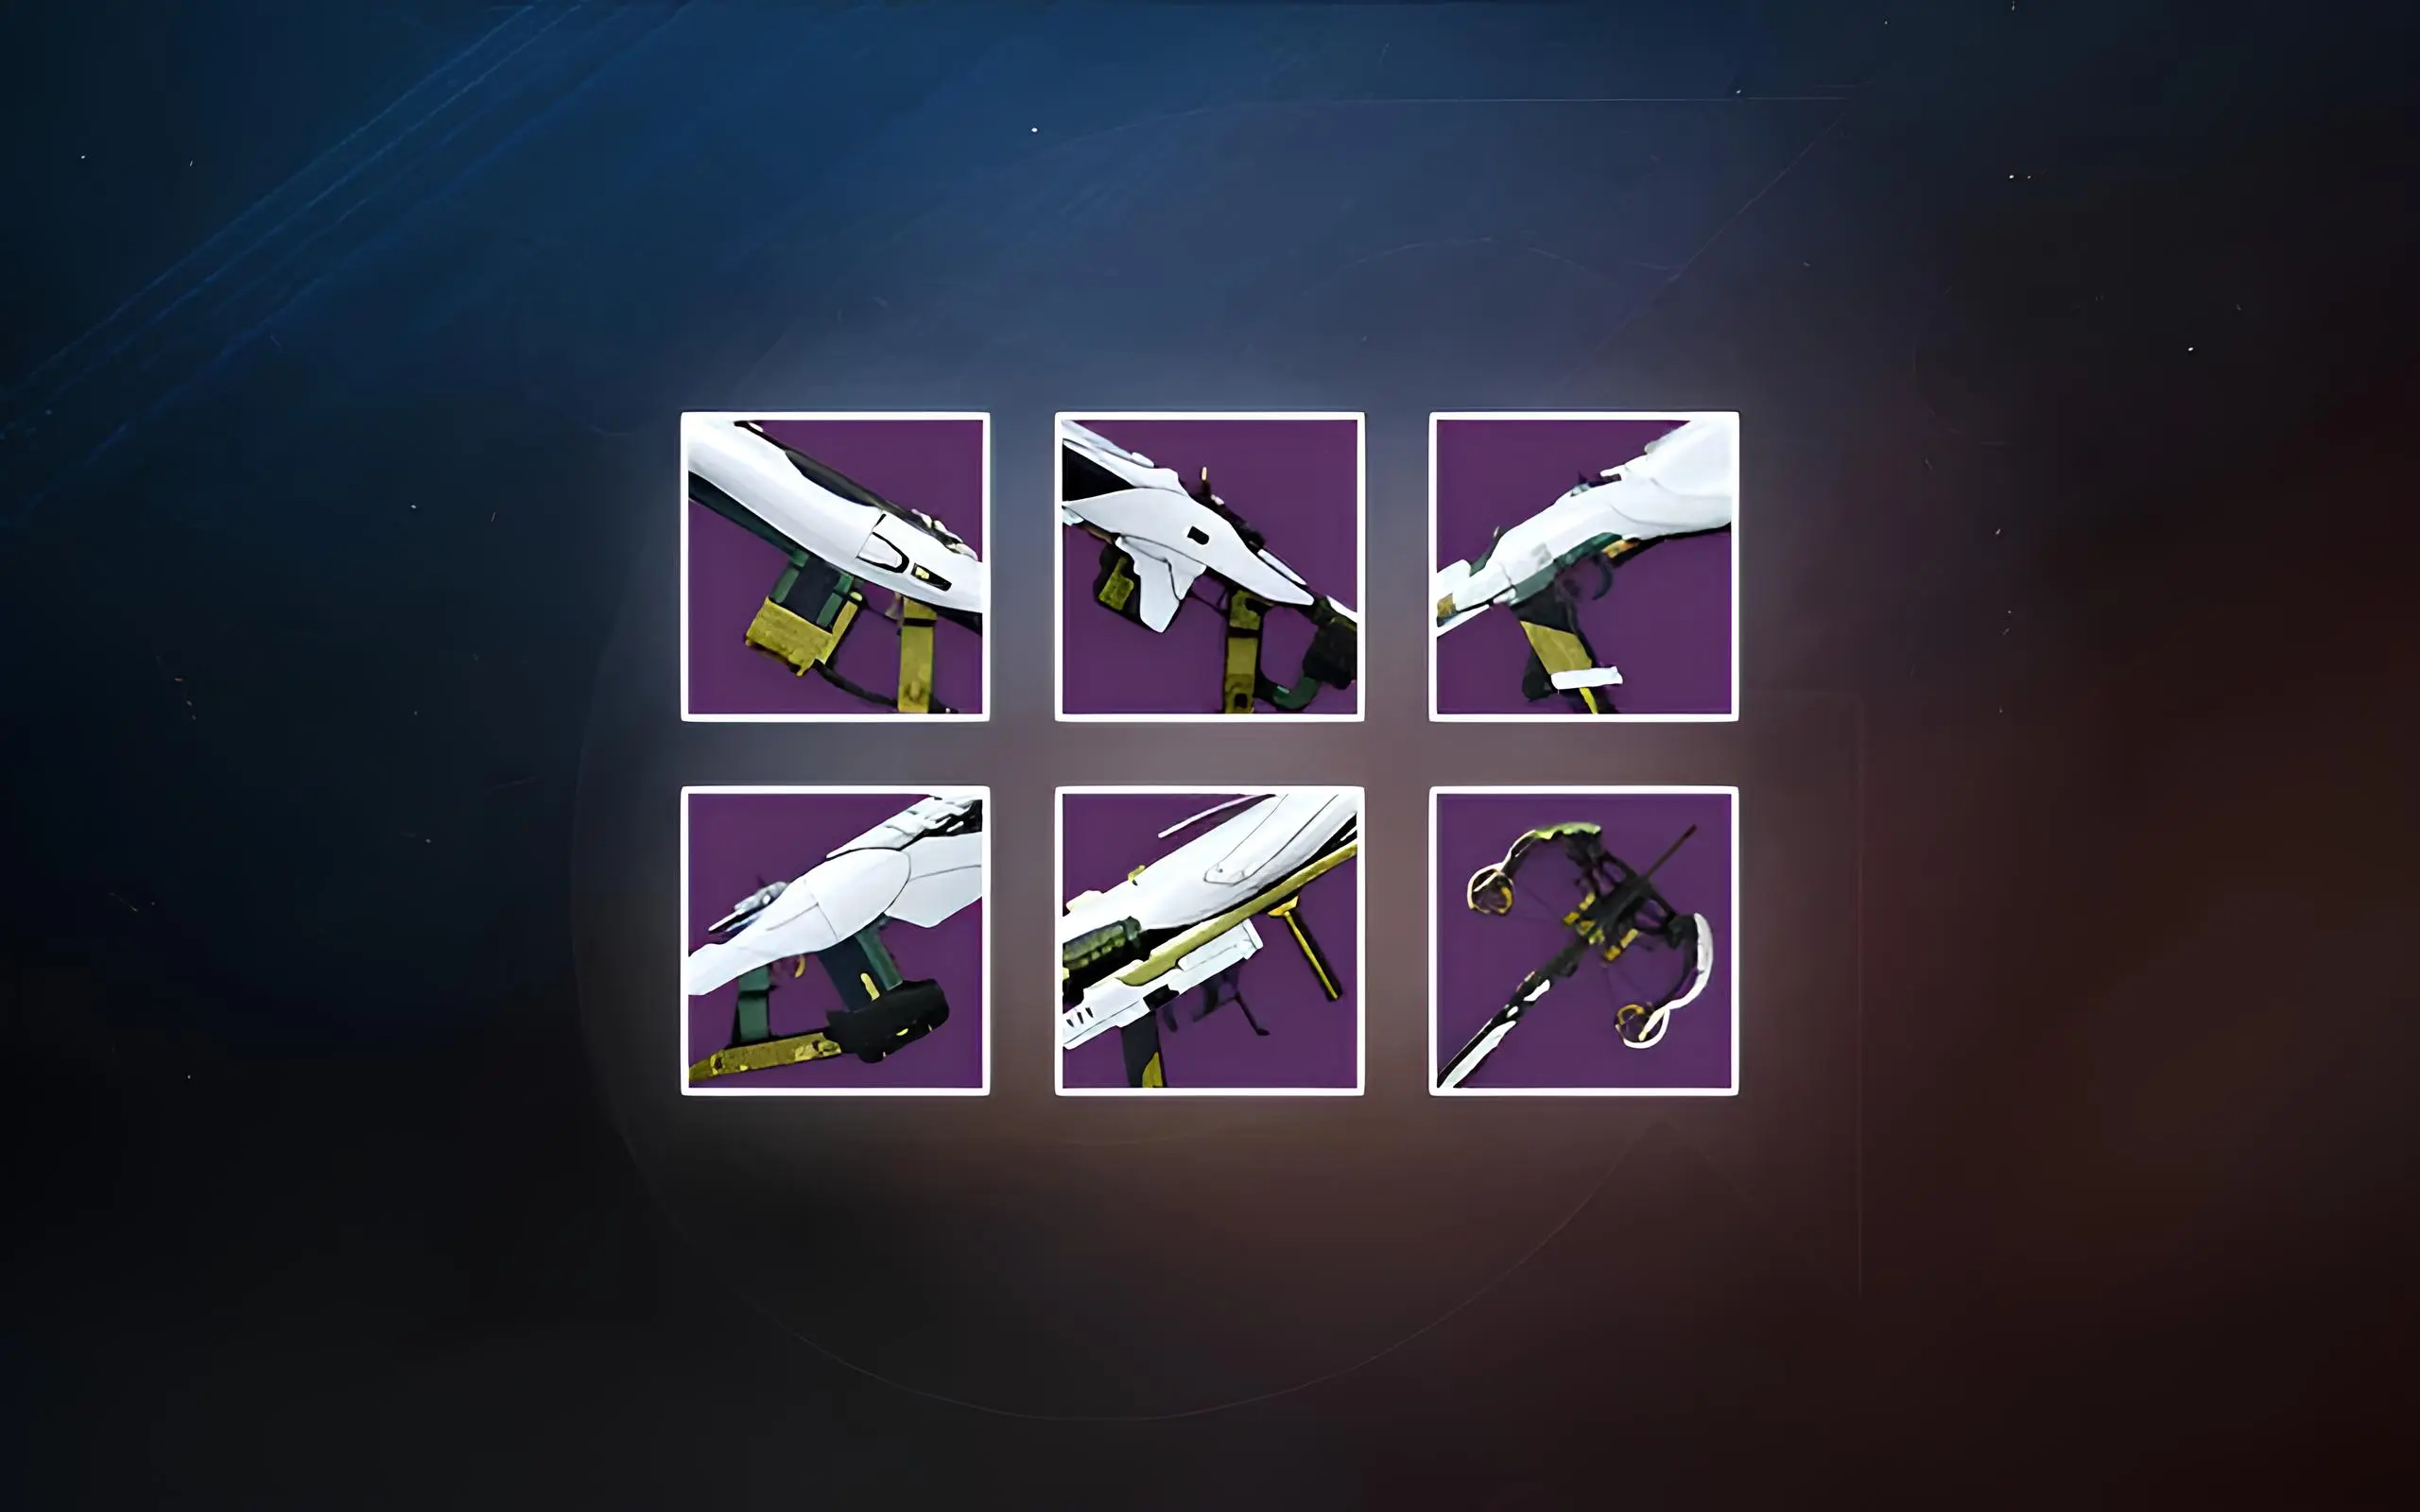
Weapons

Frame of Reference - Weapon Kills grant a stack of Frame of Reference for 8 seconds. Maximum of 5 stacks. Frame of Reference timer is paused while stowed. Remaining duration is rounded up to a whole number of seconds. Frame of Reference benefits at 1|2|3|4|5 stacks:
- 1 Stack : +1.45% increased weapon damage
- 2 Stacks : +2.80% increased weapon damage
- 3 Stacks : +4.20% increased weapon damage
- 4 Stacks : +5.60% increased weapon damage
- 5 Stacks : +7.00% increased weapon damage


Intercalary
Legendary // Adaptive Frame // Auto Rifle
Desirable Perks-
Barrel:
- Arrowhead Brake
- Chambered Compensator
-
Magazine:
- Ricochet Rounds
-
Column 1 Perks:
- Headstone
- Rewind Rounds
- Demolitionist
-
Column 2 Perks:
- Rimestealer
- Target Lock
- Onslaught
Masterwork: Range
Mod Slot: Bandolier
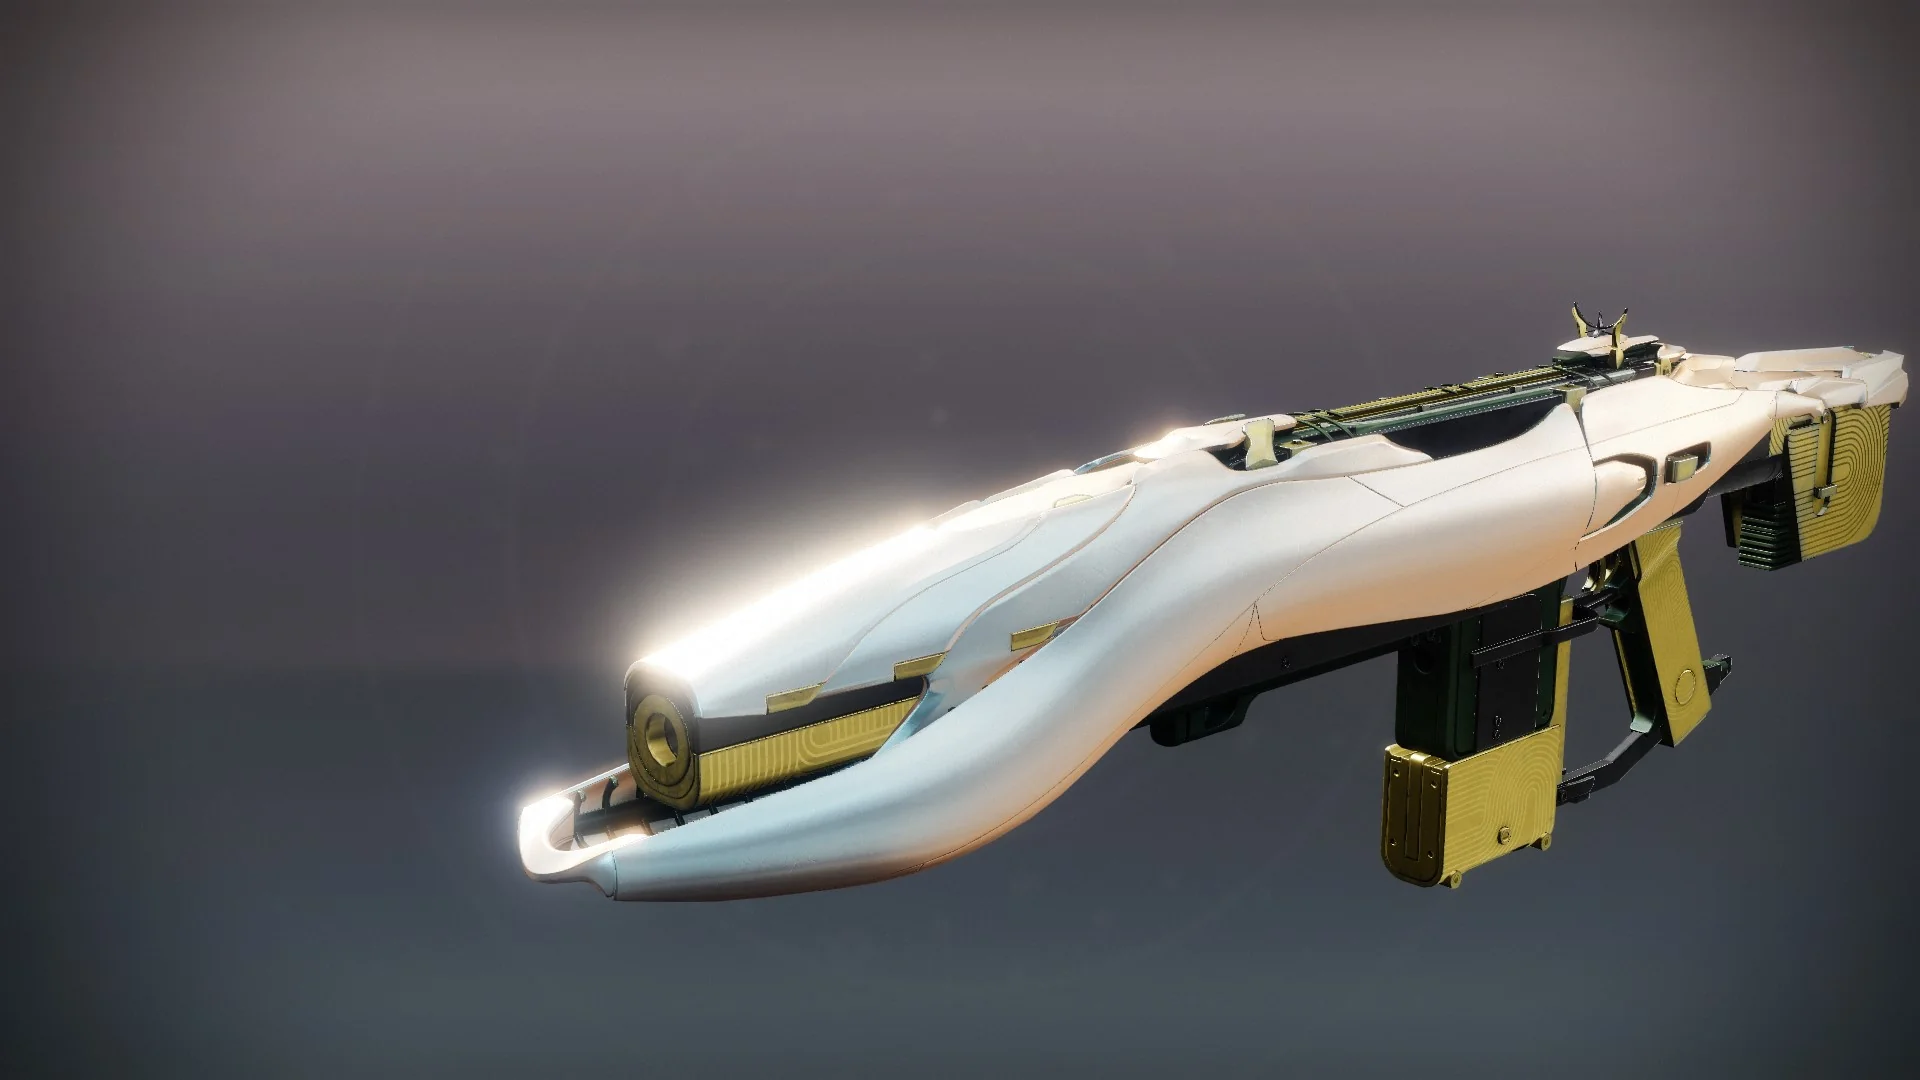
A solid auto rifle. Intercalary plays well into stasis builds with favorable perks, but comes with onslaught to boost its ad-clearing momentum. This gun is a reliable pick, taking its place as one of the best stasis autos in the game.

Antedate
Legendary // Adaptive Frame // Submachine Gun
Desirable Perks-
Barrel:
- Arrowhead Brake
- Corkscrew Rifling
-
Magazine:
- Ricochet Rounds
-
Column 1 Perks:
- Rolling Storm
- Rewind Rounds
- Dragonfly
-
Column 2 Perks:
- Jolting Feedback
Masterwork: Range
Mod Slot: Bandolier
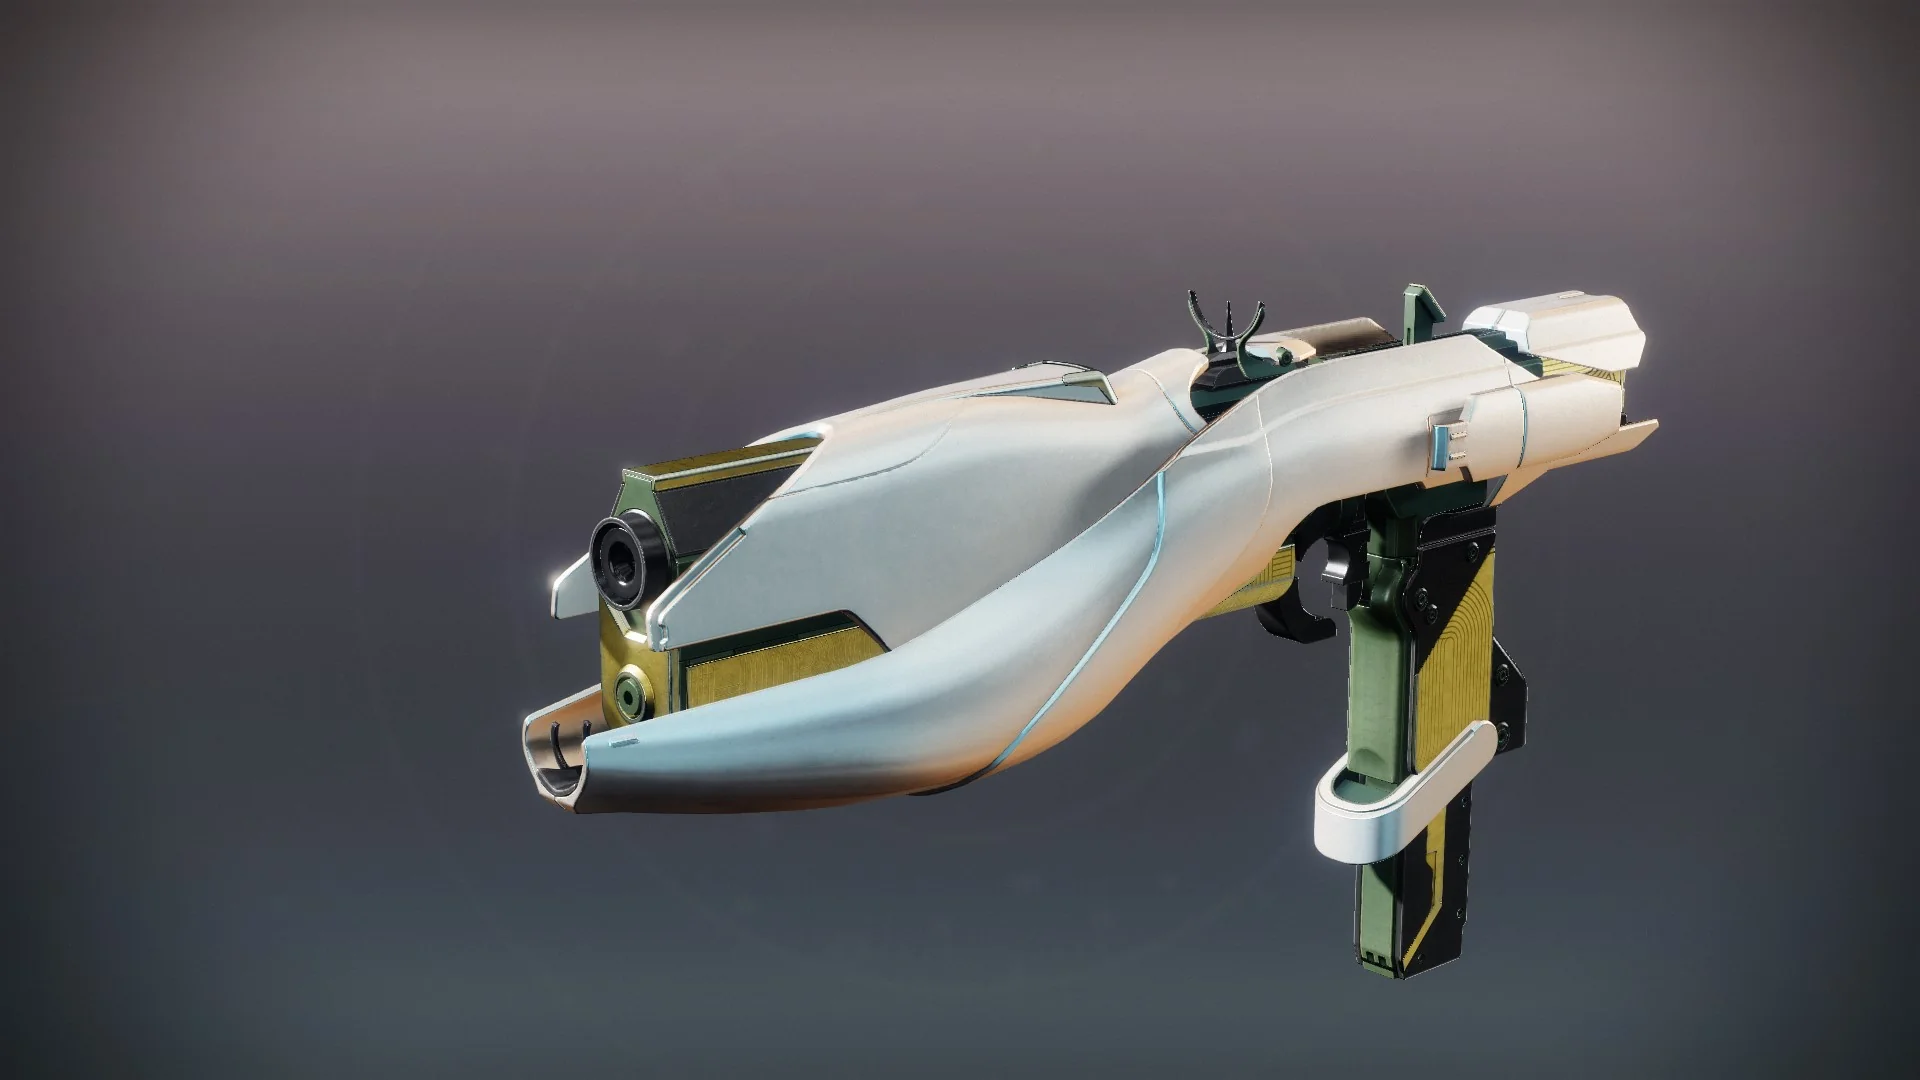
A comfortable SMG archetype with good arc utility. Not a lot of choices besides Jolting Feedback in the 4th column. The best arc SMG of its anti-barrier archetype, but competes and tends to lose against Out of Bounds from Crucible engrams for arc SMG supremacy.


Finite Maybe
Legendary // Aggressive Frame // Fusion Rifle
Desirable Perks-
Barrel:
- Arrowhead Brake
-
Battery:
- Accelerated Coils
-
Column 1 Perks:
- Reconstruction
- Lead from Gold
-
Column 2 Perks:
- Bait and Switch
- Controlled Burst
- Reservoir Burst
Masterwork: Charge Time
Mod Slot: Enhanced Charge Time
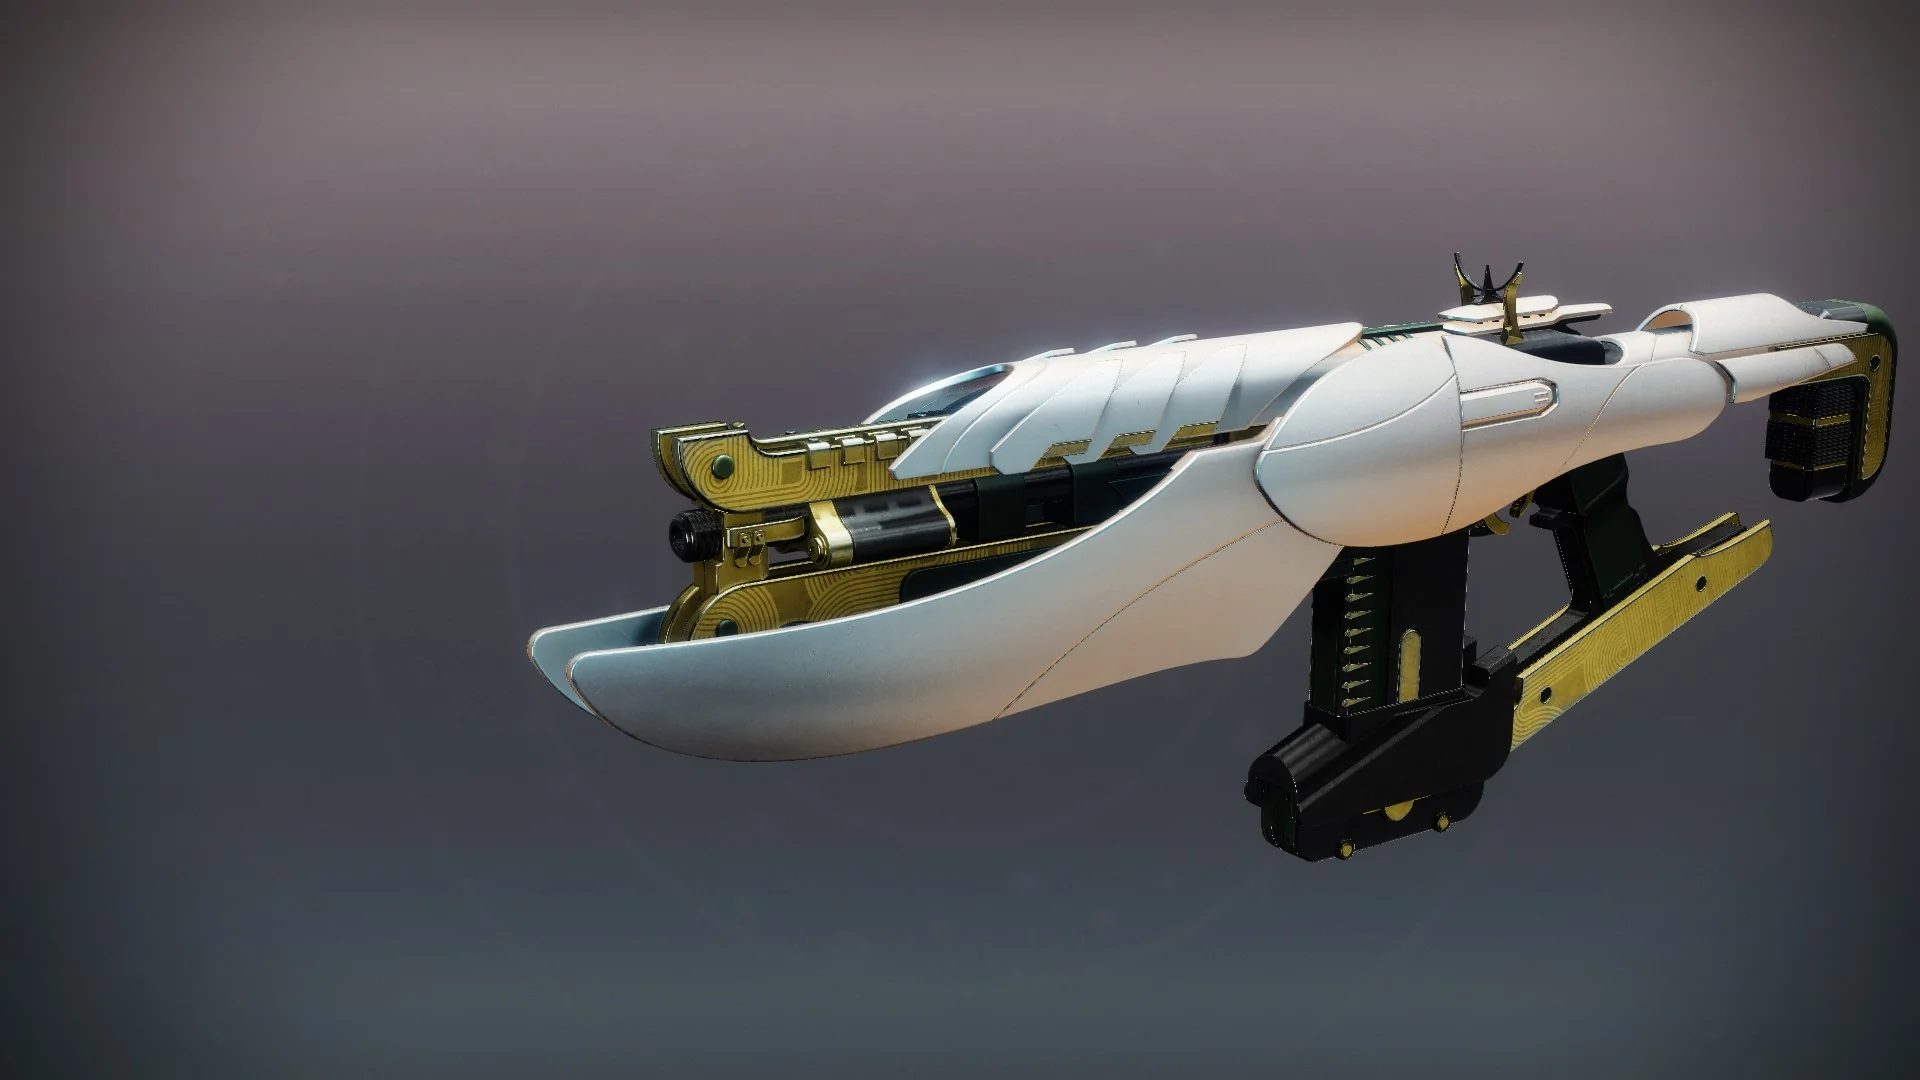
Moderately satisfying perks on a fairly unpopular archetype. You are better off finding a Cartesian Coordinate from the EDZ or The Beacon from the Tenet of Bravery for solar fusion options.


Lance Ephemeral
Legendary // Rapid-Fire Frame // Sniper Rifle
Desirable Perks-
Barrel:
- Arrowhead Brake
- Corkscrew Rifling
-
Magazine:
- Accurized Rounds
- Tactical Mag
-
Column 1 Perks:
- Fourth Time's the Charm
- Rewind Rounds
- Lead from Gold
-
Column 2 Perks:
- Bait and Switch
Masterwork: Range
Mod Slot: Bandolier
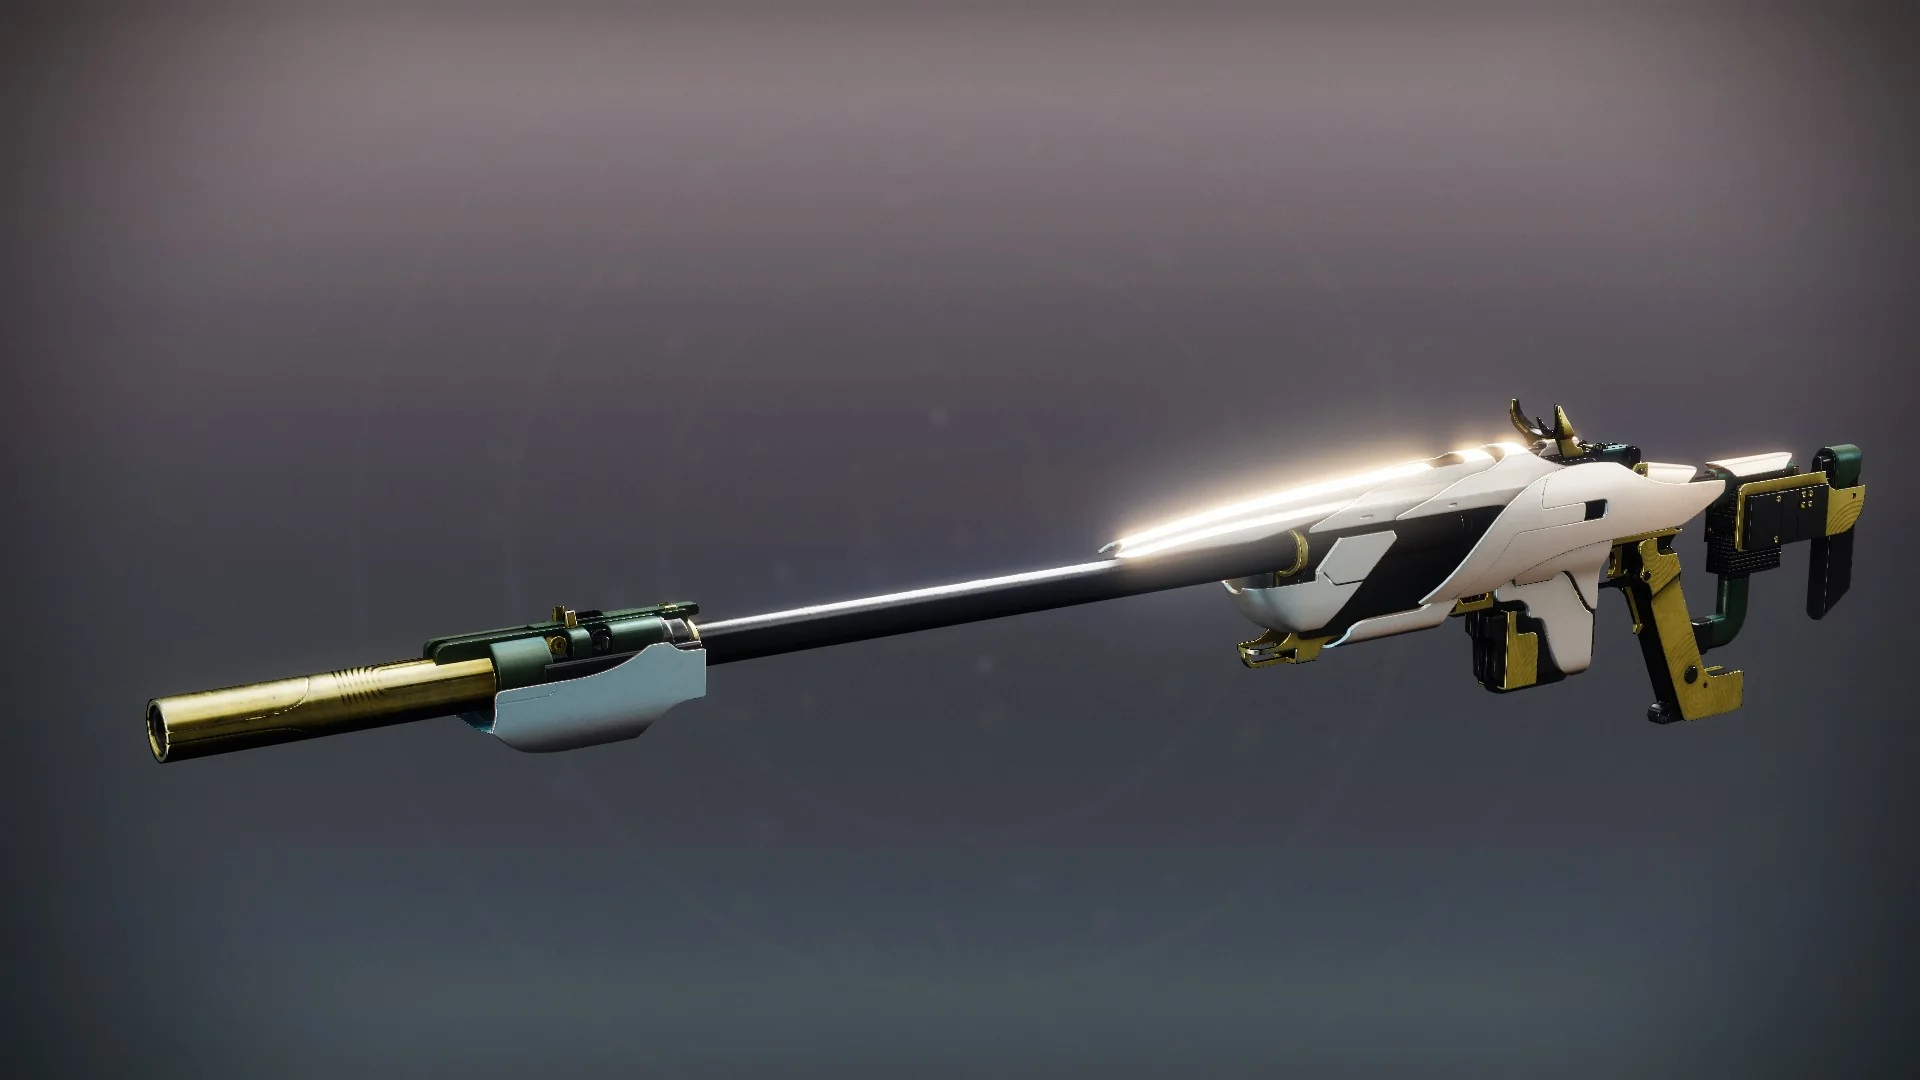
Lance Ephemeral fights very hard to stand out compared to Praedyth's Revenge and Conspiracy Honed as top-slot sniper rifles with Overload properties. It lacks double damage perks like Conspiracy, but has a solid combination of magazine extension and damage boosts. A pretty good choice.
The When and Where
Legendary // Adaptive Frame // Rocket Launcher
Desirable Perks-
Barrel:
- Volatile Launch
- Confined Launch
-
Magazine:
- Alloy Casing
-
Column 1 Perks:
- Overflow
- Clown Cartridge
- Chill Clip
-
Column 2 Perks:
- Bait and Switch
- Explosive Light
- Reaper's Tithe
Masterwork: Blast Radius
Mod Slot: Enhanced Reload
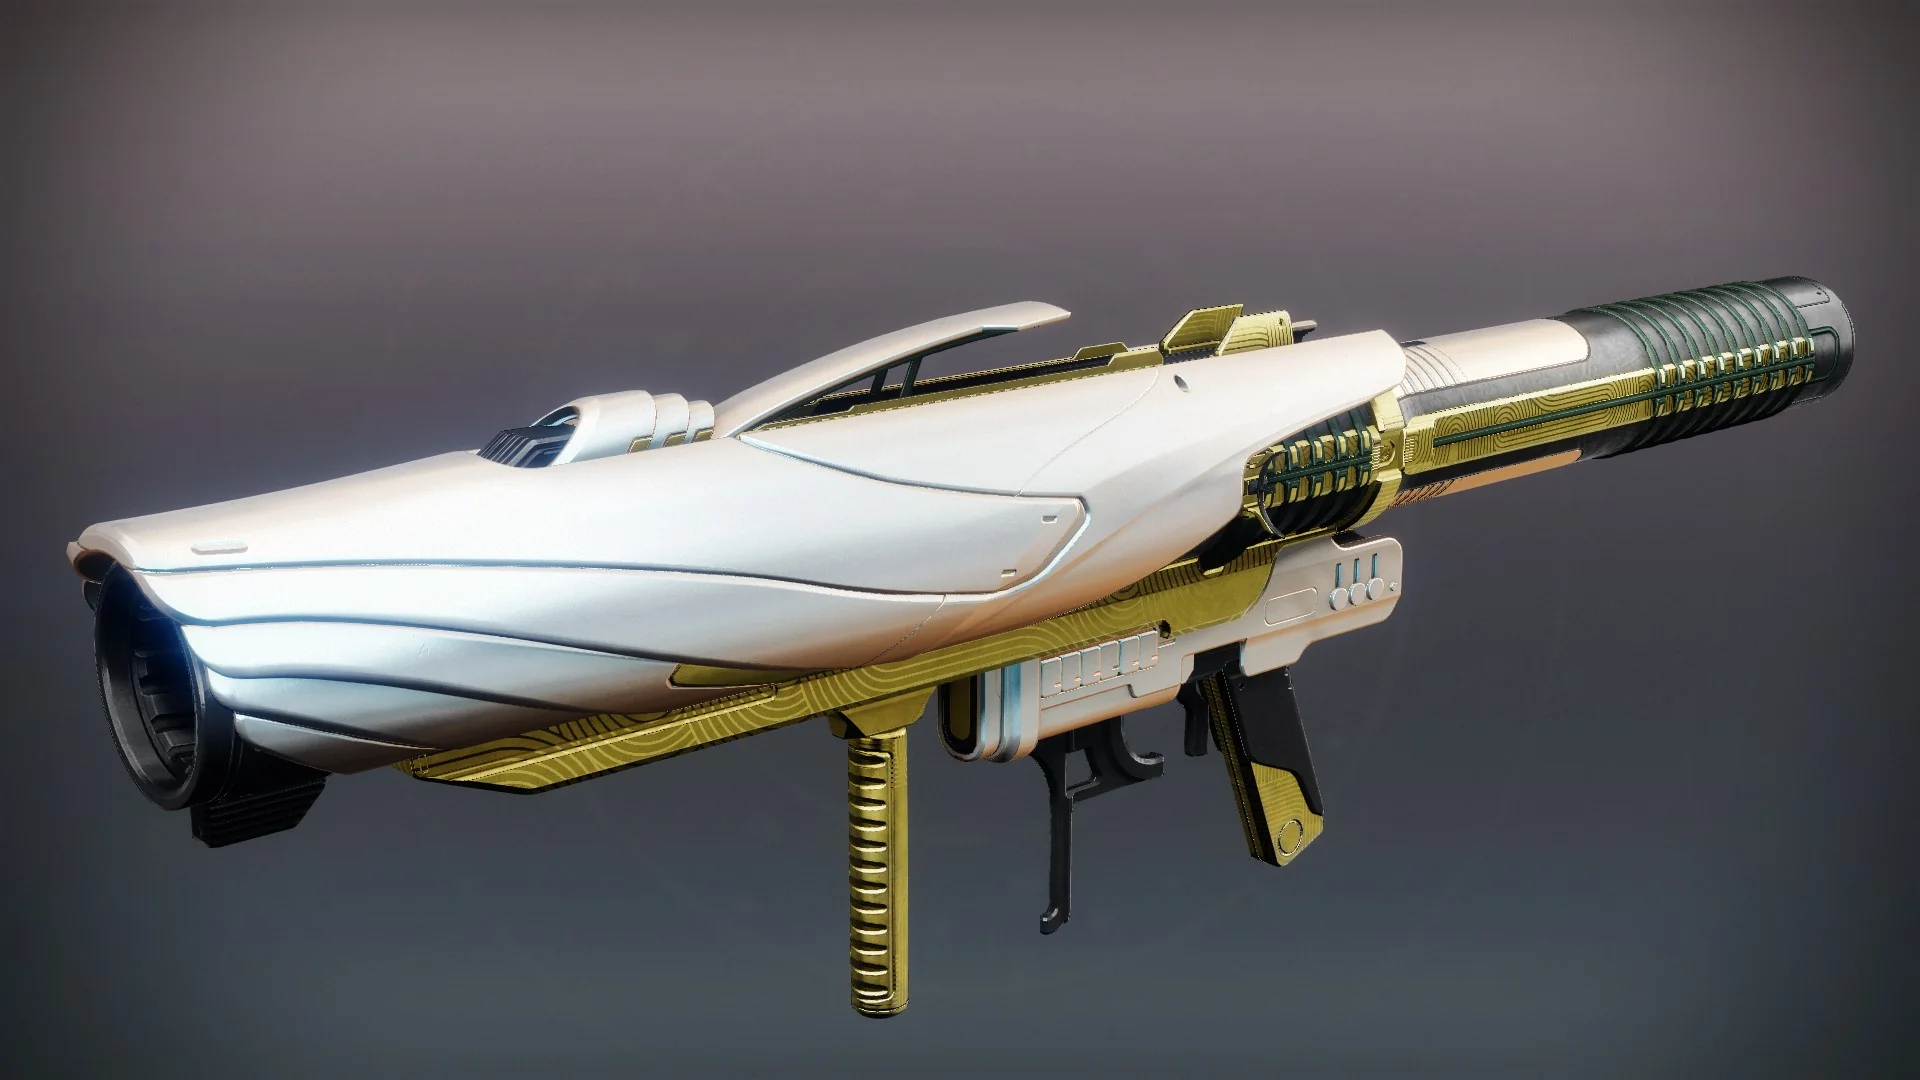
A good rocket launcher specializing in burst damage. The question on when and where exactly to use this would be if you don't have Hezen Vengeance.
Opaque Hourglass
Legendary // High-Impact Frame // Combat Bow
Desirable Perks-
Rail:
- Empowered Rail
-
Bolt:
- Explosive Bolts
-
Column 1 Perks:
- Sympathetic Arsenal
- Field Prep
-
Column 2 Perks:
- Vorpal Weapon
Masterwork: Persistence
Mod Slot: Enhanced Persistence
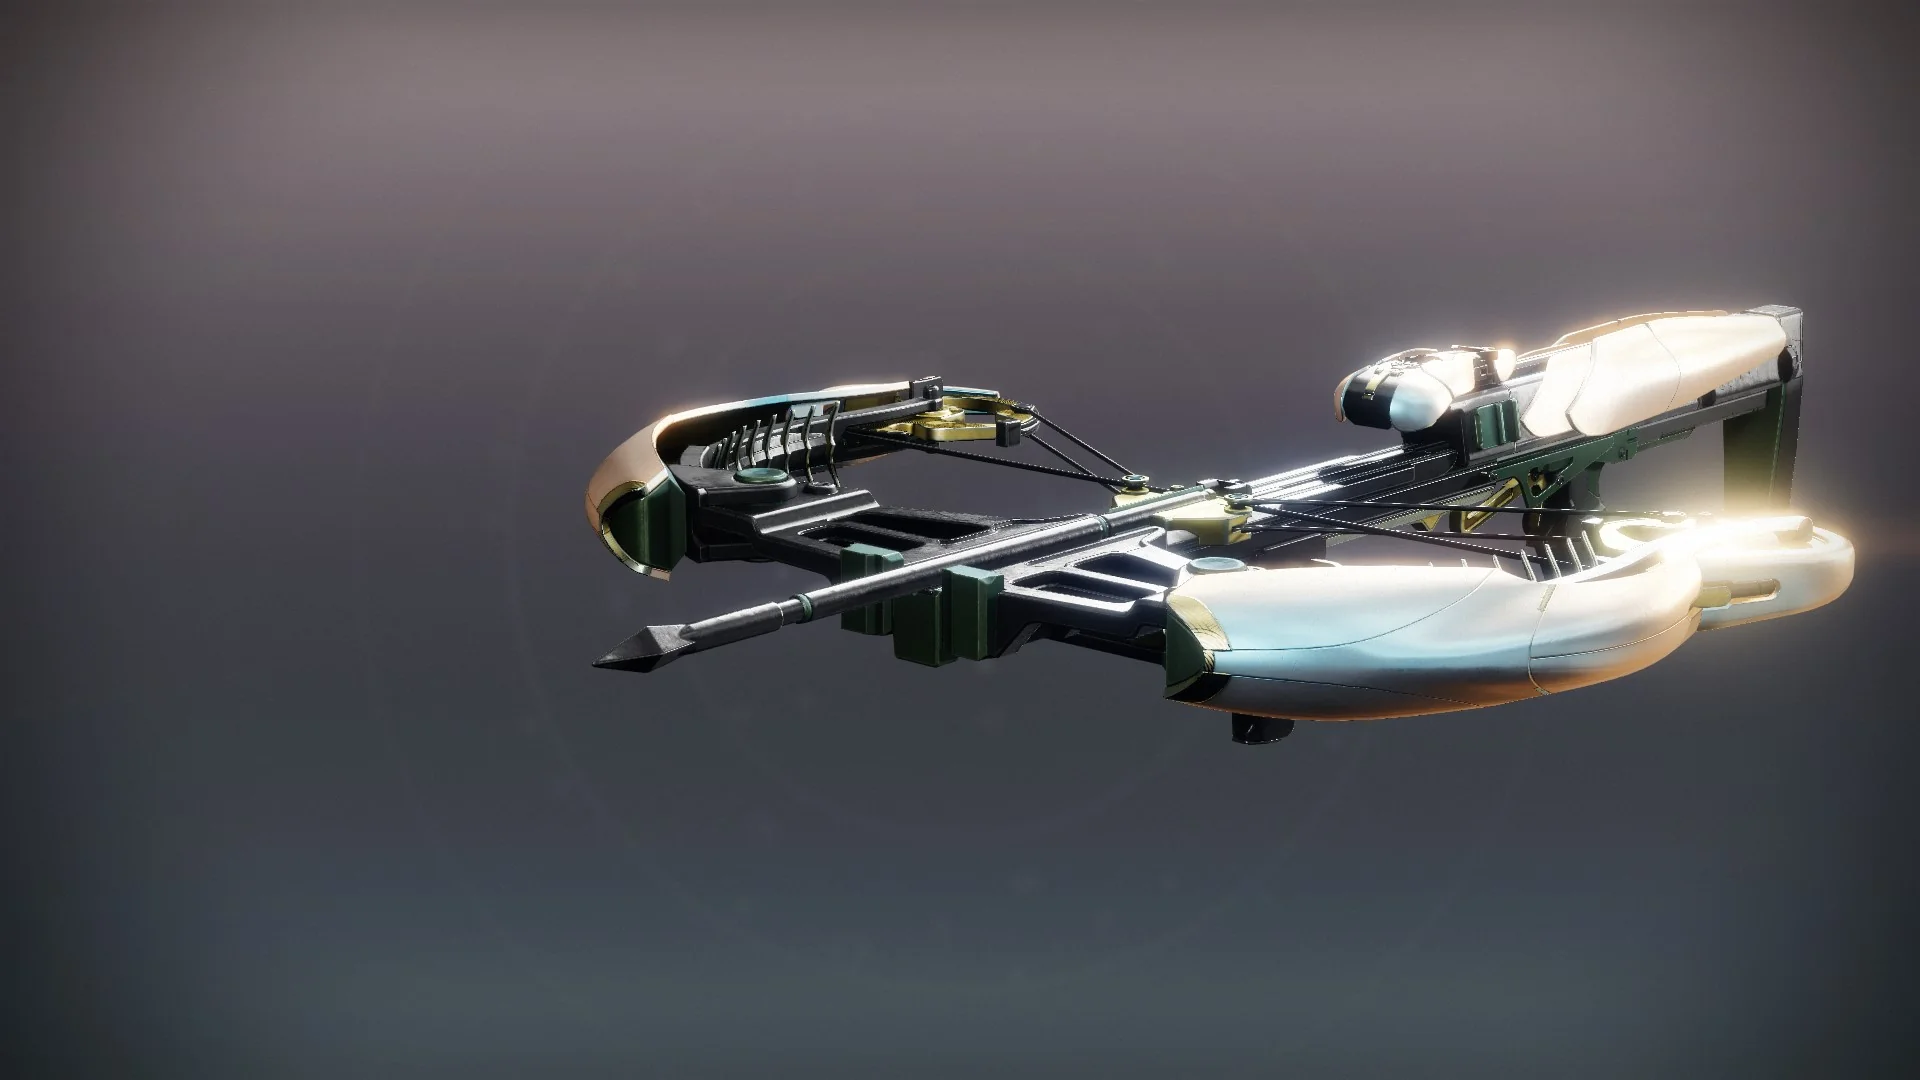
An outclassed weapon with poor damage perks and little use cases.
Whirling Ovation
Exotic // Rocket Launcher
Details
Coronal Culmination: Hold to charge rockets for a delayed solar explosion. Charging increases damage of both the rocket impact and explosion.
Anticipation: Charge speed increases over time, and increases faster as you deal damage with other weapons.
Catalyst: Fully charged shots penetrate weaker combatants, and cause a delayed solar explosion that leaves a scorching field.
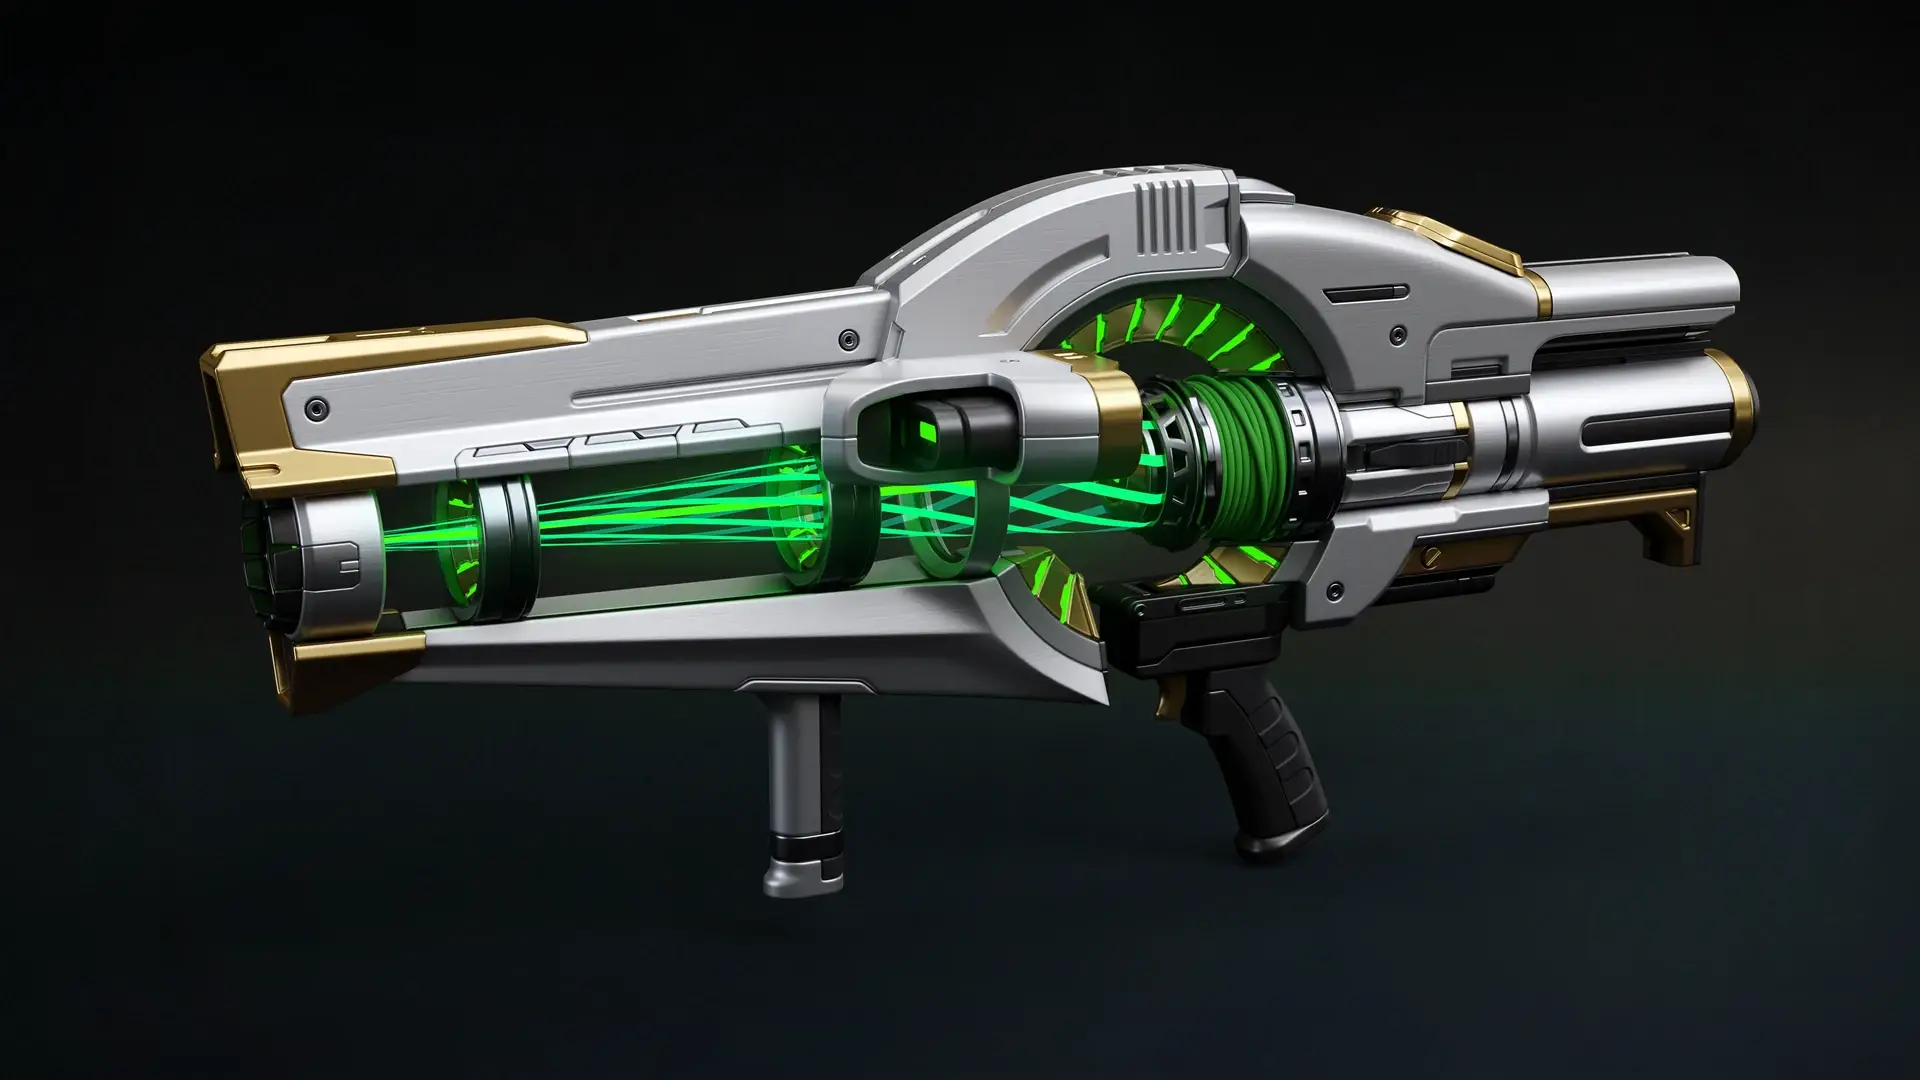
An interesting concept that is unfortunately in the wrong timeline. Whirling Ovation relies on a rotation-based DPS system that Parasite or Still Hunt/Hezen already dominate. As a rocket launcher, Truth dumps more damage for less hassle.
Secret Chests
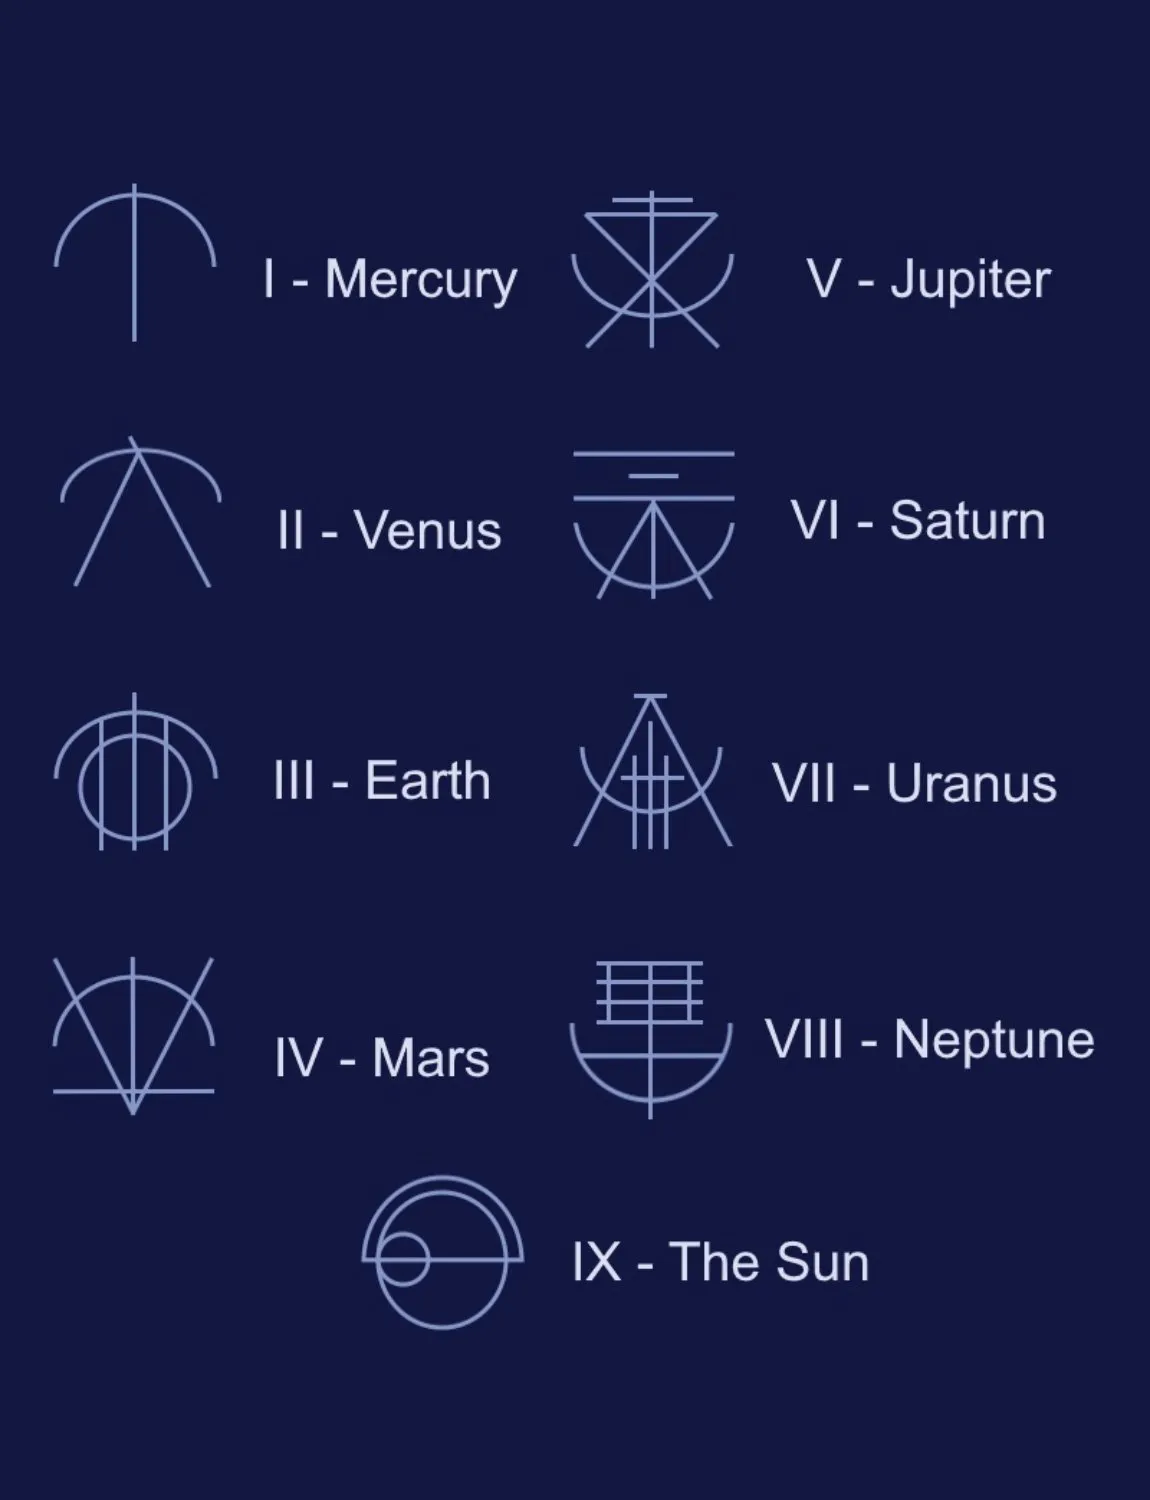
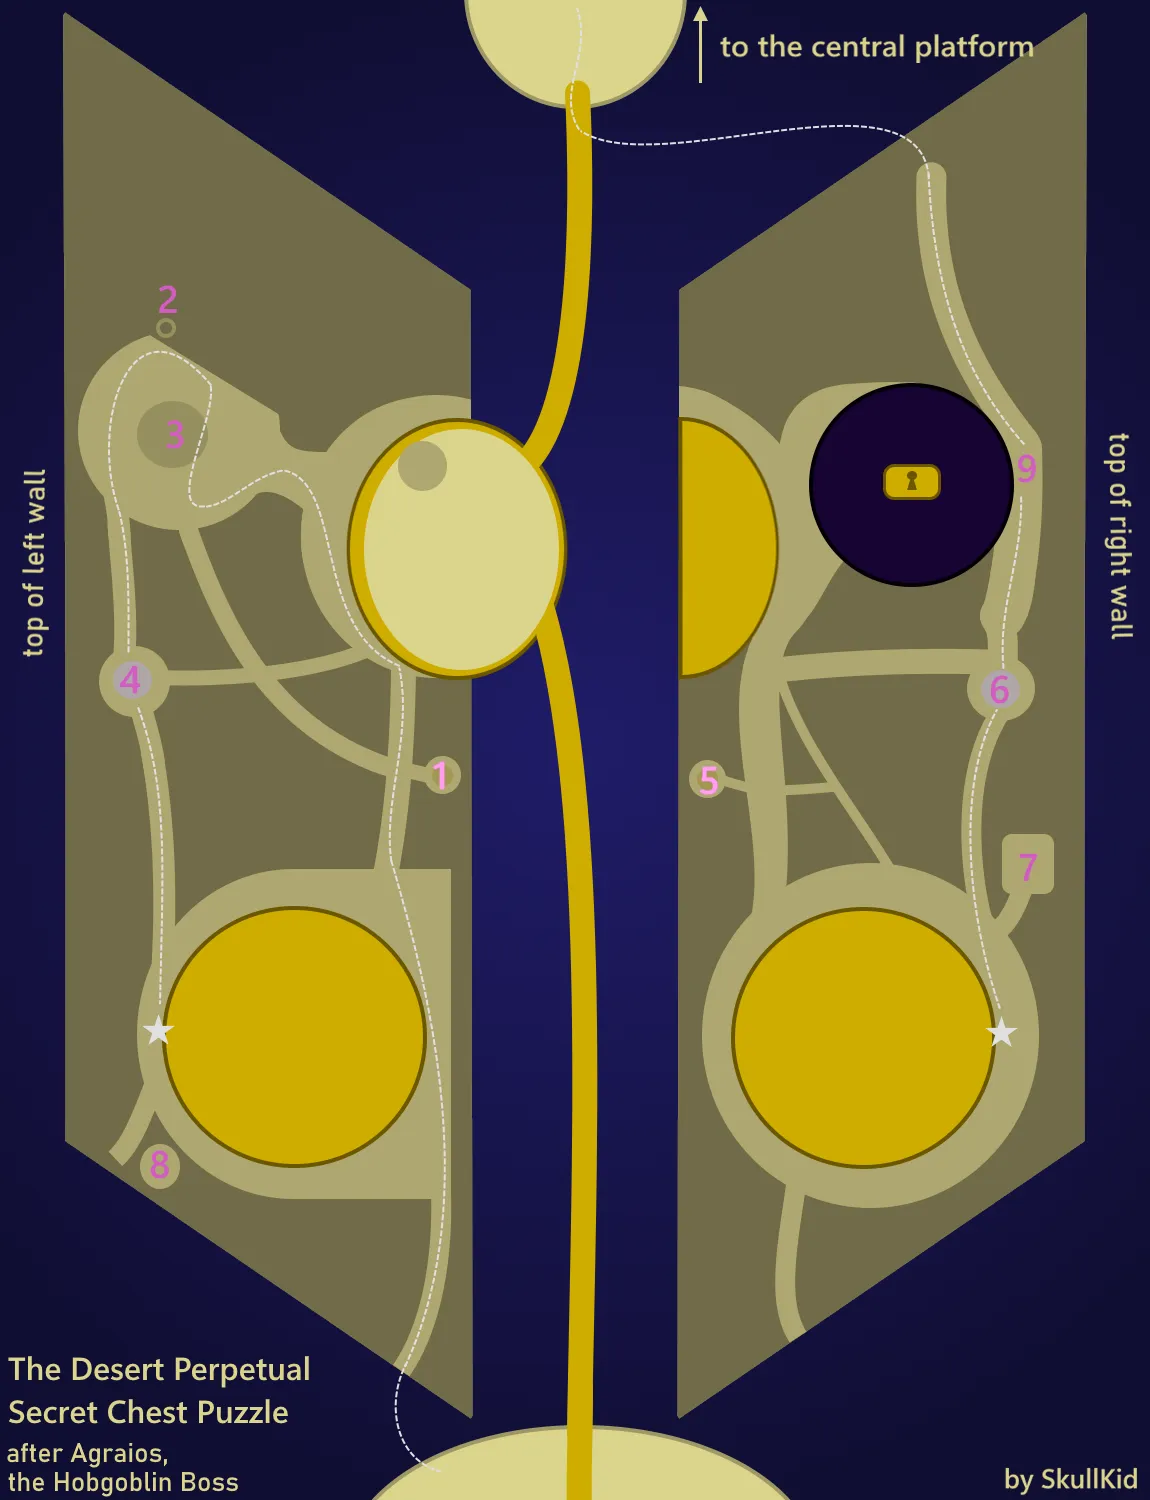
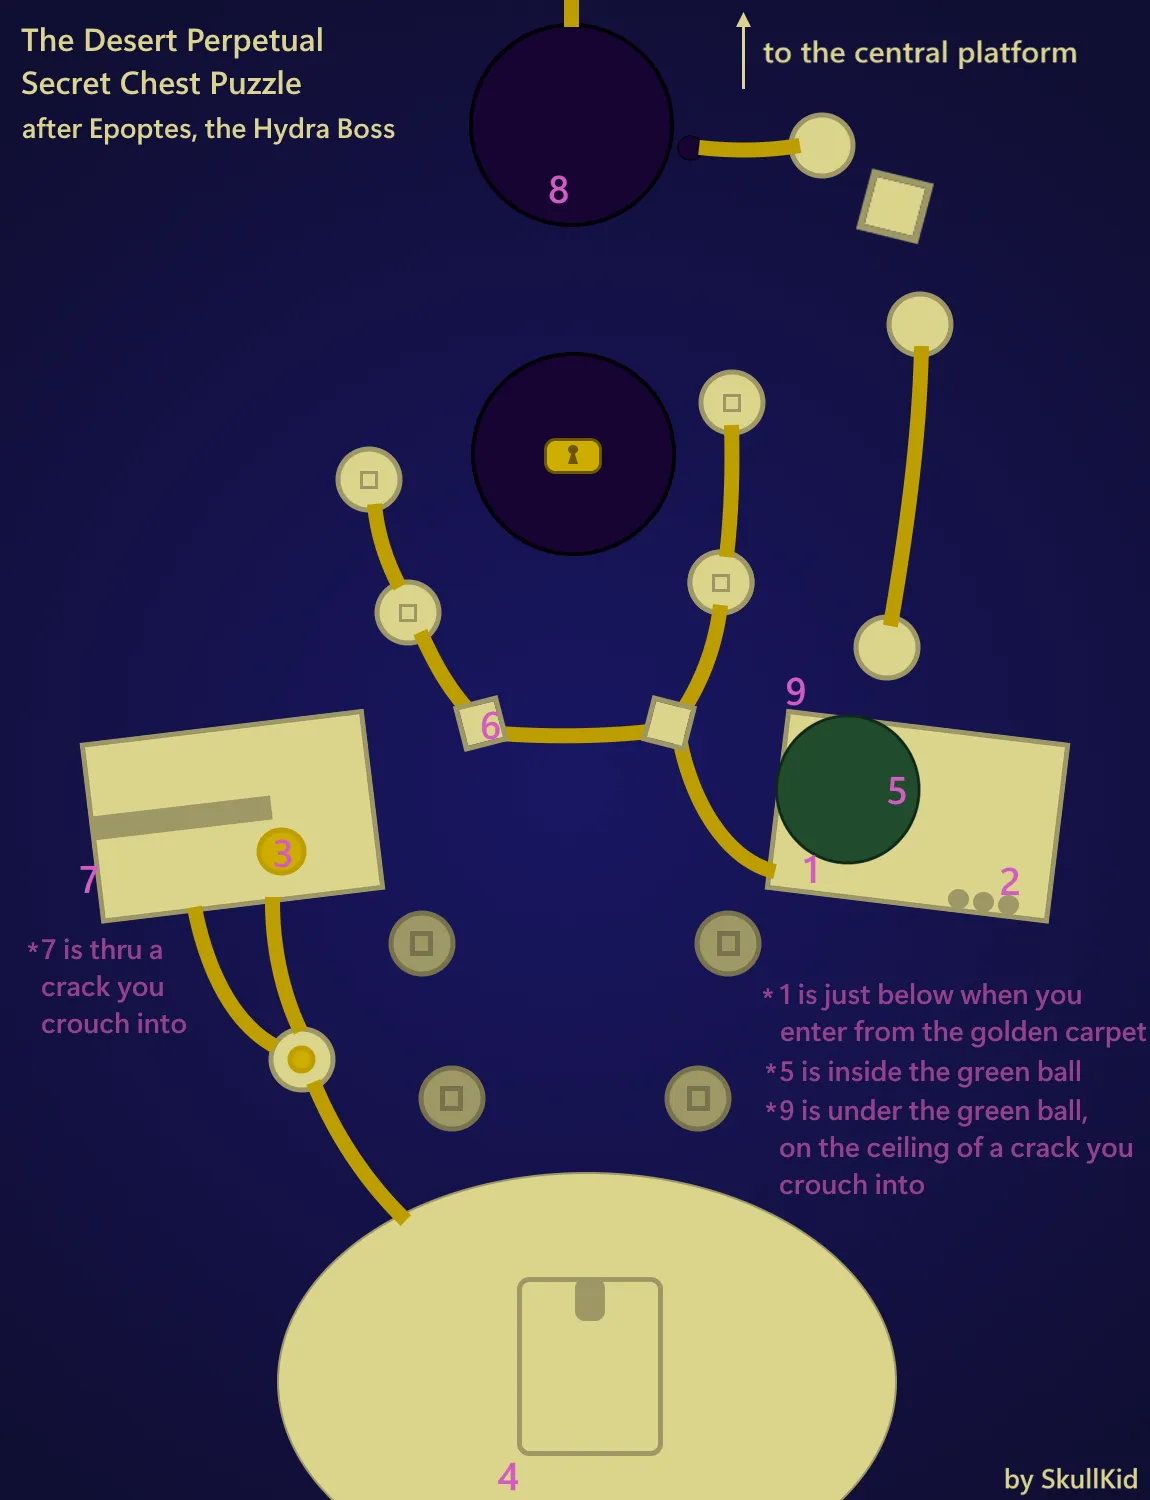
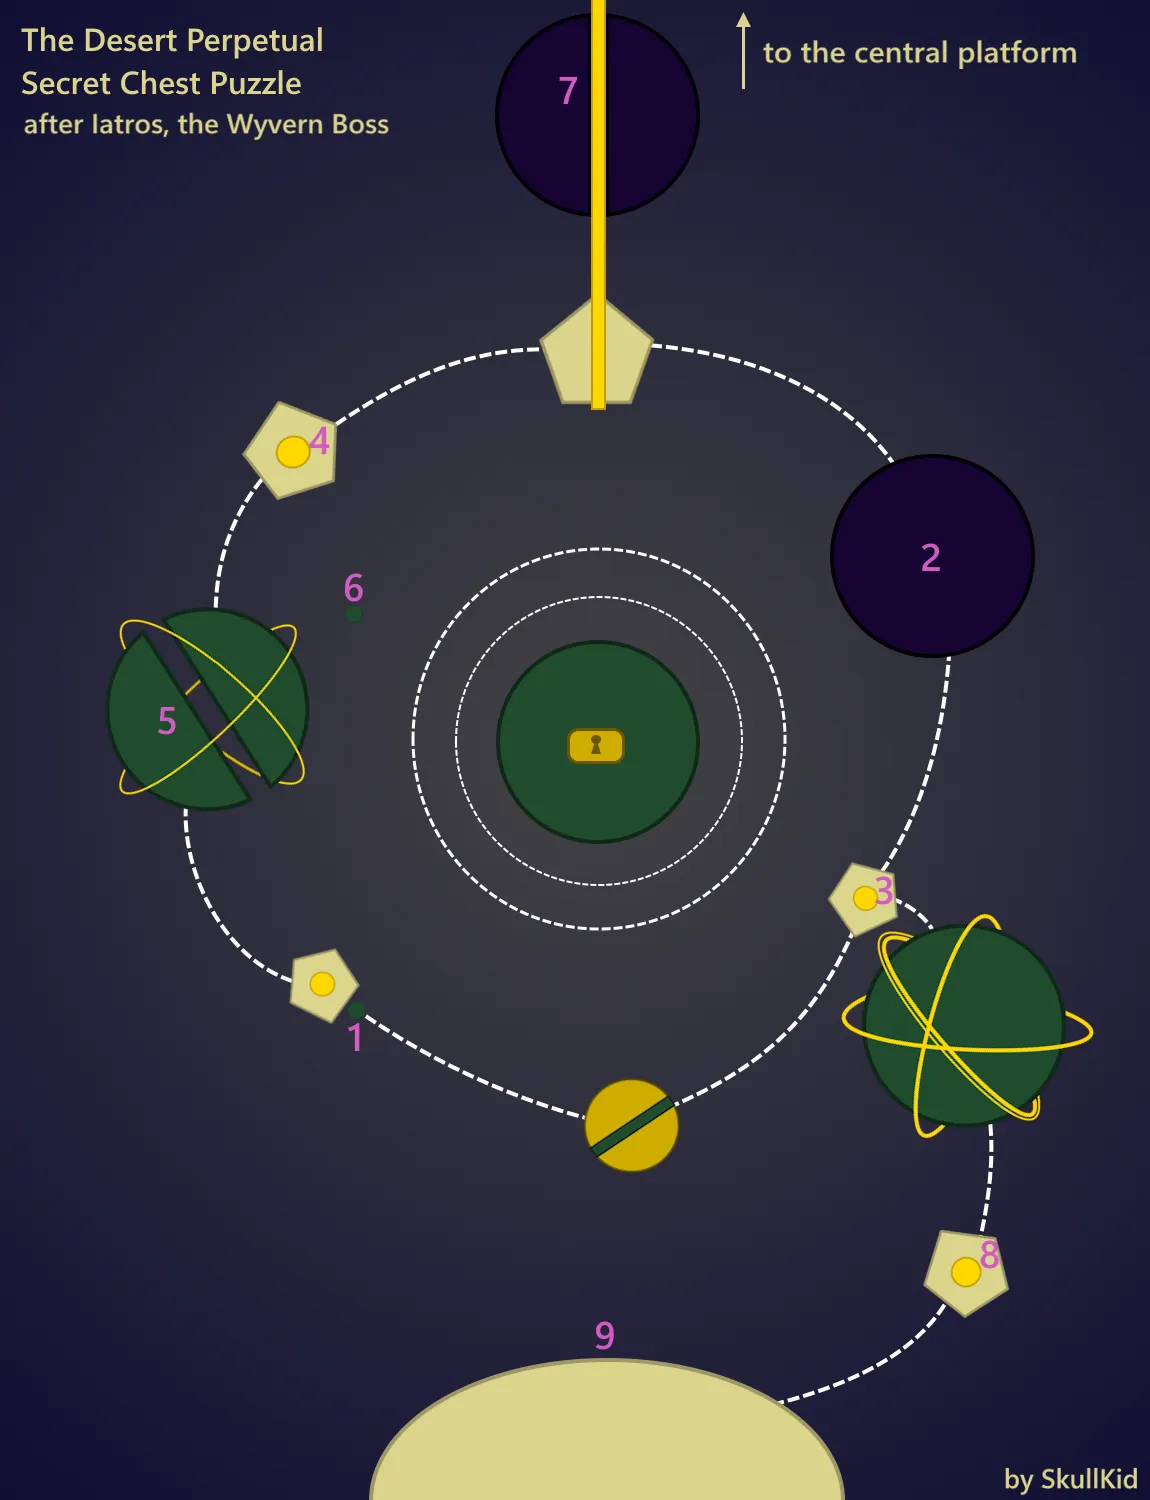
Three secret chests are available for acquisition; each one appears on the way back following the defeat of each of the three bosses. It is mandatory to kill the boss and finish the encounter. Four of the symbols must be activated at random for each secret chest. A symbol can be activated by approaching it. The ones that are not necessary for your current run will shut off when you move away. You can determine which symbols you need to spawn the secret chest by looking at the ones carved into the ball where it will appear.
Below are the symbols of The Nine, and maps for each chest:
Video Guide
Collectibles (Anchor Locations)
Start the quest by visiting Dean Rebecca on Kepler and pick up the “Map and Territory” quest. Next, complete the raid once to unlock the Network Sensor needed to place anchors. You can now locate and plant all 12 anchors:
- Spawn Location — Directly beneath the spawn platform: drop down and look underneath.
- Central Tower — Ascend the purple central tower near the encounter choice point; on the left side is a pillar with a glowing conflux (near the “All are entangled” plate).
- White Plains — In the open white plains, look right beside a large ball on the ground.
- Hobgoblin Boss Tunnel (midway) — Halfway through the tunnel leading to the Hobgoblin boss, look to your right.
- Hobgoblin Boss Door — Immediately right of the pre-fight door; be sure not to open it before grabbing the anchor.
- After Hobgoblin Boss — As you exit the boss room, check the left side just before leaving.
- Hydra Jump Puzzle (first platform) — On the floating half-circle platform early in the Hydra jump puzzle.
- Hydra Jump Puzzle (second platform) — On the next floating half-circle platform, just before reaching the boss door.
- After Hydra Boss — Underneath a golden tent at the back of the Hydra boss room.
- Wyvern Jump Puzzle — In the right path of the jump section, inside the rotating circle's center, look for a spiral design with the anchor.
- Wyvern Boss Door — To the right side of the boss doorway near the final Wyvern encounter.
- After Wyvern Boss — After defeating the Wyvern and opening the chest, go behind it — there lies the final anchor.
Additional Points:
- 9 of the anchors appear before any encounter starts.
- The last 3 spawn only after clearing each encounter in their specific rooms.
- Anchors on the paths to the bosses will despawn once you interact with the boss door, so try to collect all the pre-boss anchors before fighting the boss.
Video Guide
The Nursery
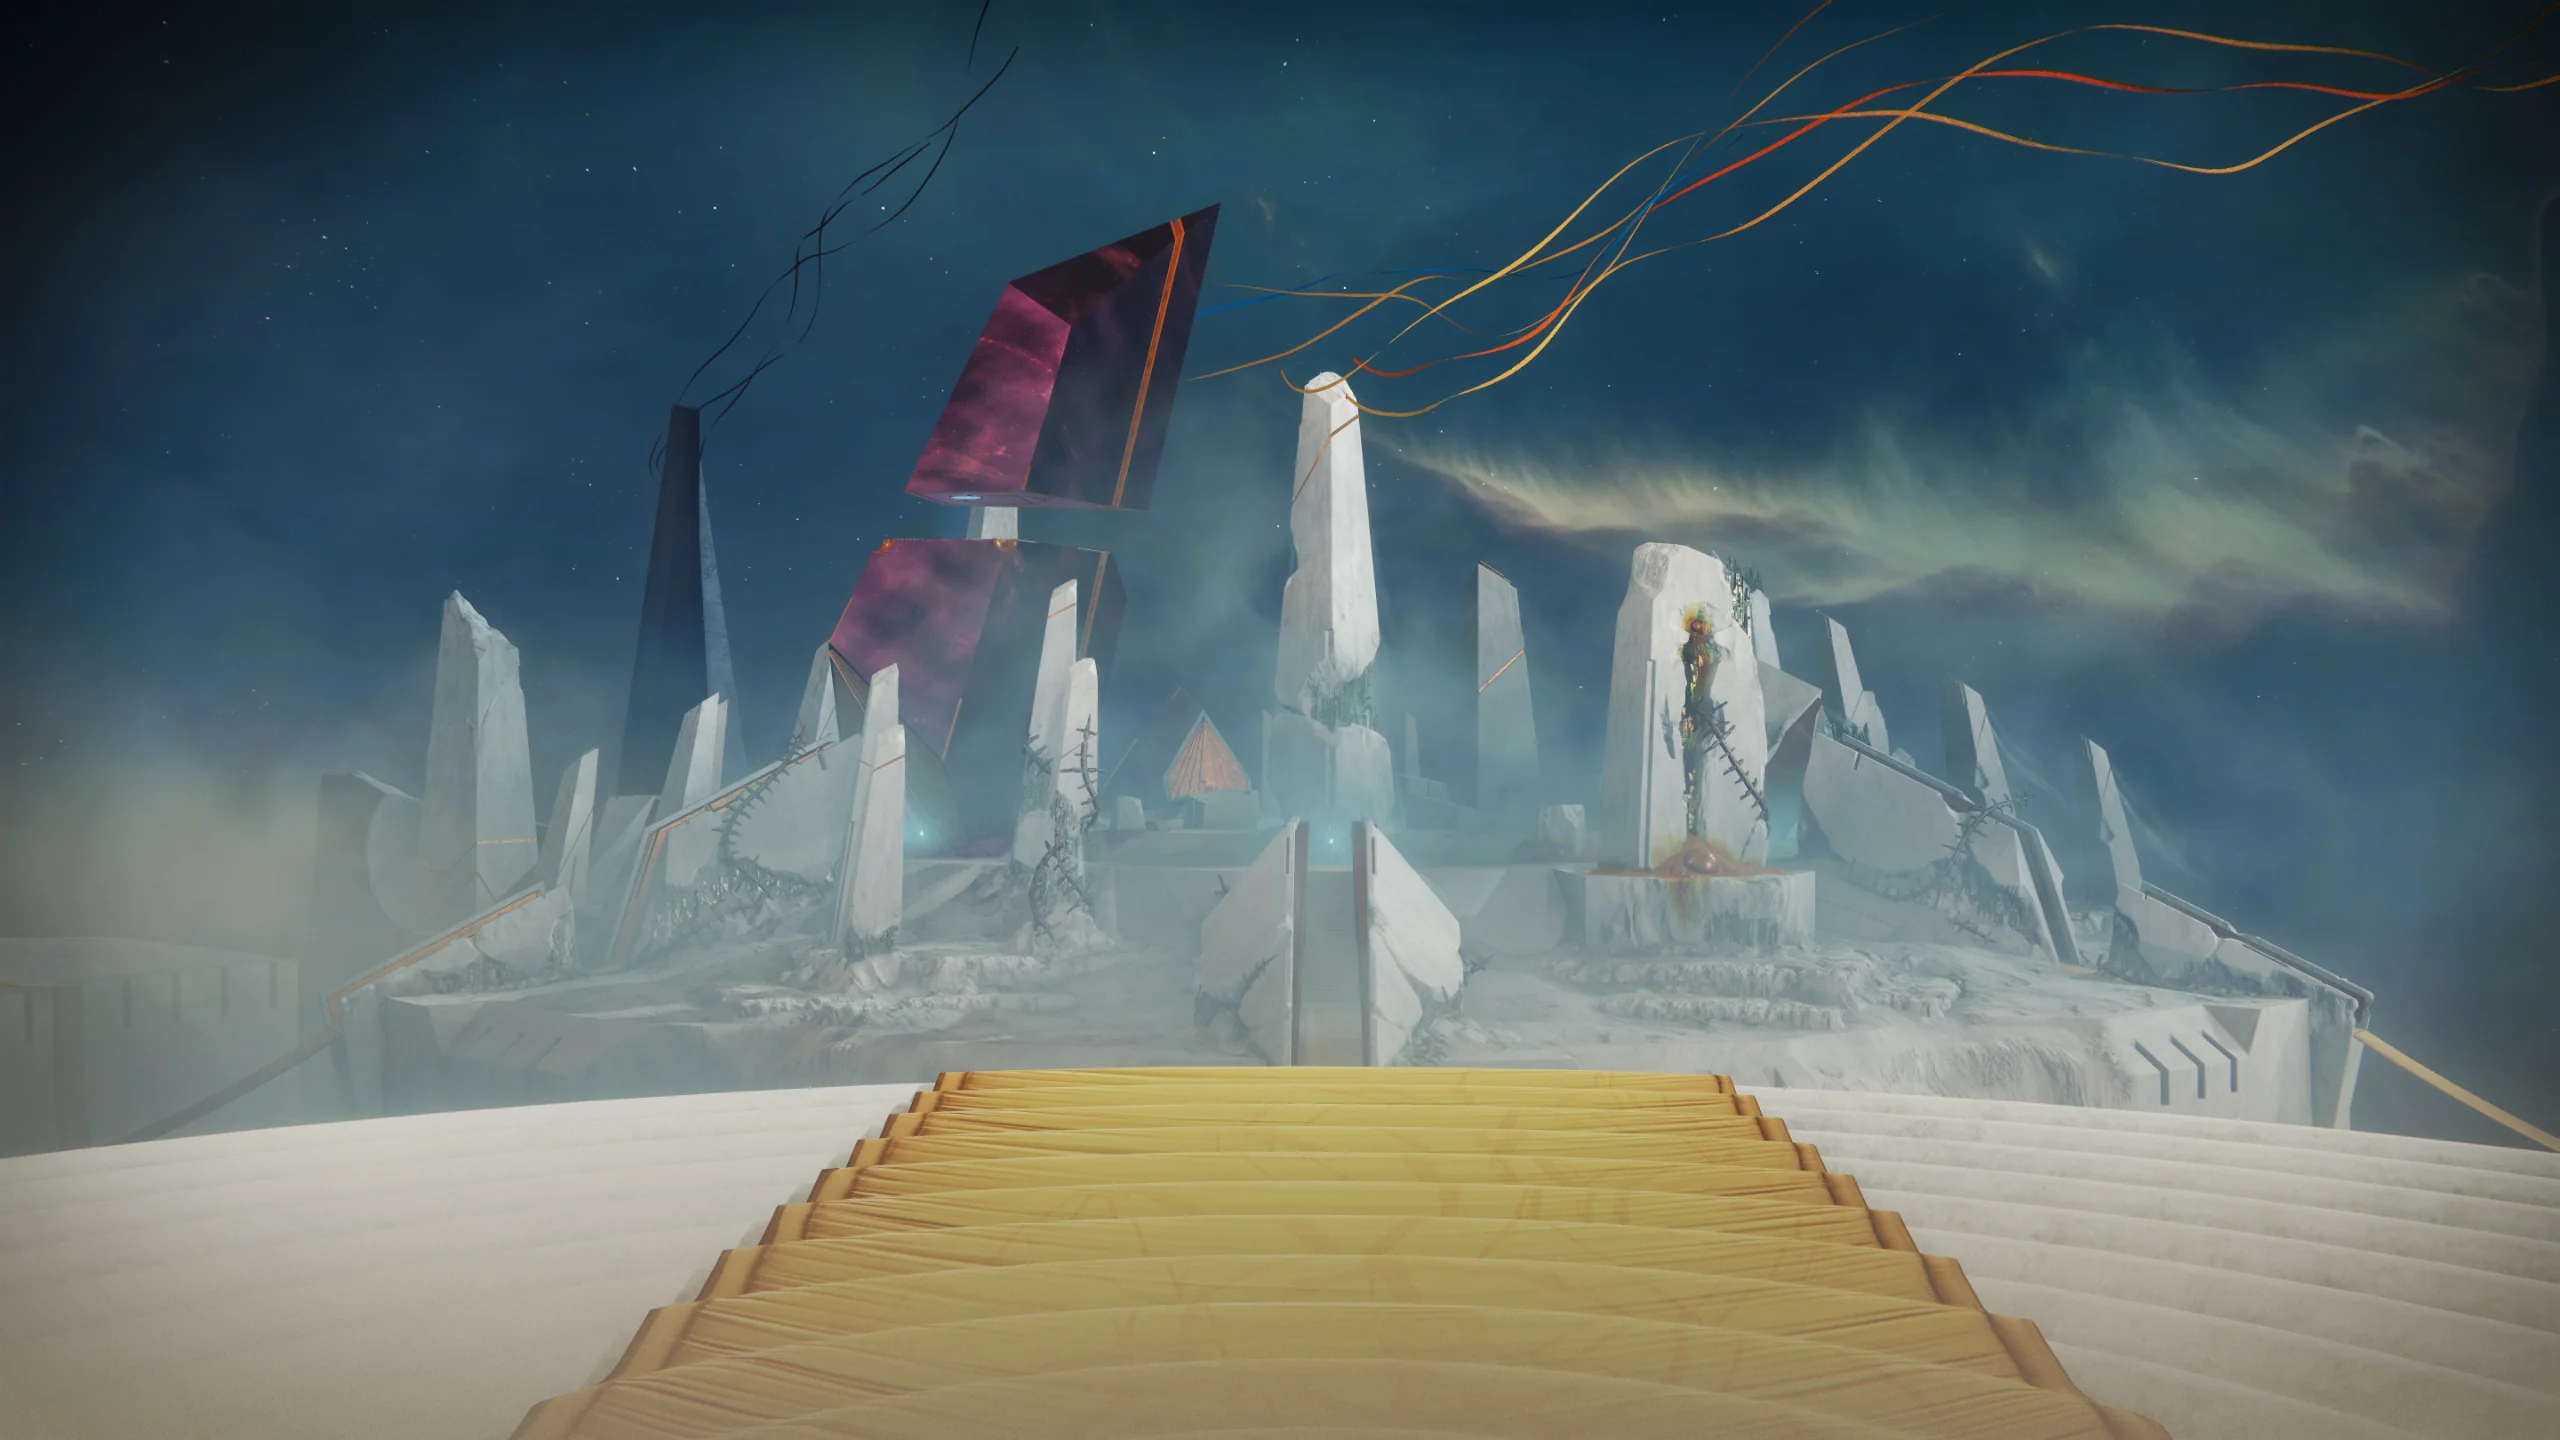
The Nursery is the opening and central area of the raid. A platform with three half-spheres, a complete sphere, and three more half-spheres forming a square along its corners is directly in the middle of the room. The boss you battle may be chosen from the three half-spheres. Each boss will have a mystery flavour text as their interact prompt, and they are as follows:
- "Interference patterns swell" : Agraios, the Hobgoblin
- "All are entangled" : Epoptes, the Hydra
- "Axion is axiom" : Iatros, the Wyvern
When you interact with one of the half-spheres, a line of smaller spheres forms around it. In the distance, a door with one of the Nine symbols on it is in the direction of that line. The big pyramid rising in the distance is the entrance to the encounter. The boss encounters you choose to tackle initially will depend on which of these half-spheres you choose to interact with. You will be returning to this hub region to move elsewhere in between fights.
For the sake of this guide, we will tackle each boss alphabetically.
Agraios, Inherent
Velocity's TombRecommended Loadouts:
- Titans: Thundercrash + Cuirass of the Falling Star (More the merrier!) // Bolt Charge.
- Warlock: Well of Radiance + Lunafaction Boots // Song of Flame + Sanguine Alchemy // Speaker's Sight for extra healing // Needlestorm + Mataiodoxia.
- Hunter: Tether // Blade Barrage + Shards of Galanor.
Recommended Weapons:
- Prospector Heavy Grenade Launcher // Truth Rocket Launcher.
- Special or Heavy Grenade Launcher or other burst damage weapons to add clear Wyverns and Hydras.
Roles:
- 3 x Temporality Buff Runners.
- 3 x Chronon Collectors.
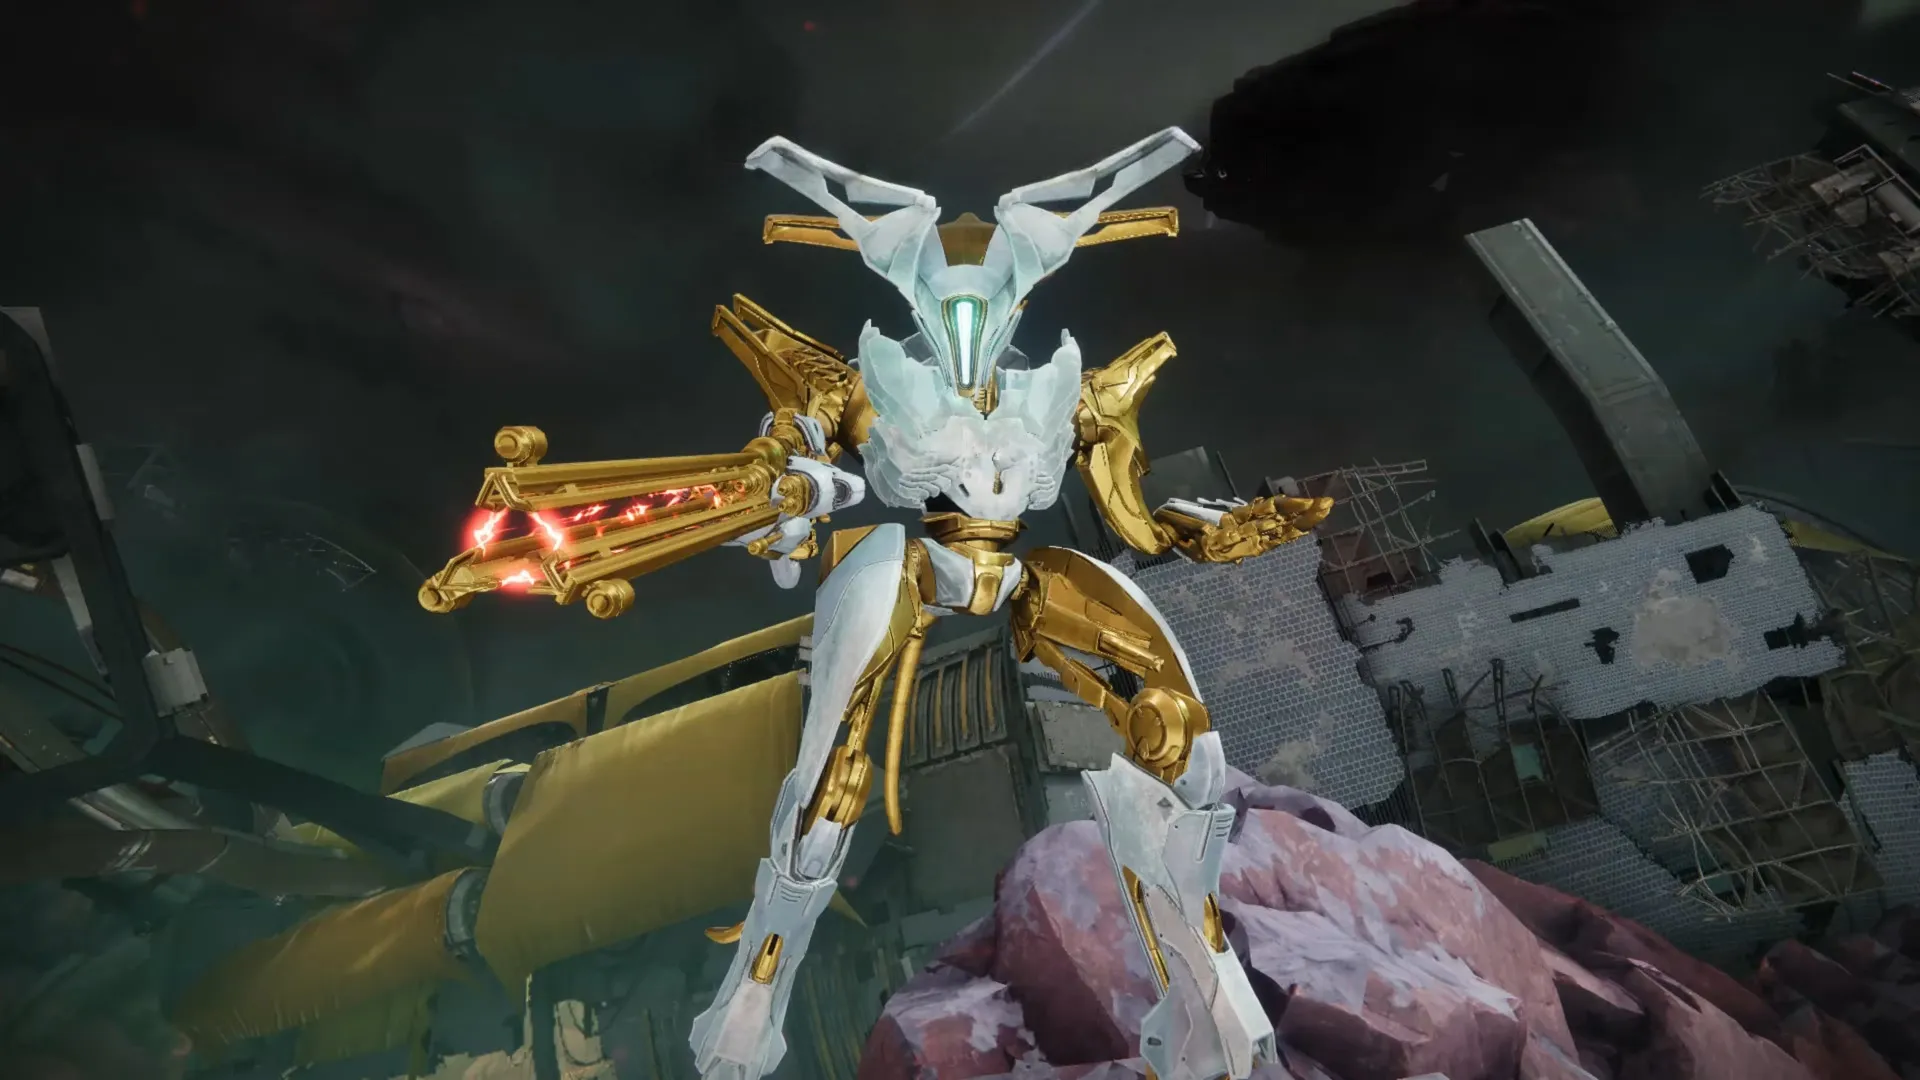
Despite being more mechanical in nature, survival is still the top objective with the fight with Agraios. The encounter has a certain flow, and every team member must contribute in some way to its implementation. Considering the quantity of callouts required to even get to the DPS phase, communication is equally important here.
Chronon Phase
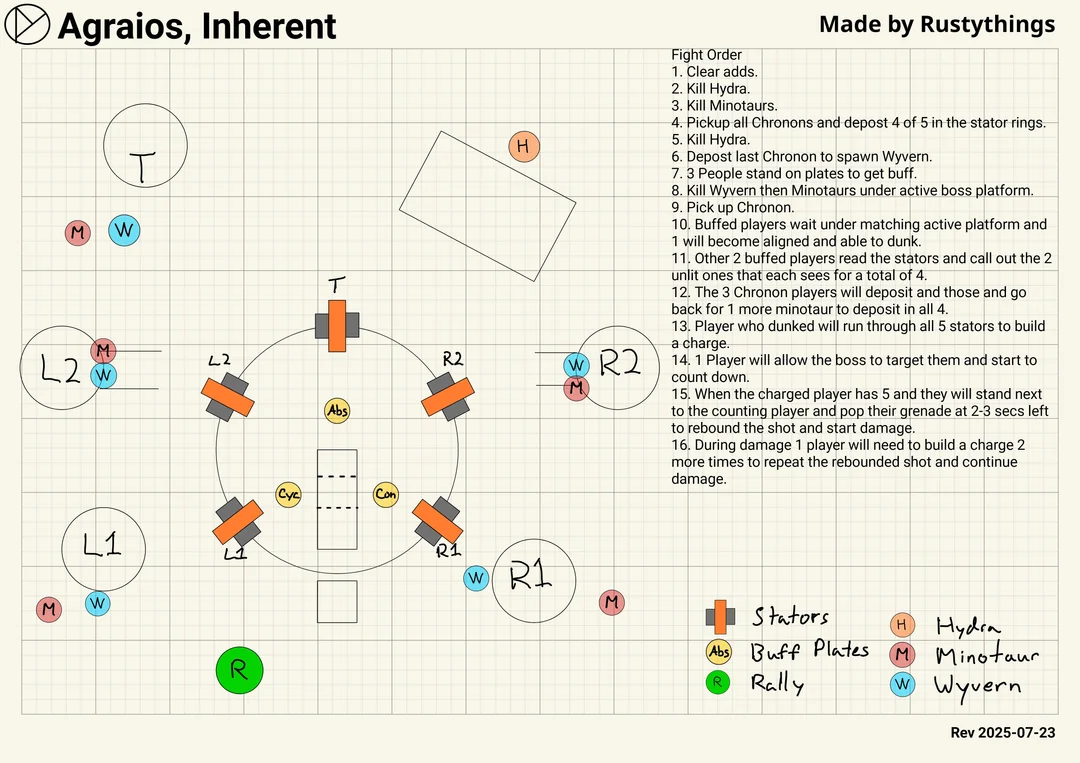
Once the encounter begins, kill the initial wave of attackers and a Hydra will appear. Five Minotaurs are spawned after defeating the Hydra, and these Minotaurs drop Chronons. Players must pick up a Chronon and go through each of the five portals in the arena. Wyverns and another Hydra will spawn together. Five new Minotaurs are spawned in after defeating the Hydra. The Wyverns are only a danger that must be eliminated immediately.
At this point, three players can obtain their temporality buffs by standing in the 3 lattice plates in the middle of the arena. Two out of the three bosses will despawn, leaving the boss to be aligned with. However, a tip for this phase is to wait for the boss to become impatient and start the wipe mechanic. This won't despawn the two other bosses, but it will help with the next phase.
Variable Elimination
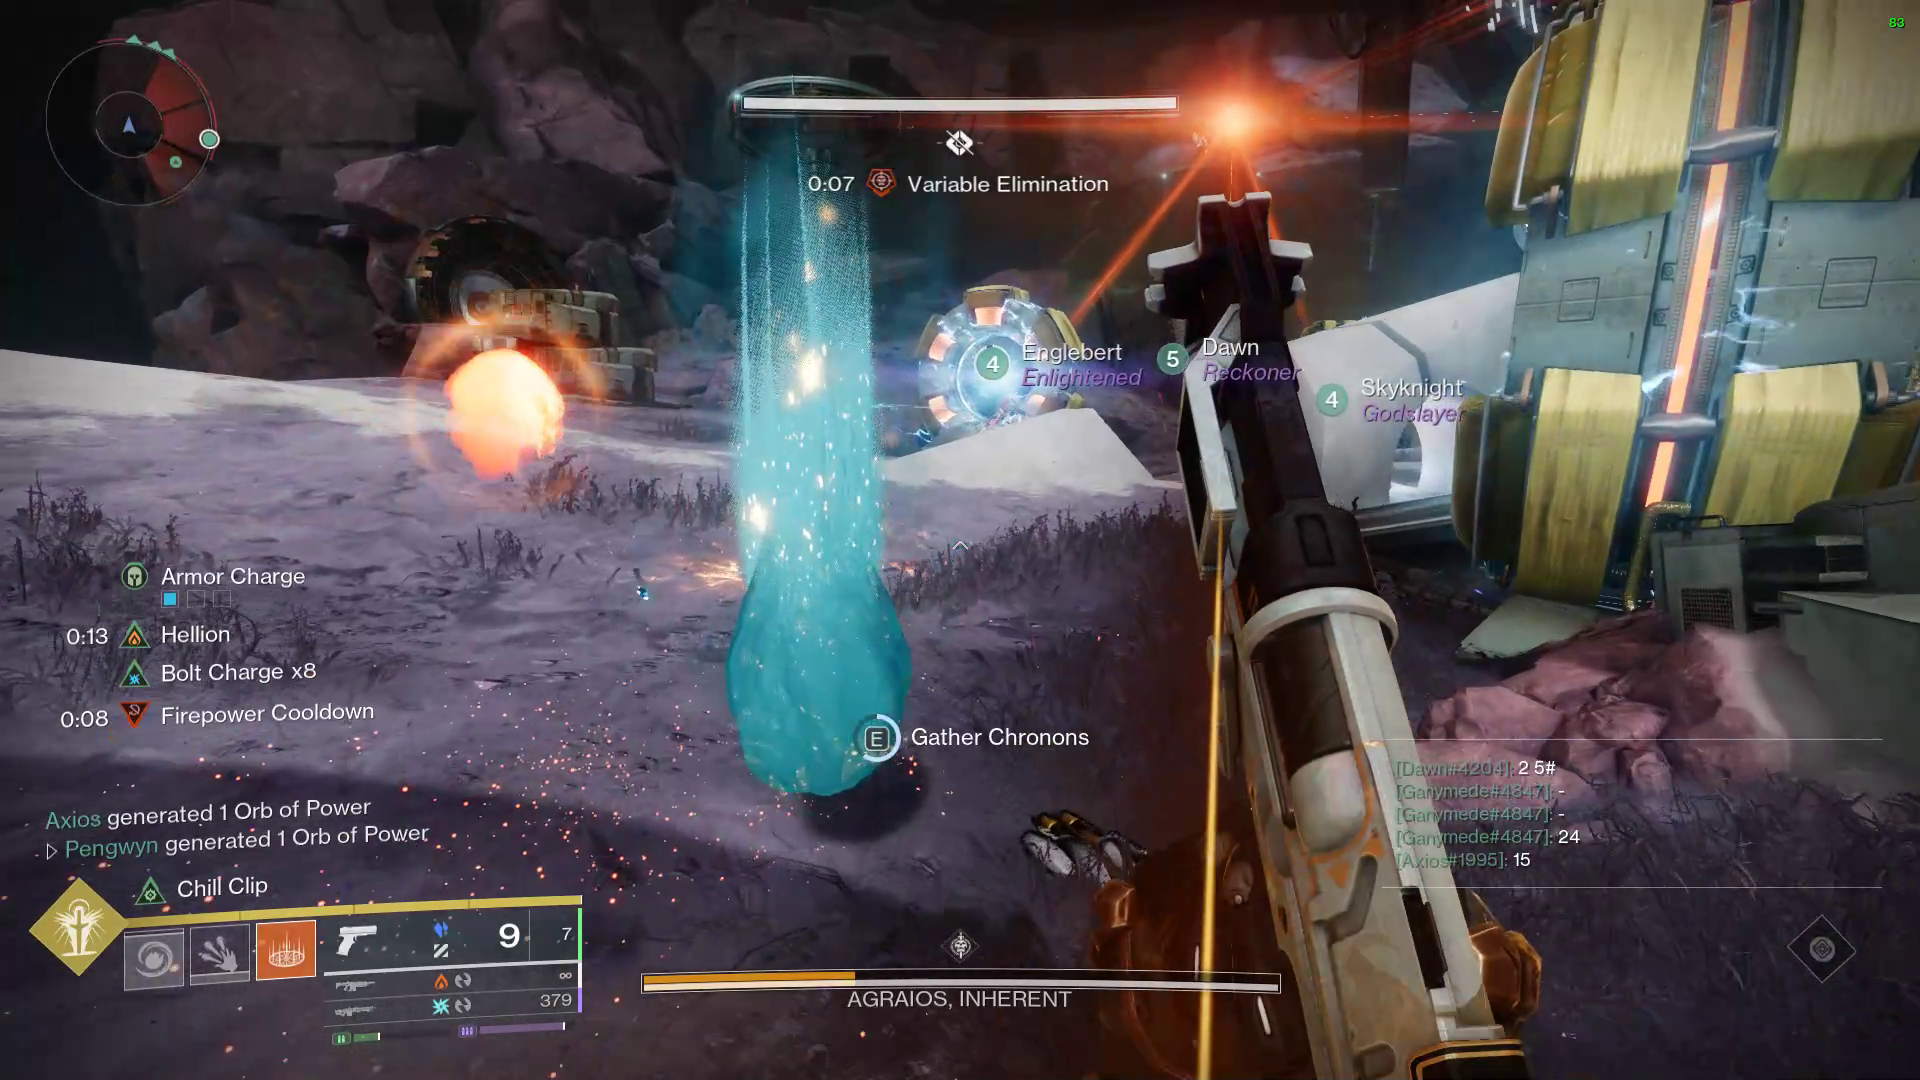
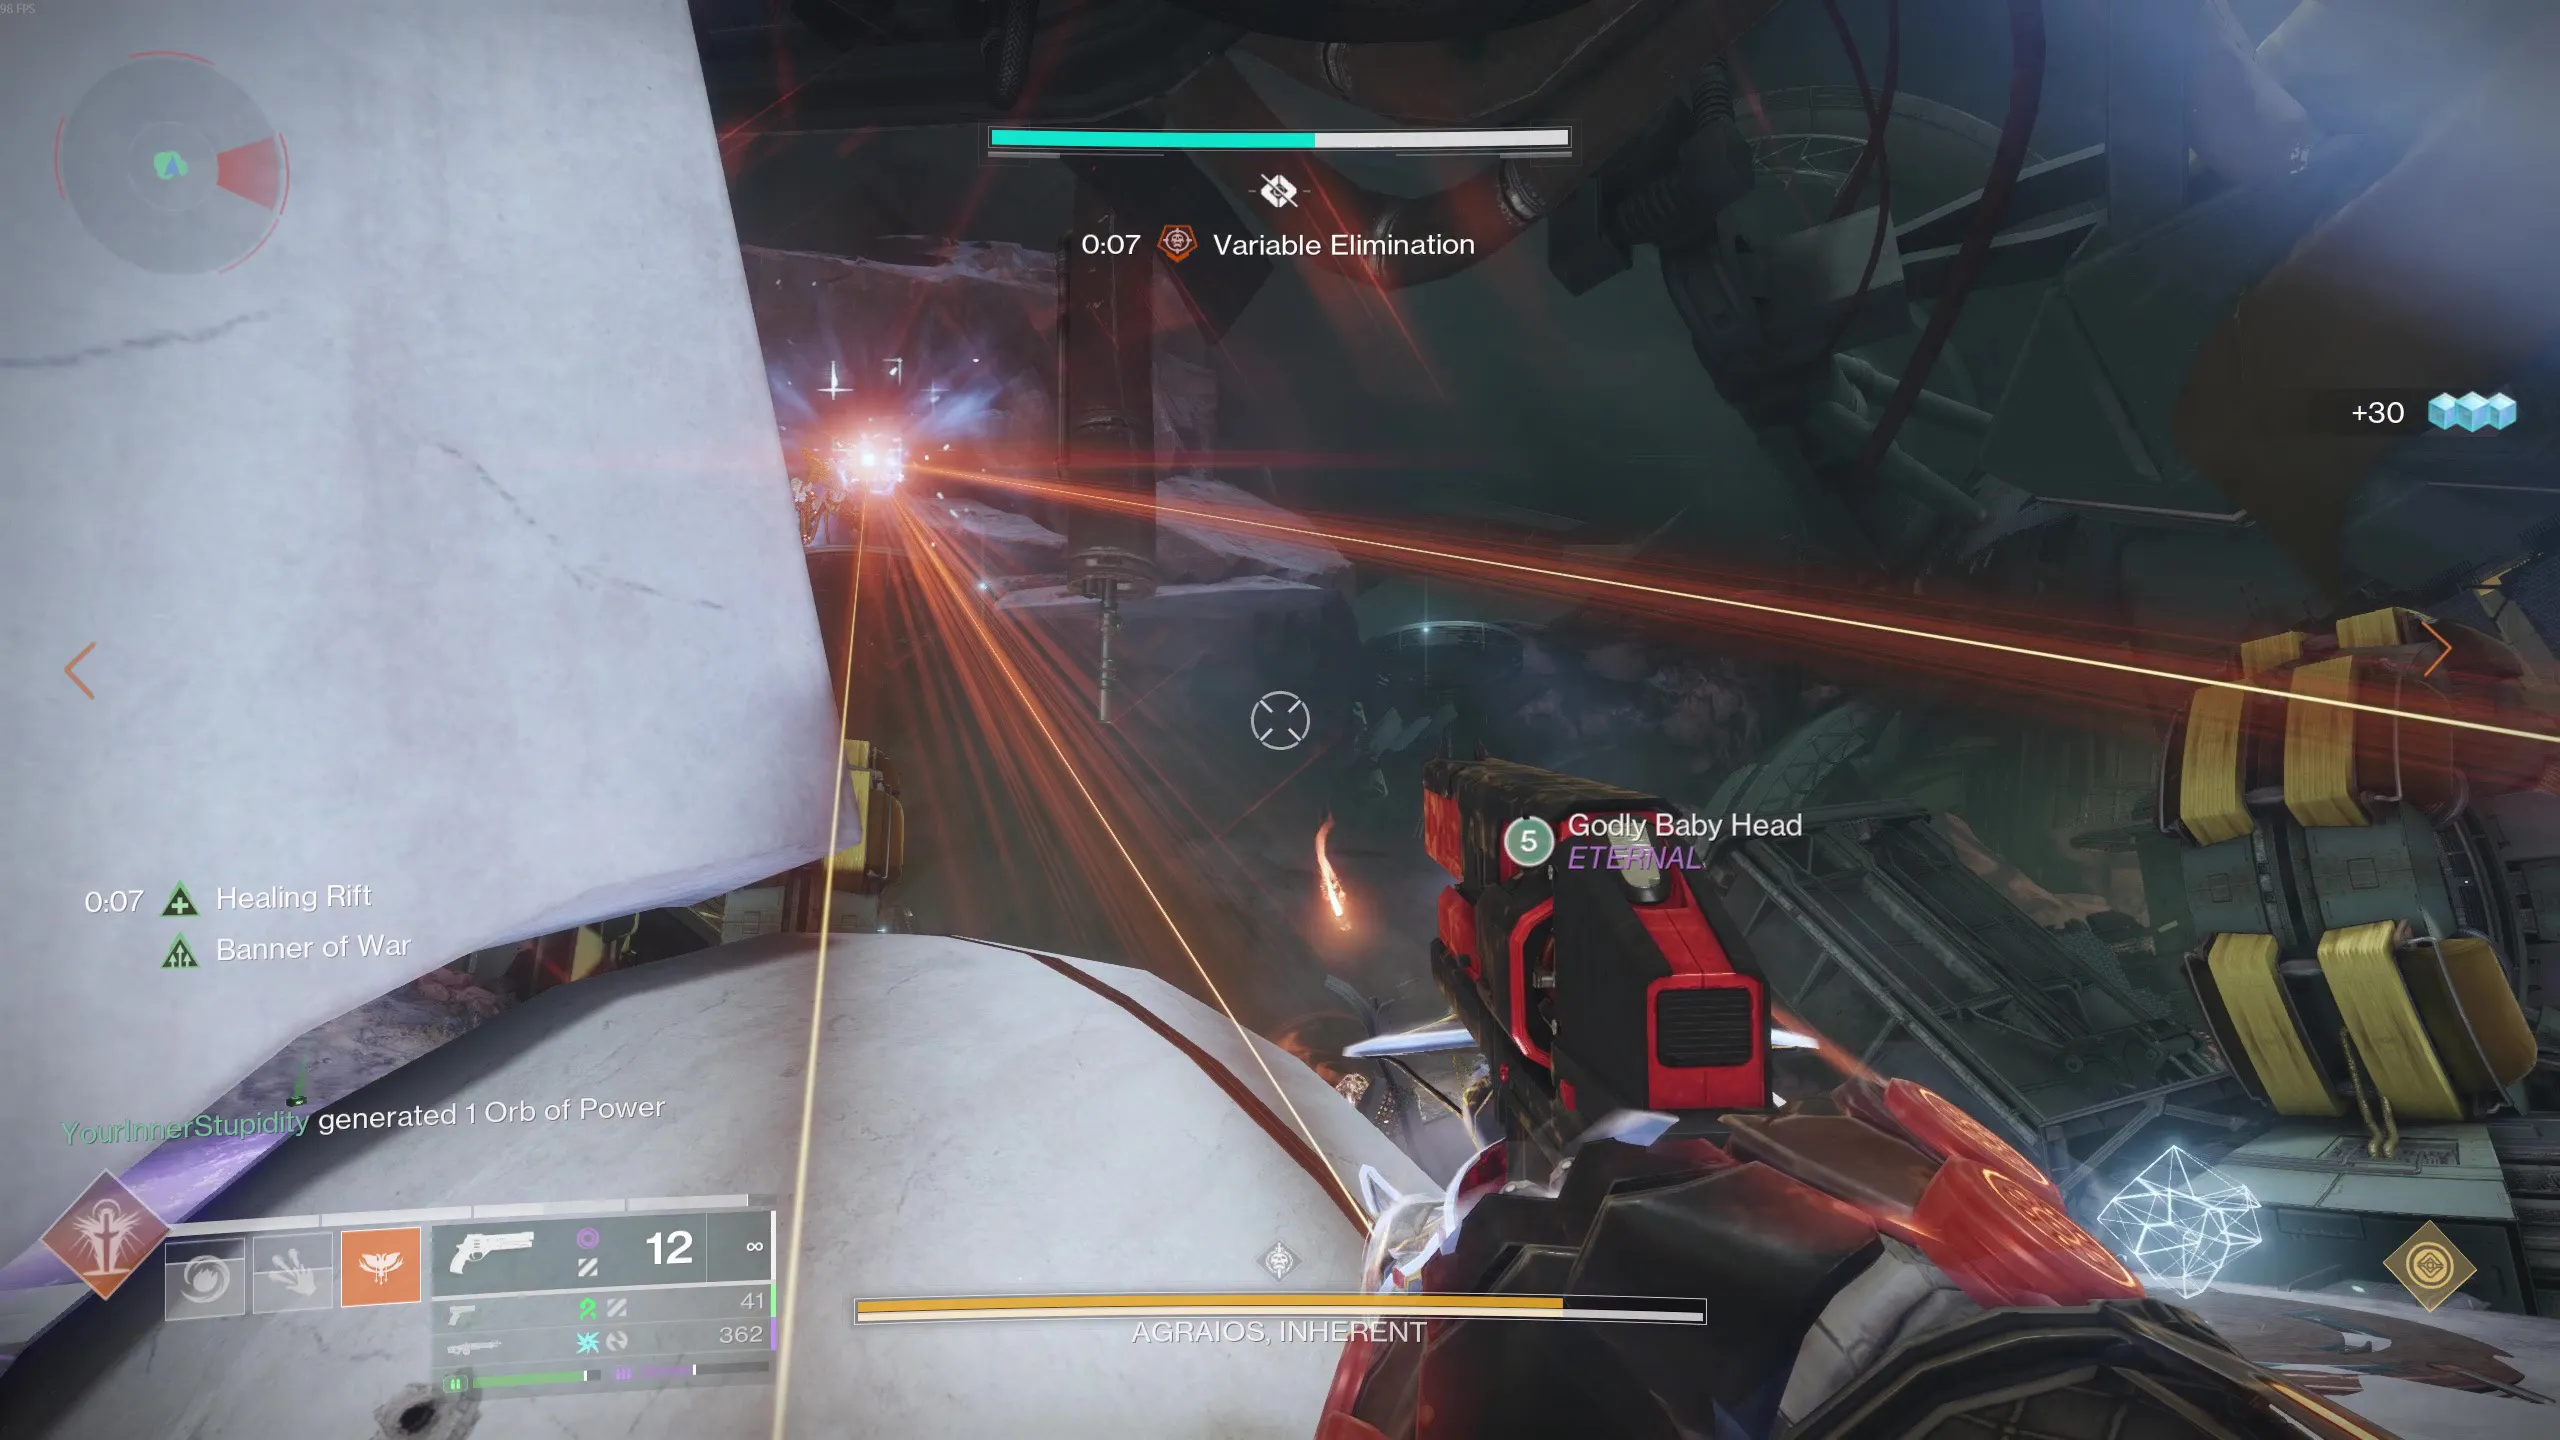
Once the boss activates the next phase, A randomly chosen boss will become "active" and gain the "Variable Elimination" attack. You will be one-shot if you remain in the boss's line of sight for ten seconds. You can reset the timer by losing sight of the active boss, but you are unable to avoid or block this attack. A huge glowing red light on the boss indicates which one is active (See top image).
At the same time, three players can step on the three plates in the middle to get their temporality buffs. There are three forms of it: Absolute, Cyclical, and Constant Temporality. On the upper platforms, the names of the sniping Hobgoblins are then visible to all players. One of the three players with the temporality buff must align with one of the bosses. If you started the account early, two of the bosses will despawn leaving the one boss to align with. If let the boss become impatient and start the wipe mechanic, the two other bosses will not despawn, but the player will simply align with the boss that is doing the variable elimination attack. Look at the name of the boss, it will have one of the three temporality buffs in its name. The player with the matching buff must then go to the terminal below the boss and interact with it. This will "align" the player with the boss, allowing the player to soon start the DPS phase. But before that the aligning player has to make one callout.
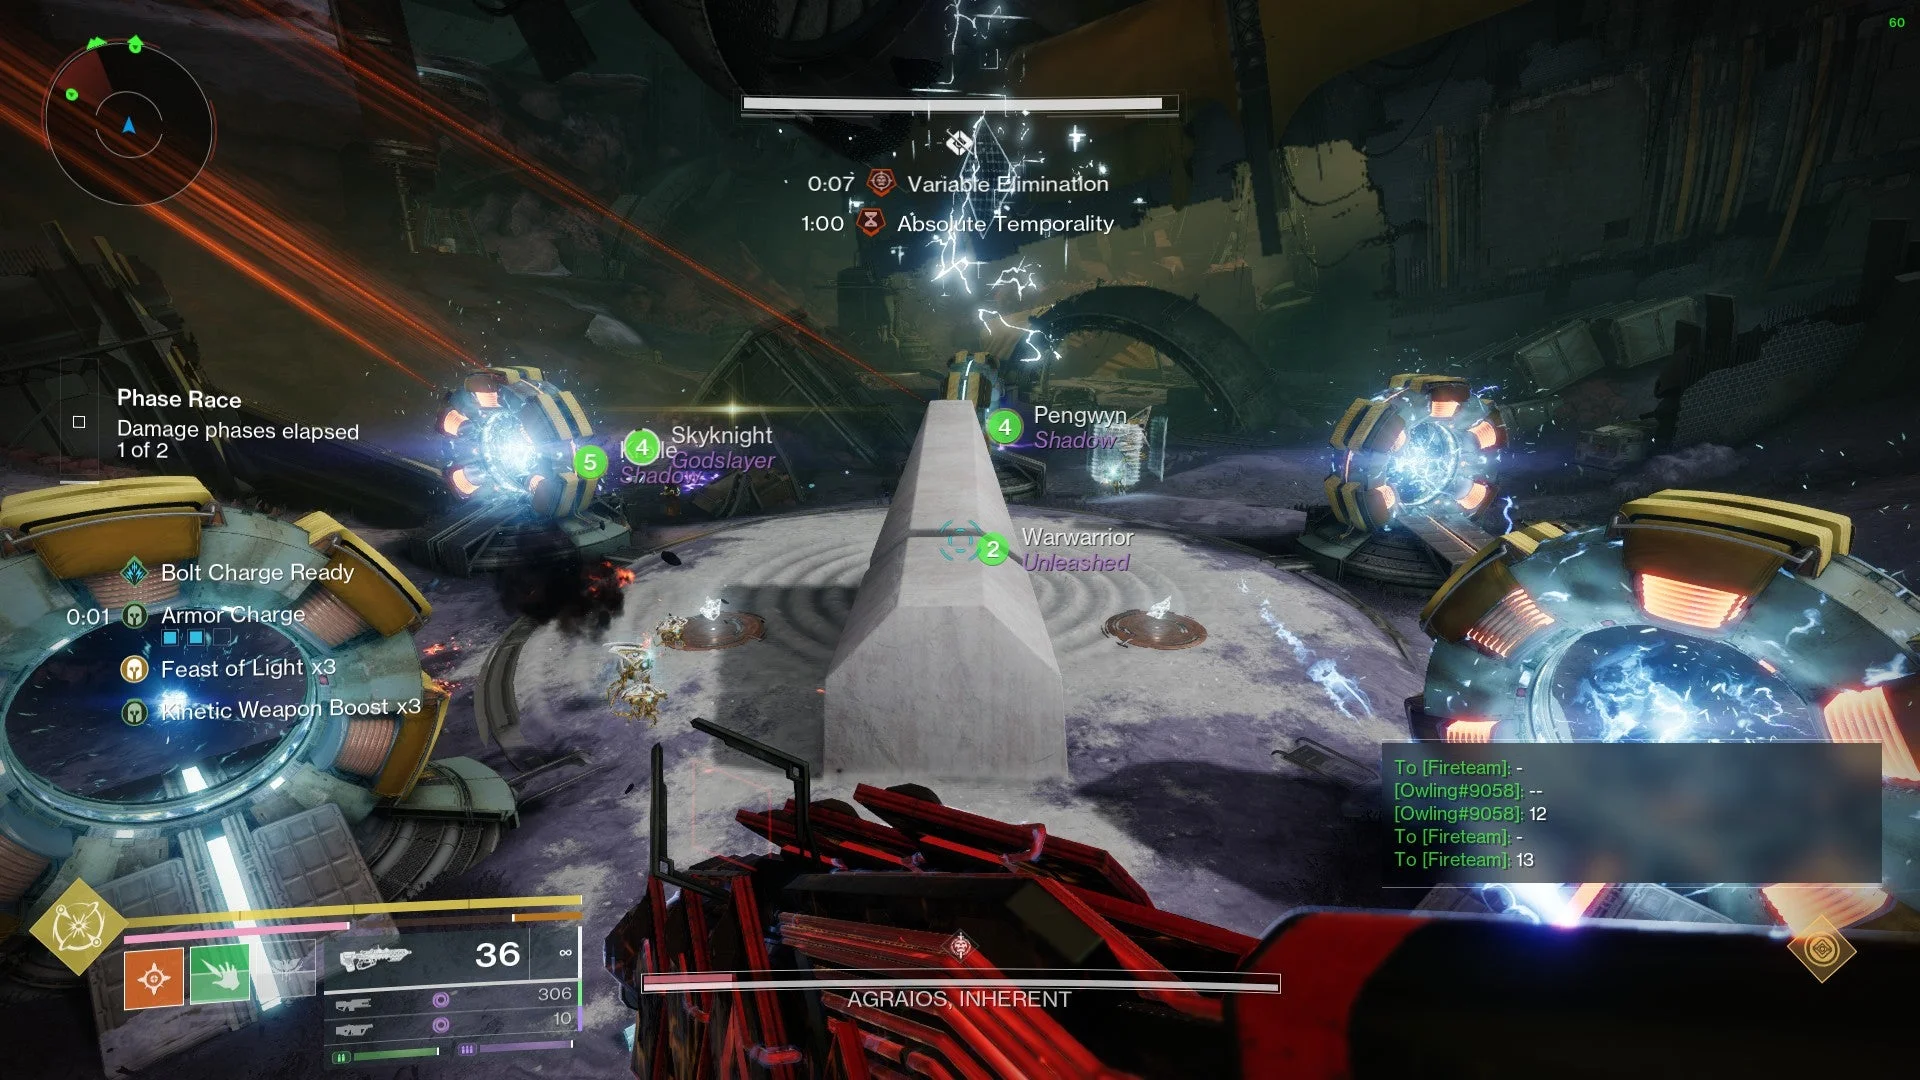
At the same time Variable Elimination begins, 4 out of the 5 portals will require a Chronon to be deposited (See bottom image). By right, the other two players with temporality buffs are supposed to callout with two different portals are not glowing (blue in colour). Instead, the easier way is to let the aligning player do the callout, because from the aligning player's perspective, he/she will see one portal glowing red. Which means the remaining four portals are the ones that need a Chronon to be deposited. After calling out the portal, the aligning player can align with the terminal under the boss with the matching name and receive the Tachyon Alignment buff. The remaining players without buffs will collect Chronons from the Minotaurs and deposit them in the four portals that were not called out by the aligning player.
Pre-DPS and DPS Phase
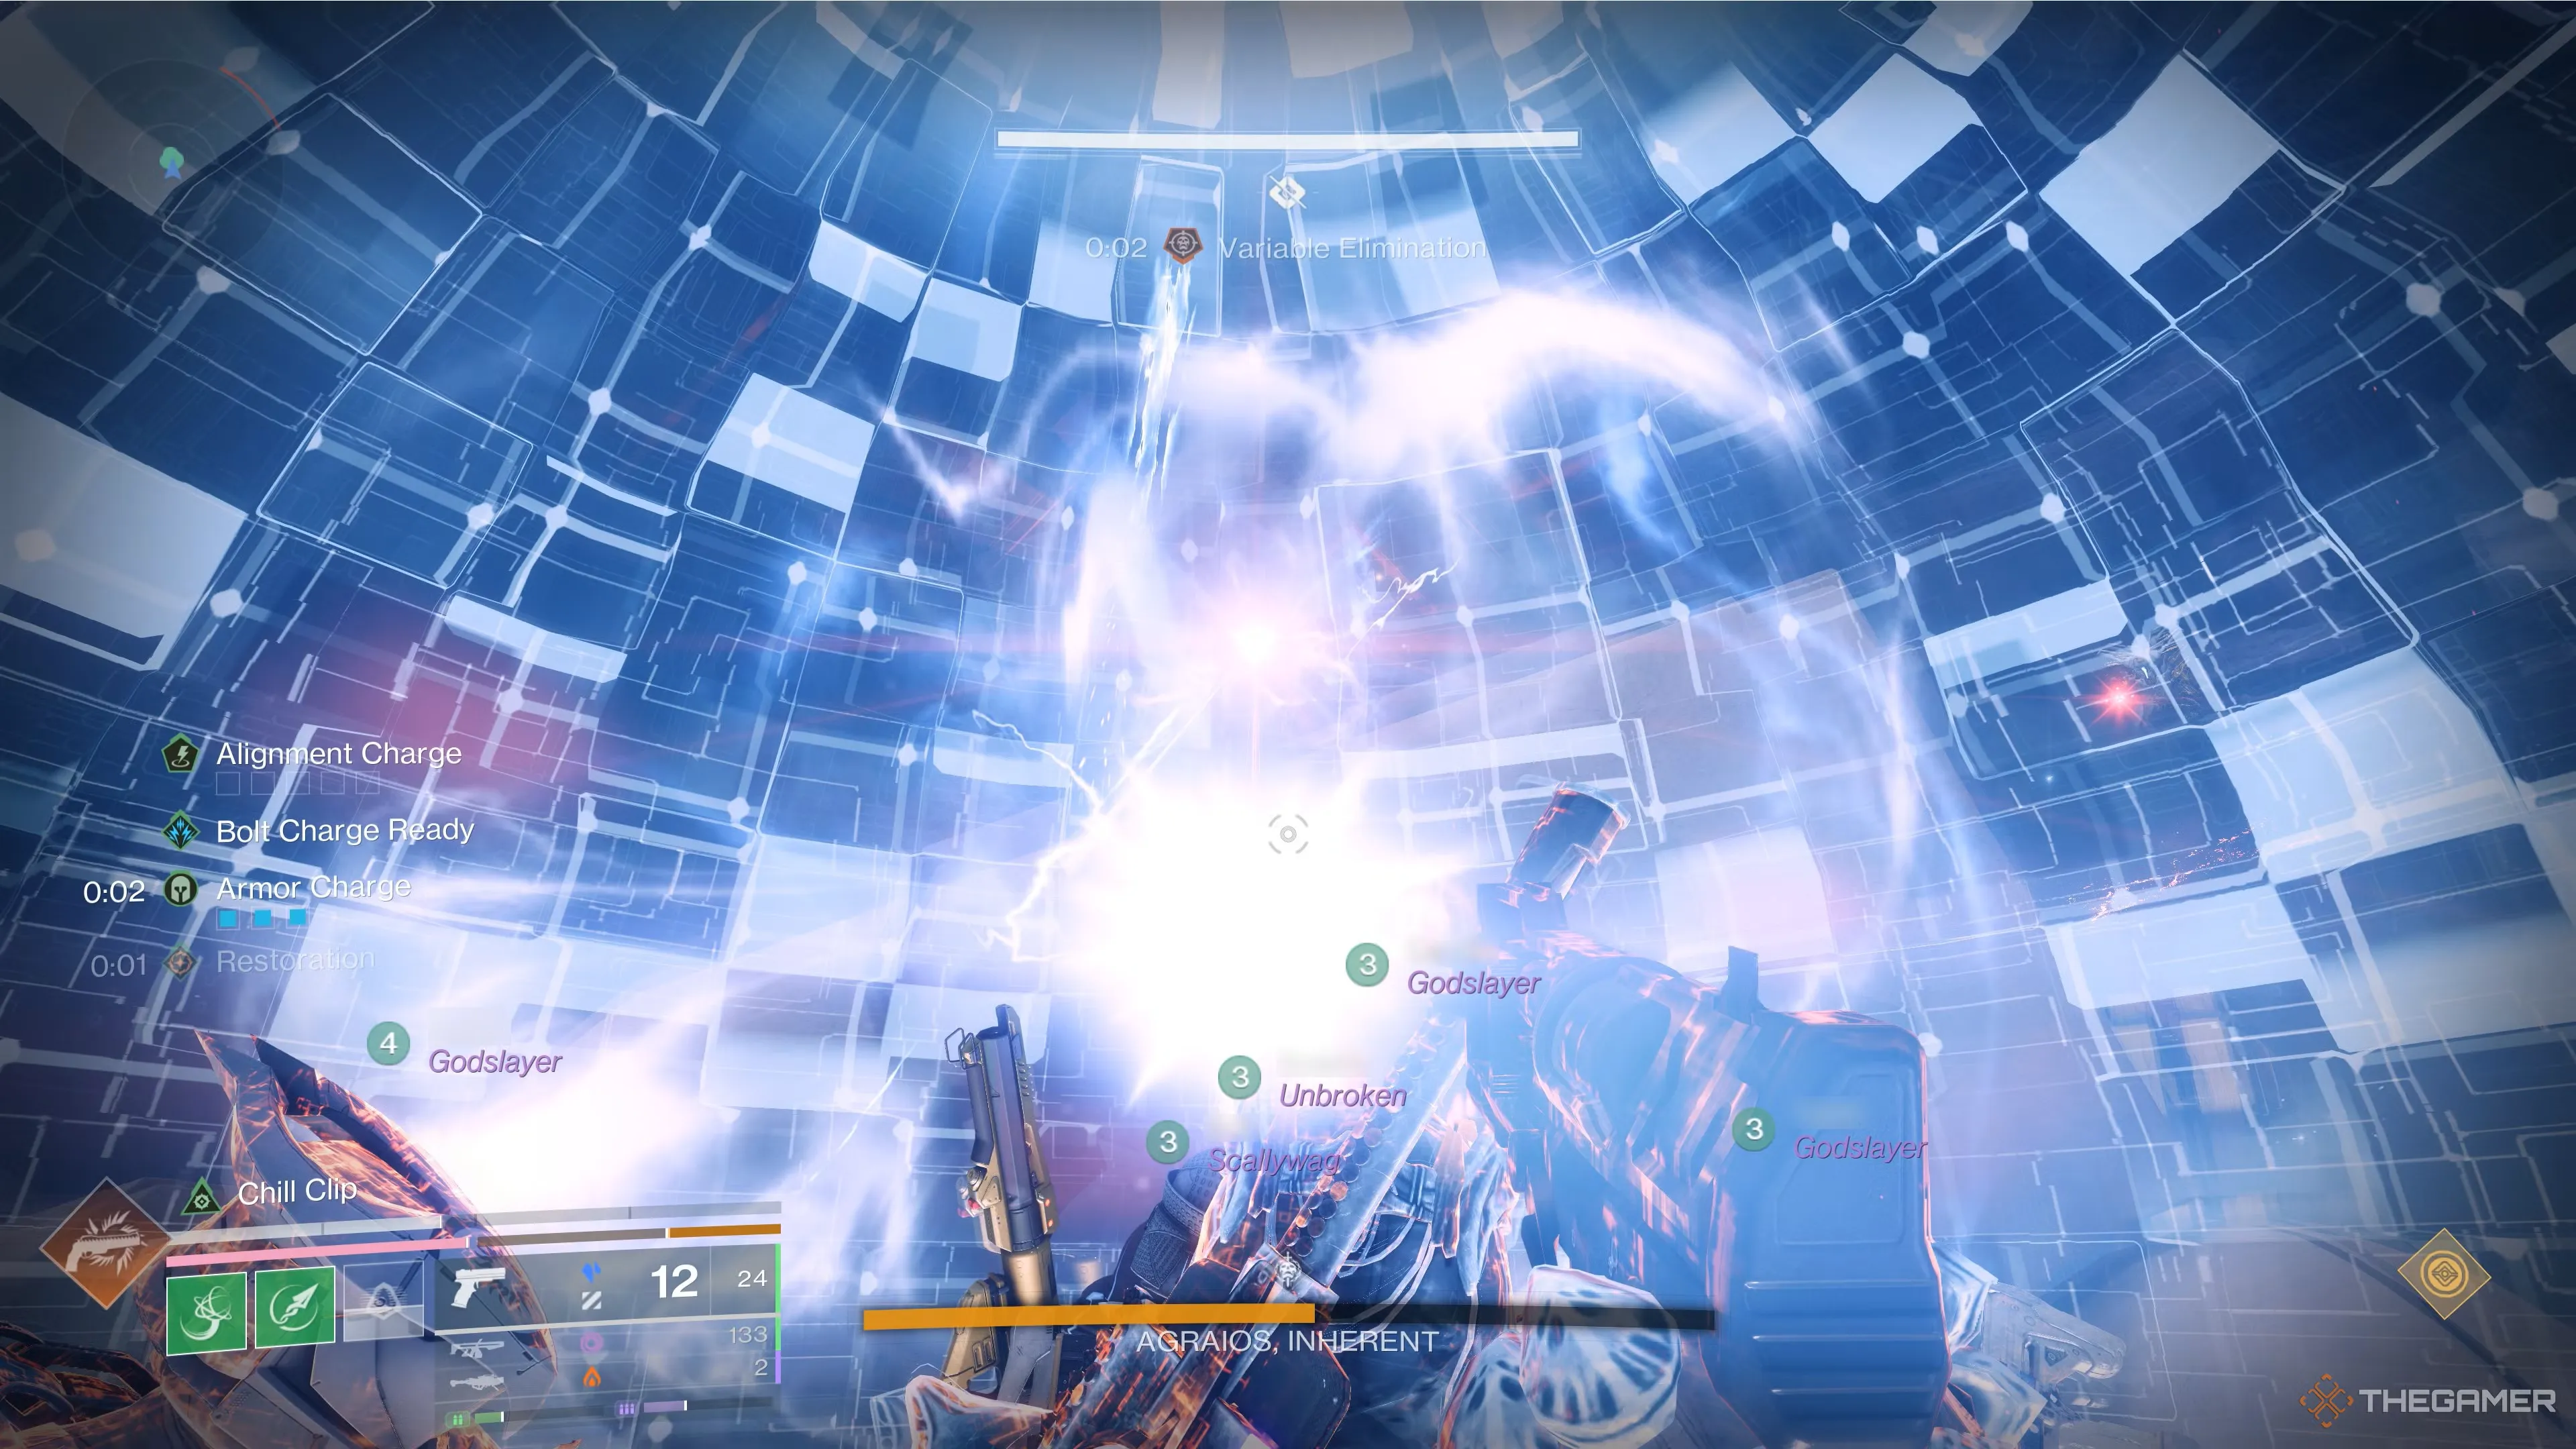
After all four portals have been charged with a Chronon, the aligned player must run through all five active portals and charge the Tachyon Alignment buff five times. This will change their grenade into a Vex detainment bubble. To begin DPS, the player with the detainment grenade must reflect one of the Agraios's Variable Elimination sniper shots. Everyone should fall to the center area. Get someone to count down to the Variable Elimination attack. Around the two-second mark, throw the detainment grenade down on the player and hide in the dome (see picture). The bullet should be reflected back to the boss who fired it, killing it in the process as well. The boss will show up in the middle after a few seconds, and DPS will start. You have about 15 seconds to do damage before the boss runs away and tries to use Variable Elimination again.
Once the boss teleports away, everyone in the team will get the Tachyon Alignment buff. One of the players will run through all 5 portals again to charge the buff 5 times again to get the detainment grenade. Block the Variable Elimination attack again with the detainment grenade to spawn the boss in the middle again for another DPS phase. Other players can still DPS the boss while it is standing on one of its elevated platforms. This happens up to three times during DPS. After that, the fight returns to normal. Repeat the whole process until the boss is defeated.
Challenge Mode:
Every player must pick up a Chronon before anyone can pick up another.
Points to Note:
- First wave spawns only 5 Minotaurs; the 6th player gets theirs after killing the Hydra to spawn more Minotaurs.
- During running/DPS phases, some players may hold a Chronon they can't deposit — this is acceptable if the group cycle remains correct.
- Plate roles may need rotation if someone is holding a leftover Chronon that must be banked before they can pick up another.
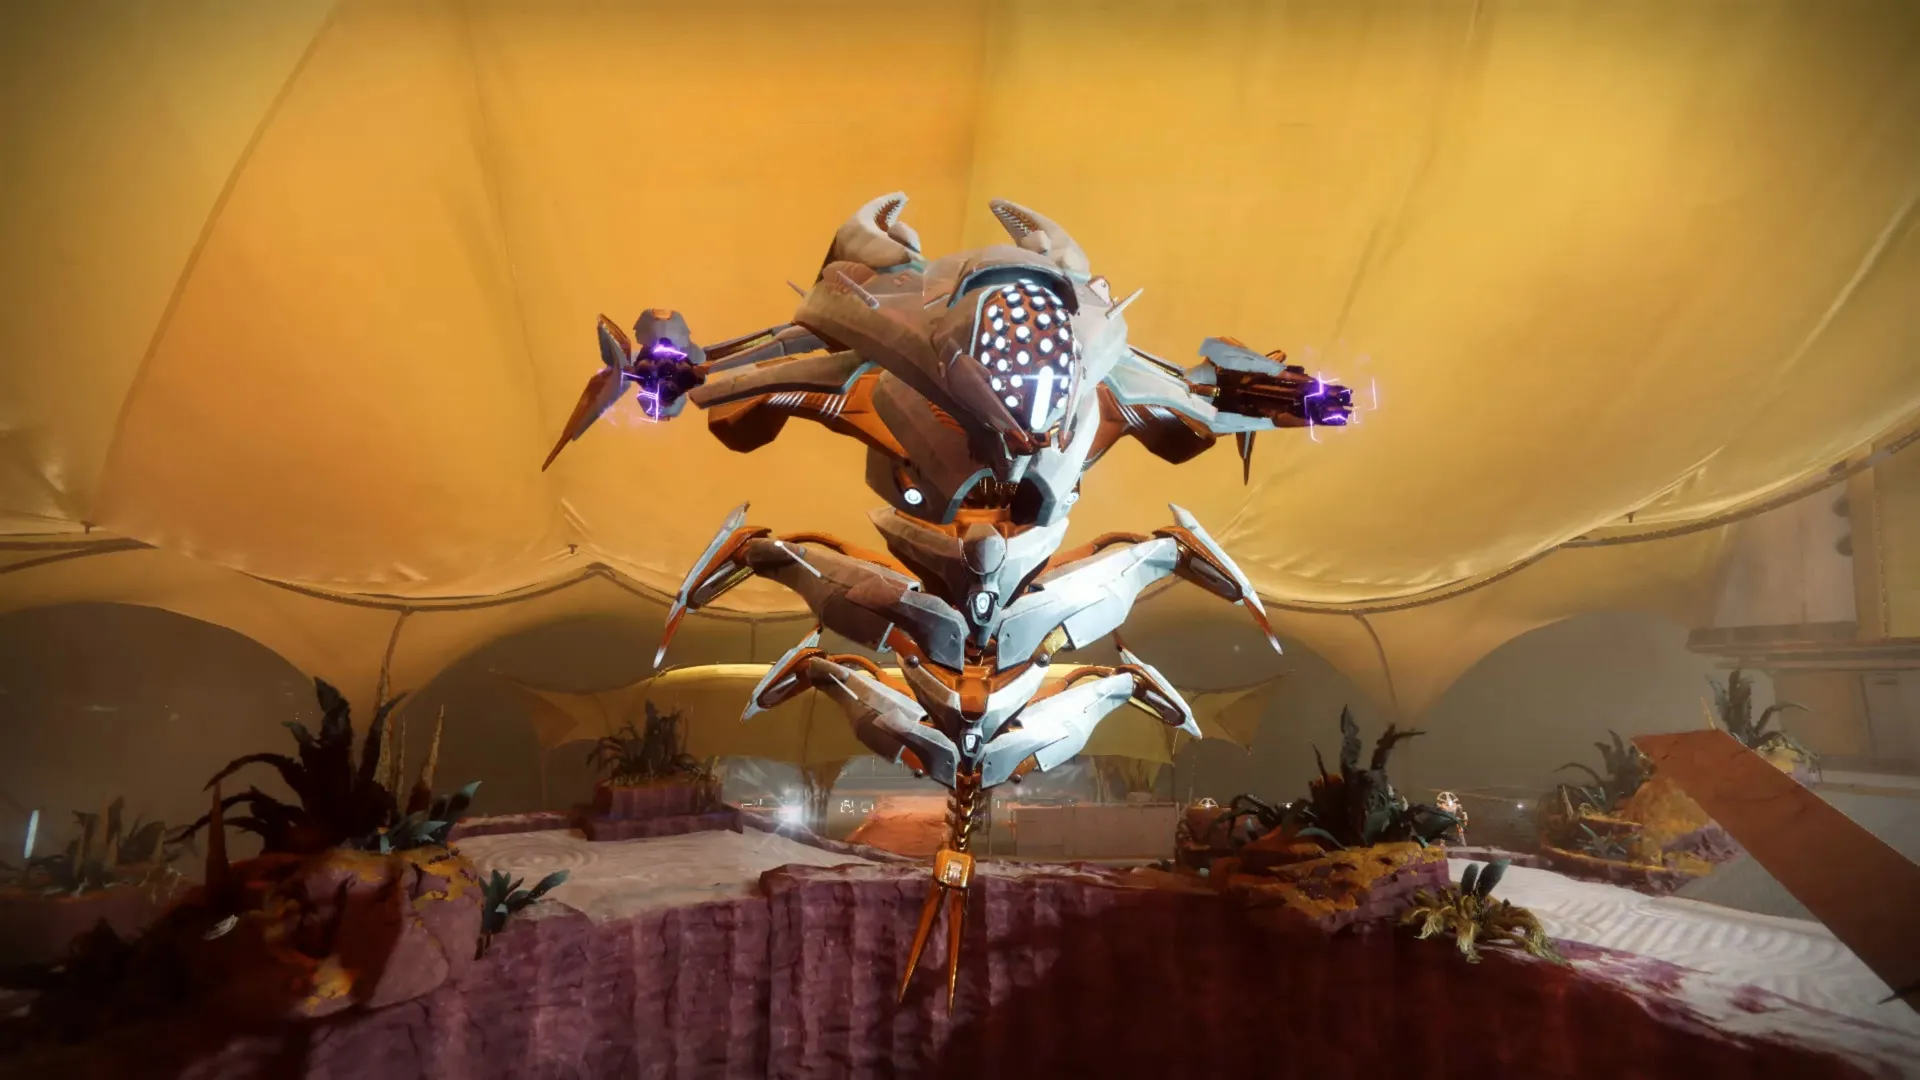
Epoptes, Lord of Quanta
Fallow PavilionRecommended Loadouts:
- Titans: Thundercrash + Cuirass of the Falling Star (More the merrier!) // Bolt Charge.
- Warlock: Well of Radiance + Lunafaction Boots // Nova Bomb + Getaway Artist for ad-clear // Speaker's Sight Build for extra healing // Song of Flame + Sanguine Alchemy.
- Hunter: Golden Gun + Celestial Nighthawk // Tether.
Recommended Weapons:
- Linear Fusion Rifles // Snipers (Refurbished A499, The Supremacy, Succession).
- Rocket Pulse and other ad-clear weapons for ads and cyclops.
- A hit-scan weapon (Auto Rifle, Pulse Rifle) if you are dealing with Epoptes's eyes.
Roles:
- 2 groups of 3 on each side of the map:
- 1 x Room (Inside) Reader.
- 1 x ad-clear (Room + Main Arena).
- 1 x Main Arena (Outside) Reader.
Epoptes is a "reading and shooting" boss. In this fight, one player calls will give a callout and the other person shoots it, multiple times. You should divide your squad into two groups of three because there are two sides to this encounter. You should also give each side a "inside" and "outside" reader.
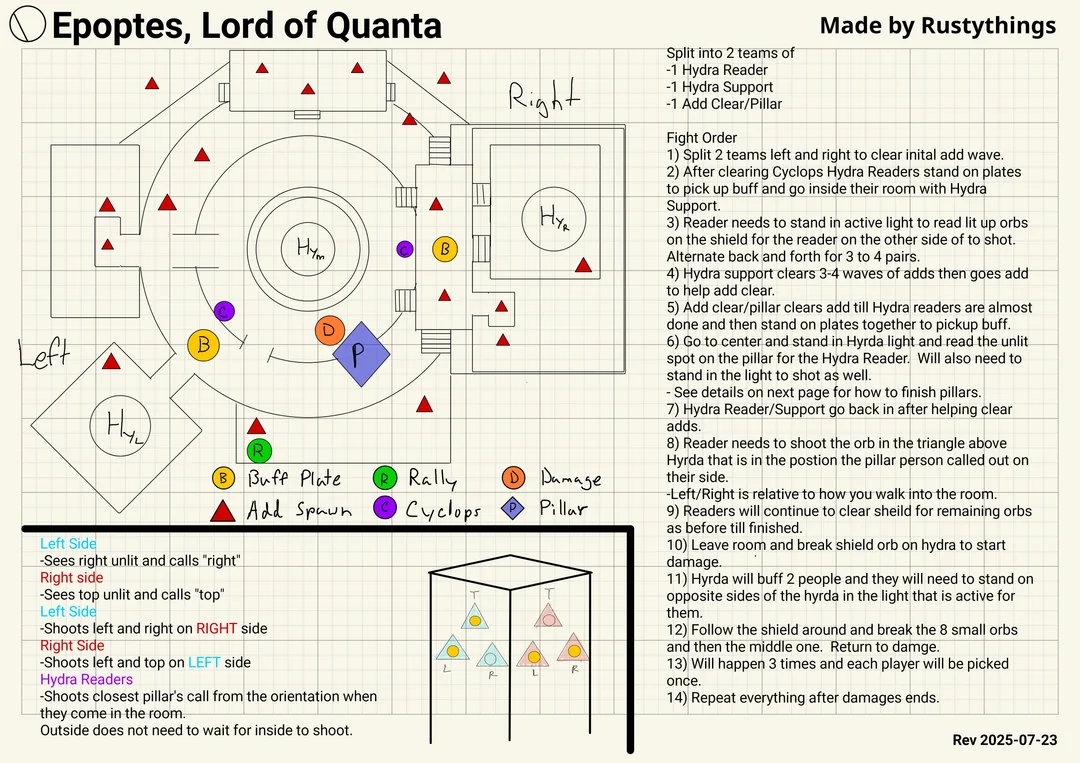
Enter the arena to spawn the initial wave of enemies and yellow-bar Cyclops named Time's Magistrate. Destroy Time's Magistrates to spawn two Cyclical Temporality buffs on neighboring plates (see first image). The buff appears like a latticework collection of white lines. Two players must stand on the plates at the same time to pick up the buffs and access their respective side rooms. A second player will travel with them for add clear. The remaining two unbuffed players stay in the middle and the room to keep it relatively clean of adds. They'll also need to perform a single piece of reading not long into the pre-DPS part.
Room Duty
In the side rooms, there will be a boss Hydra with a shield covered in seven eyes: six on the exterior in a hexagon, and bigger in the middle. In each room, there is another hexagon made up of 6 eyes. One of these squares will light up in both side rooms when the buffed player enters the light beam (refer to second image). The debuff timer will be paused so long as they're in the light, preventing death. Both buffed players will yell out which tile is lighted up. They then fire the eye on the Hydra's shield called out by the player in the adjoining room.
- So for example, if Player A says "bottom middle," and Player B says "top middle," A would shoot top middle, while B would shoot bottom middle.
- Another method would be labelling the eyes with numbers (1-6) from left to right and calling out the numbers instead.
This happens four times. Note that the eyeballs need to be shot practically simultaneously and correctly without the player leaving the light beam for too long, else all the eyes will grow back and shut, forcing the players to start from scratch.
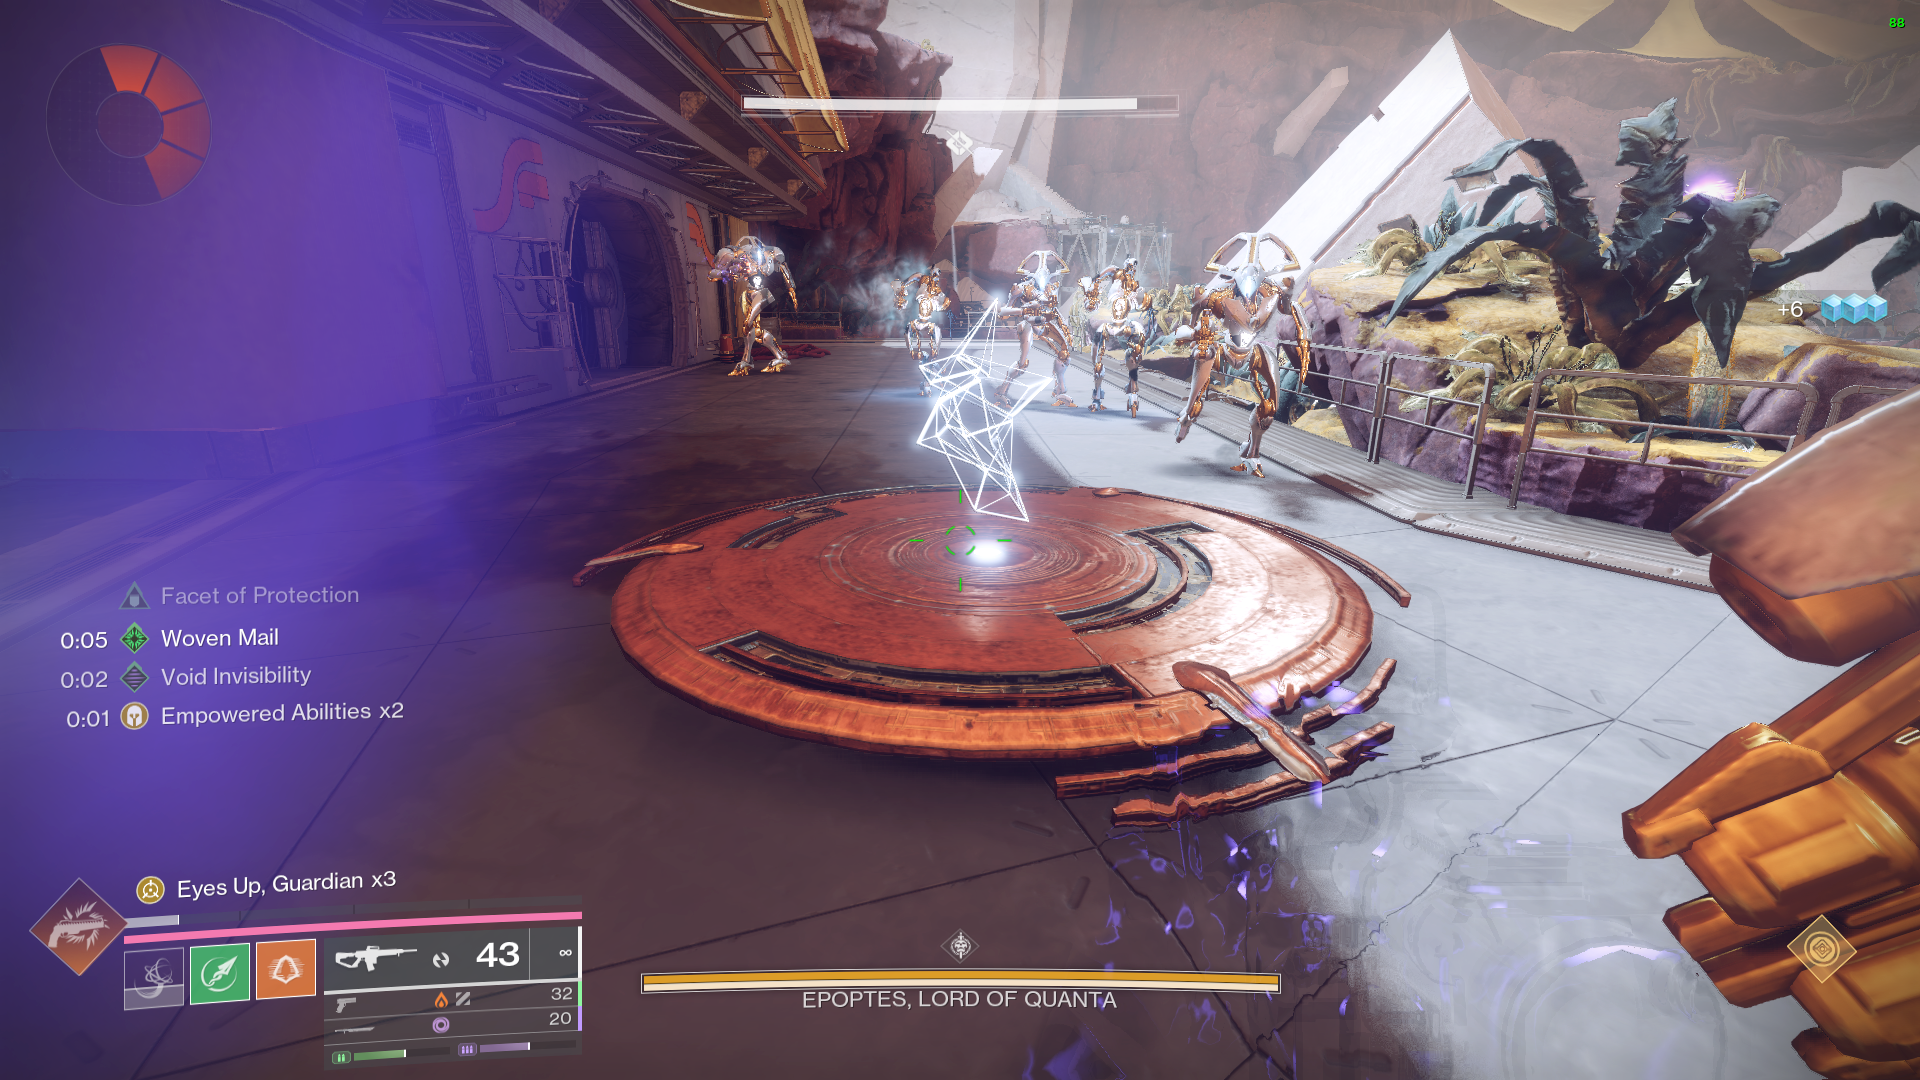 The plate where the temporality buff is obtained.
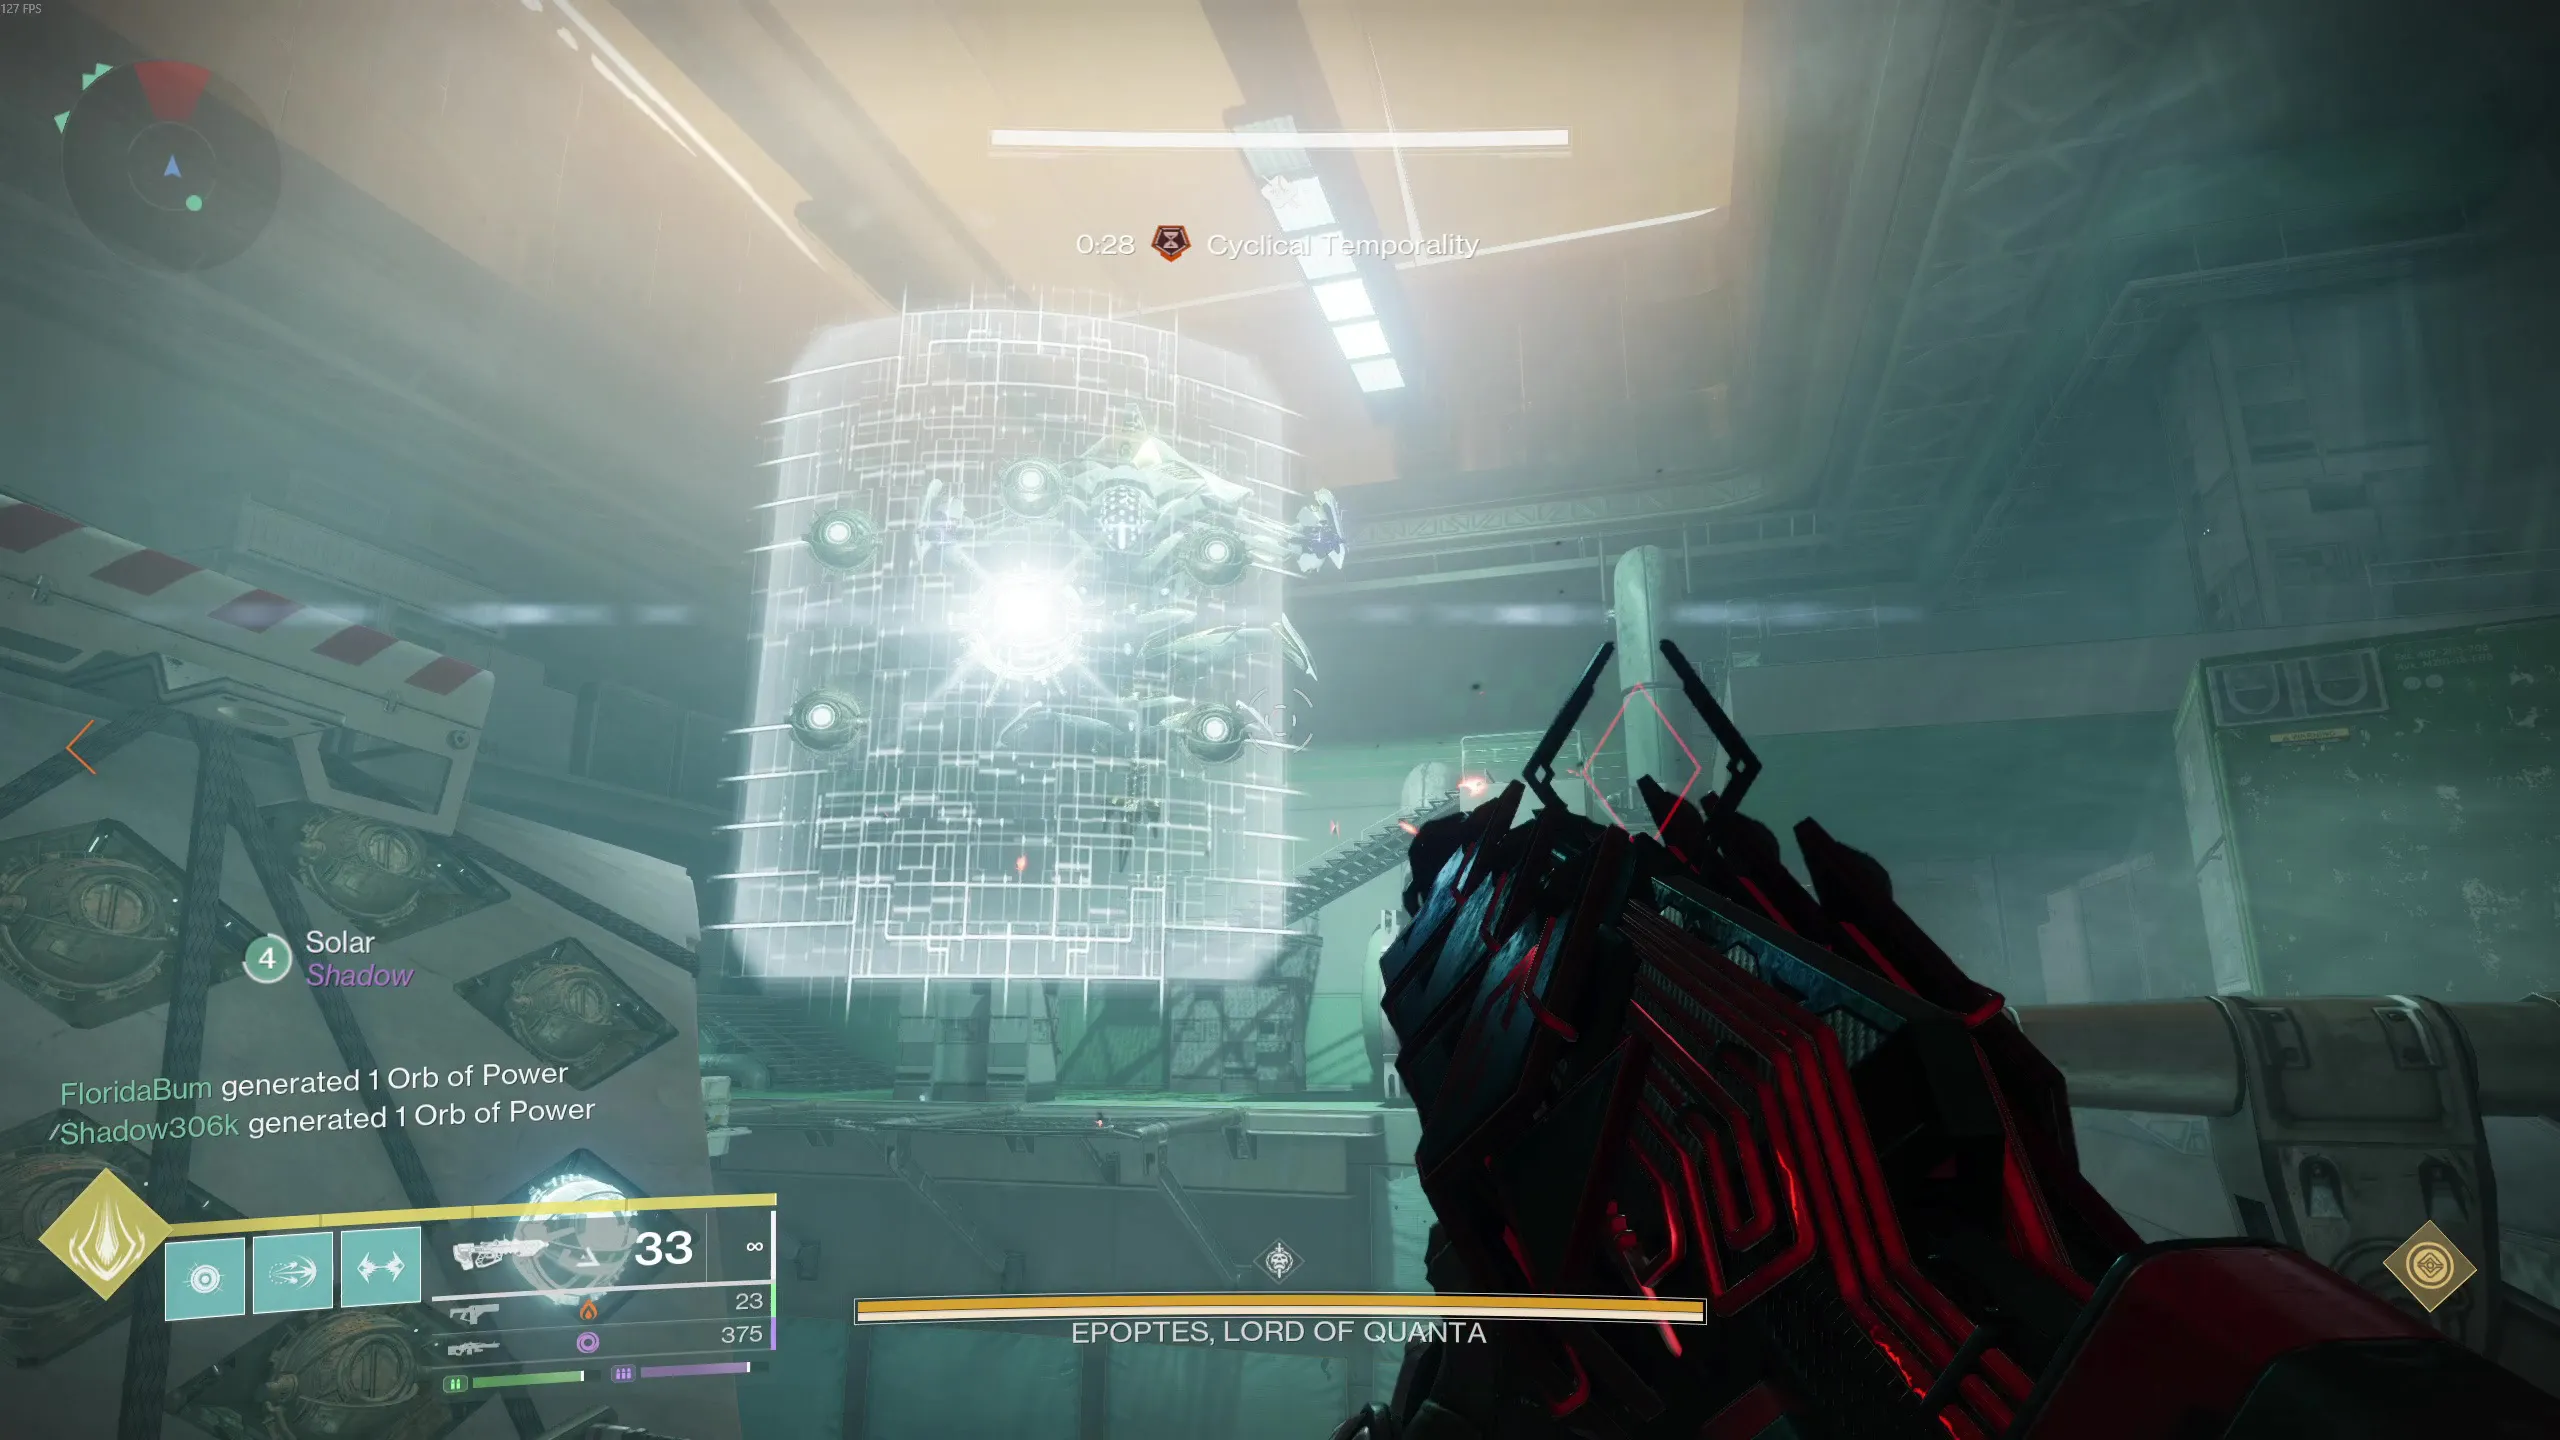 On the shield, the seven eyes are arranged in a hexagonal
pattern. On the left you can see the 6 eyes on a panel that is
supposed to be the callout for the opposite room.
On the shield, the seven eyes are arranged in a hexagonal
pattern. On the left you can see the 6 eyes on a panel that is
supposed to be the callout for the opposite room.
Outside Duty
After around 4 eyes are shot, a flavour text will appear saying, "Epoptes judges parameters exceeded and prompts function collapse." This means that players on outside will need to do their part. Those players must now get the Temporality buff from the plates. A Time's Magistrate may respawn, preventing the plate from working, eliminate them as soon as you can. If you are quick enough you can grab the buff before the Magistrates spawn in.
After both readers obtain their buffs, they need to stand in the beam of light emitted from Epoptes's shield. This pauses their Temporality timer and reveals two out of three diamonds on the center pillar (refer to first picture). The outside player should call out the diamond that isn't glowing. In the rooms, the player should be looking at the three spheres above the Hydra in the room (refer to second image) and shoot the one that was called out. Any callout system works, though “top, left, right” is usually the simplest. From the room, this will be from the POV of the player entering the room. To prevent confusion, you can callout your teammate's name as well to ensure the correct person shoots the correct sphere.
As the outside player, in addition to calling which diamond on your side isn't glowing, you must also listen to the opposite outside reader's call and shoot the two diamonds on their side that are glowing. You won't be able to see what is glowing on the other side of the central pillar, so listen and shoot carefully. Put simply: call your missing diamond, then destroy the other side's lit ones. Once both the inside and outside players have destroyed their respective diamonds/triangle sphere, everyone will be cleansed of Temporality, and the wipe mechanic will be stopped.
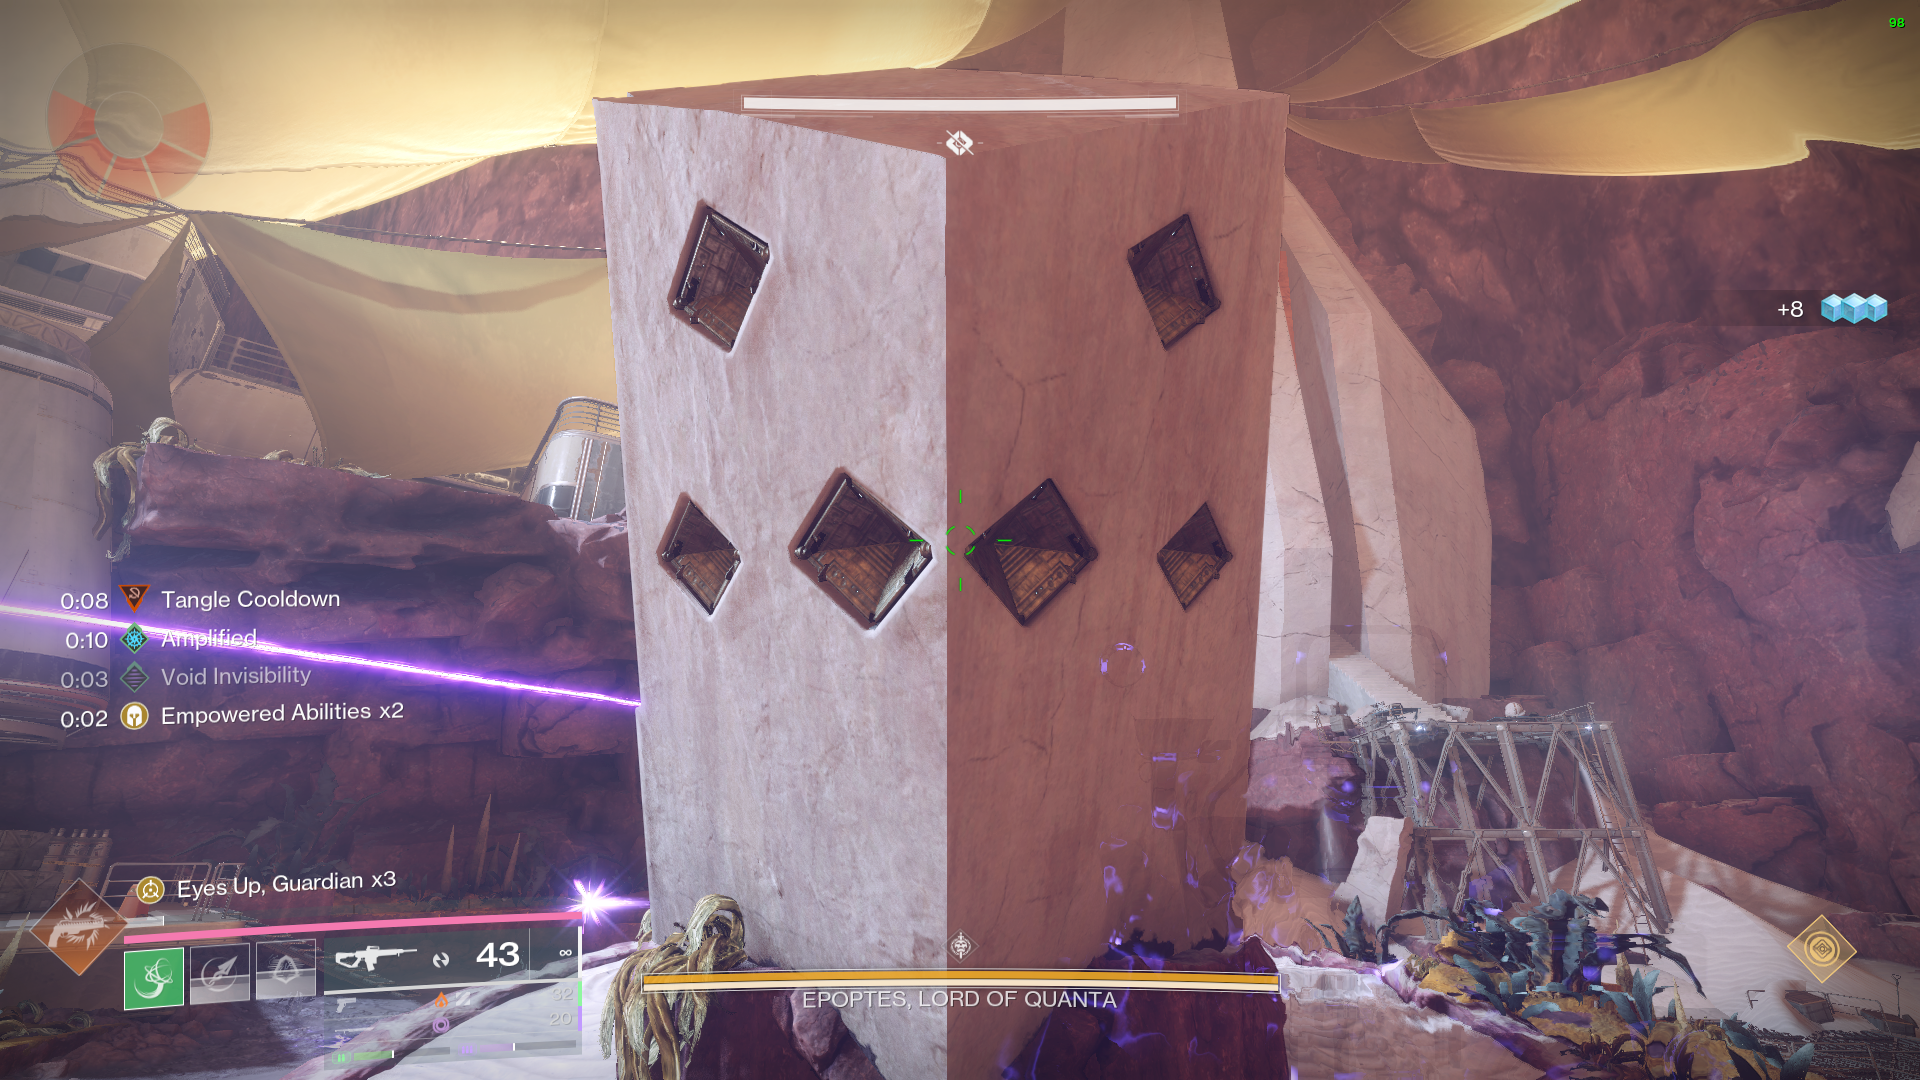 The central pillar where the two center players make their
callouts on each side.
The central pillar where the two center players make their
callouts on each side.
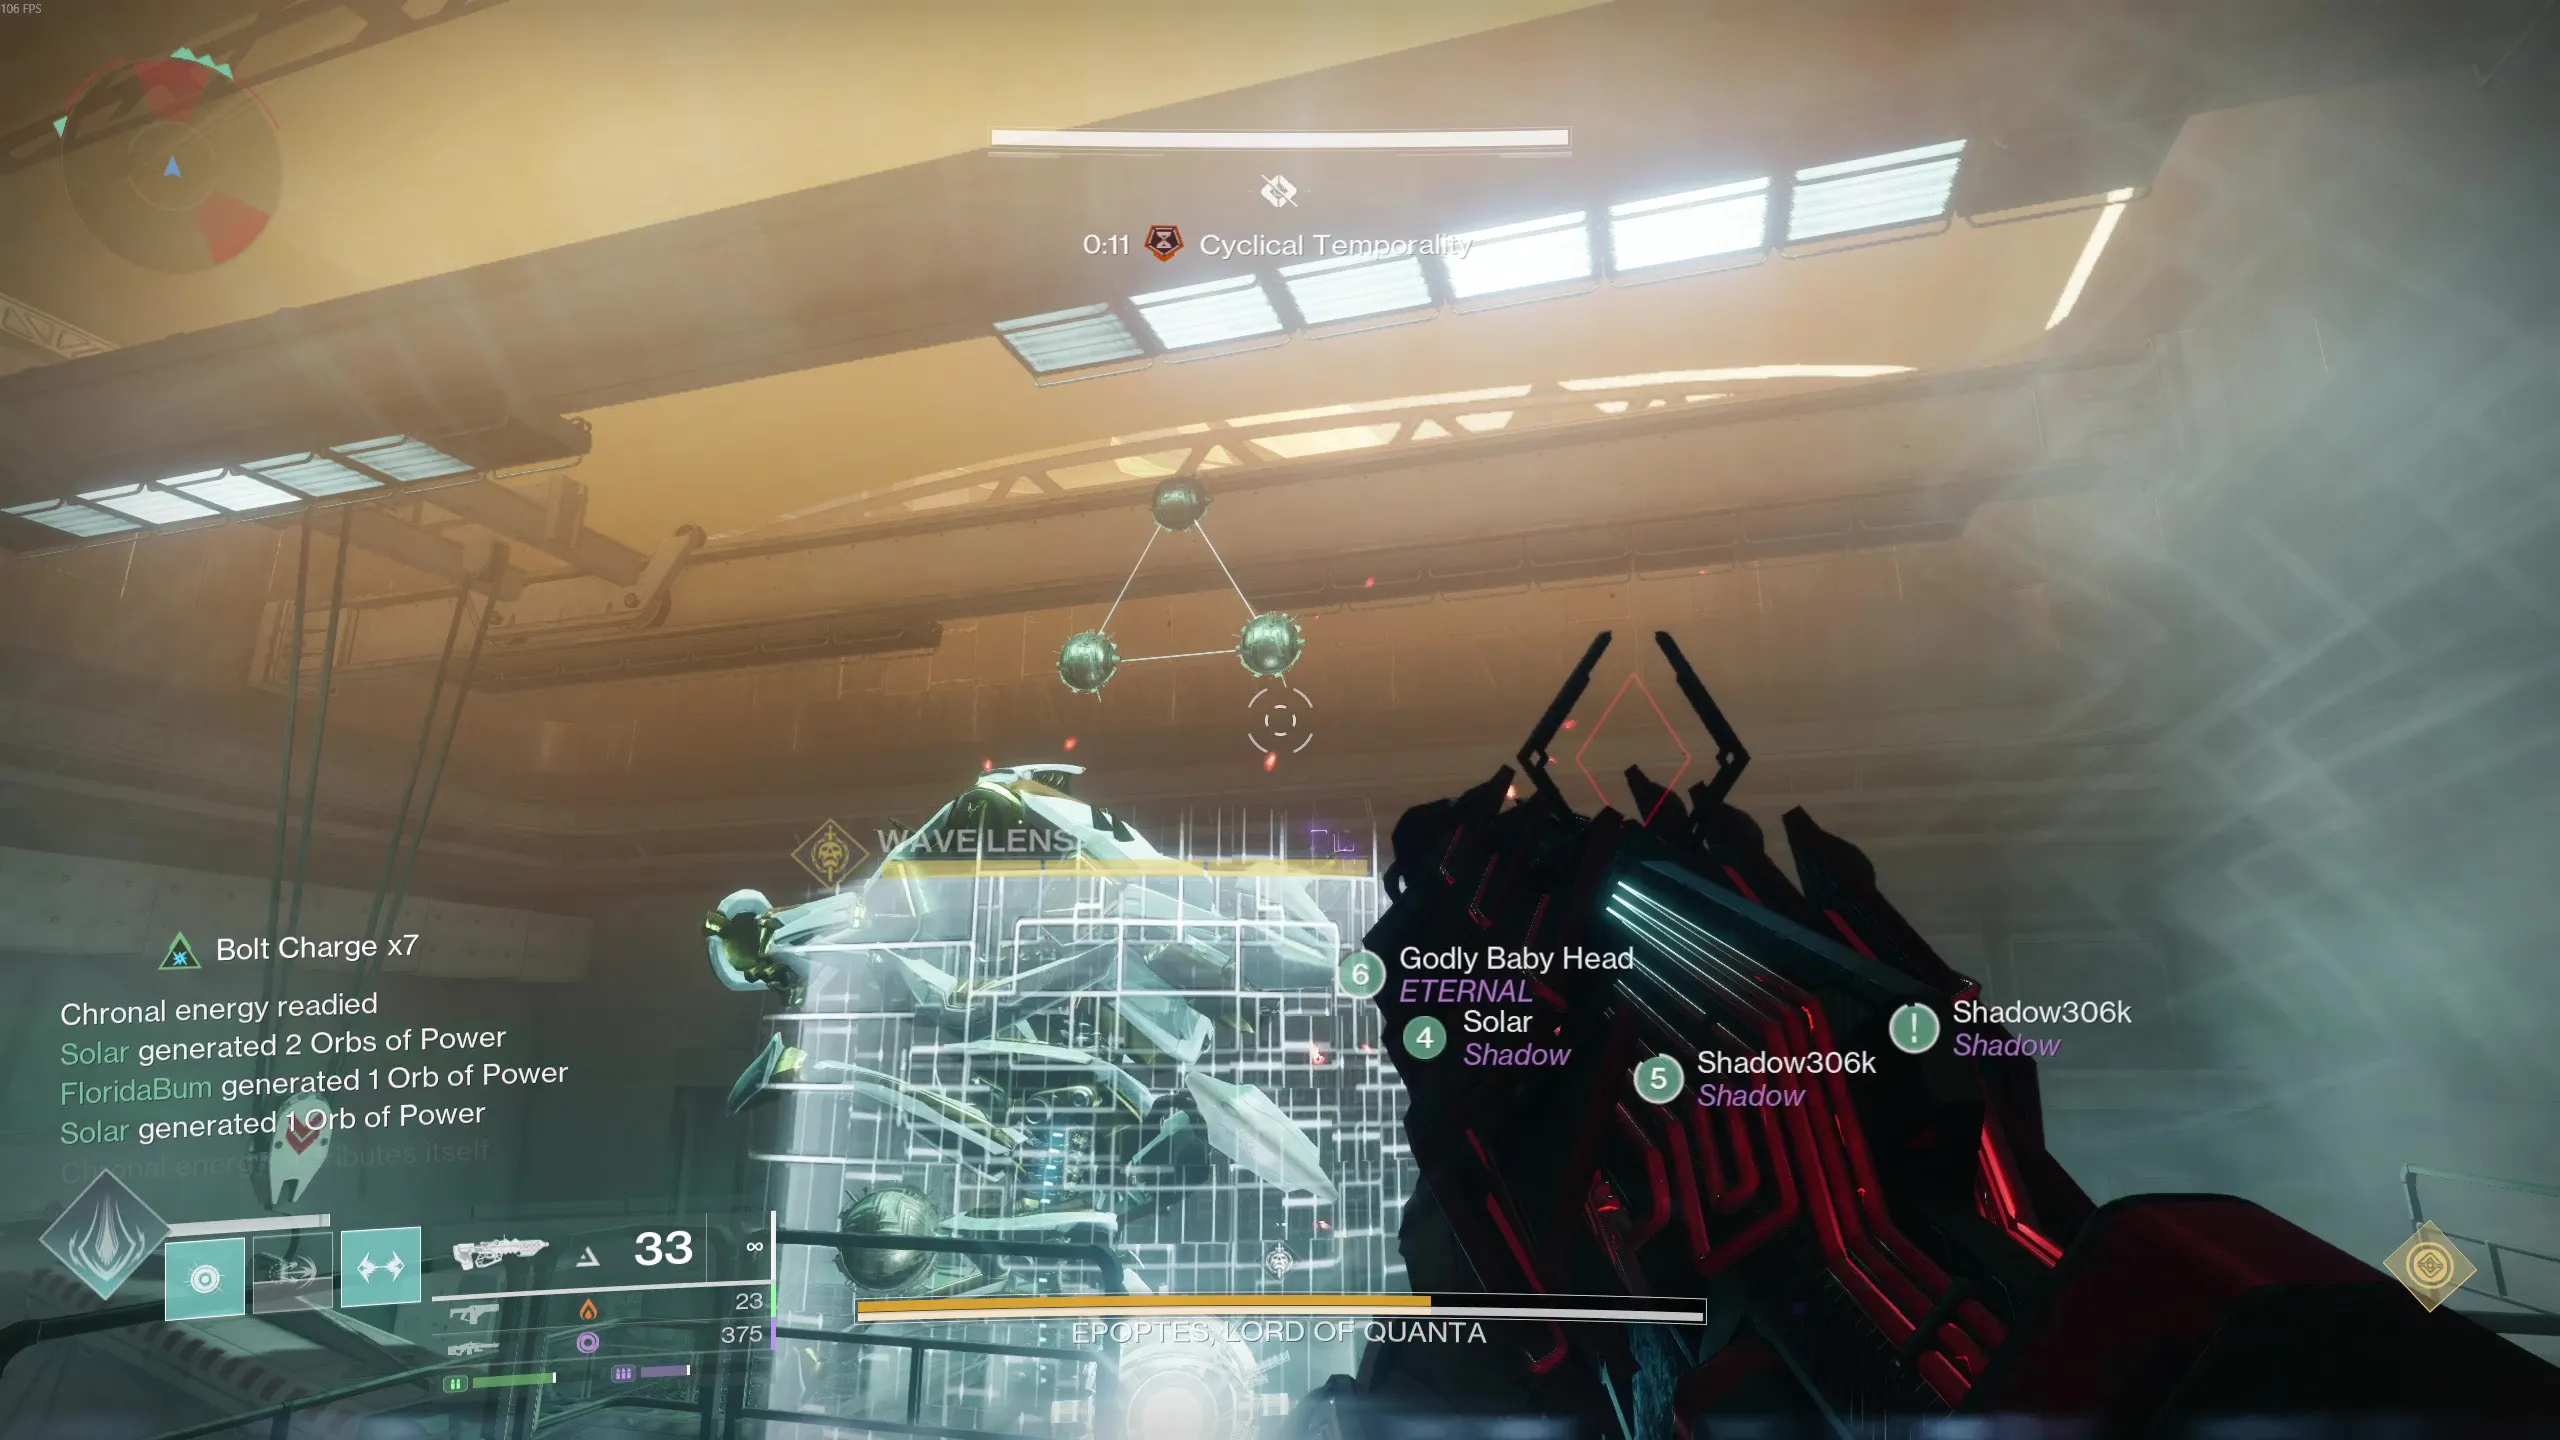 The three orbs above the Hydra. The outside player will call
which one to shoot.
The three orbs above the Hydra. The outside player will call
which one to shoot.
When this sequence ends, the inside players must pick up their Temporality buffs again and return inside to complete the lens-breaking and diamond-reading process. Finishing this grants them the Probabilistic Lancet buff, which lets them shatter Epoptes's shield by destroying the central lens on his body in the main arena to trigger the DPS phase.
DPS Phase
Epoptes will 'pull players through time' three times during DPS. This mechanic is identical to what the inside players had to do, but without the reading and calling. Two players are chosen at random each time and will receive a random Temporality buff and the Probabilistic Lancet buff after you are 'pulled through time.' You will need to run to the half of the Hydra's shield, where you can destroy the spawning lenses by standing in the beam of light and destroying them. The lenses don't spawn immediately, so you have some time, but don't linger too long because you will lose a phase of damage if you don't destroy the lenses in time. After shooting the lenses, return to damaging the boss. Keep repeating this process until the boss goes immune.
To defeat Epoptes, you'll probably need to complete this whole rotation at least twice. Repeat the steps until you have defeated the boss.
Challenge Mode:
In each eye room, the two assigned players must alternate shooting the Hydra's eyes.
Points to Note:
- Alternation applies only to the six shield eyes inside the room.
- The wipe eye and anything outside the room are not part of the challenge requirement.
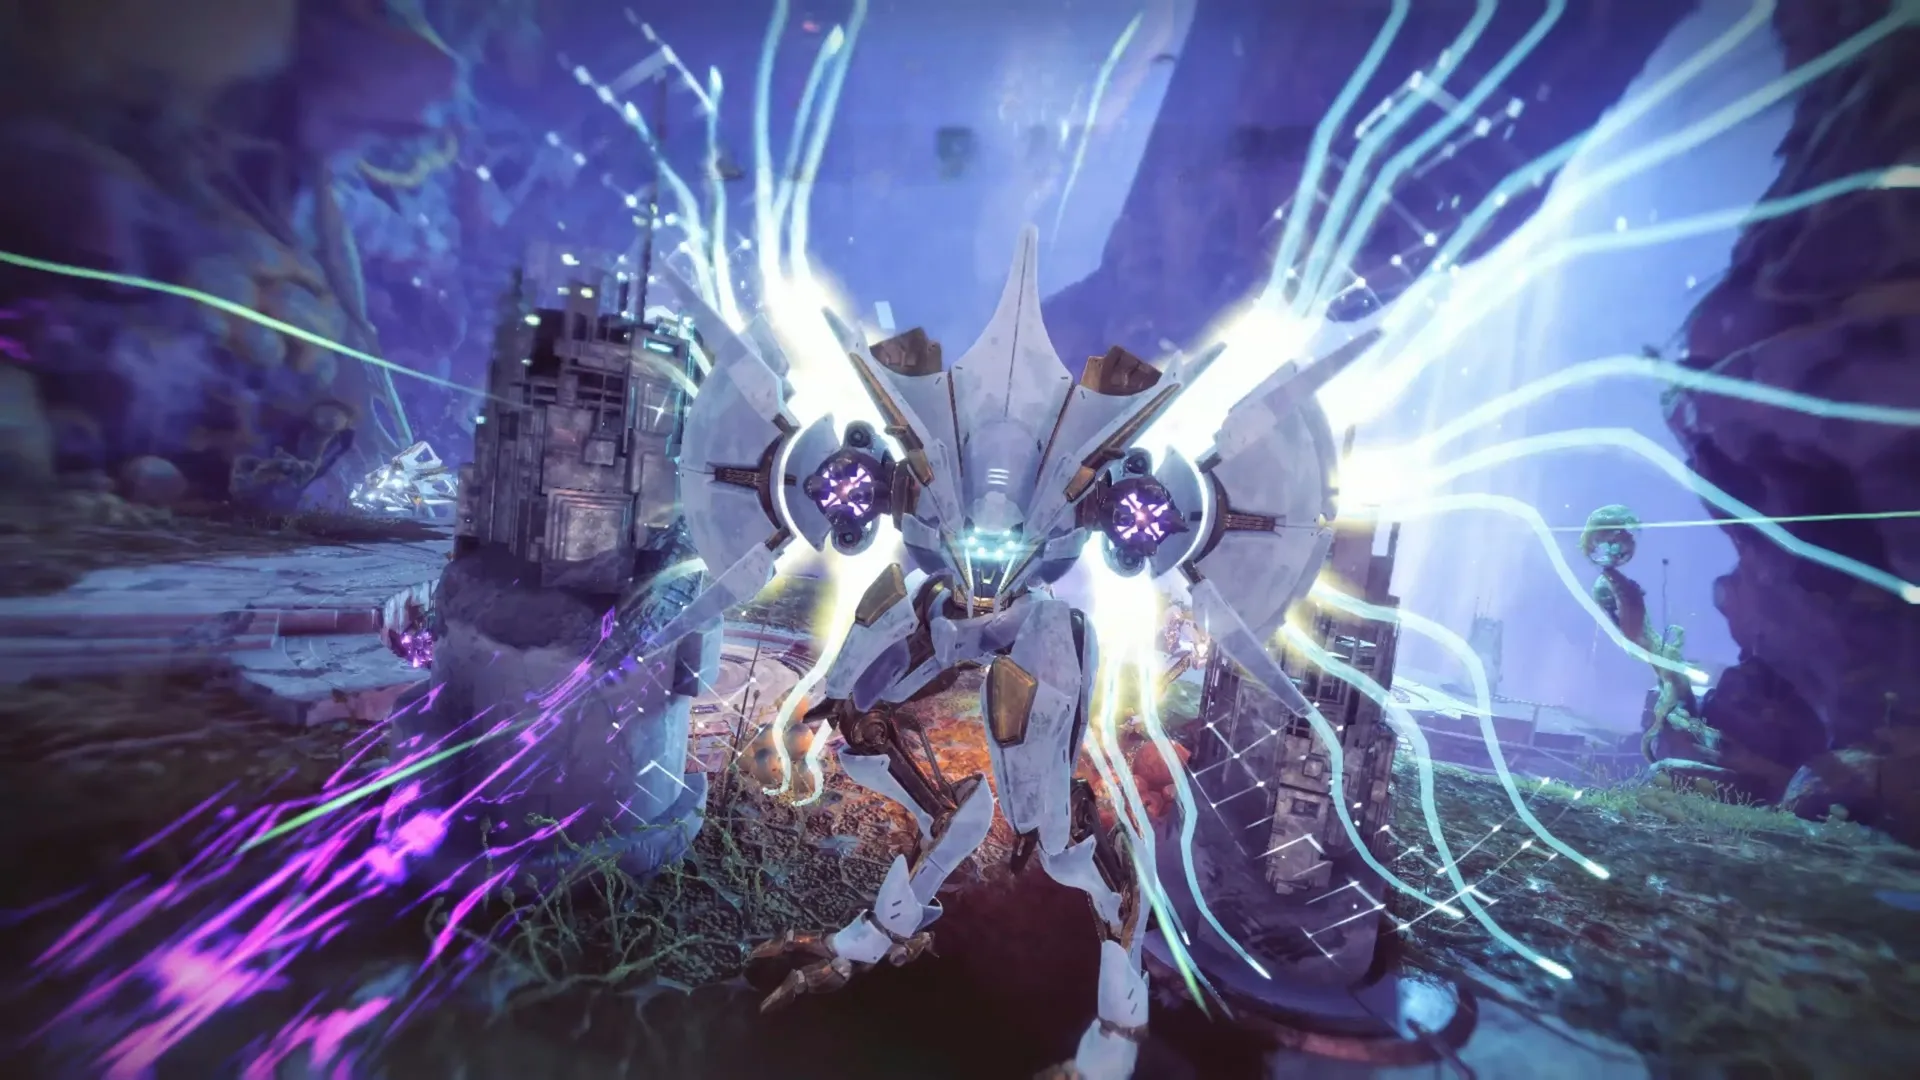
Iatros, Inward-Turned
The ChambersRecommended Loadouts:
- Titans: Thundercrash + Cuirass of the Falling Star (More the merrier!).
- Warlock: Well of Radiance + Lunafaction Boots // Song of Flame + Sanguine Alchemy (Run Sanguine Alchemy if you are using a solar weapon for DPS).
- Hunter: Blade Barrage + Shards of Galanor // Tether.
Roles:
- 3 x Builders (Box Shooters).
- 2 x Chronon Collectors.
- 1 x Climber.
Recommended Weapons:
- Prospector Heavy Grenade Launcher // Truth Rocket Launcher.
- A Song of Flame warlock can run Tractor Cannon and keep igniting the boss so that it doesn't move too much.
- Climbers will have to deal with imp swarms while climbing up the platforms. Rocket pulses/ Rocket sidearms can be used to kill them very fast.
- Other ad-clear weapons to kill ads.
Iatros is a more straightforward encounter, placing greater emphasis on survivability and accuracy rather than complex mechanics. The encounter takes place in a smaller arena with a high concentration of enemies, while the boss itself is a Wyvern. Reaching the DPS phase ultimately comes down to maintaining efficient add clear, managing the encounter mechanics quickly, and minimizing unnecessary delays.
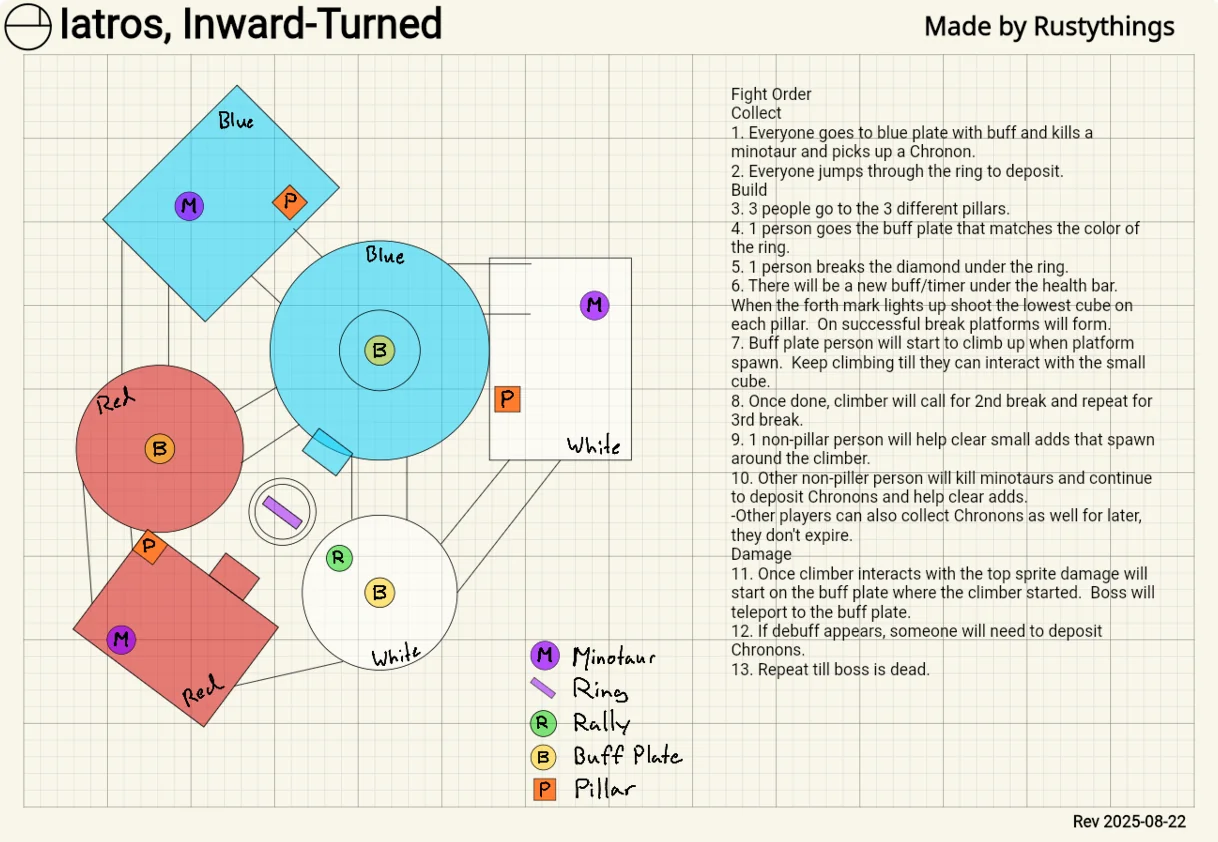
Chronon Phase
To begin the encounter, move into the central area where the boss is located. Shortly afterward, six Minotaurs will spawn in the middle of the arena. Defeating them causes them to drop Chronons. Ideally, each player should pick up one Chronon and then jump through the ring to deposit it. Be careful when entering the ring, as players jumping from opposite sides can easily collide with one another. Once all six Chronons have been deposited, the hourglass beneath the ring will become full and a Vex diamond will appear below it. Destroying the Vex diamond begins the Diastole phase.
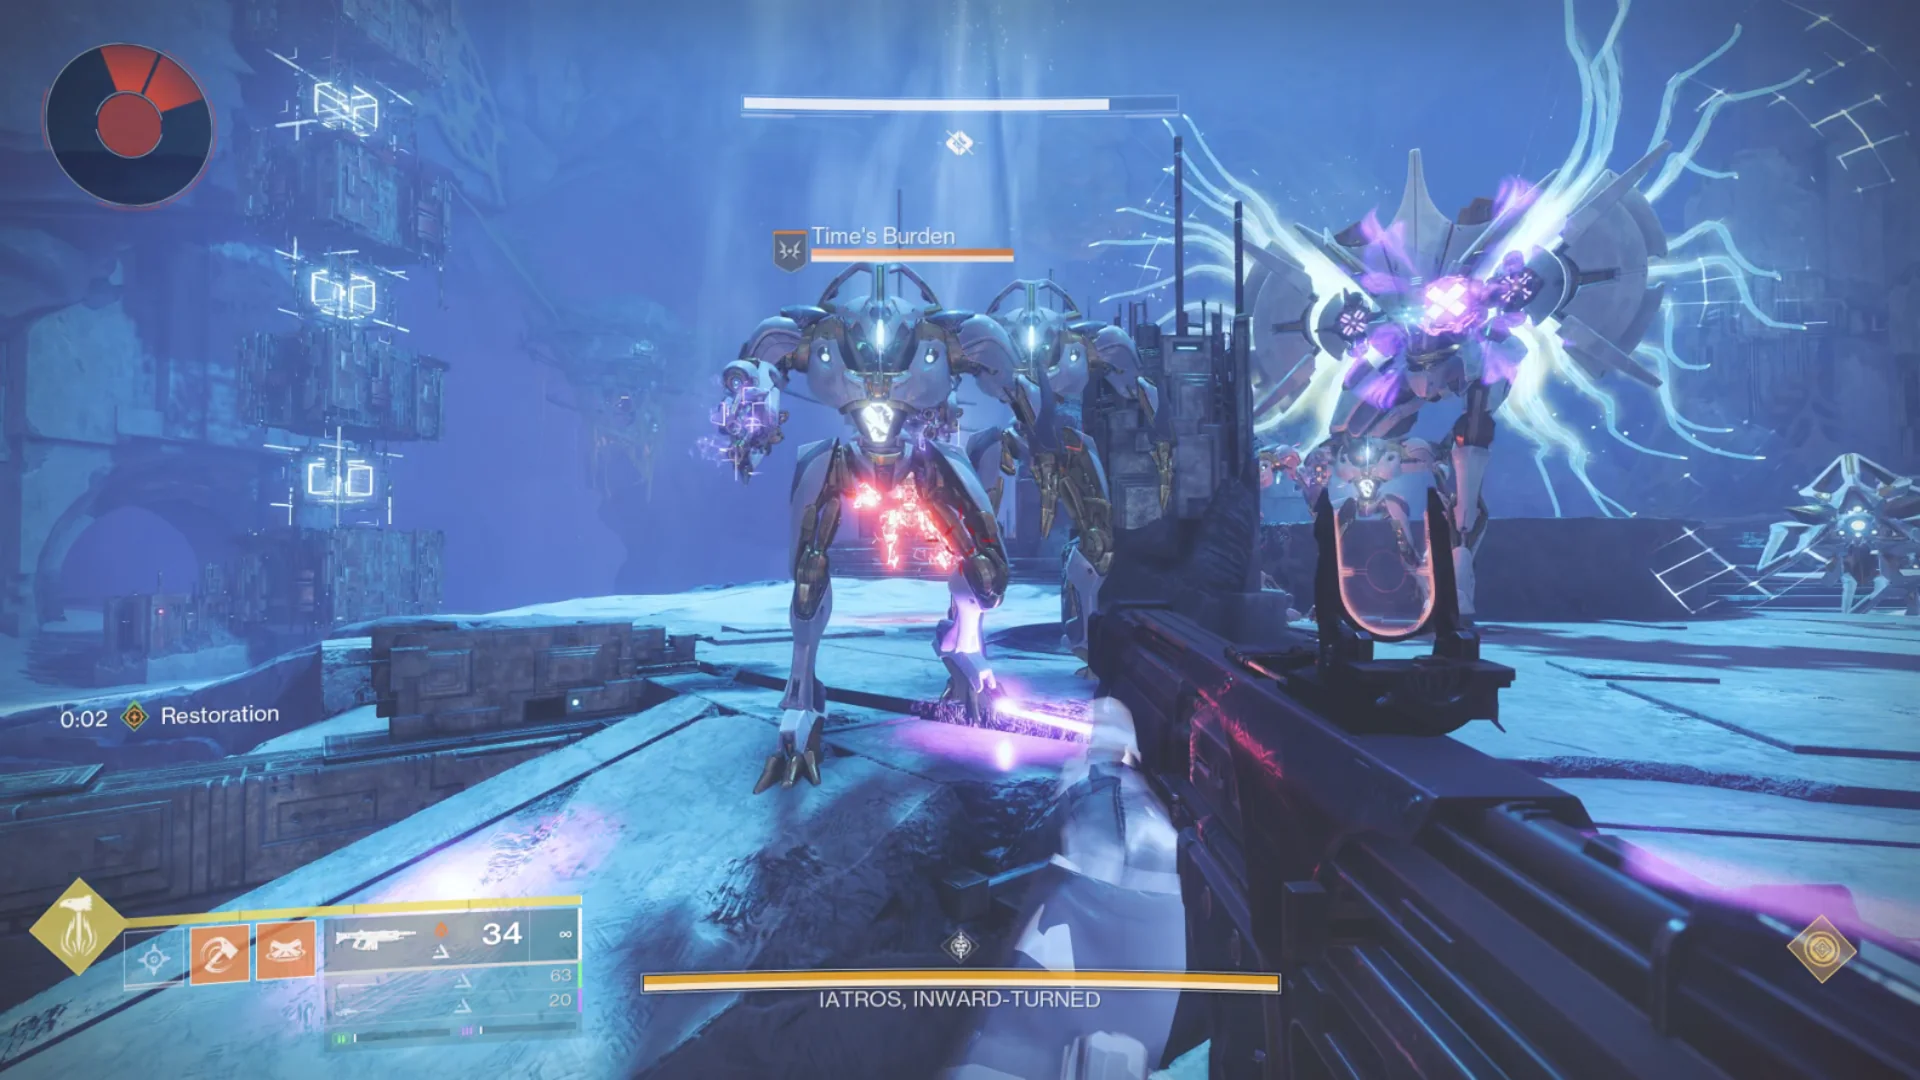 Time's Burden are the minotaurs that spawn throughout this
encounter.
Time's Burden are the minotaurs that spawn throughout this
encounter.
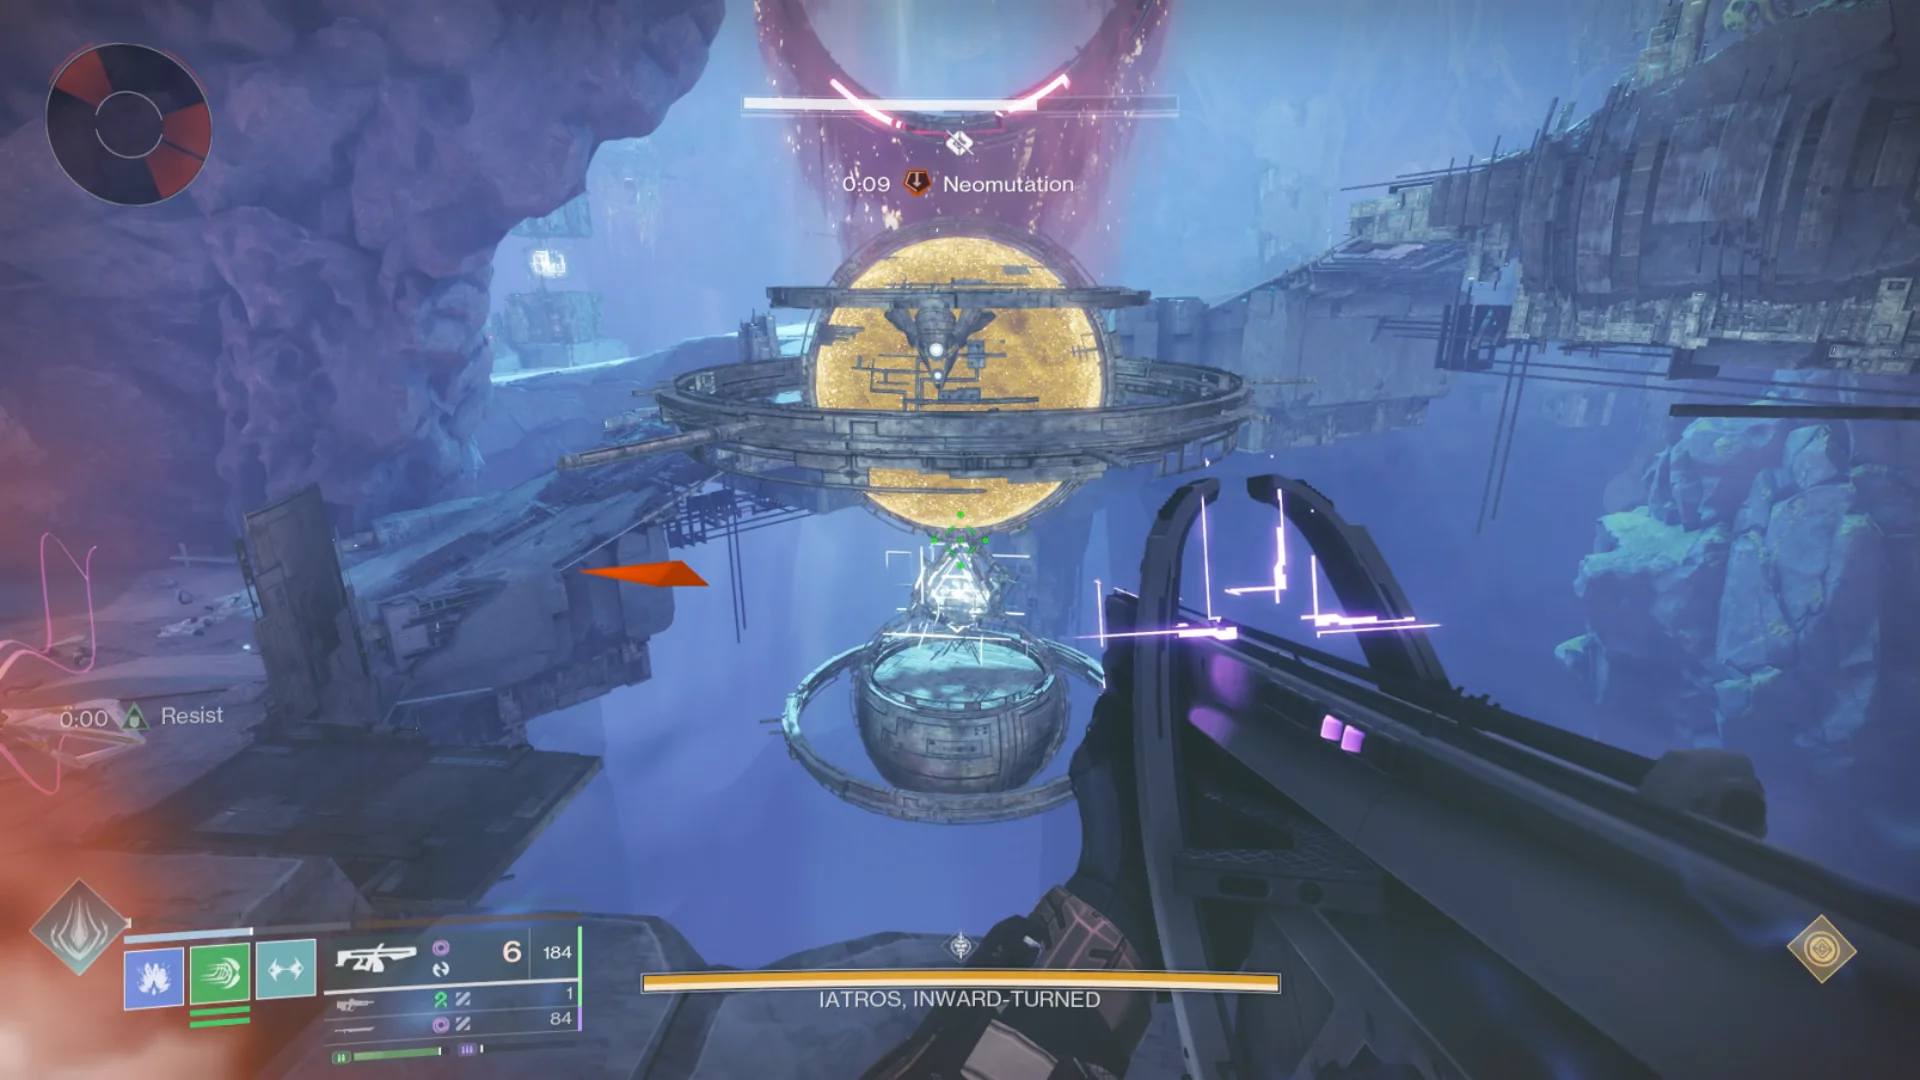 Destroying the Vex diamond below the hourglass will trigger the
next phase.
Destroying the Vex diamond below the hourglass will trigger the
next phase.
Diastole Phase - Builders (Box Shooters)
During the Diastole phase, the three players assigned to Tower/Box Shooter duty should move to their respective towers. The objective is to shoot the boxes at the correct time to create platforms for the Climber. The first rotation begins with the bottom box. It is recommended that each Box Shooter chooses their tower before the encounter begins to avoid confusion.
During Diastole, everyone will receive a Diastole buff at the top of their screen, accompanied by four boxes. These boxes gradually fill. The Box Shooters must fire their assigned boxes when the fourth box becomes full. When this happens, all players on the ground are launched upward. If you are already airborne when the fourth box fills, you can avoid the launch by timing your jump accordingly.
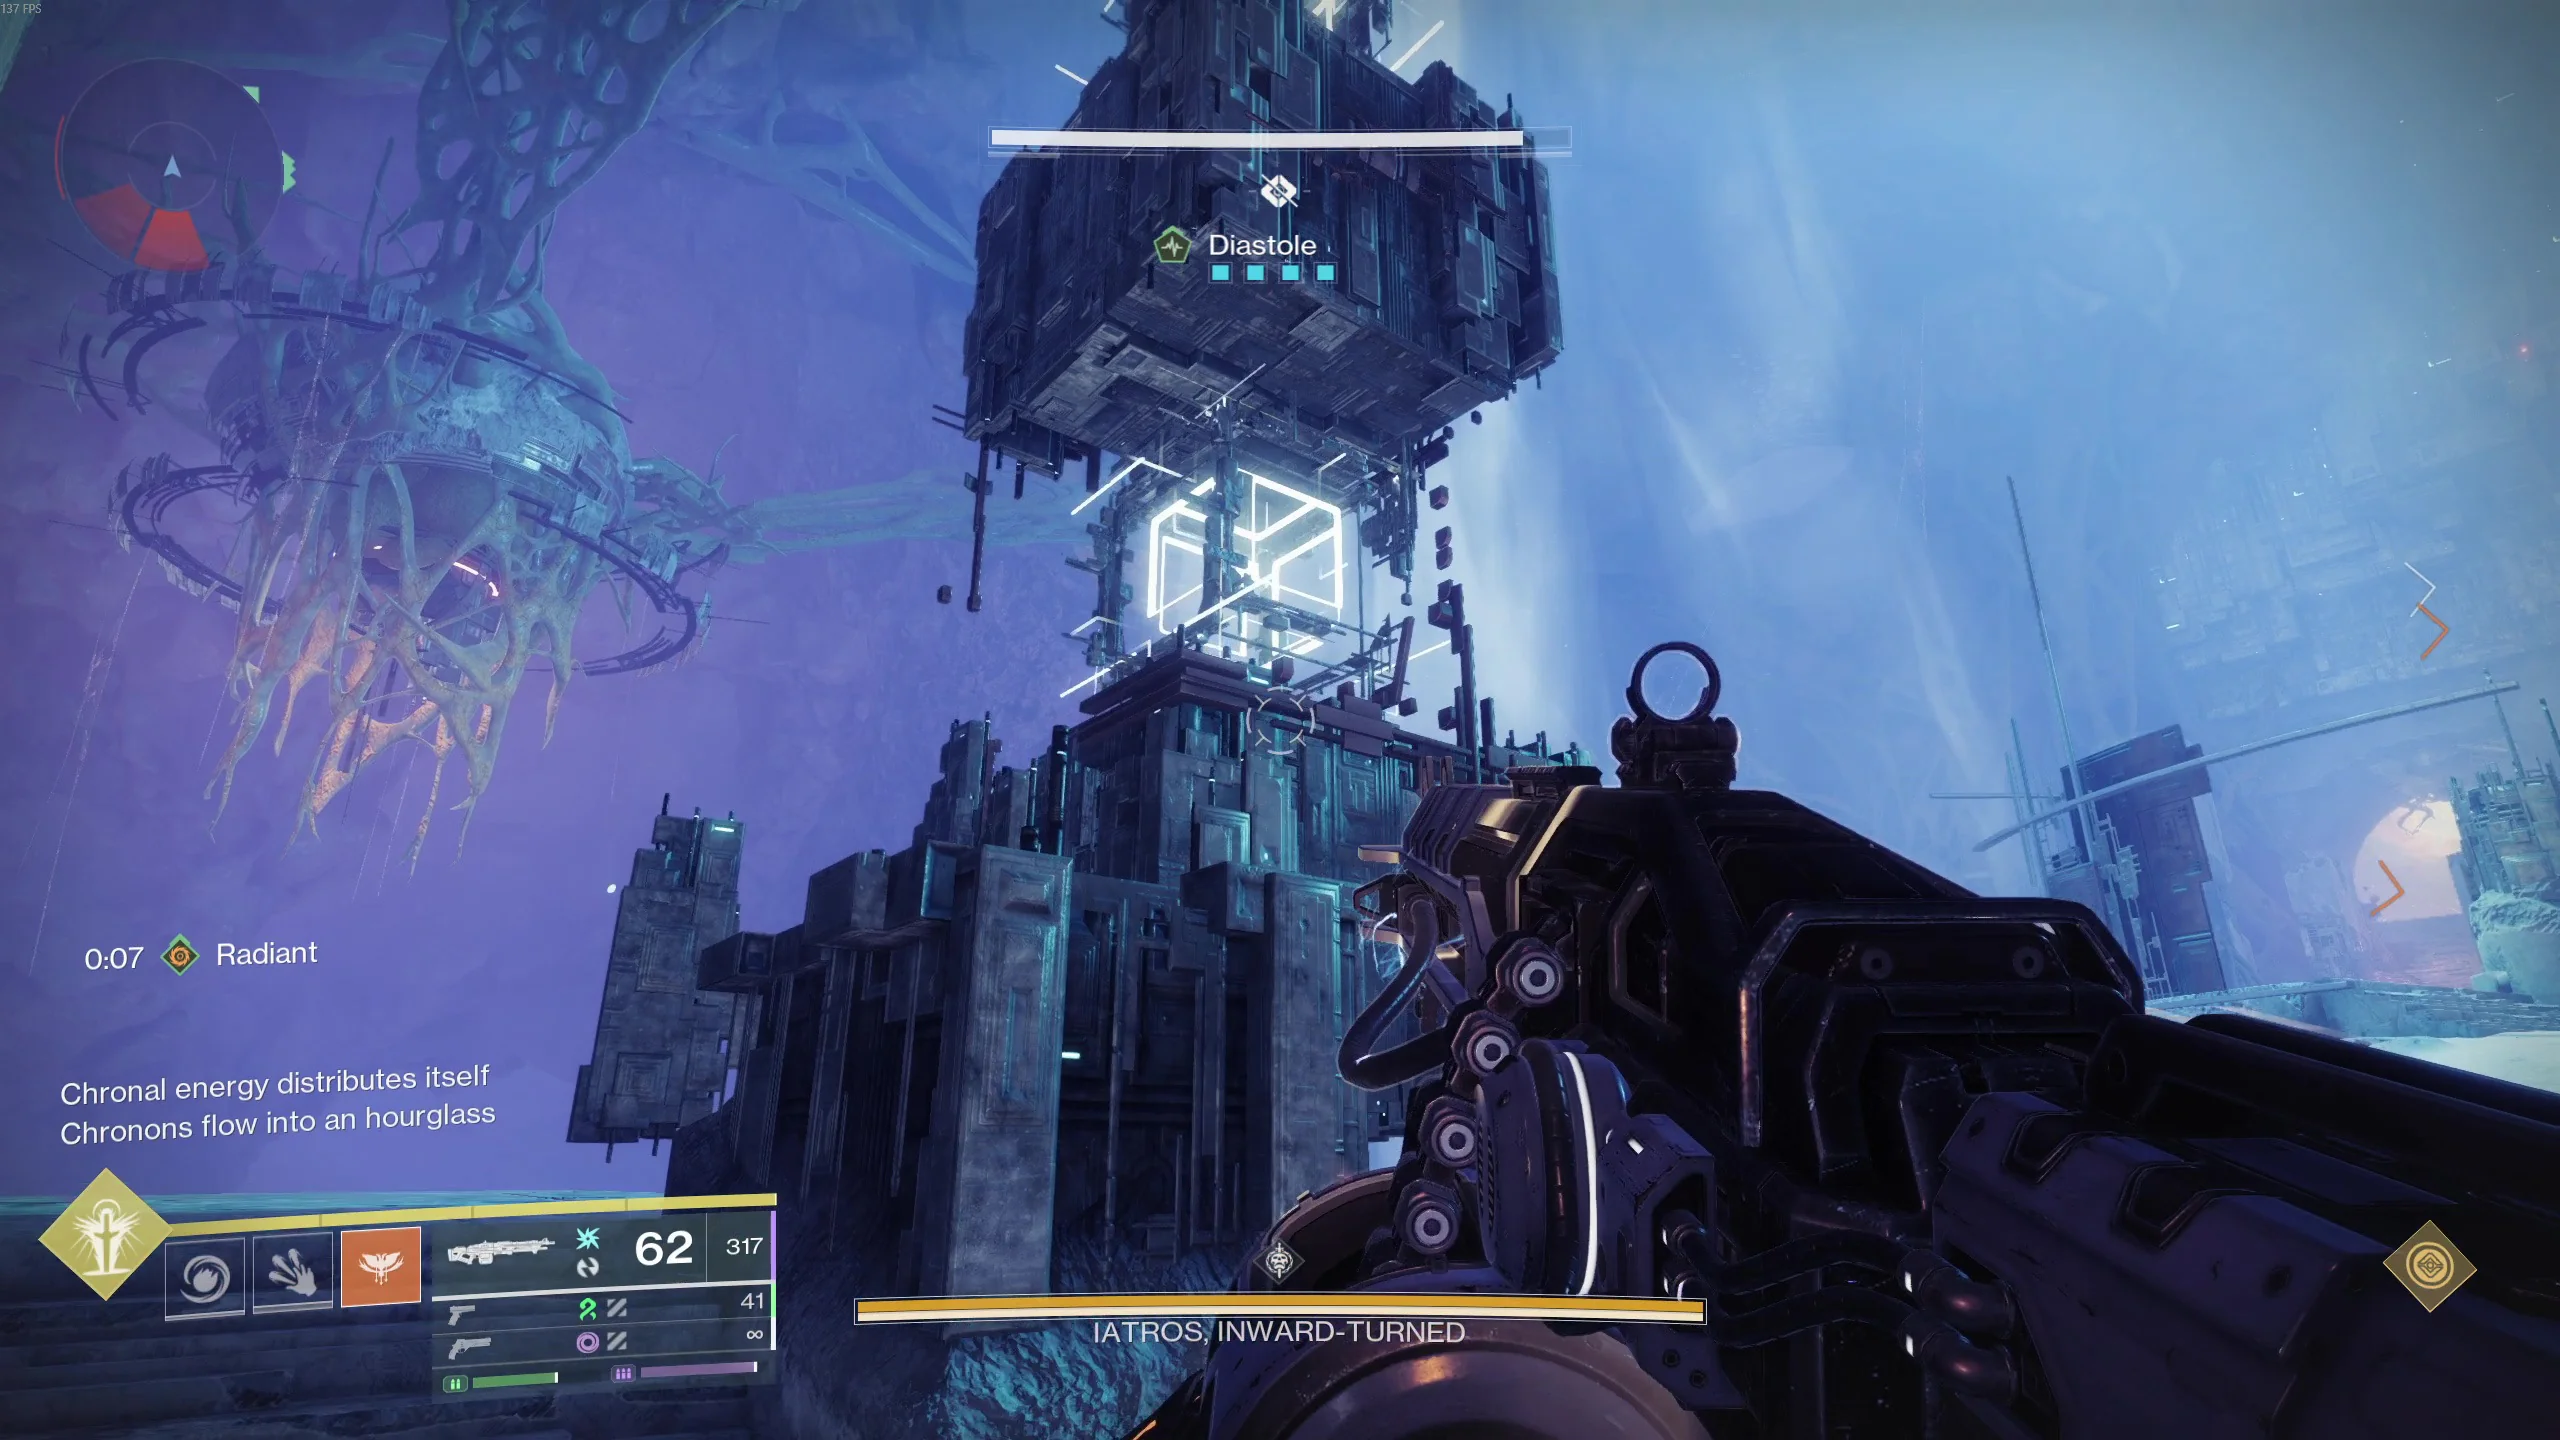
If all three Box Shooters fire their boxes correctly, the message: “Iatros loses control of phase space” will appear above the Super bar.
If the timing is incorrect, the message: “Chronons dissipate with instability” will appear instead.
Every time “Chronons dissipate with instability” appears, two Chronons are drained from the hourglass. The Box Shooters should wait for the Climber's callouts before progressing:
- First rotation: Shoot the bottom boxes.
- Second rotation: Wait for the Climber's callout, then shoot the middle boxes.
- Third rotation: On the final callout, shoot the top boxes.
Once the required platforms have been created, move toward the activated Vex plate and the area where the platforms spawned.
Neomutation
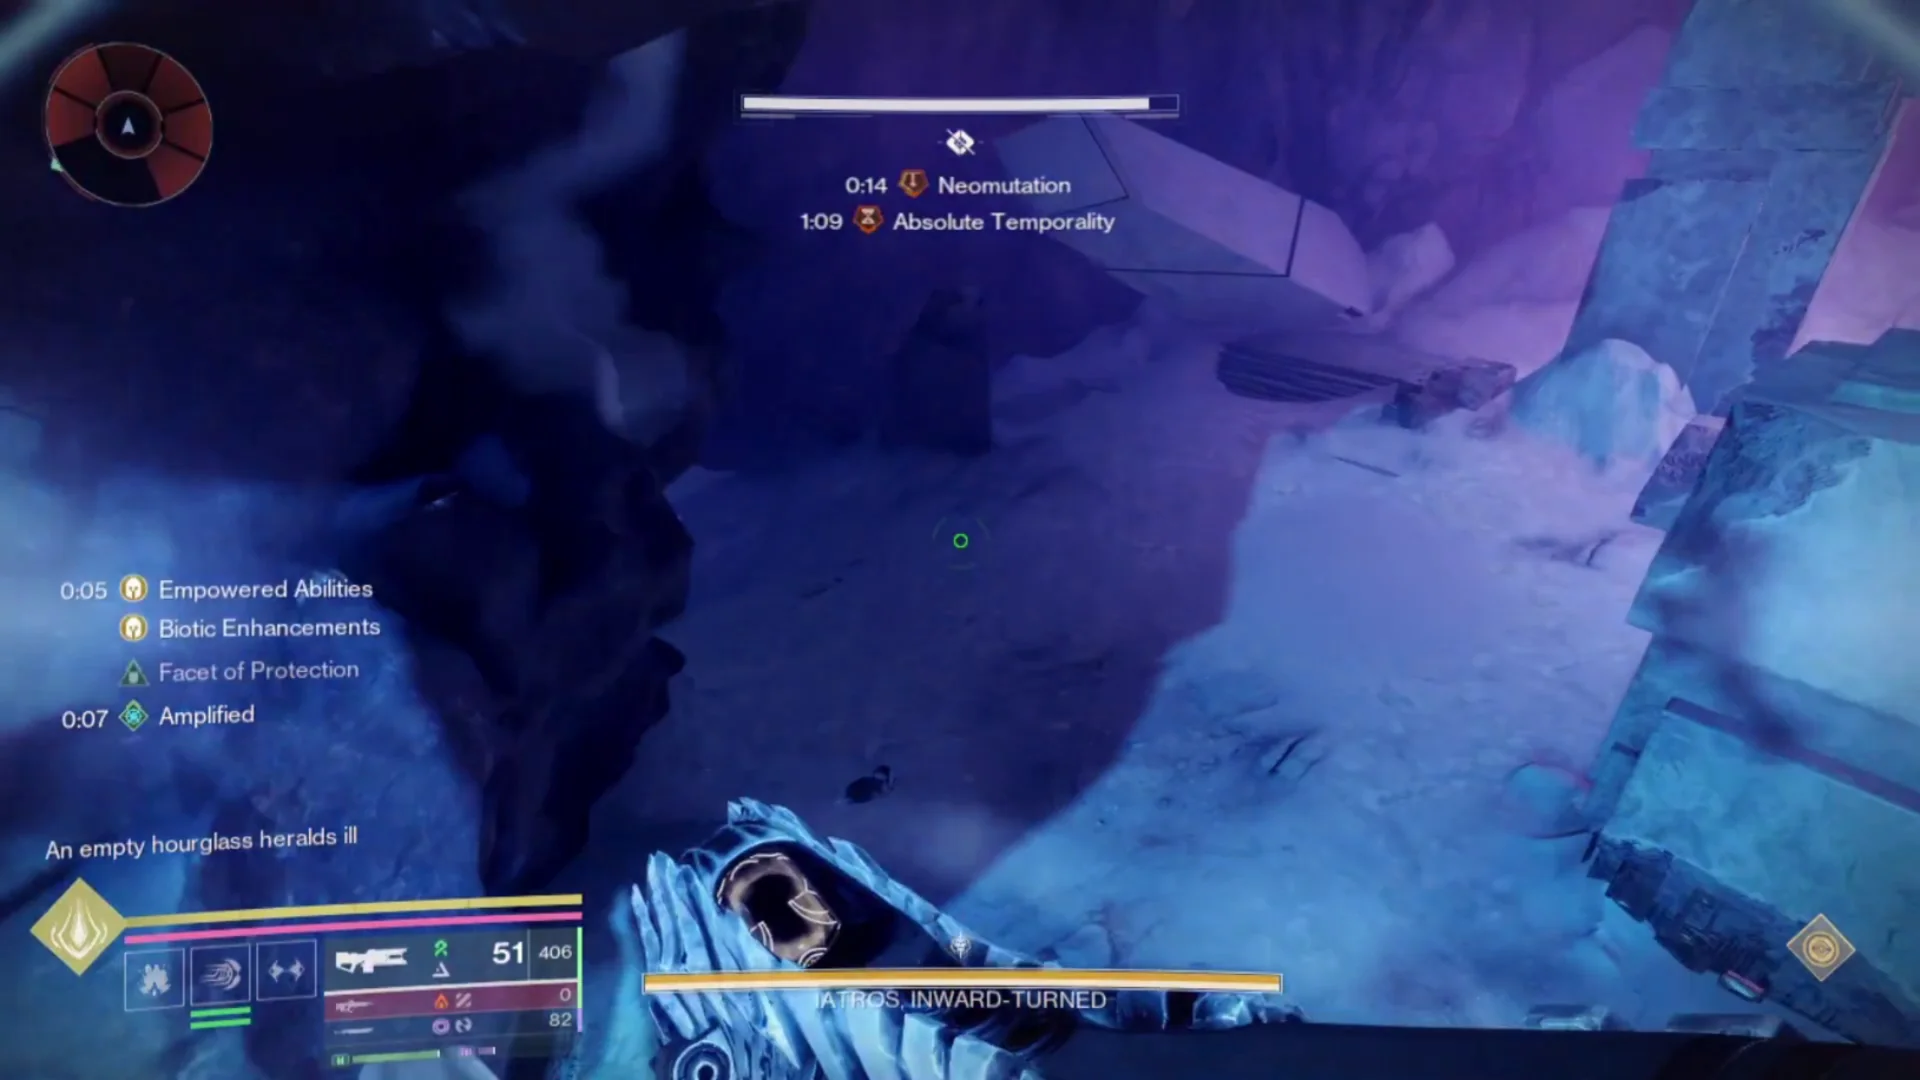
If the hourglass becomes empty, a Neomutation timer will appear at the top of the screen, accompanied by the message:
“An empty hourglass heralds ill”
The fireteam must deposit Chronons into the hourglass before the Neomutation timer reaches zero. Failure to do so results in a wipe. The Chronon Collectors are responsible for killing Minotaurs throughout the arena and depositing the Chronons they drop into the central ring. Minotaurs generally spawn around the boss or in the area toward which the boss is moving. Other players should call out any Minotaurs they spot on their side of the arena.
Diastole Phase - Climber
While the other players handle the boxes, the Climber's objective is to travel to the appropriate Vex plate based on the color of the ring.
| Ring Color | Vex Plate Location |
|---|---|
| Red | Bottom Left |
| White | Spawn |
| Blue | Middle |
Standing on the Vex plate grants the Absolute Temporality buff. This buff is required to activate the Vex node later in the encounter. Once you reach the correct Vex plate, call out to the Box Shooters to begin the next Diastole rotation. When all three boxes are successfully shot, another set of platforms will appear above you. The highest platform contains a Vex node that must be activated. You cannot activate the Vex node without the Temporality buff from the Vex plate.
After activating the node, call out to the Box Shooters to begin the next Diastole rotation. When "Iatros loses control of phase space" appears, immediately jump onto the next set of platforms. The previous set will disappear shortly afterward. Repeat this process until you reach the top of the third platform set. Activating the Vex node at the top will begin the damage phase.
Important Climber Notes:
- If you fall, the Box Shooters must restart from the bottom box and rebuild the platforms.
- Taking damage can interrupt the Vex node activation.
- Clear the Imp swarms before attempting to activate the node. Rocket Pulses are your best friend for this.
- Barricades or Invisibility are your best friends to prevent interruptions while activating the node.
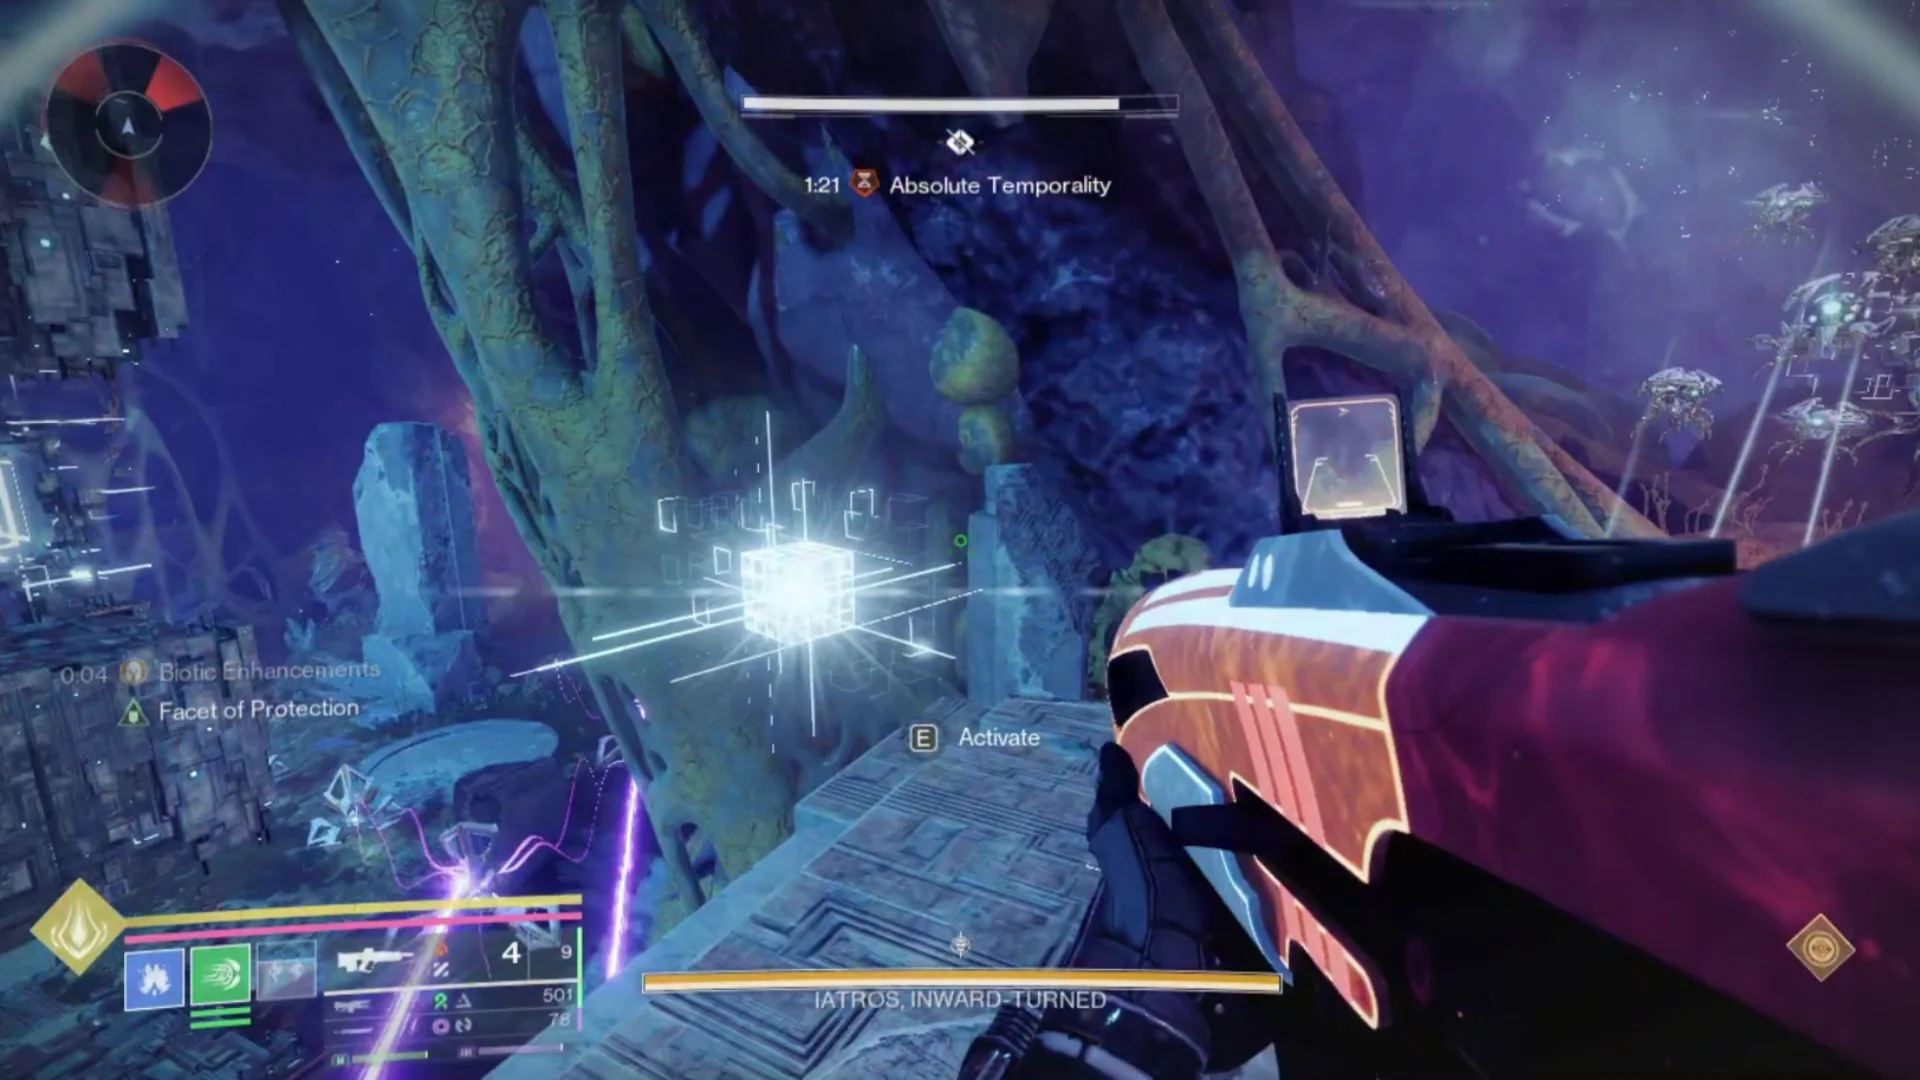 This is what the node looks like along with the activate prompt
that appears if you have the buff.
This is what the node looks like along with the activate prompt
that appears if you have the buff.
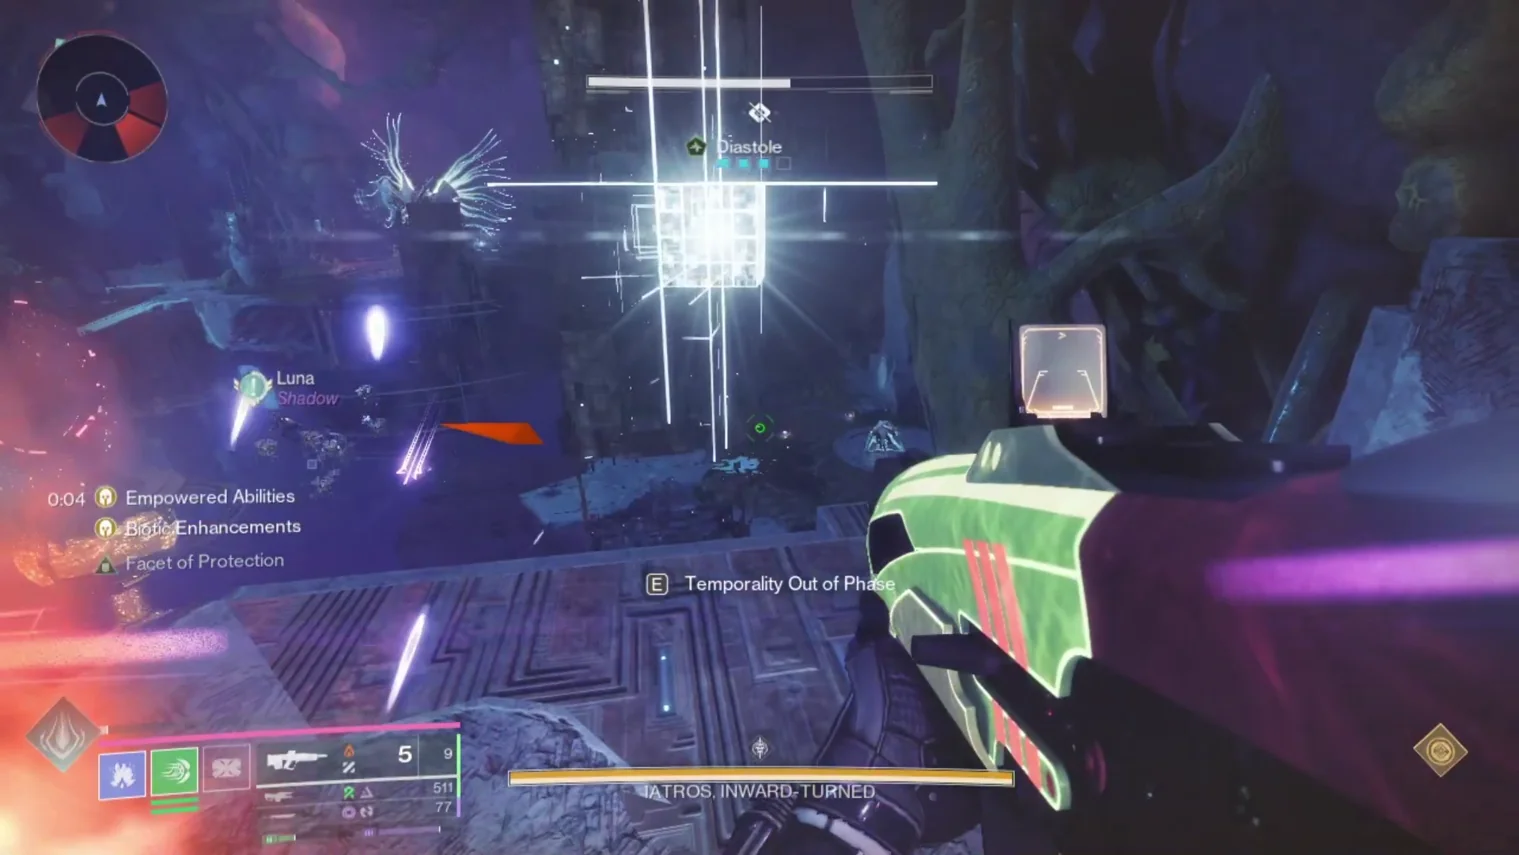 This is what you see if you don't have the buff.
DPS Phase
The boss will spawn on the activated Vex plate where the platforms spawned and will be vulnerable to damage, lay waste on it.
- If the boss spawns on Bottom Left or Spawn, it will slowly move toward the middle.
- If the boss spawns on the Middle plate, it will move toward Spawn.
If the fireteam manages the Chronons effectively throughout the encounter, there should be no need to deal with Neomutation during DPS. If the hourglass is running low, one player may need to continue depositing Chronons during the damage phase. The Neomutation timer disappears automatically when DPS ends.
Challenge Mode:
A different player must pick up each buff while climbing the platforms.
Points to Note:
- There are 3 buffs to collect. Assign 3 players to climb the platform.
- At each stage: one player grabs the buff, then leaves to help with Minotaurs or banking; the next player continues up for the following buff. Continue until DPS Phase begins.
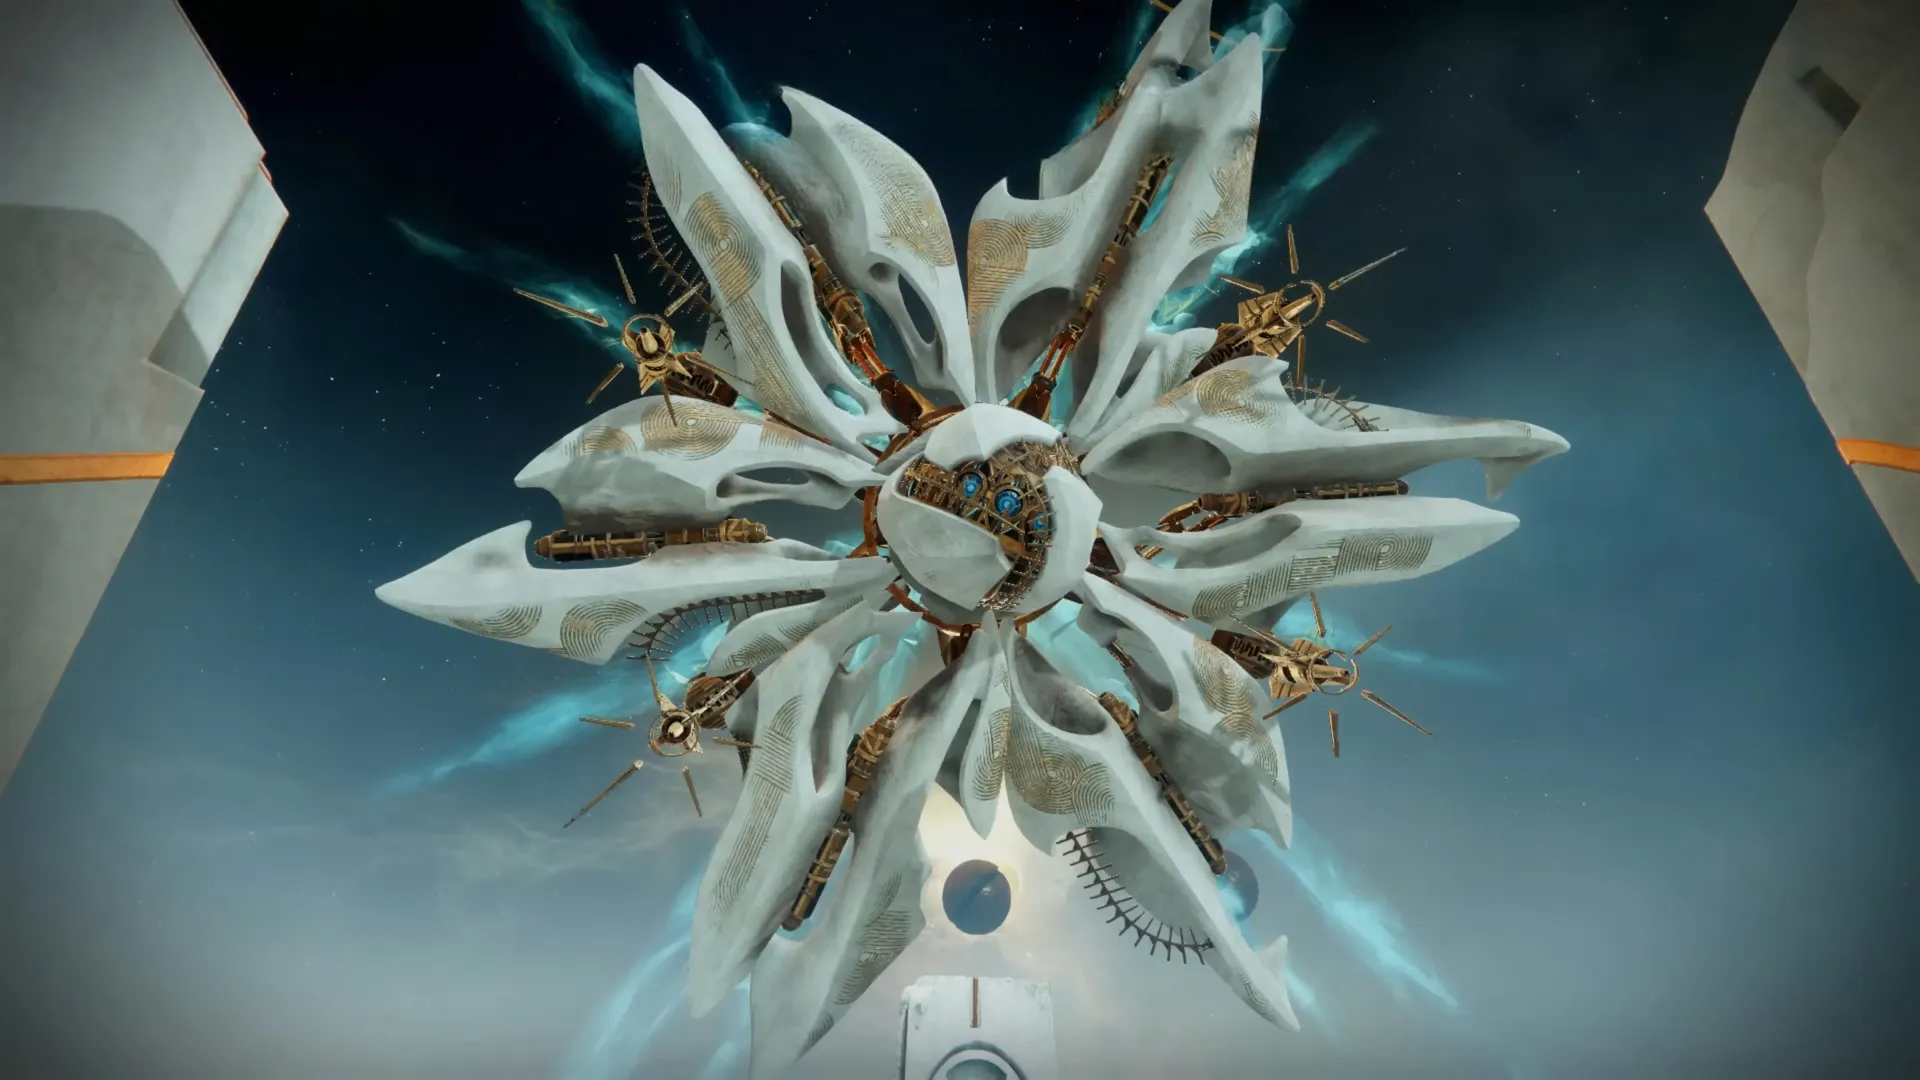
Koregos, The Worldline
The NurseryRecommended Loadouts:
- Titans: Thundercrash + Cuirass of the Falling Star (More the merrier!) // Bolt Charge.
- Do not use Glacial Quake for this encounter, as it is ineffective against the boss.
- Warlock: Well of Radiance + Boots of the Assembler / Song of Flame + Sanguine Alchemy (Run Sanguine Alchemy if you are using a solar weapon for DPS).
- Hunter: Blade Barrage + Shards of Galanor. Alternatively, Golden Gun + Celestial Nighthawk.
- The 4x Vault of Glass armor set bonus can help the fireteam generate enough Super energy to approach or potentially gain a second Super during the encounter.
- Pairing the set bonus with an Attrition Orbs Wolfsbane can generate a significant number of Orbs during the DPS phase.
Recommended Weapons:
A variety of weapons are effective against this boss, including:
- Wolfsbane
- 1,000 Voices - One player can run this to debuff with Particle Reconstruction artifact mod.
- Queensbreaker - Good for Titan Bolt Charge builds.
- Tractor Cannon - For debuffing.
- The Warlock can deploy Well of Radiance and use Tractor Cannon to debuff the boss while focusing on extending the DPS phase.
- Players assigned to boss-stunning duty should use Sniper Rifles or Rocket Pulses to destroy the boss's four critical spots. Avoid using primary-ammo weapons for this task, as they take significantly longer to break the critical spots.
Roles:
- 3x Constant Temporality Players (Left Plate)
- 2x Boss Stunners
- 1x Temporal Oculus Player
- 2x Cyclical Temporality Players (Right Plate)
- 1x Absolute Temporality Player (Middle Plate)
Interact with the Vex node in the center of the boss arena to begin the encounter. Once the encounter starts, immediately move to your assigned plate. You will receive a “Digitization” debuff at the top of your screen. The fireteam must fill the hourglass and destroy the Vex diamond beneath it before the Digitization timer reaches zero. Failure to do so will result in a wipe.
Avoid standing in the center of the arena. As the encounter progresses, the boss will gradually ascend before teleporting. If you are positioned directly in the center when this occurs, you can fall through the opening beneath the boss and die. Once at your assigned plate, eliminate the Hydras that spawn. After they have been defeated, all players must simultaneously step onto their respective plates. Successfully doing so grants each player their assigned Temporality buff.
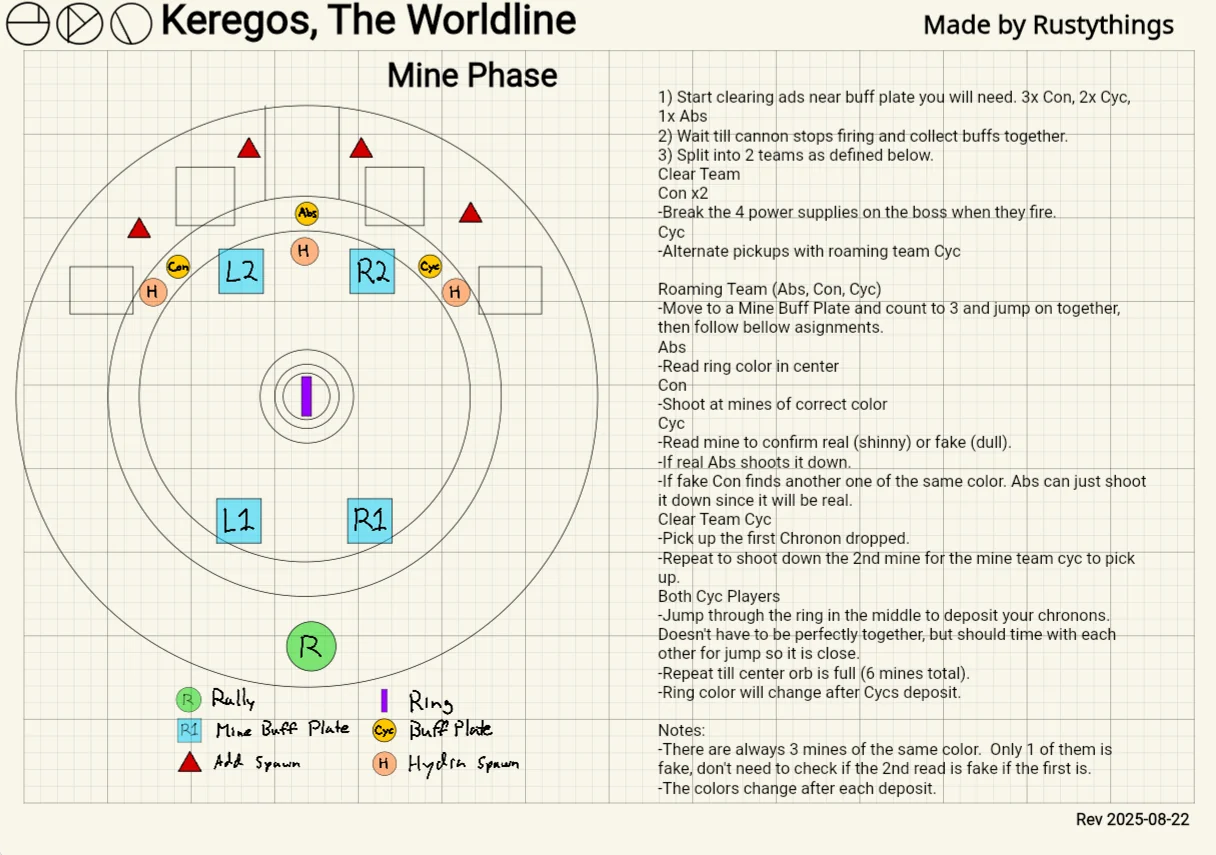
Next, the following four players should group together near one of the pillars with a Vex circle above it (Labeled using L1, L2, R1, R2 in the diagram above):
- 1x Constant Temporality
- 1x Absolute Temporality
- 2x Cyclical Temporality
Once the boss's four critical spots have been destroyed by the Boss Stunners, Vex circles will appear above all four pillars.
All four players should jump onto the same pillar simultaneously. Successfully stepping onto a pillar grants the Temporal Oculus buff, which appears on the left side of the screen and enables several special abilities. The four players do not necessarily have to use the same pillar, but using the same pillar is recommended. Activating a pillar removes its Vex circle, so if the group fails to obtain Temporal Oculus from the first pillar, the remaining three pillars can still be used. If any player fails to receive Temporal Oculus, the entire group can move to another pillar and attempt the mechanic again. The special abilities granted by Temporal Oculus are used to interact with the mines floating throughout the boss arena. We will now break down what each player with each temporality will see and do during the encounter.
Constant Temporality - 3 Players
Two players with Constant Temporality are responsible for stunning Koregos. Whenever the boss begins charging its laser attack, or while the laser is active, shoot all four critical spots to interrupt the attack. Outside of the stun mechanic, these players should focus on clearing enemies.The third Constant Temporality player, who receives Temporal Oculus, has an additional responsibility.
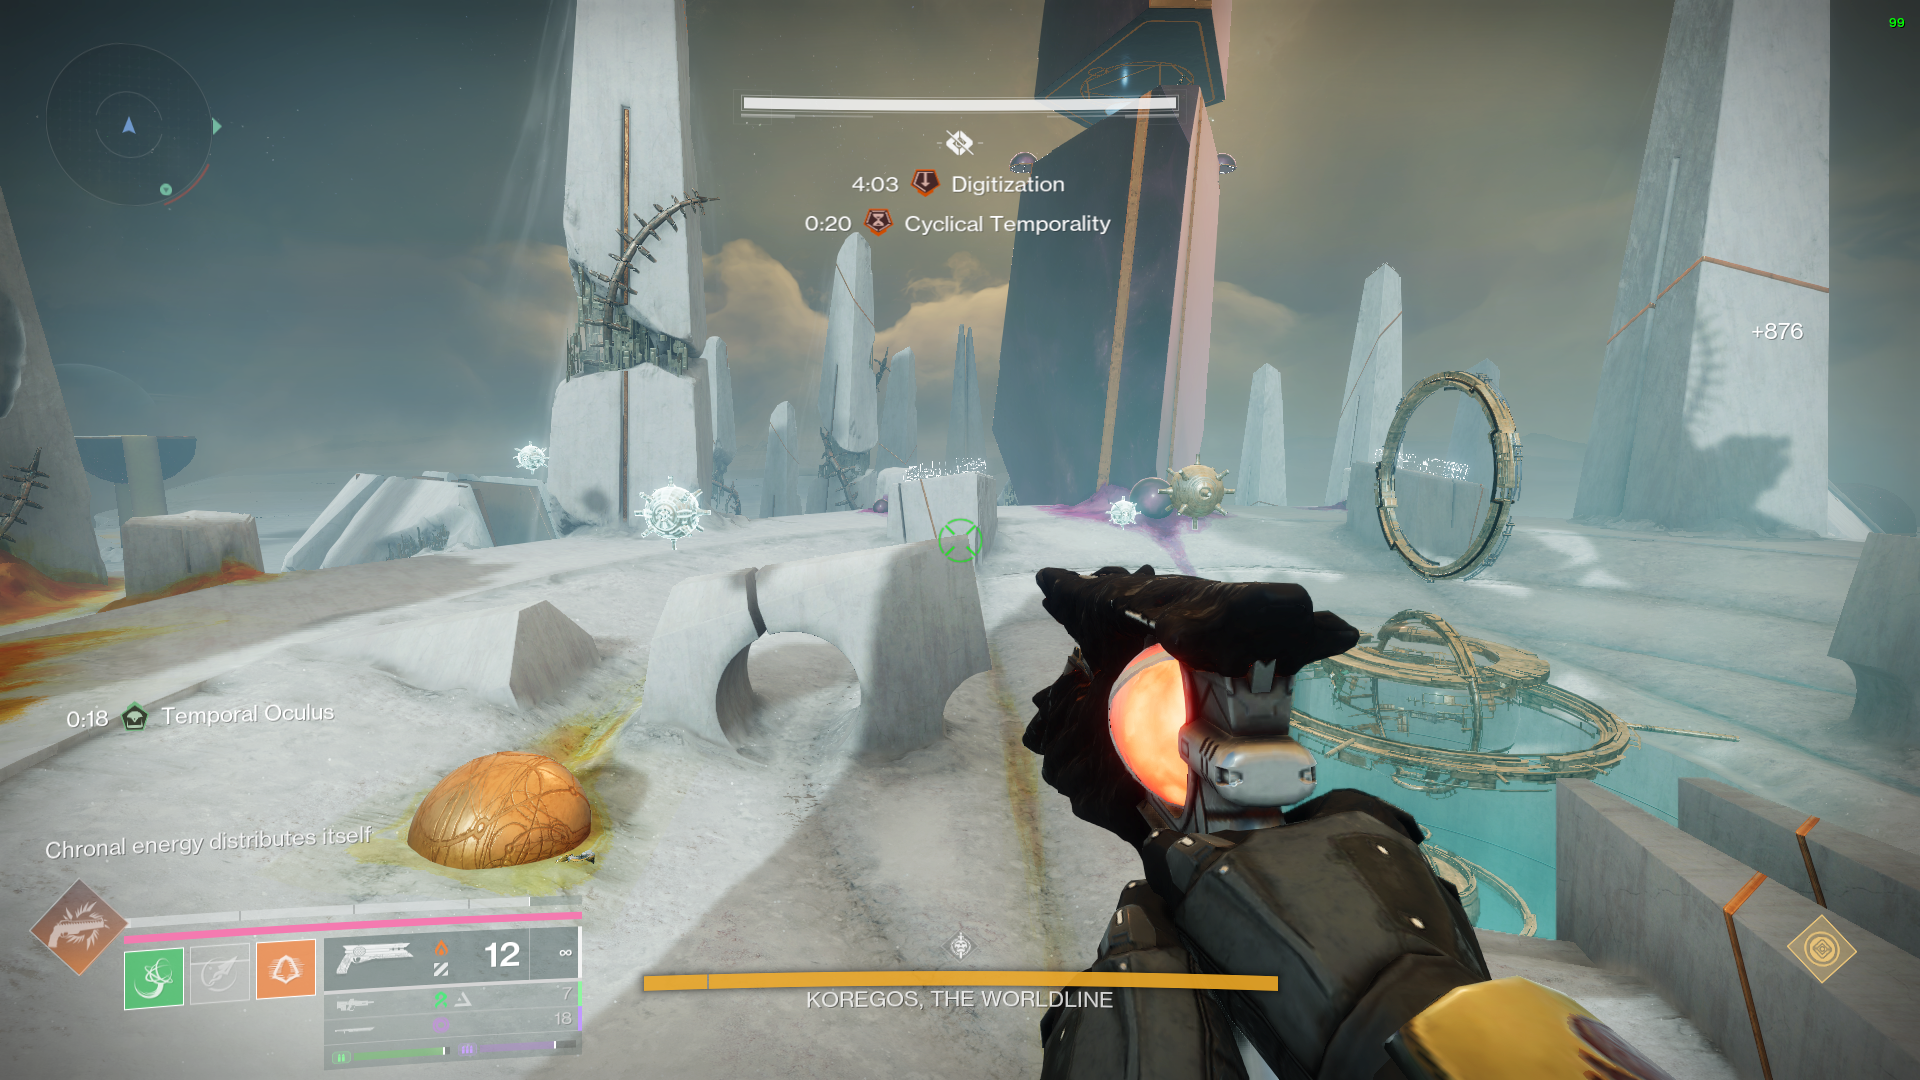
Temporal Oculus allows this player, with this buff, to see the colors of the floating mines: Red, Blue, and White.
Wait for the Absolute Temporality player to call out the color of the central ring. Once the color has been identified, locate the three mines matching that color and shoot them to highlight their locations for the Cyclical Temporality players.
A Trace Rifle, Auto Rifle, or SMG is recommended for highlighting the mines. Avoid using Void Trace Rifles, as their visual effects can resemble certain Vex attacks and potentially cause confusion. Once you highlight a mine, ask the Cyclical players whether it is glowing. If they confirm that it is glowing, the Absolute Temporality player will destroy it. There are three mines of each color. If the first mine you identify is not glowing, quickly check the other two, as they will contain the glowing mines.
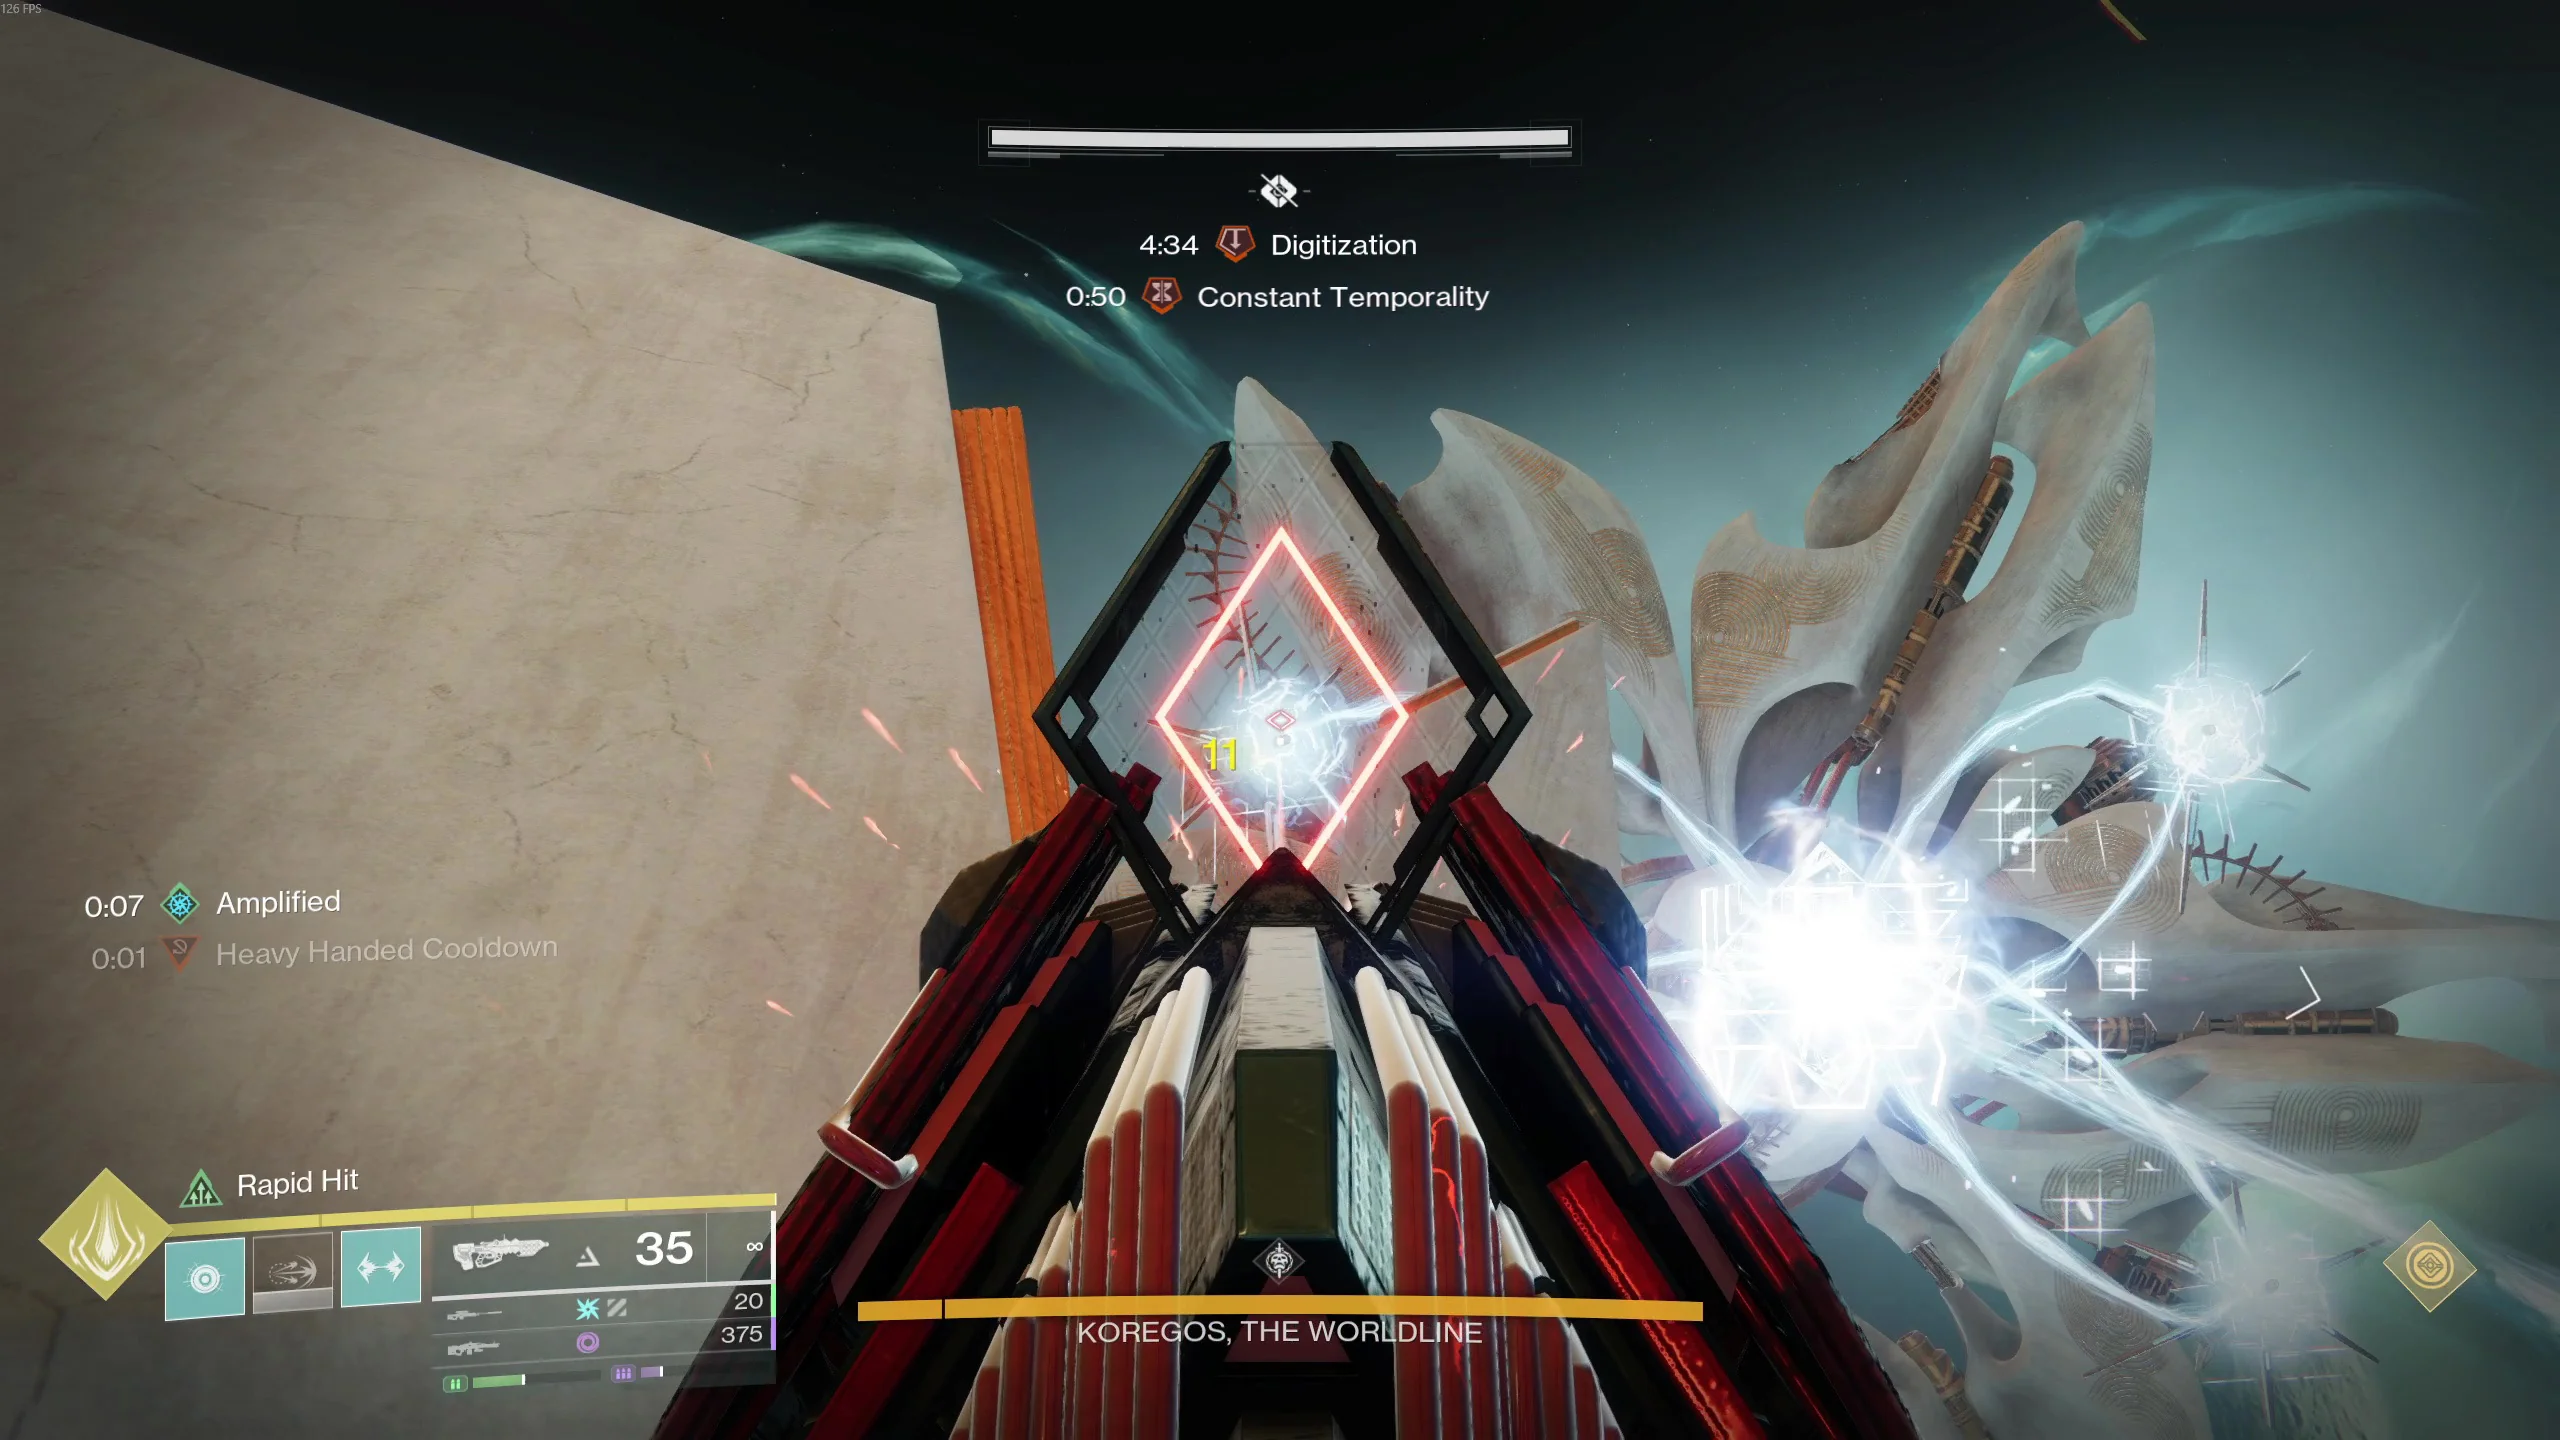 The 2 players with Constant Temporality need to shoot the 4
turrets to interrupt Koregos's laser attack.
The 2 players with Constant Temporality need to shoot the 4
turrets to interrupt Koregos's laser attack.
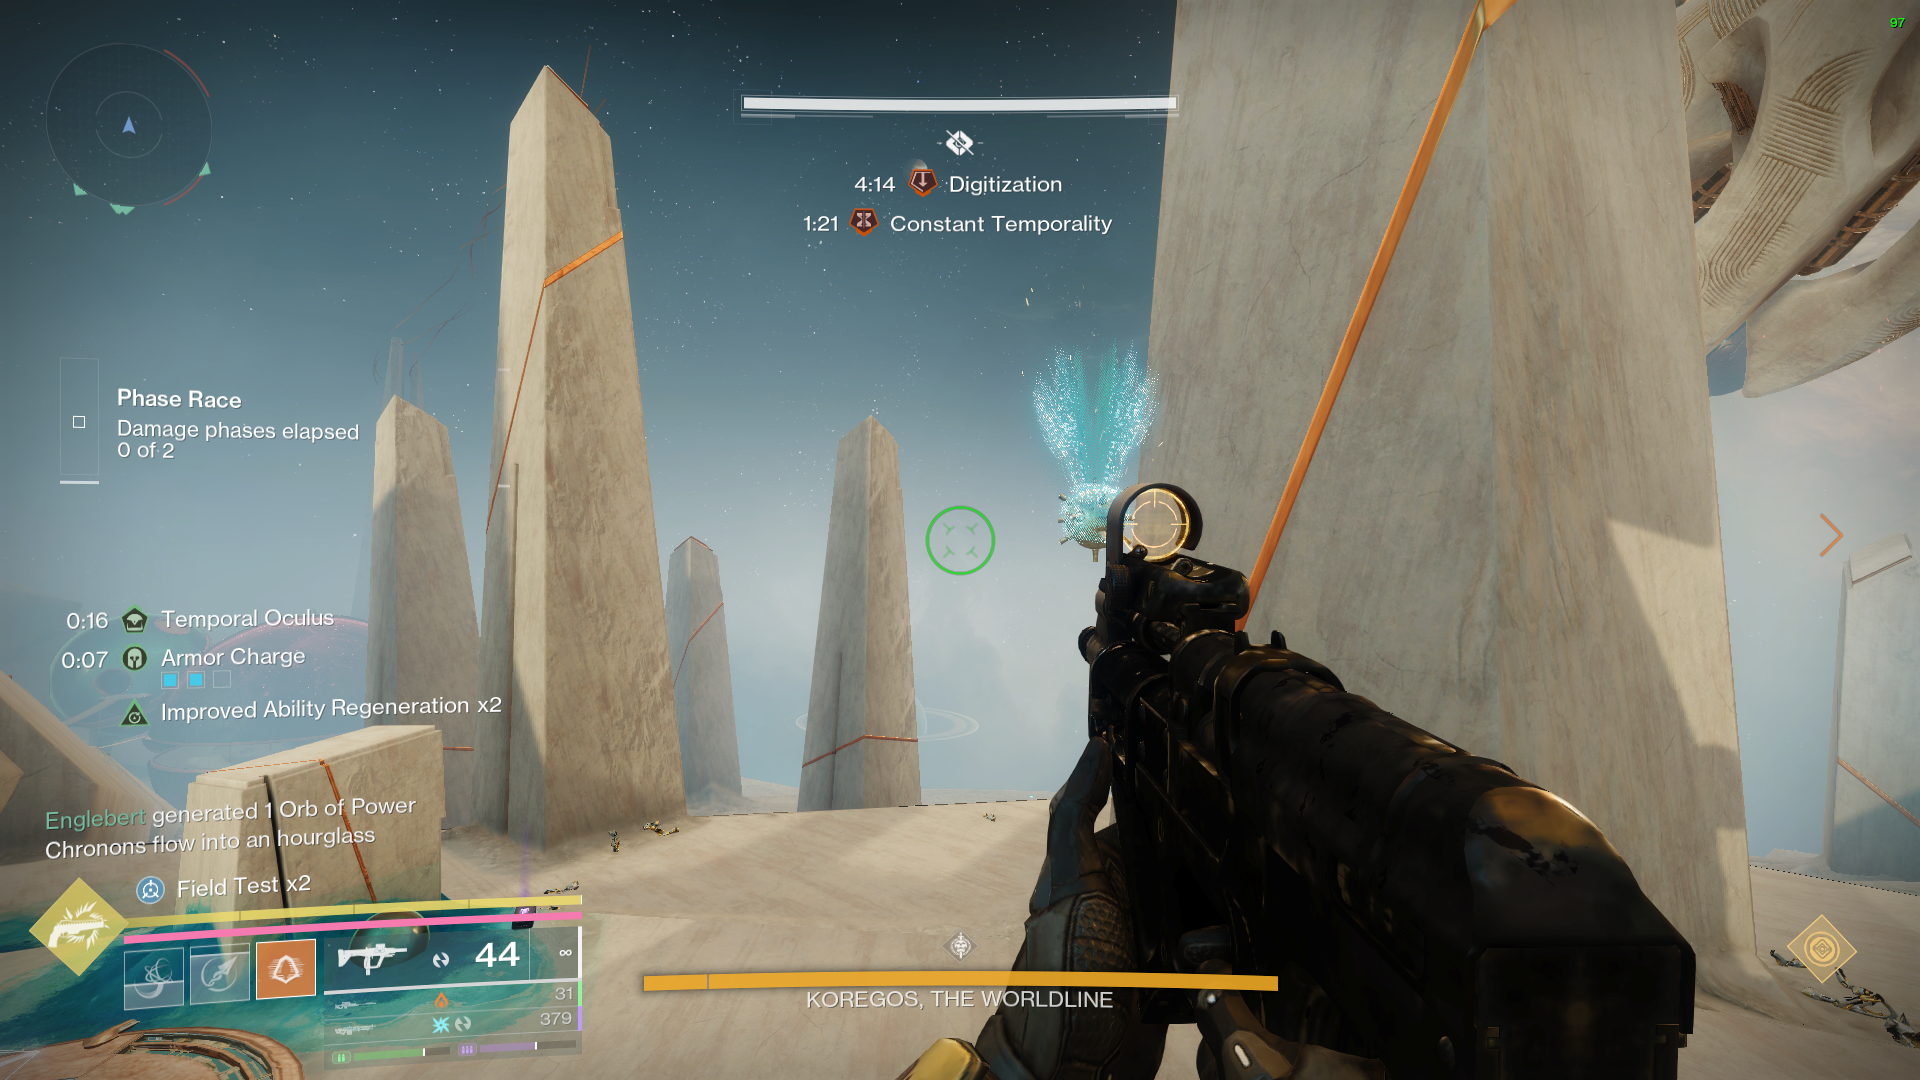 The player with Constant Temporality and Temporal Oculus will
be able to see the colours of the mine.
The player with Constant Temporality and Temporal Oculus will
be able to see the colours of the mine.
Absolute Temporality - 1 Player
The Absolute Temporality player has two primary responsibilities: Calling out the color of the central ring and destroying the glowing mines.
Temporal Oculus allows this player, with this buff, to see the color of the central ring: Red, Blue, and White, and the ability to shoot and destroy mines.
First, once Temporal Oculus has been obtained, look at the central ring and call out its color to the Constant Temporality player. The Constant player will then locate and shoot the mines corresponding to that color, highlighting them for the Cyclical players. The Cyclical players will call out whether each highlighted mine is glowing. If a mine is confirmed to be glowing, the Absolute player must shoot and destroy it.
Destroying the correct mine causes it to drop an Unobserved Chronon. These appear as balls of sand to the Cyclical players who can see and pick them up. They are invisible to the other players. Be careful when destroying mines. Shooting the wrong mine will drain Chronons from the central hourglass.
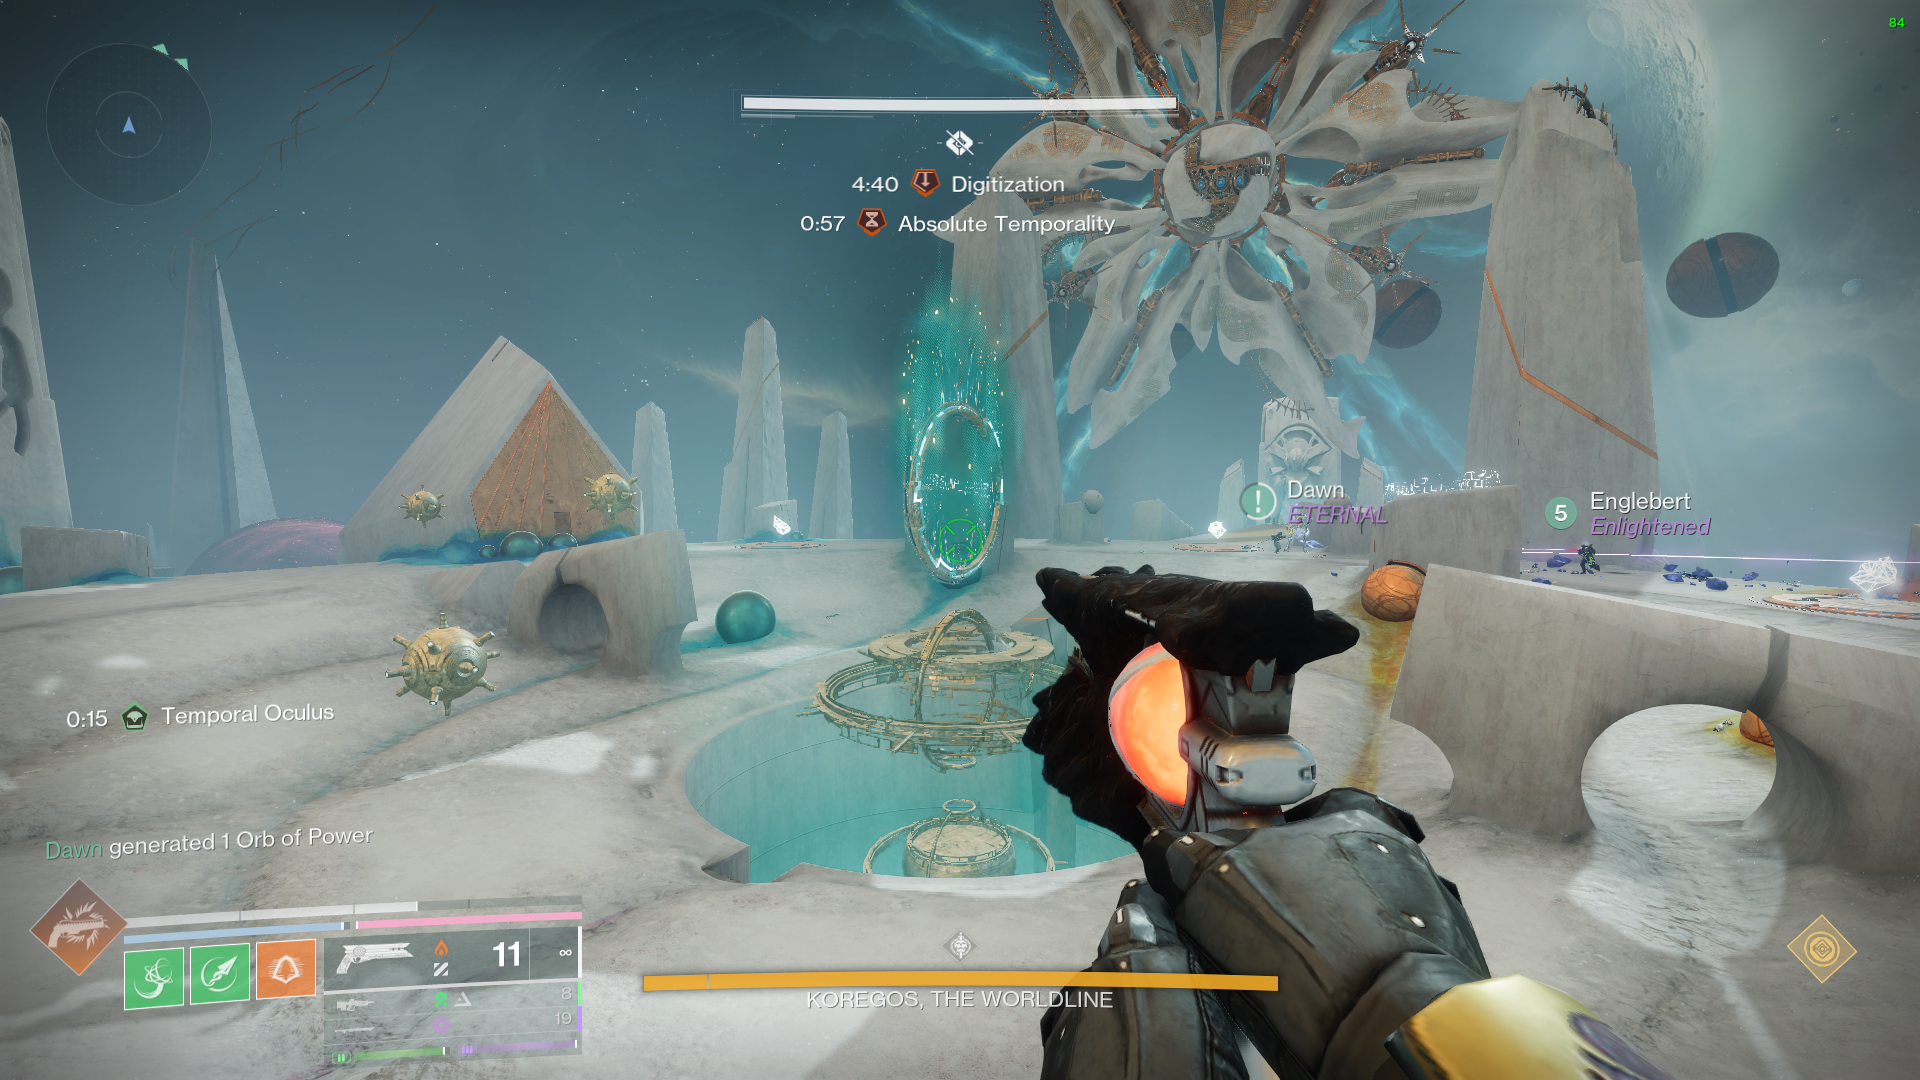 The player with Absolute Temporality and Temporal Oculus will
be able to see the colour of the central ring.
The player with Absolute Temporality and Temporal Oculus will
be able to see the colour of the central ring.
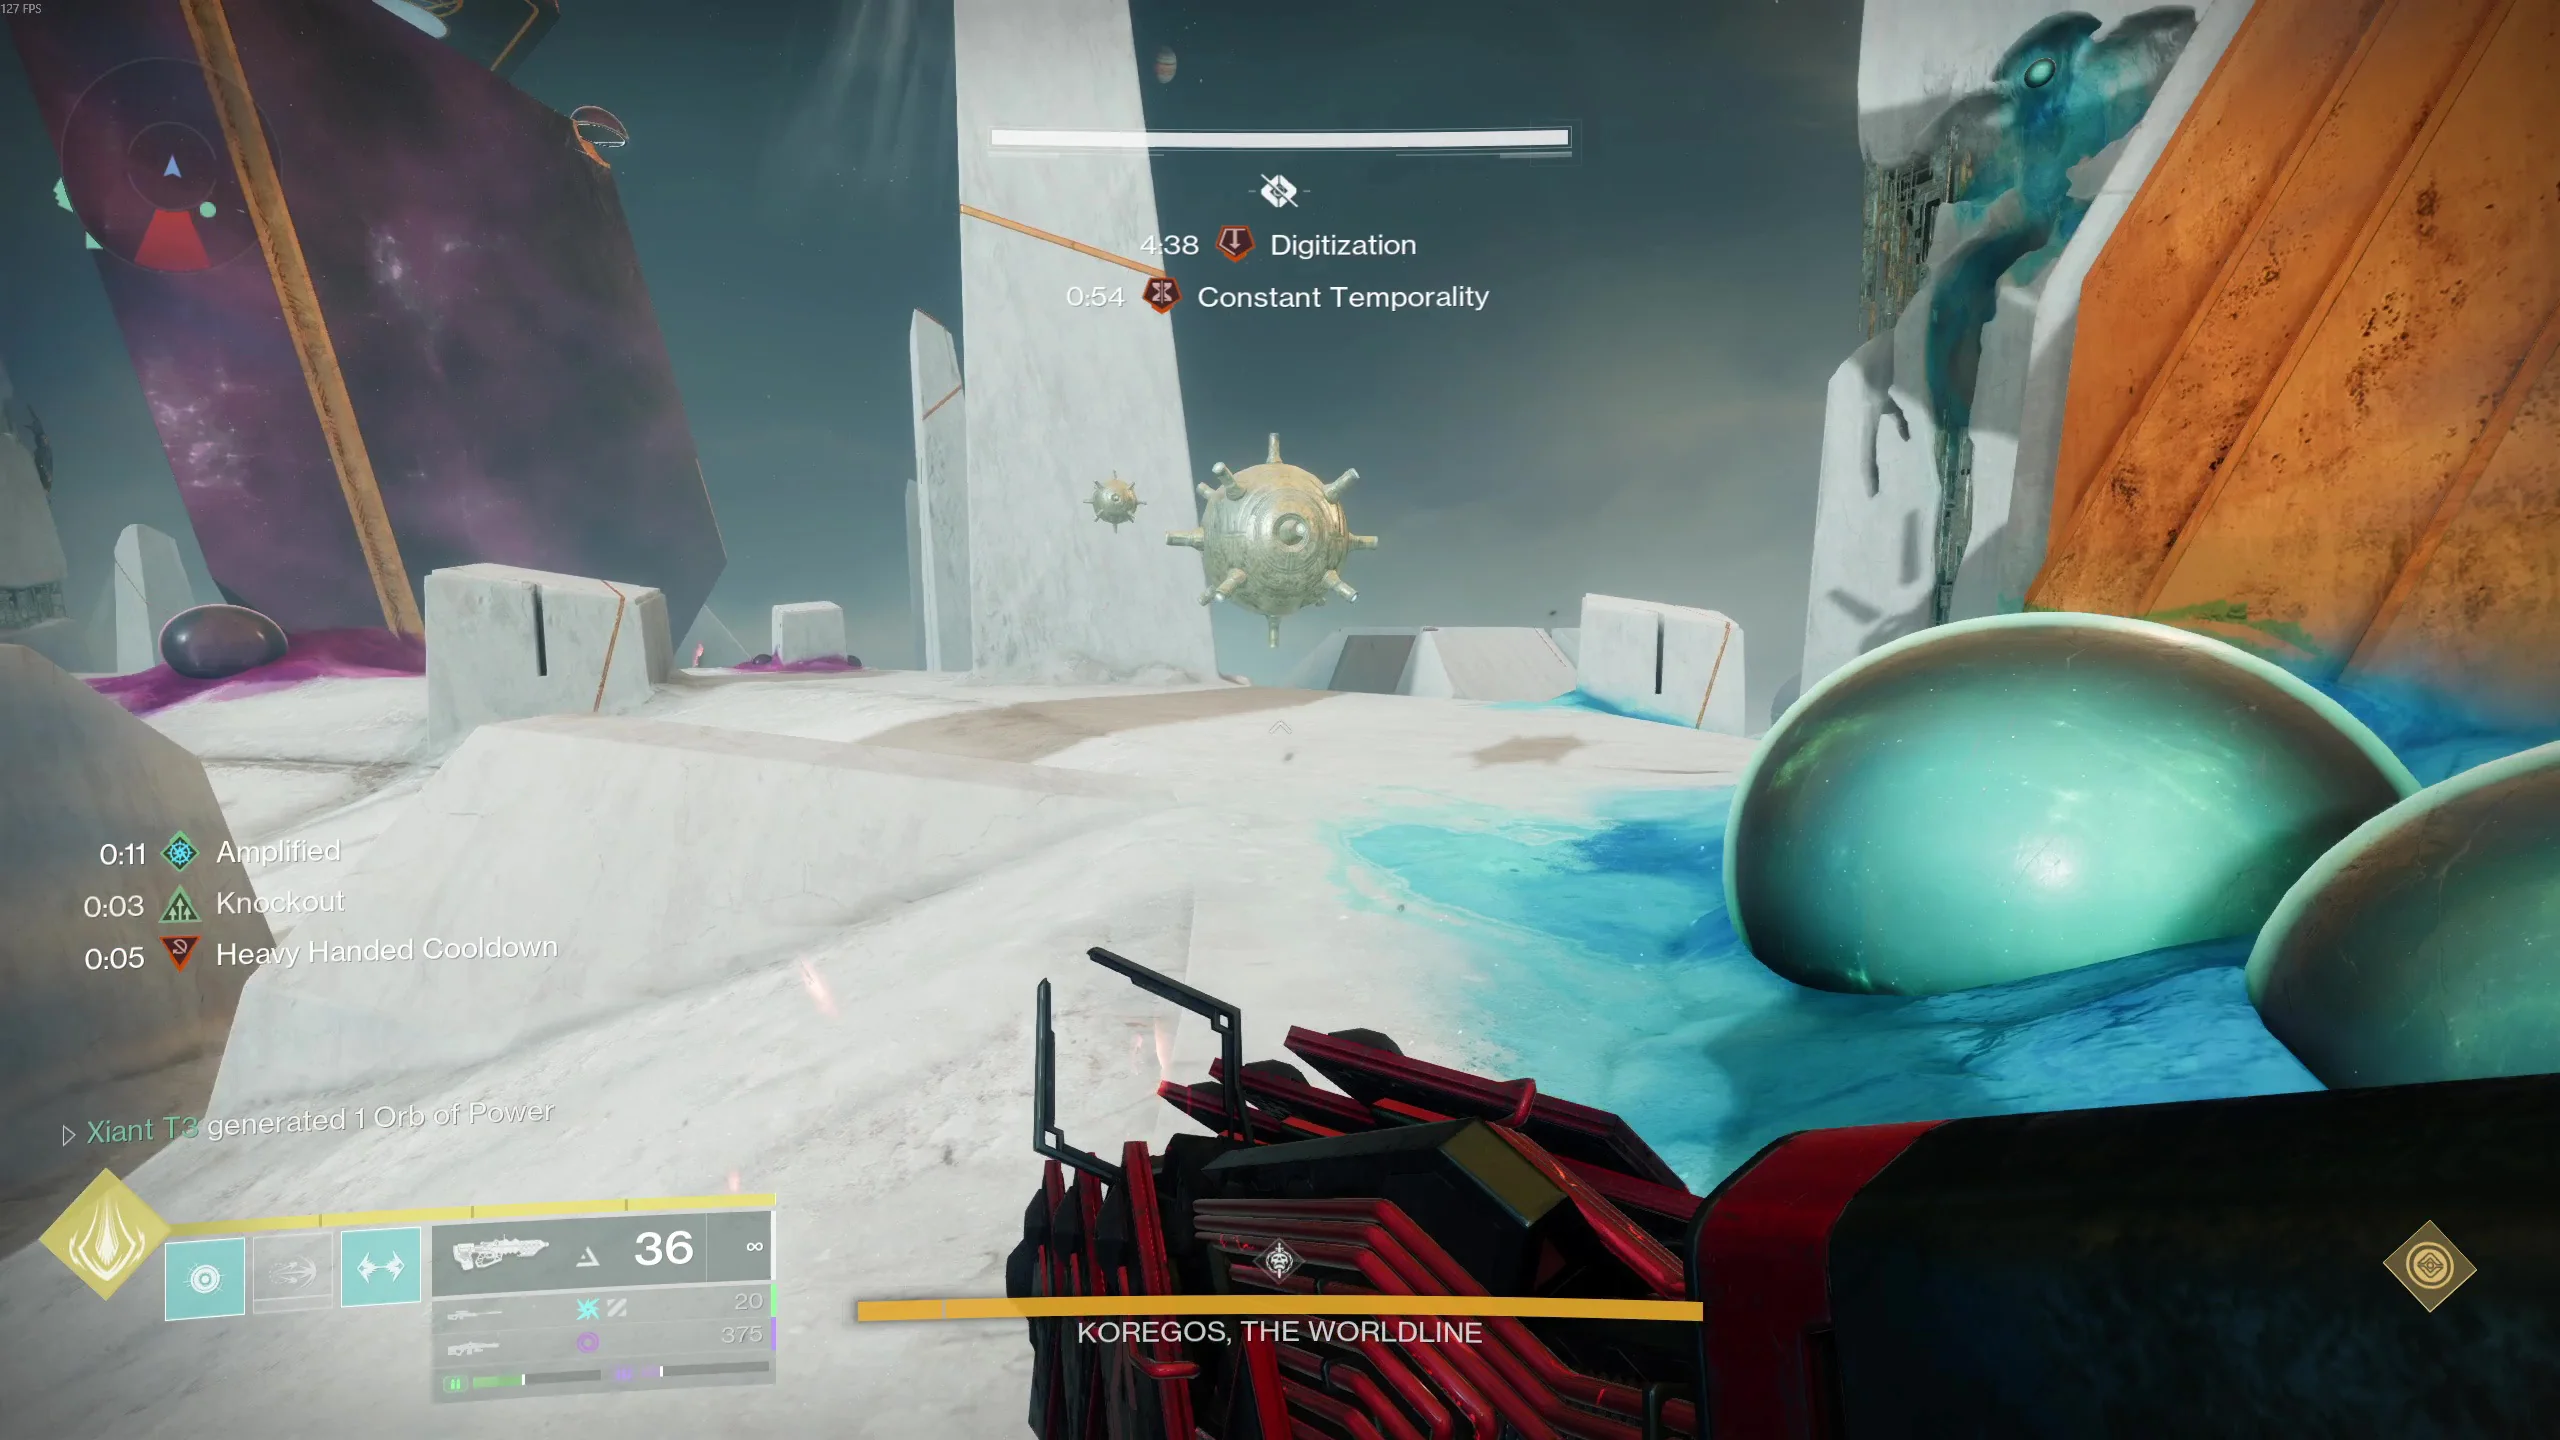 The player with Absolute Temporality and Temporal Oculus will
shoot the mines floating around the map.
The player with Absolute Temporality and Temporal Oculus will
shoot the mines floating around the map.
Cyclical Temporality - 2 Players
The Cyclical Temporality players are responsible for identifying the correct mines and collecting the Chronons they produce.
Temporal Oculus allows this player, with this buff, to see which mines are glowing, and the ability to see and collect Chronons.
There are nine mines floating throughout the arena: 3 Red, 3 Blue, 3 White. For each color, two mines will be glowing while one will not. Once the Absolute Temporality player destroys the correct glowing mines, collect the Unobserved Chronons that drop directly beneath them. Once both Cyclical players have obtained a Chronon, they must jump through the central ring simultaneously.
Timing is important because the ring changes color a few seconds after a player passes through it. If the two players do not synchronize their jumps, the second player may attempt to deposit a Chronon of the wrong color and die. If the Constant player is unable to identify the second correct mine in time, it is acceptable to deposit only one Chronon.
 The player with Cyclical Temporality and Temporal Oculus will
be able to see which mines are glowing.
The player with Cyclical Temporality and Temporal Oculus will
be able to see which mines are glowing.
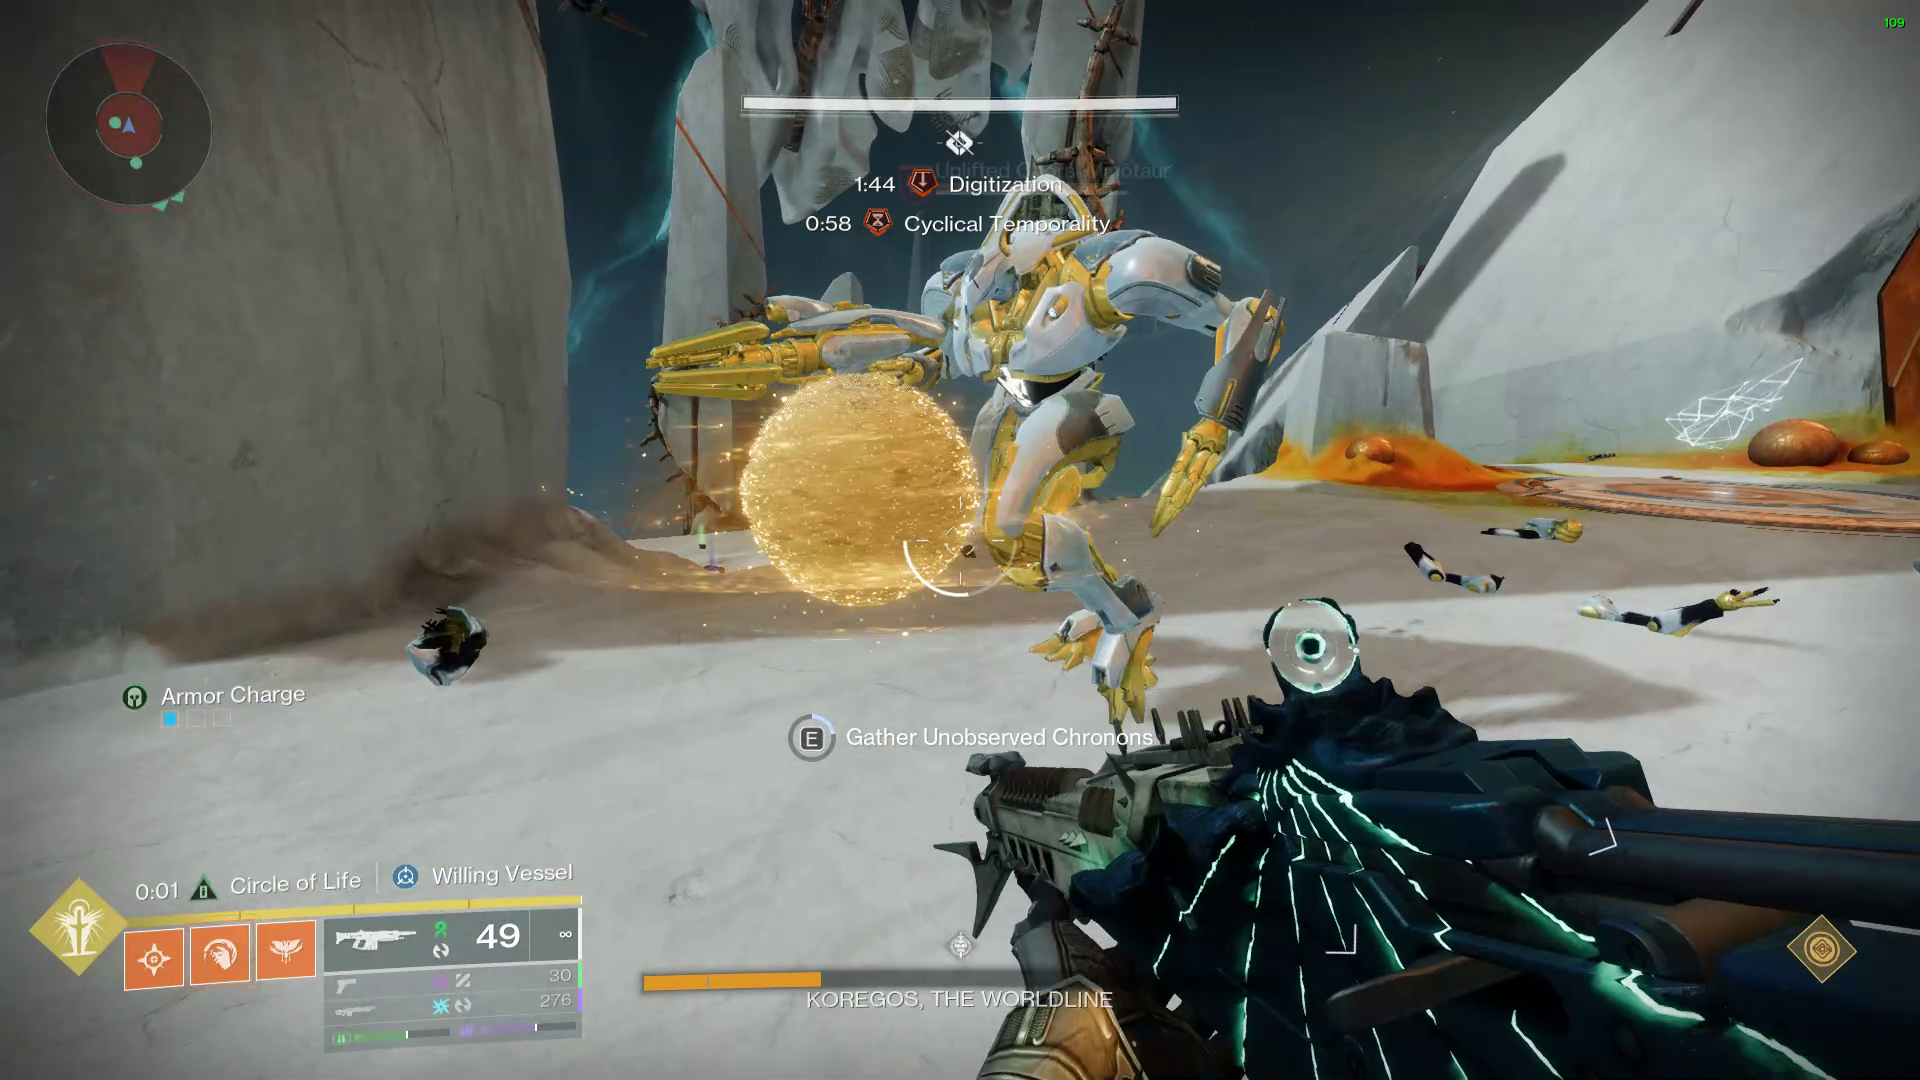 The player with Cyclical Temporality and Temporal Oculus will
be able to see the Chronons that drop from the mines and pick
them up.
The player with Cyclical Temporality and Temporal Oculus will
be able to see the Chronons that drop from the mines and pick
them up.
In Summary:
- Constant Temporality: Allows the player to see the colors of the floating mines.
- Absolute Temporality: Allows the player to see the color of the central ring, and shoot and destroy mines.
- Cyclical Temporality: Allows the player to see which mines are glowing and pick up Chronons.
- Absolute: Calls out the color of the central ring.
- Constant: Locates and highlights the mines matching that color.
- Cyclical: Calls out whether the highlighted mine is glowing.
- Absolute: Destroys the glowing mine.
- Cyclical: Collects the Unobserved Chronons.
- Cyclical: Both players jump through the ring simultaneously to deposit their Chronons.
- Repeat until the hourglass is full.
Once the hourglass is full, a Vex diamond will appear beneath it. Destroying the Vex diamond spawns a series of platforms leading to the boss's DPS area. However, one final puzzle must be completed before DPS can begin.
Pre-DPS: Vex Node Puzzle
Once you reach the top of the platforms, you will find four sets of Vex cubes/nodes. One player from each Temporality role must participate in this puzzle. It is recommended to decide who will handle the puzzle beforehand, as there is limited time available to complete it. The visibility of the Vex nodes differs between the three roles:
- Constant Temporality: Can see two Vex nodes.
- Cyclical Temporality: Can see two Vex nodes.
- Absolute Temporality: Can see all three Vex cubes/nodes.
Refer to the image below for an example of the Vex nodes and their visibility based on each Temporality role. Note that the nodes can change positions between all 4 turrets on Koregos.
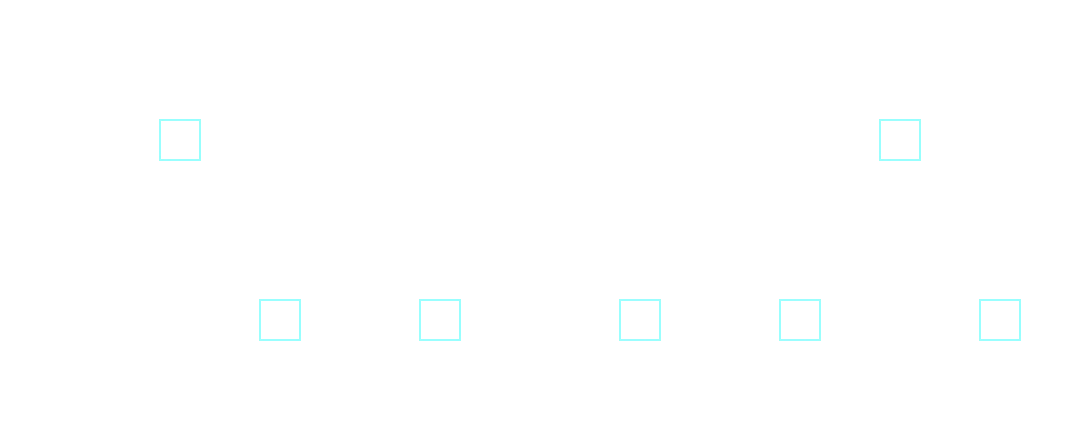
There are two primary methods for solving this puzzle:
Method 1 - Common Node
- The Constant and Cyclical players stand between the two Vex cubes they can see.
- The Absolute player then interacts with the Vex cube/node that is visible to both players.
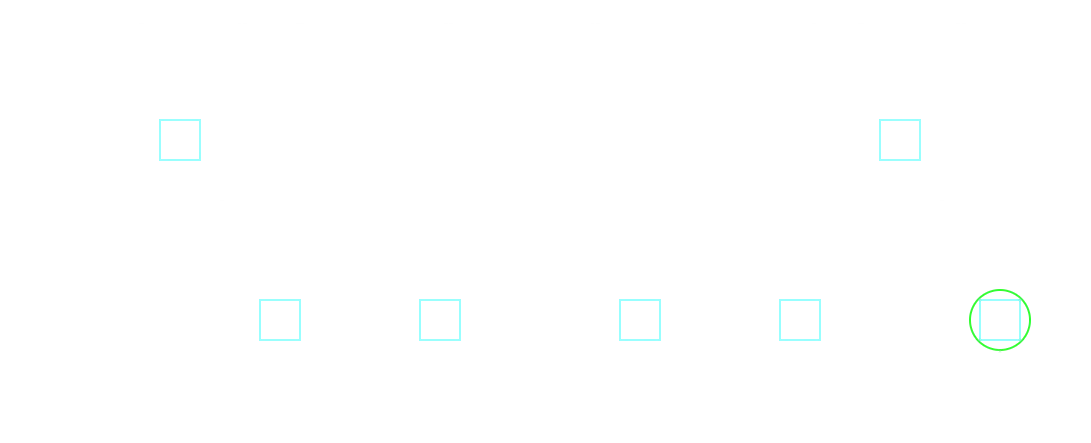
Method 2 - Empty Node
- Treat the three Vex nodes as the vertices of a triangle. The Constant and Cyclical players position themselves where the third Vex cube/node would be, based on the two nodes visible to them.
- The Absolute player then interacts with the node where no player is standing.
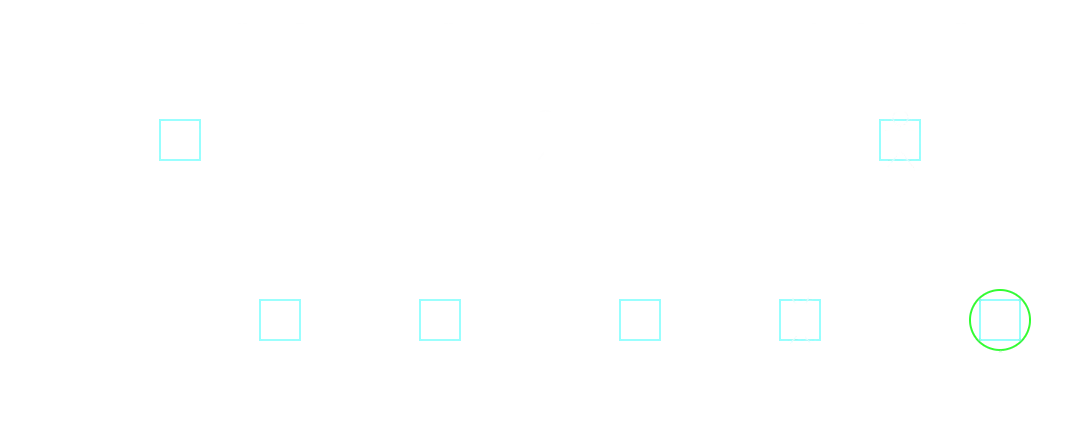
Repeat this process for all four sets of Vex nodes. Once four sets have been completed successfully, the damage phase begins.
If a puzzle is failed, the entire puzzle sequence does not need to be restarted. The requirement is simply to complete four sets successfully. Therefore, if one set is failed, complete one additional set correctly before DPS begins.
DPS Phase
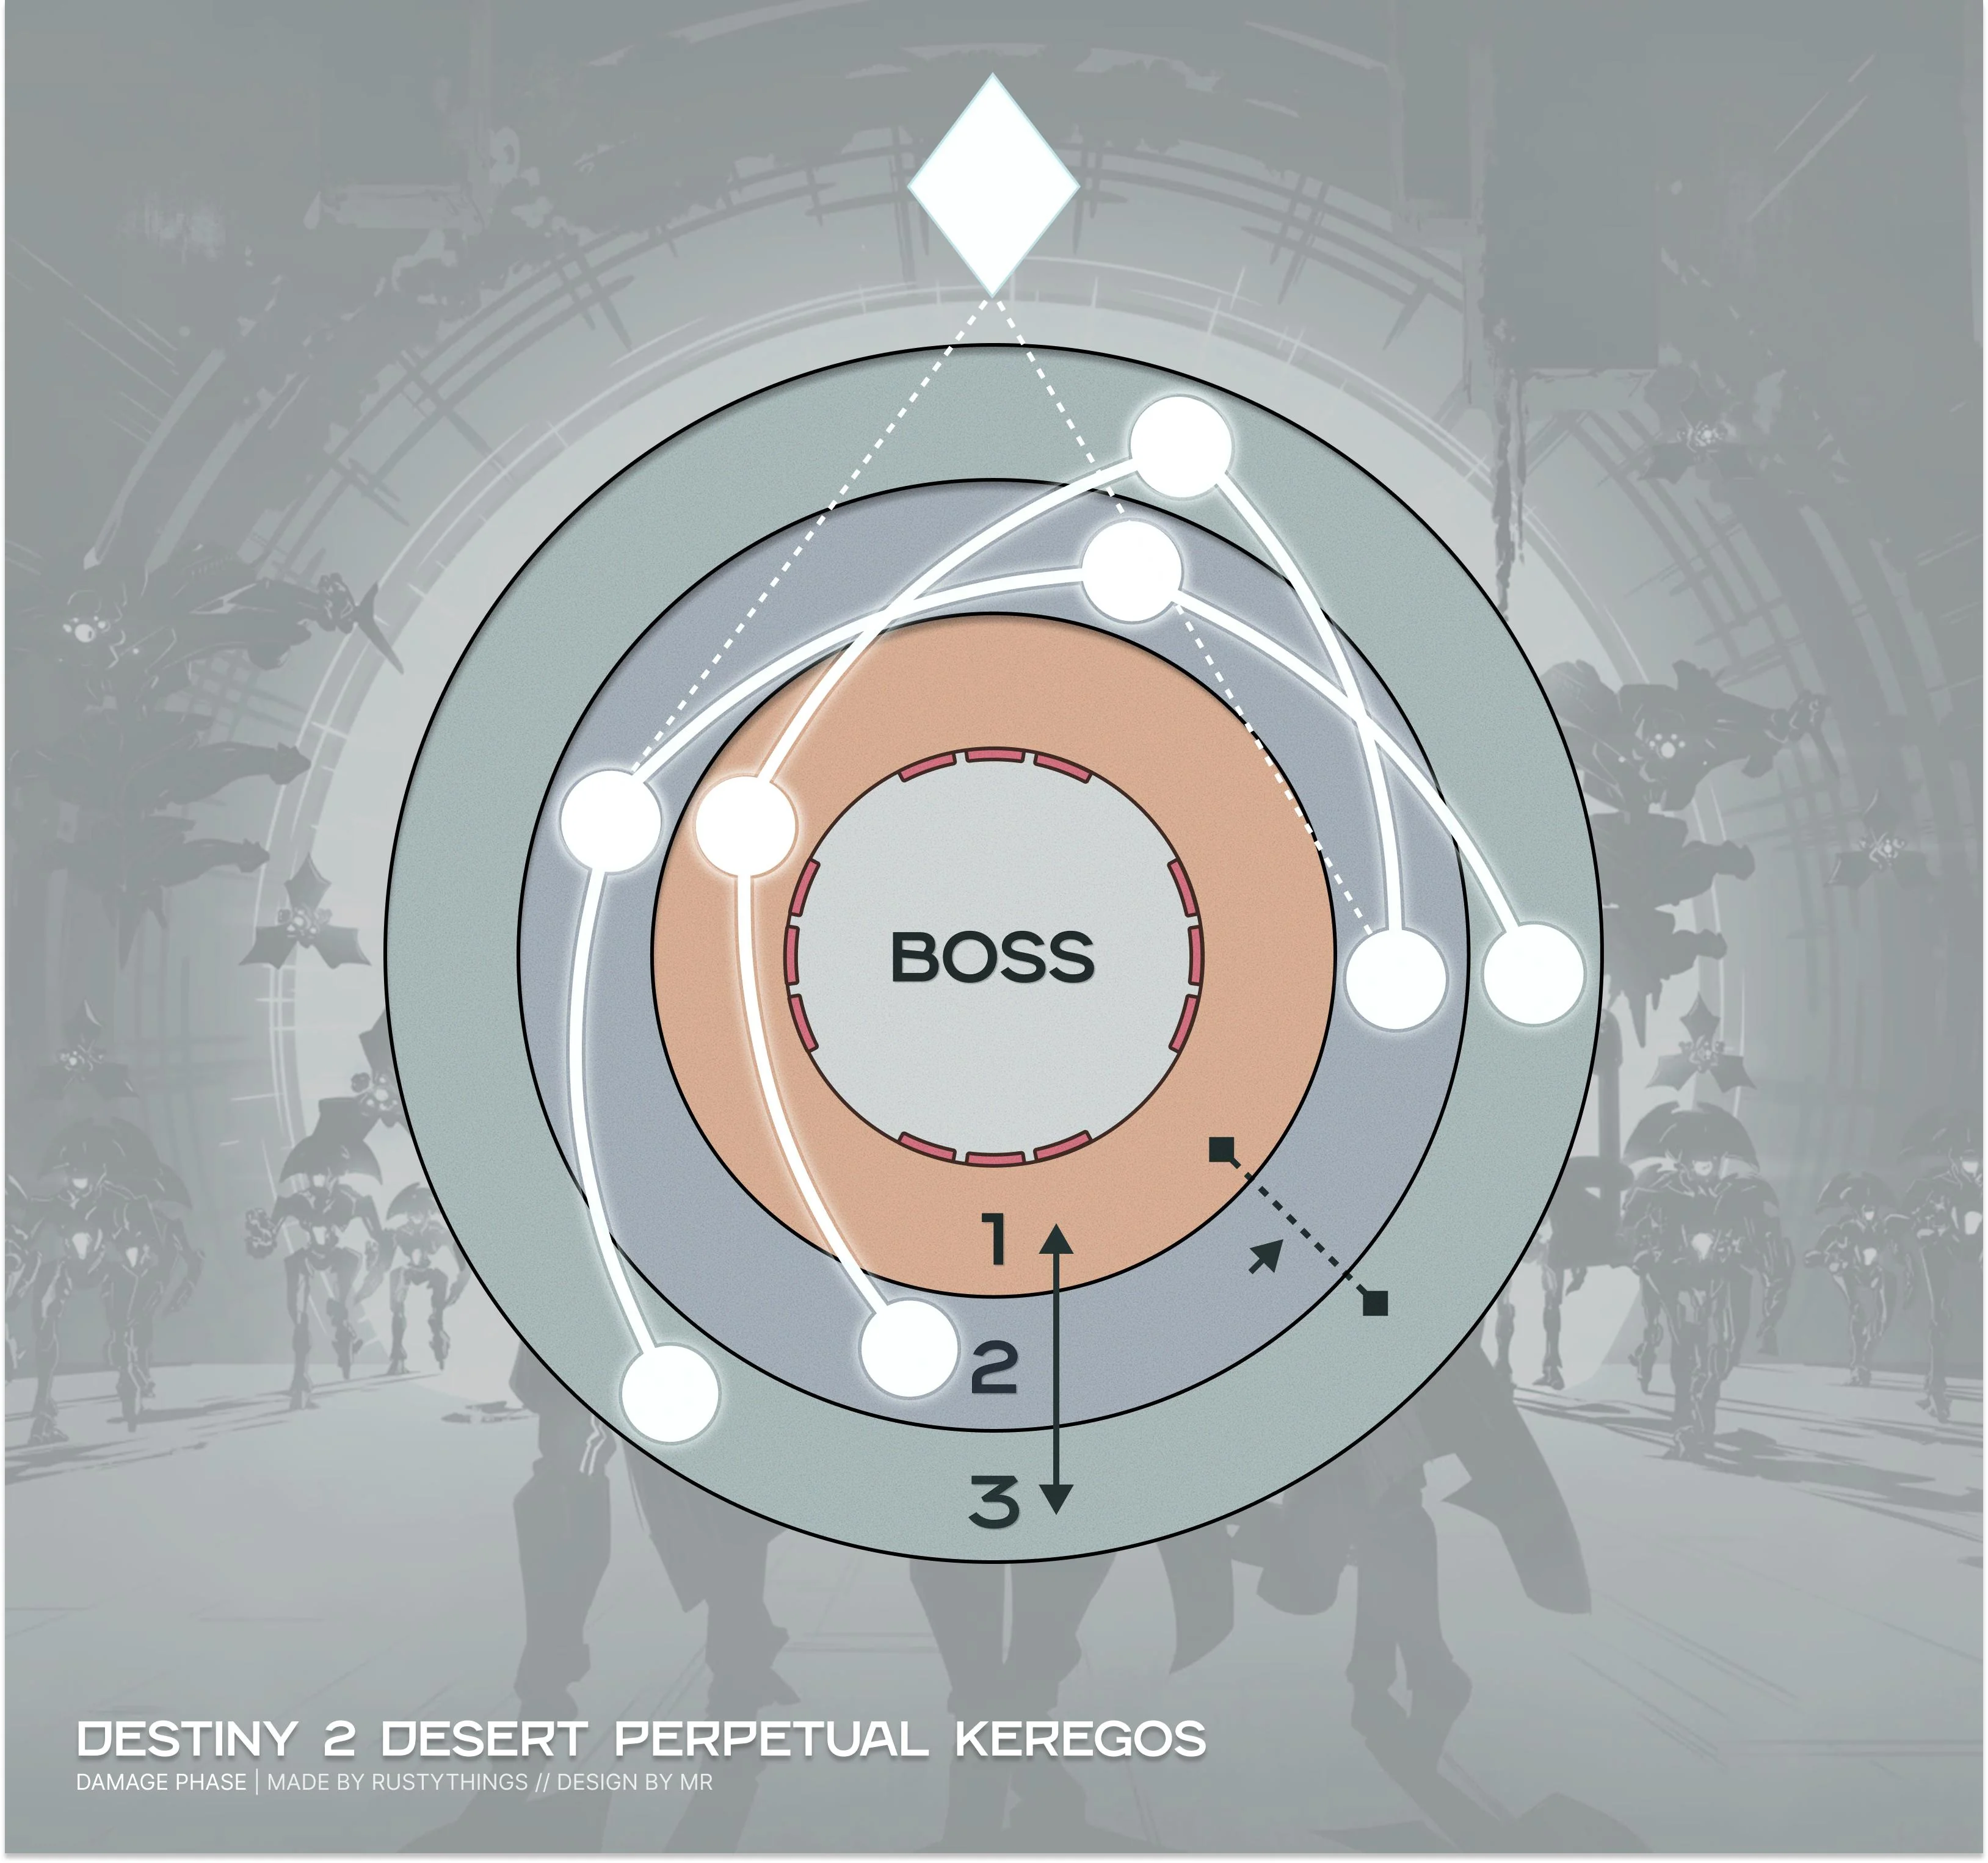
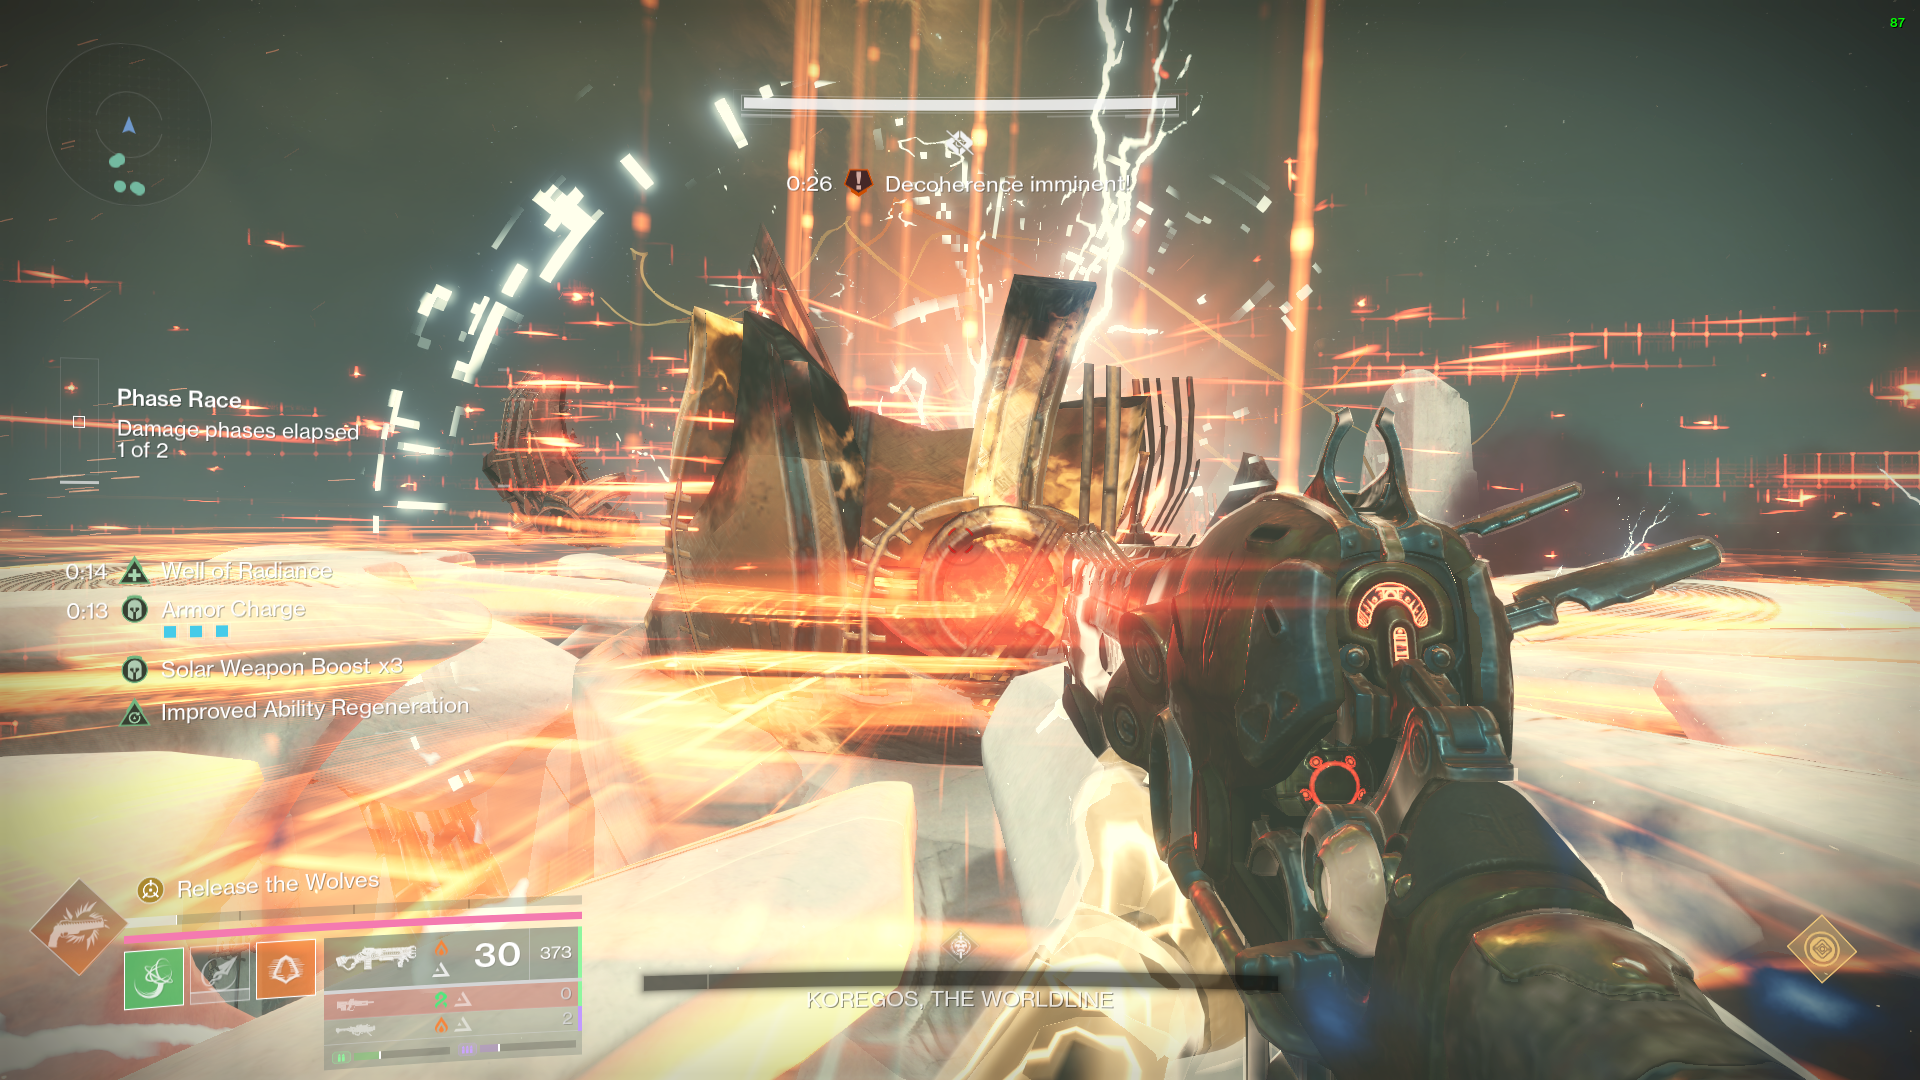
Once the damage phase begins, Koregos will deploy two rotating lasers that sweep around the arena. Refer to the picture on the right to get a rough idea of the path the laser takes. A Well of Radiance can be used to withstand the lasers, with a few Arc Resistance mods providing additional protection. There is also a DPS extension mechanic during this phase.
One player assigned to damage extension must watch for rings that appear around the arena. When a ring appears:
- Identify the ring's color.
- Locate a Chronon matching that color.
- Pick up the matching Chronon jump through the ring to extend the DPS phase.
Chronons can spawn throughout the arena, so all players should remain alert for them. If a player focused on DPS spots the correct Chronon, they should call it out to the player responsible for extending the damage phase. The damage-extension player should ideally run Well of Radiance + Tractor Cannon, as their primary responsibility is extending DPS rather than dealing damage to the boss. Once the damage phase ends, return to the encounter mechanics and repeat the process until final stand.
Final Stand
Koregos has a Final Stand, so it is recommended to conserve your damage Supers for this phase. This provides the fireteam with additional burst damage to secure the kill.
After Koregos is defeated, players may receive the Decoherence imminent debuff. If you still have this debuff when the boss falls, you will die. Immediately jump down and create some distance from the boss to avoid being caught by the effect.
The encounter chest spawns in front of the Maya Sundaresh statue. The statue can also be interacted with to spend Spoils of Conquest on previously acquired weapons and armor.
Congratulations on completing the The Desert Perpetual!
Challenge Mode:
Every player must dunk one of the six Chronons during the encounter.
Points to Note:
- Adopt a 2-2-2 formation: two players per role (Cyclical, Contact, Absolute). After completing a phase, everyone rotates to a different role. Clockwise or Anti-clockwise, it doesn't matter.
- Buff timers carry over even when your buff name changes after rotation.
- Constant-buffed players should stun the boss right before rotating, to avoid issues with timer expiration and the boss's laser attack. Other players should also reset their timer if possible before rotating.