
The Desert Perpetual (Epic) Guide
Done by: Vedallion#7774, Luna#8297, Citoxl#8492 | September 13th 2026
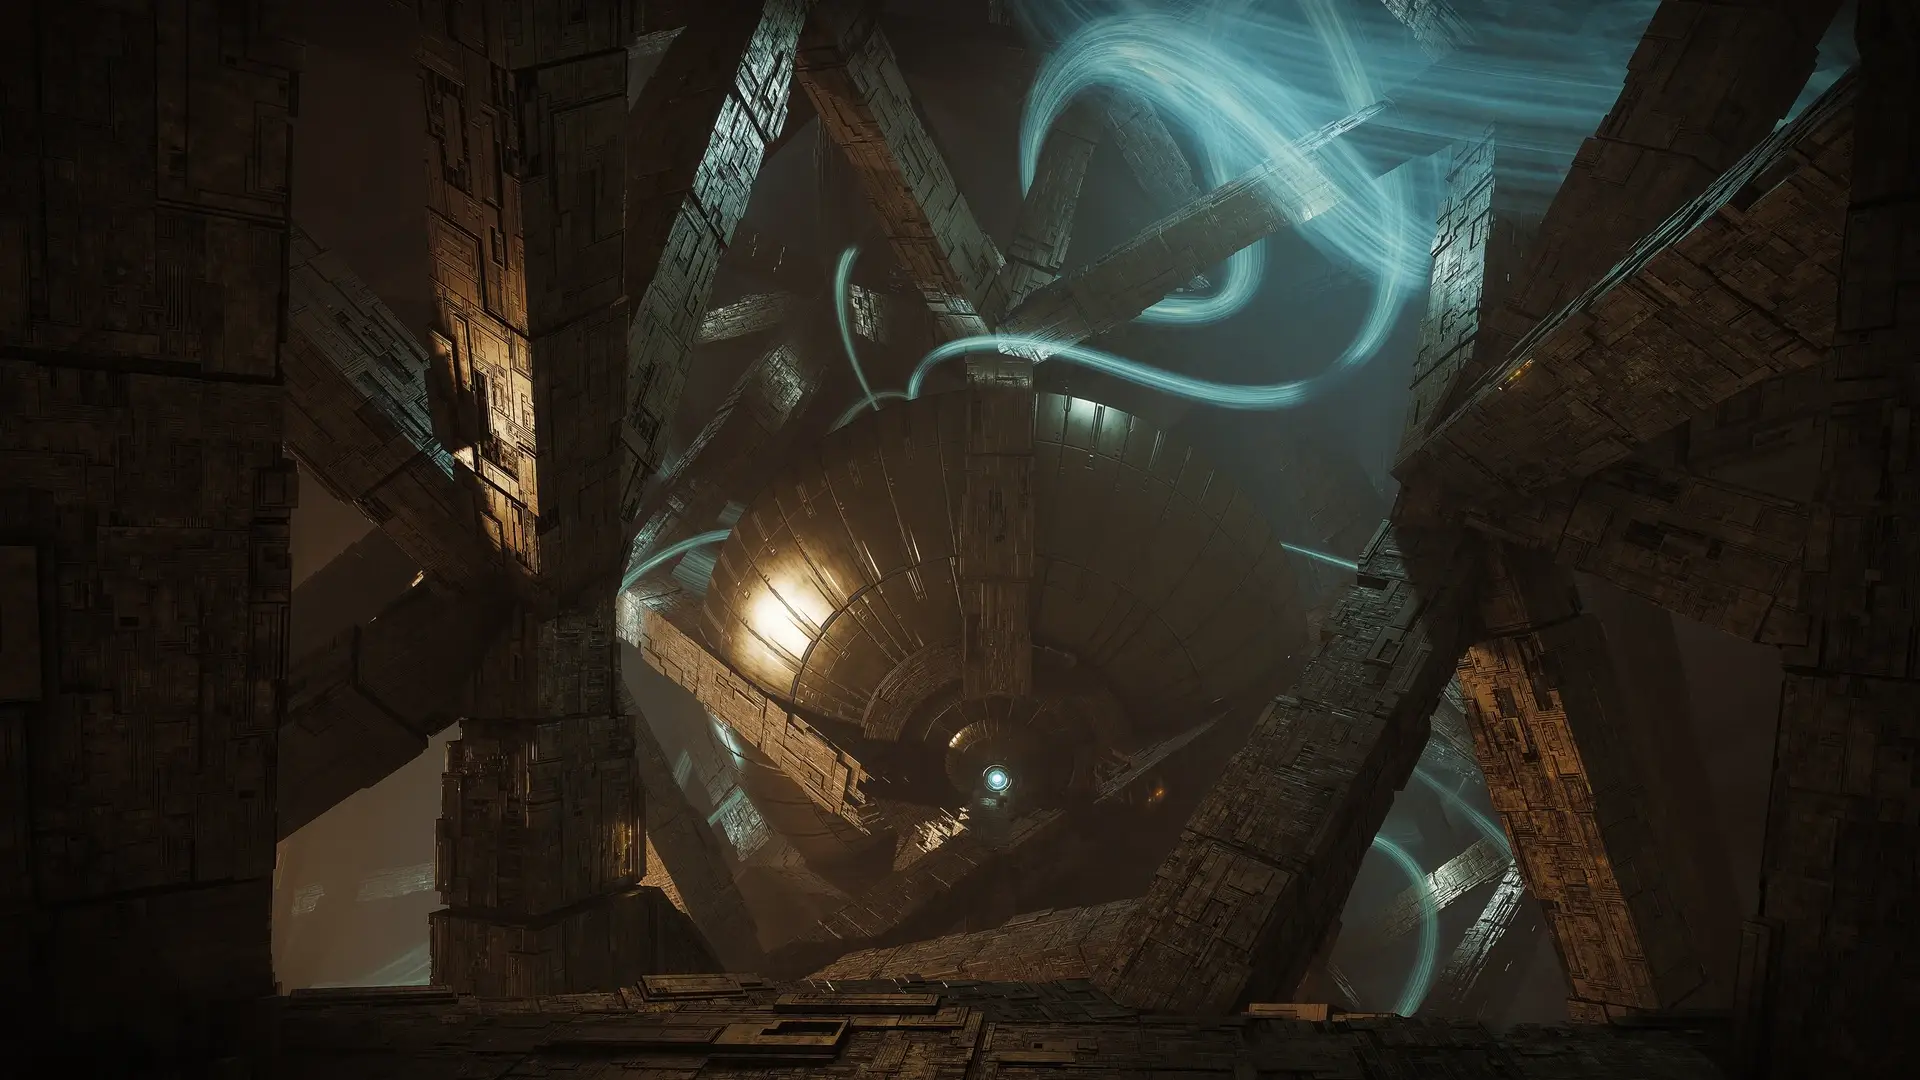
Epic Desert Perpetual
Epic Desert Perpetual introduces more than additional difficulty. Completing the Epic raid provides access to new Legendary weapons, the Wayward Psyche armor set with unique set bonuses, additional raid pursuits, and progression toward the Whirling Ovation Catalyst. Feats can be enabled independently to further increase encounter difficulty and improve reward quality.
Inherited Pressure Mechanic System
One of the defining features of Epic Desert Perpetual is the Inherited Mechanics system. Unlike Normal difficulty, where each encounter operates largely independently, Epic introduces an additional mechanic that carries from one encounter into the next. This means that the order in which the fireteam completes the first three bosses directly affects the difficulty and mechanics of the following encounters. They can still be completed in any order, but the fireteam should deliberately choose its route rather than treating the order as irrelevant.
How the System Works
There are three inherited mechanics:
- Variable Elimination (Agraios): A targeting laser will track players during important portions of the encounter and during DPS. Players need to remain mobile and break line-of-sight to avoid being eliminated.
- Detainment Seekers (Epoptes): The boss will release 3 detainment seekers that will pursue players and detain them if they are not destroyed. Players must prioritize destroying these seekers while also managing the boss's other mechanics. If the player is detained, they will need someone to destroy the bubble around them as they cannot be freed by themselves.
- Diastole Suspension (Iatros): The boss will periodically suspend players in the air, preventing them from moving or using abilities. Players must coordinate to avoid being suspended and manage the boss's other mechanics.
- Also note that this version of Diastole is an upgraded version from Normal Desert Perpetual. Diastole in Normal difficulty launches the player like a jump, Diastole in Epic suspends the player like a Strand ability in mid-air, making the player vulnerable for a longer period of time.
The first boss you choose to fight does not inherit a mechanic from other two bosses. Instead, the first boss inherits Koregos's overhead targeting laser. The second boss then inherits the mechanic associated with the first boss. The third boss inherits the mechanic associated with the second boss. The mechanics do not stack.
The order that you fight the three bosses is also carried into Koregos, where the three corresponding encounter rooms appear in the same order. More information on this can be found in the Epic Koregos section of this guide.
Our recommended order you should fight the bosses should be:
Epoptes → Agraios → Iatros → Koregos
The reason is the Diastole mechanic introduced by Iatros. Of the additional mechanics that can be carried into Koregos, Diastole is generally the most tedious to execute and can be particularly disruptive when the team is already juggling multiple mechanics. Additionally, bringing the Detainment Seekers to Agraios, and Variable Elimination to Iatros did not pose too much inconvenience compared to the reverse. By completing Iatros last, the Koregos room order becomes:
Epoptes → Agraios → Iatros
This places the Iatros's room at the end of the Koregos sequence, meaning the team does not have to deal with Diastole until later on.
Epic Armor & Weapons
Epic Desert Perpetual introduces the Wayward Psyche armor set and three new Legendary weapons. You can refer to the following tables for their set bonuses and perks, as well as where to acquire them.
| Pieces | Set Bonus | Effect |
|---|---|---|
| 2-Piece | Special Relativity | Picking up ammo reloads your stowed Special weapons from reserves. |
| 4-Piece | Superluminal Motion | After dealing damage with your Super, your health and shields regenerate over time while you are moving. Additional Super damage refreshes the effect. |
| Encounter | Wayward Psyche Armor | Weapon | Type |
|---|---|---|---|
| Agraios | Chest, Legs | The Ever-Present | Strand Rapid-Fire Frame Heavy Grenade Launcher. |
| Iatros | Helmet, Chest | Starscape Null | Solar Lightweight Frame Shotgun. |
| Epoptes | Arms, Legs | Cusp Sempiternal | Void Support Frame Auto Rifle. |
| Koregos | Arms, Class Item | Whirling Ovation | Exotic Rocket Launcher. Catalyst only drops from attunement. |


The Ever-Present
Legendary // Rapid-Fire Frame // Heavy Grenade Launcher
Desirable Perks-
Barrel:
- Volatile Launch
- Confined Launch
-
Magazine:
- Spike Grenades
-
Column 1 Perks:
- Envious Arsenal
-
Column 2 Perks:
- Bait and Switch
Masterwork: Blast Radius
Mod Slot: Bandolier
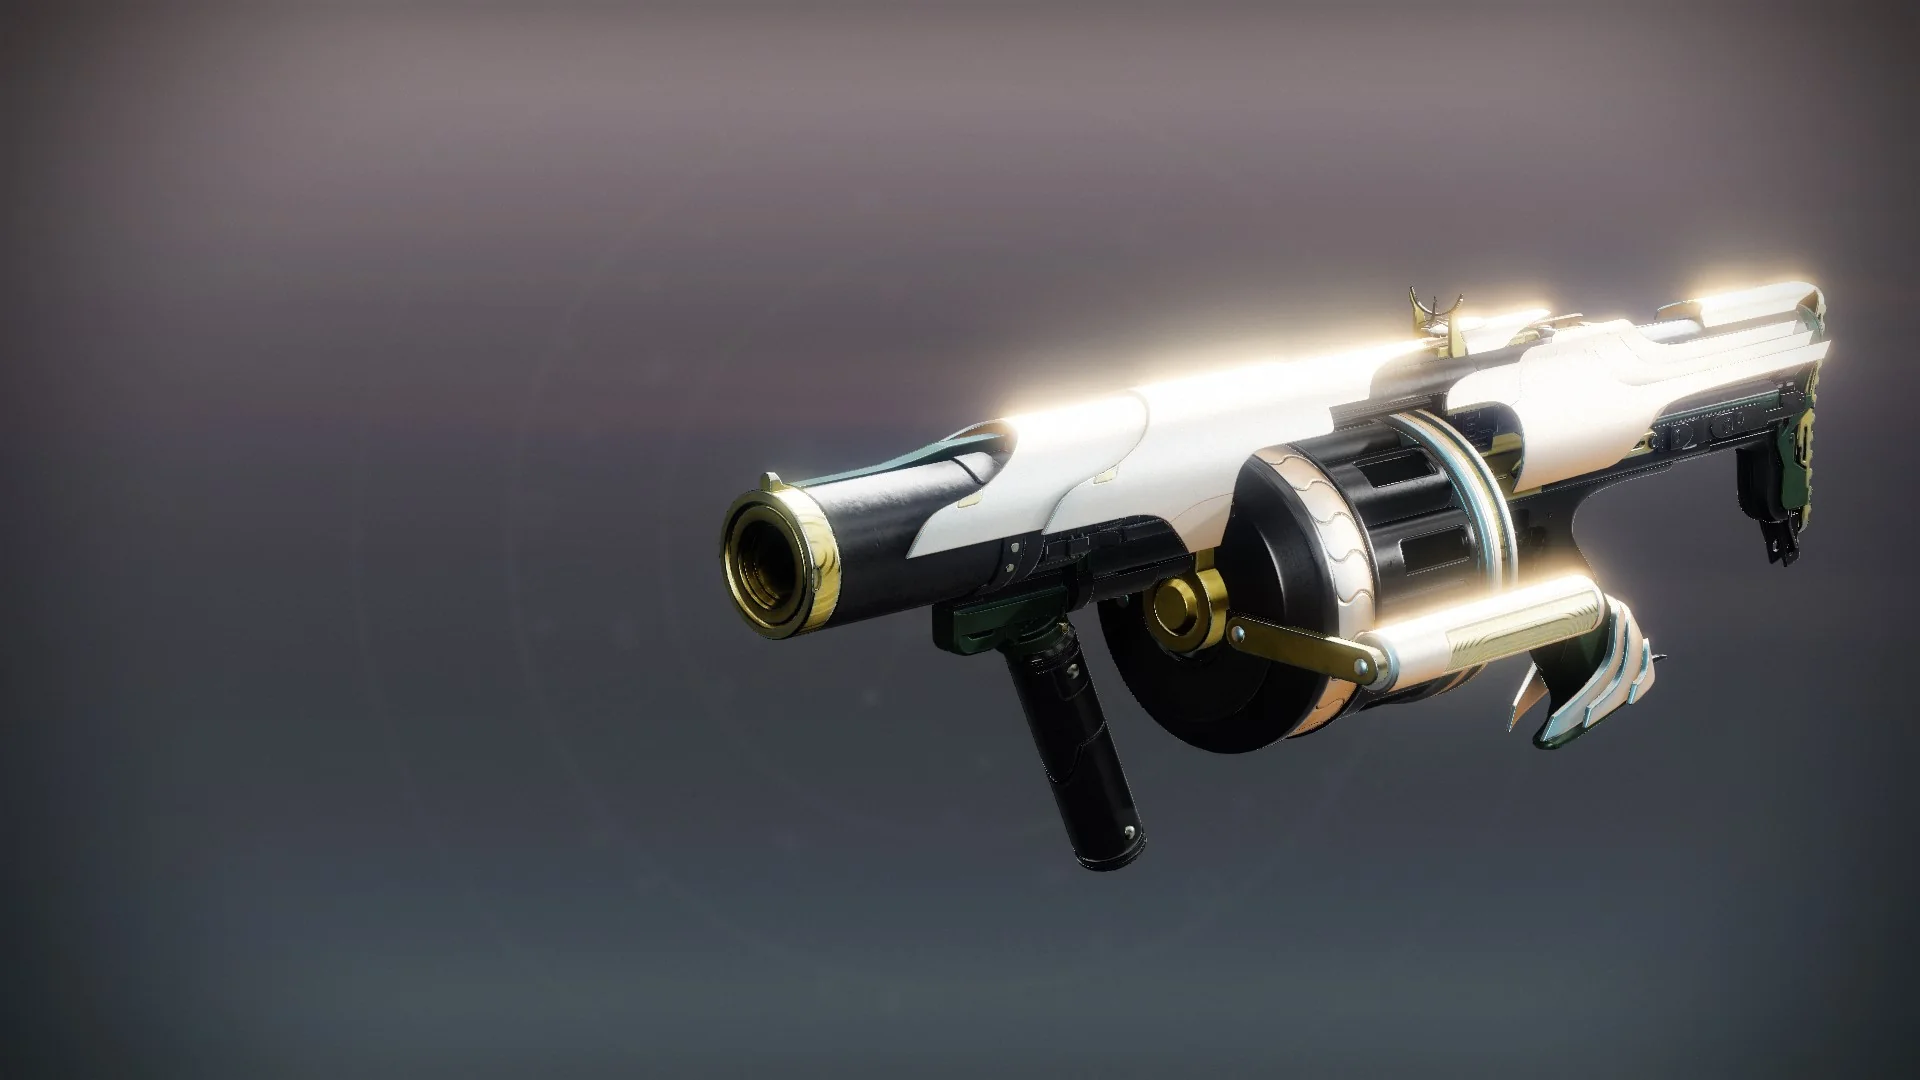
With strong damage perks and a magazine refill at its core, The Ever-Present is actually a pretty good heavy GL to chase in general. Exactly the same frame, but slightly better damage perks compared to Koraxis's Distress.

Starscape Null
Legendary // Lightweight Frame // Shotgun
Desirable Perks-
Barrel:
- Rifled Barrel
- Smallbore
-
Magazine:
- Assault Mag
-
Column 1 Perks:
- Reconstruction
- Rewind Rounds
-
Column 2 Perks:
- Elemental Honing
- Bait and Switch
- One-Two Punch
- Aggregate Charge
Masterwork: Range
Mod Slot: Bandolier
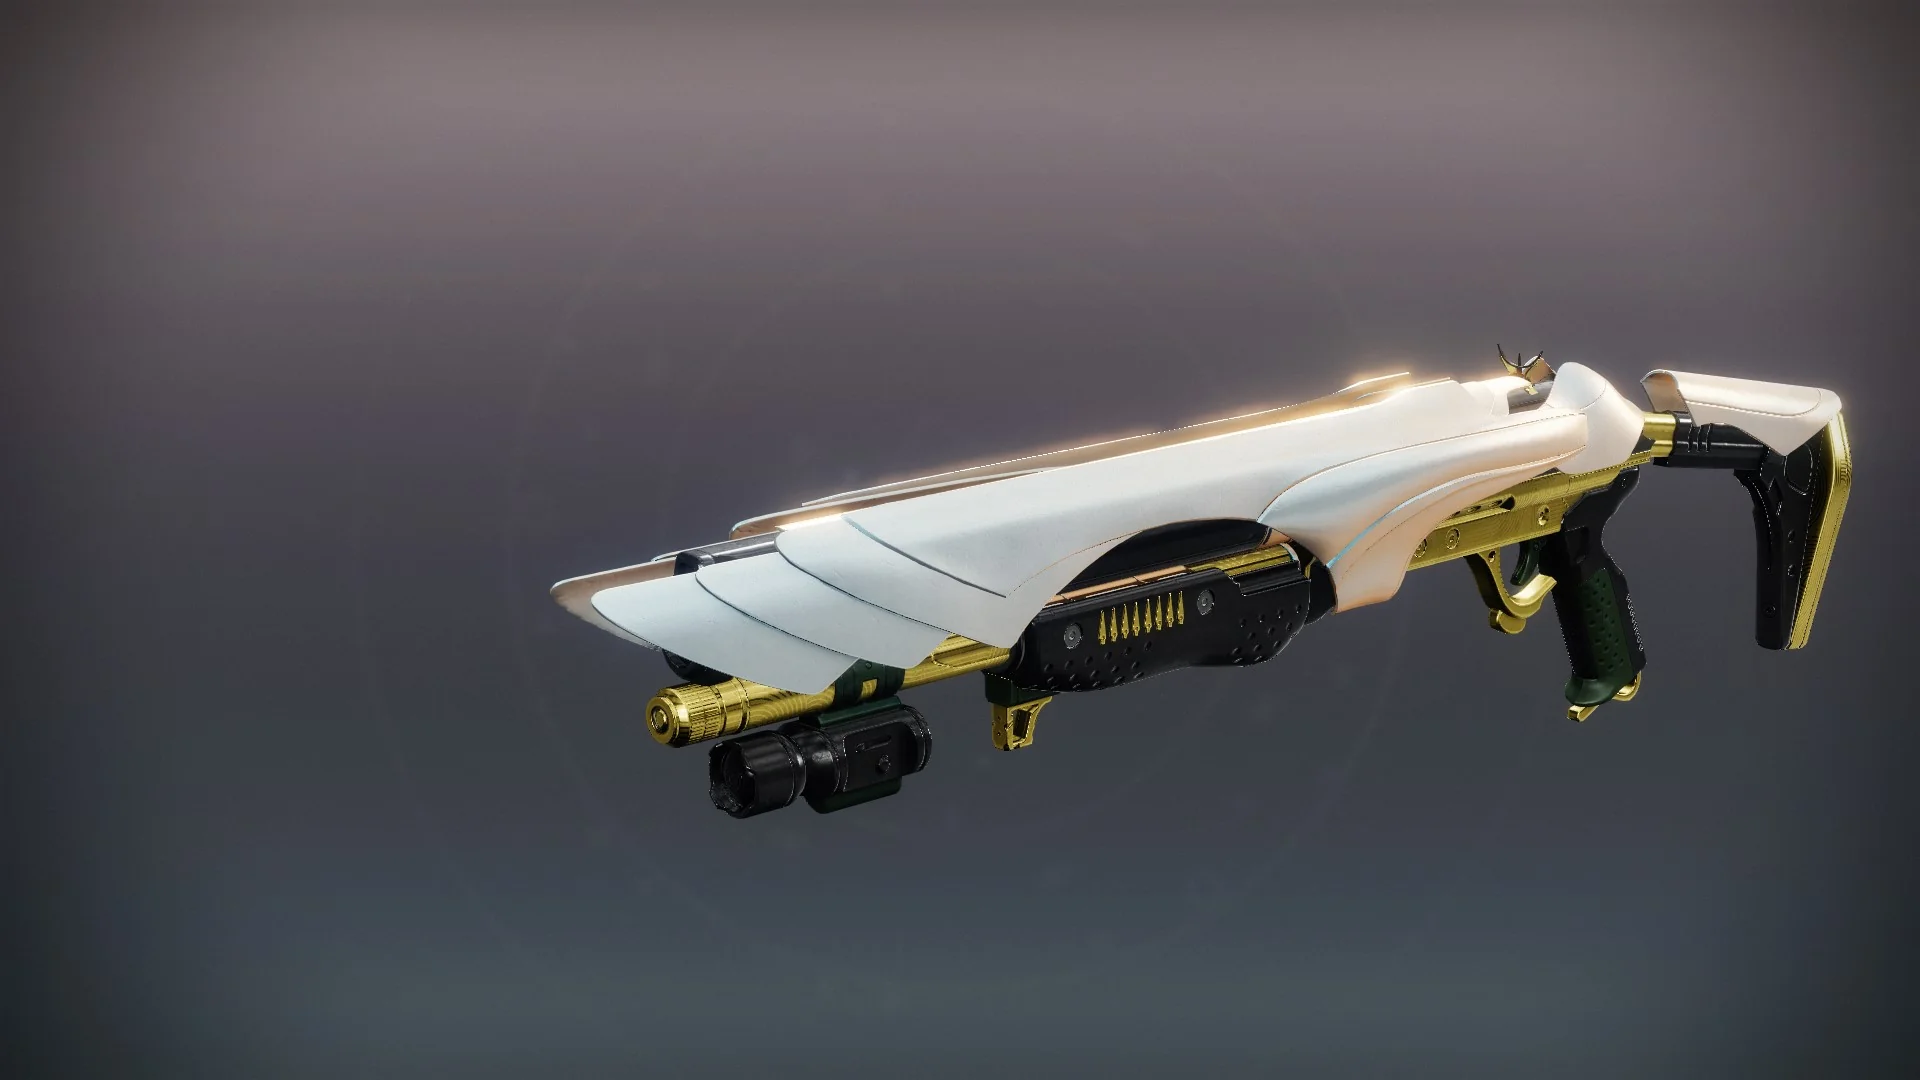
Its perks suggest a rotation-based use case, but on a less-than-ideal archetype for damage purposes. There's nothing wrong with Starscape Null, but it doesn't quite have the sauce to be an outstanding shotgun like Threat Level or the Ikelos.

Cusp Sempiternal
Legendary // Support Frame // Auto Rifle
Desirable Perks-
Barrel:
- Arrowhead Brake
- Corkscrew Rifling
-
Magazine:
- Accurized Rounds
- Appended Mag
-
Column 1 Perks:
- Reciprocity
- Repulser Brace
-
Column 2 Perks:
- Circle of Life
- Destabilizing Rounds
Masterwork: Range
Mod Slot: Bandolier
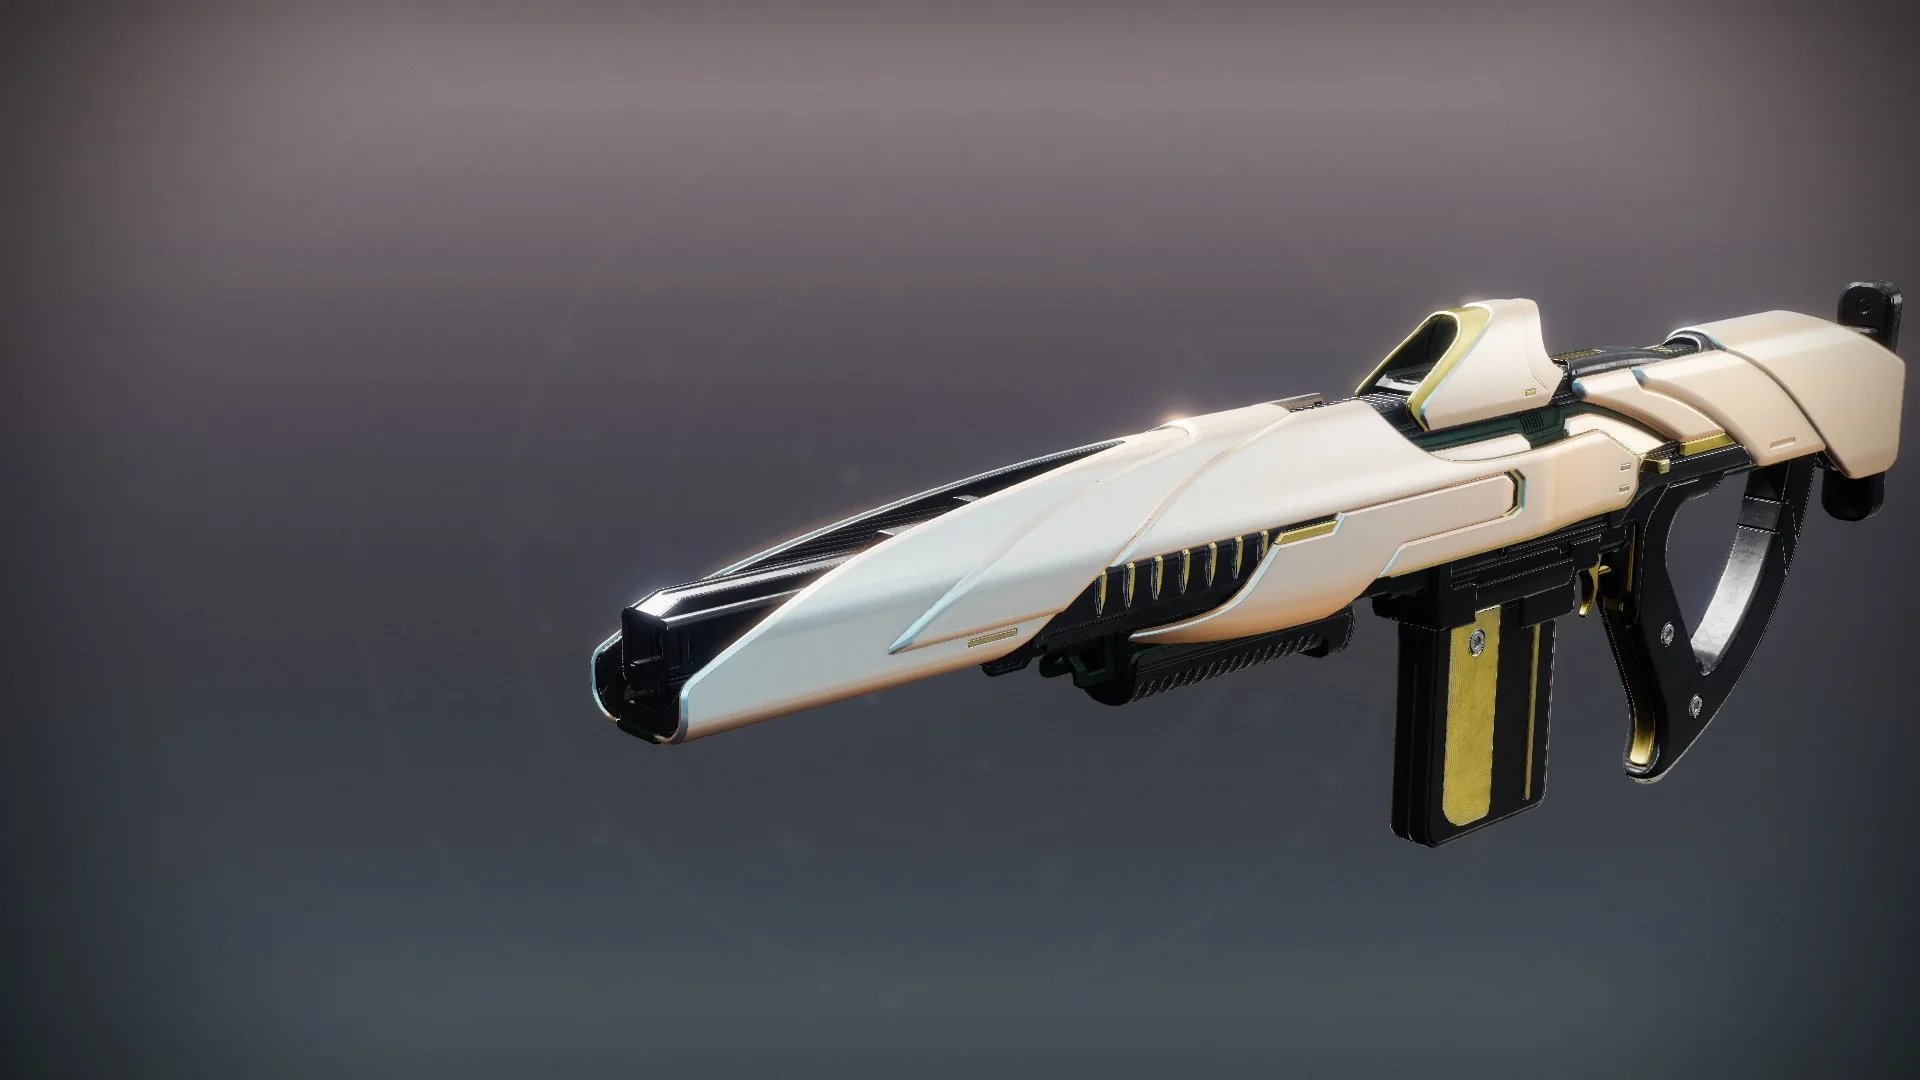
An outstanding auto rifle, with key utility perks and void debuffs. Stands confidently alongside Reckless Oracle, Gnawing Hunger and Reghusk's Pledge as some of the best void autos in the game. Compared to its brethren, Cusp Sempiternal trades some offensive capability for support. A personal favorite of the review writer.

Whirling Ovation
Exotic // Rocket Launcher
Details
Coronal Culmination: Hold to charge rockets for a delayed solar explosion. Charging increases damage of both the rocket impact and explosion.
Anticipation: Charge speed increases over time, and increases faster as you deal damage with other weapons.
Catalyst: Fully charged shots penetrate weaker combatants, and cause a delayed solar explosion that leaves a scorching field.
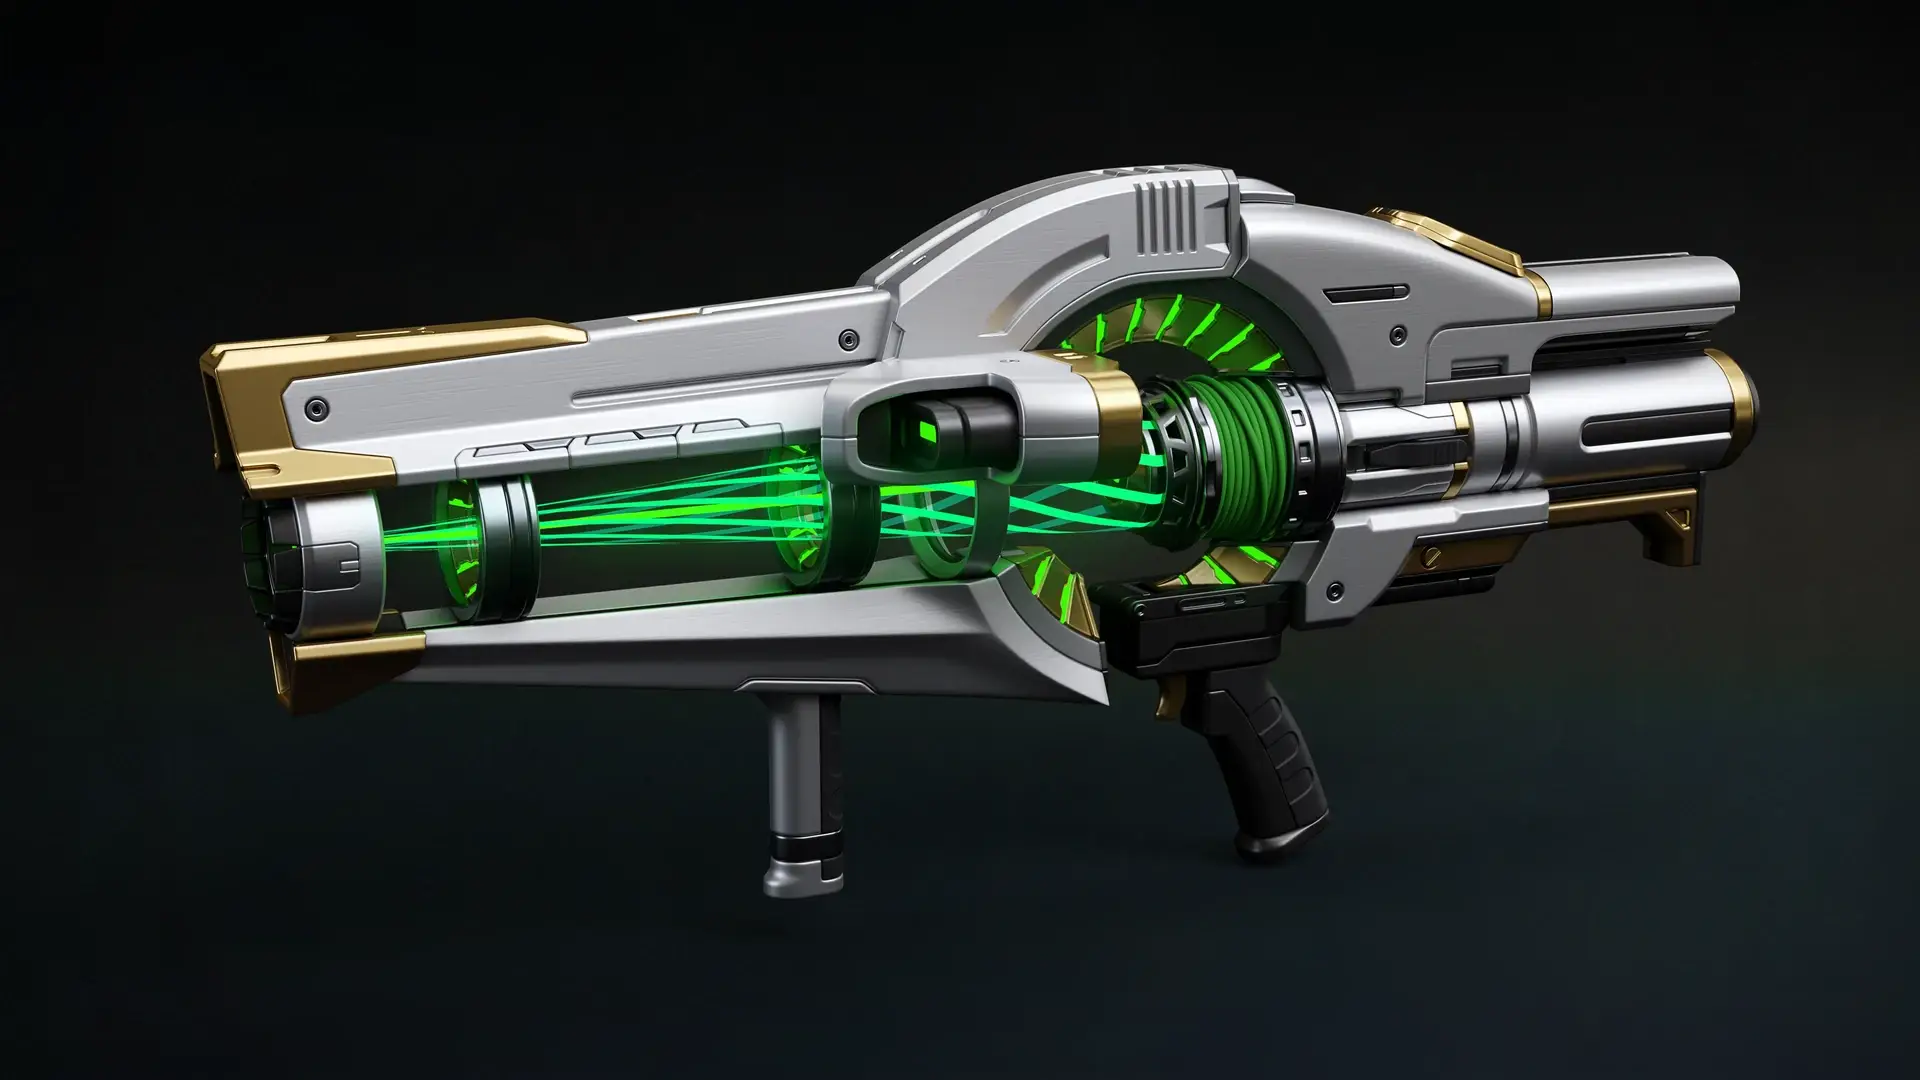
An interesting concept that is unfortunately in the wrong timeline. Whirling Ovation relies on a rotation-based DPS system that Parasite or Still Hunt/Hezen already dominate. As a rocket launcher, Truth dumps more damage for less hassle.
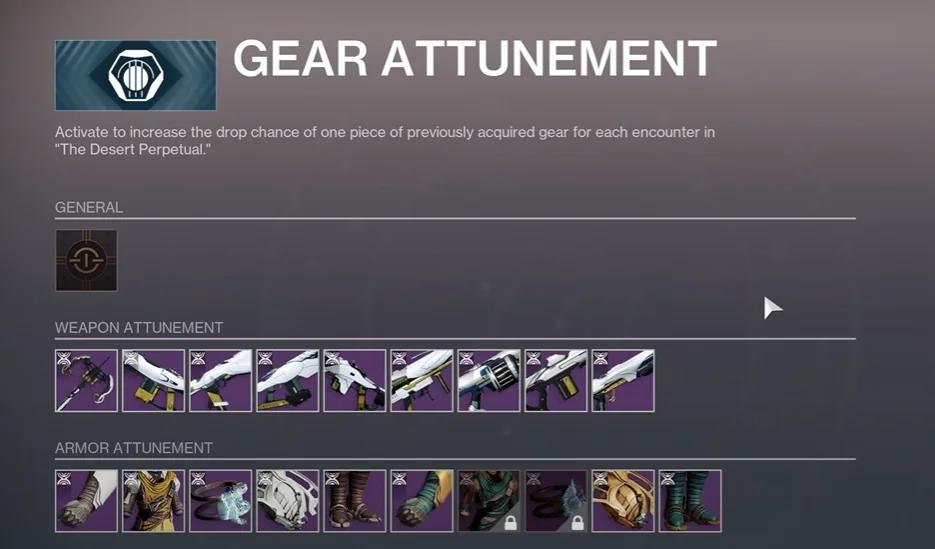
Raid Vendor Attunement
Epic also expands the raid's vendor system. After completing the required progression, players can attune previously acquired Desert Perpetual gear, increasing its chance of dropping from encounters. This is particularly useful when farming a specific weapon or armor piece because you are no longer relying entirely on the base encounter loot pool. Bungie introduced this as part of the Epic expansion and tied it to the additional raid questline.
You can also attune for the Whirling Ovation Catalyst, which will drop from any boss encounter after attunement.
The Nursery
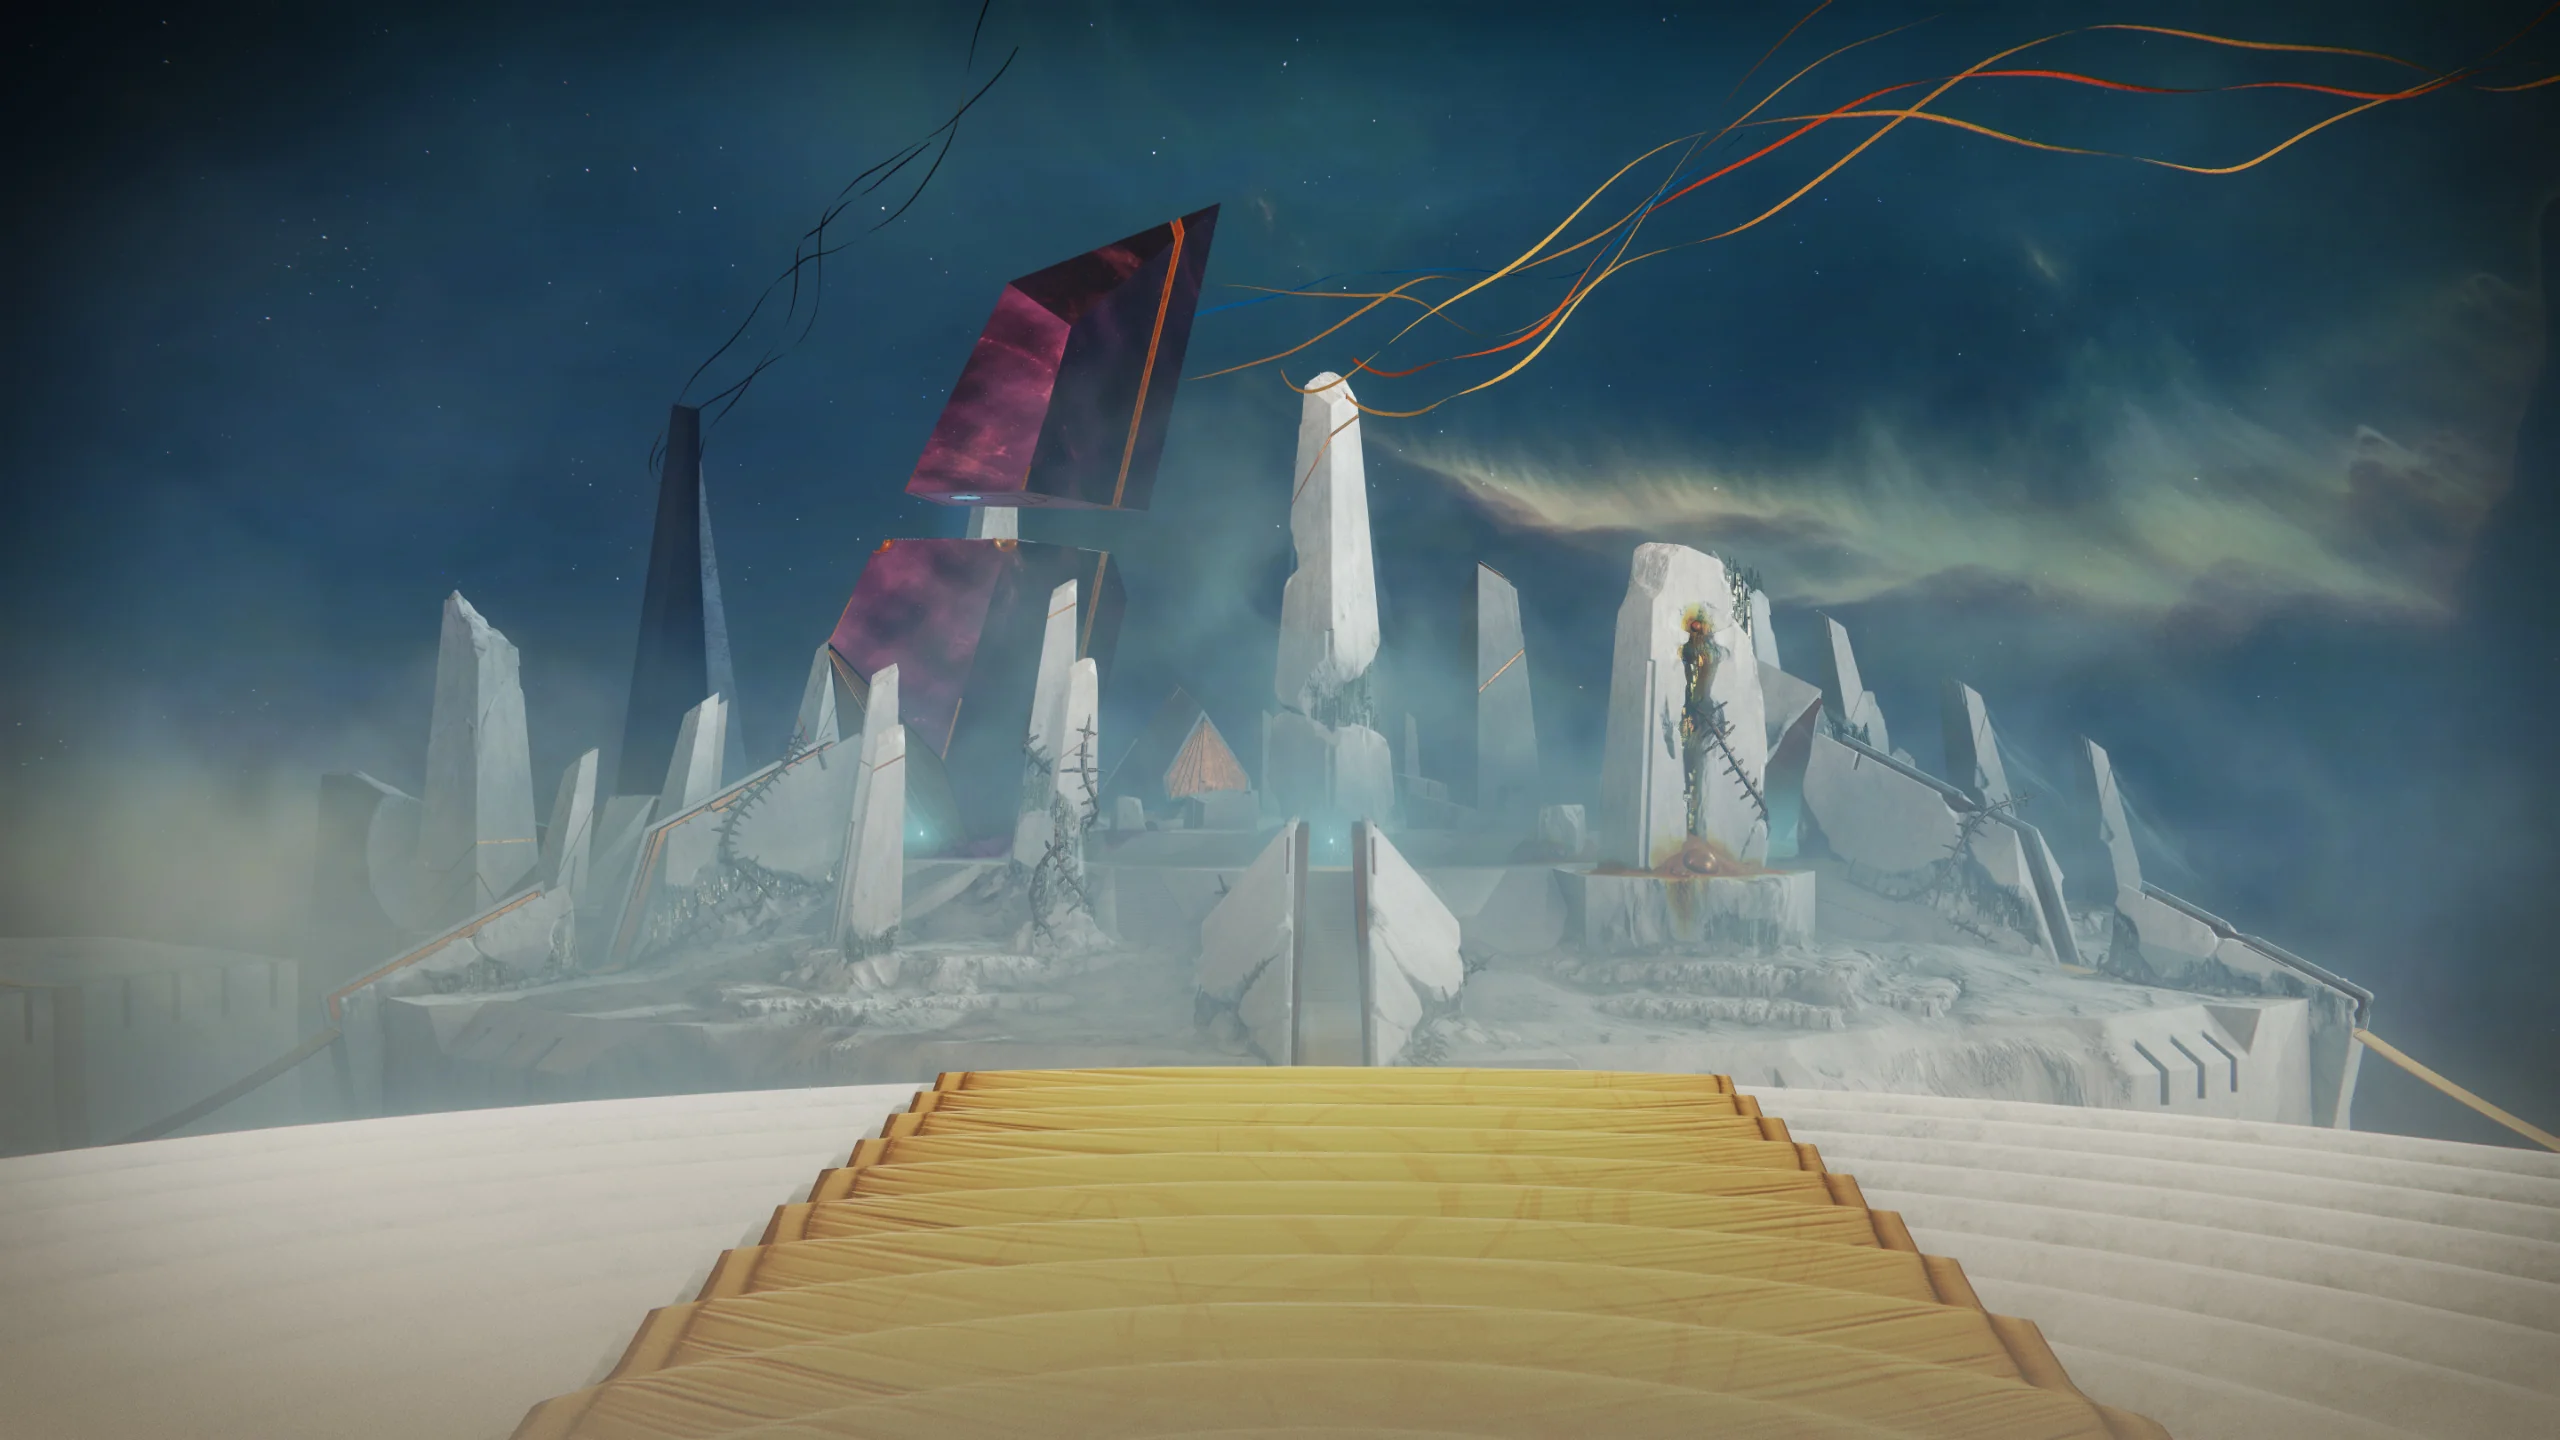
The Nursery remains the central hub for Epic Desert Perpetual, with each half-sphere corresponding to one of the available encounters. The interact prompts are changed to the following:
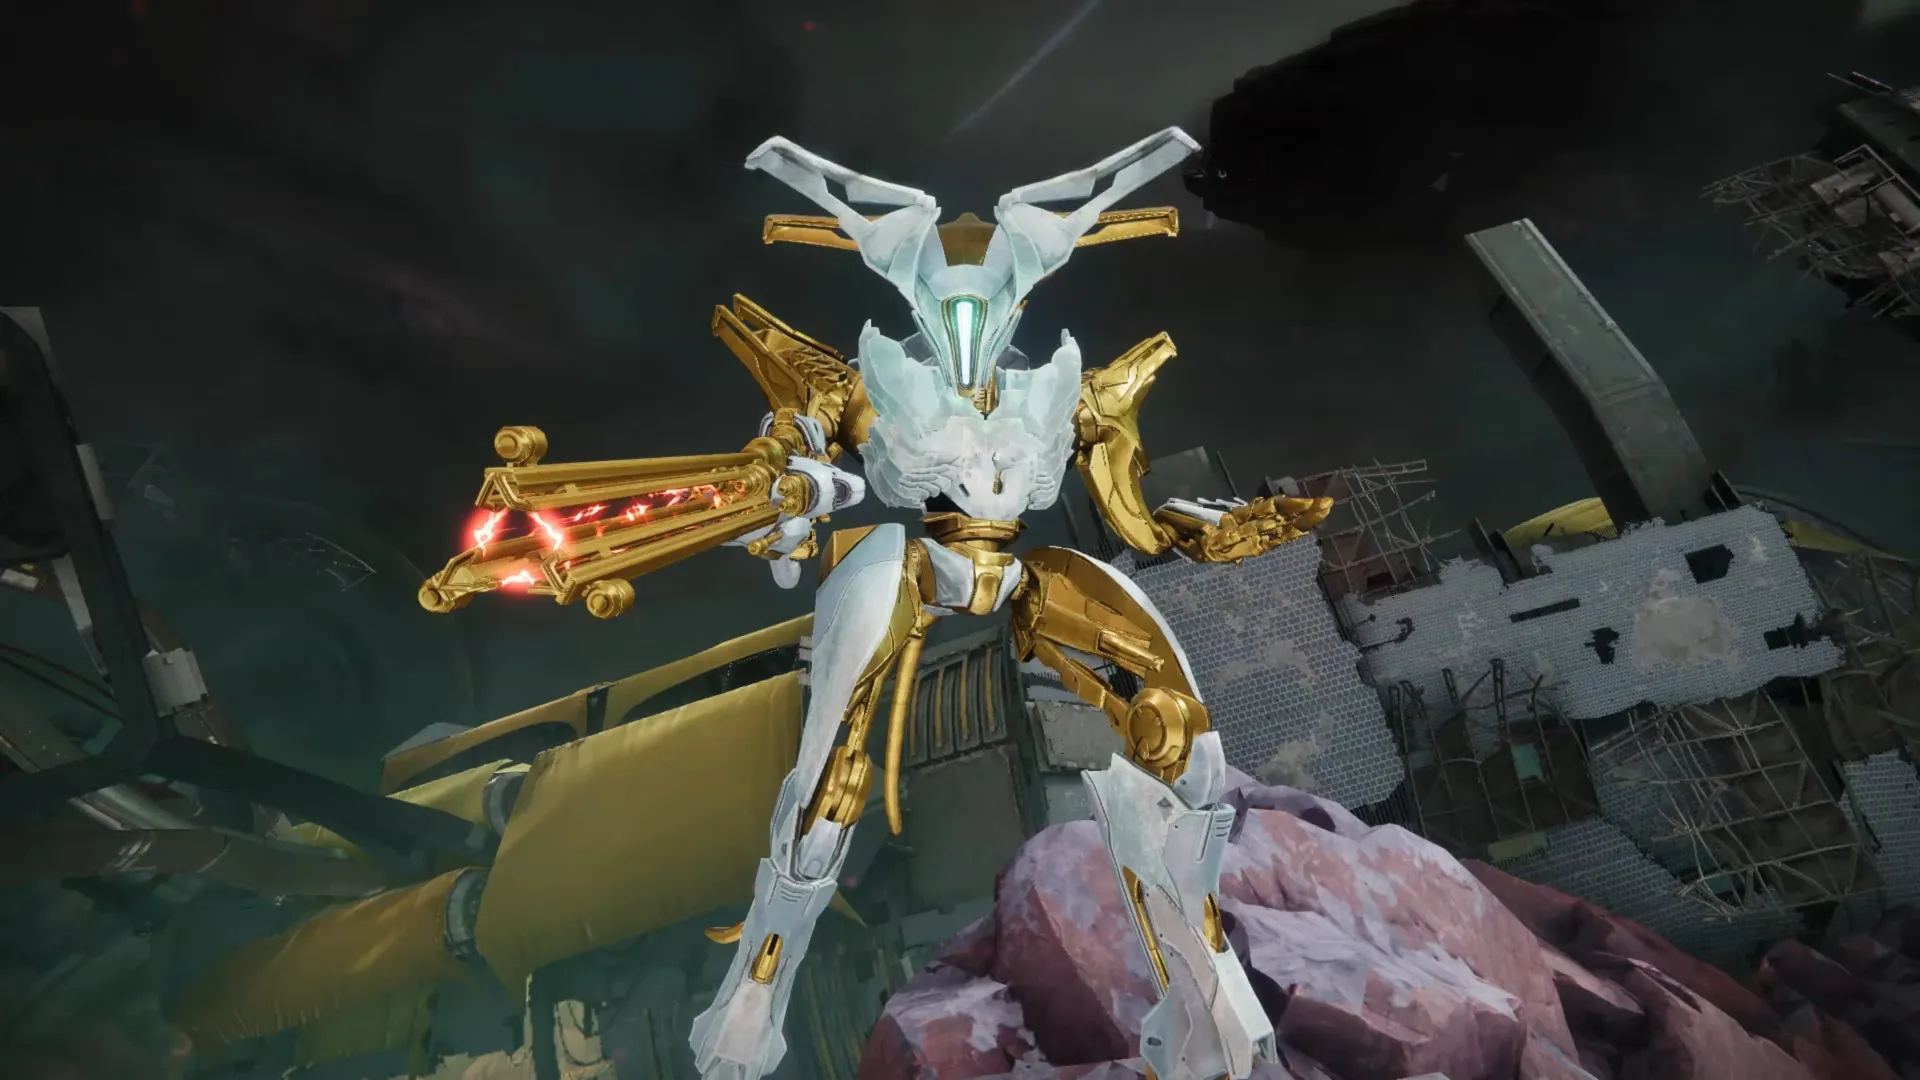
- "directive=seek&&grasp" : Agraios, the Hobgoblin
- "directive=observe&&influence" : Epoptes, the Hydra
- "directive=evolve&&judge " : Iatros, the Wyvern
- "directive=reconstruct" : Koregos, Fractured in Time (Unlocked directly after completing Epic once)
As with Normal, interacting with a half-sphere reveals the path toward its corresponding encounter. The first three encounters can be completed in any order, while Koregos becomes available after all three have been defeated. The Nursery remains the central hub throughout the raid, allowing the fireteam to return here between encounters.
In this guide we will describe the additional mechanics and changes to each encounter.
Agraios, Inherent
Velocity's TombRecommended Loadouts:
- Titans: Thundercrash + Cuirass of the Falling Star (More the merrier!) // Bolt Charge.
- Warlock: Well of Radiance + Lunafaction Boots // Song of Flame + Sanguine Alchemy // Speaker's Sight for extra healing // Needlestorm + Mataiodoxia.
- Hunter: Tether + Fortune's Favor // Blade Barrage + Shards of Galanor.
Recommended Weapons:
- Prospector // Truth.
- Special or Heavy Grenade Launcher or other burst damage weapons to add clear Wyverns and Hydras.
Roles:
- 3 x Temporality Buff Runners.
- 3 x Chronon Collectors.
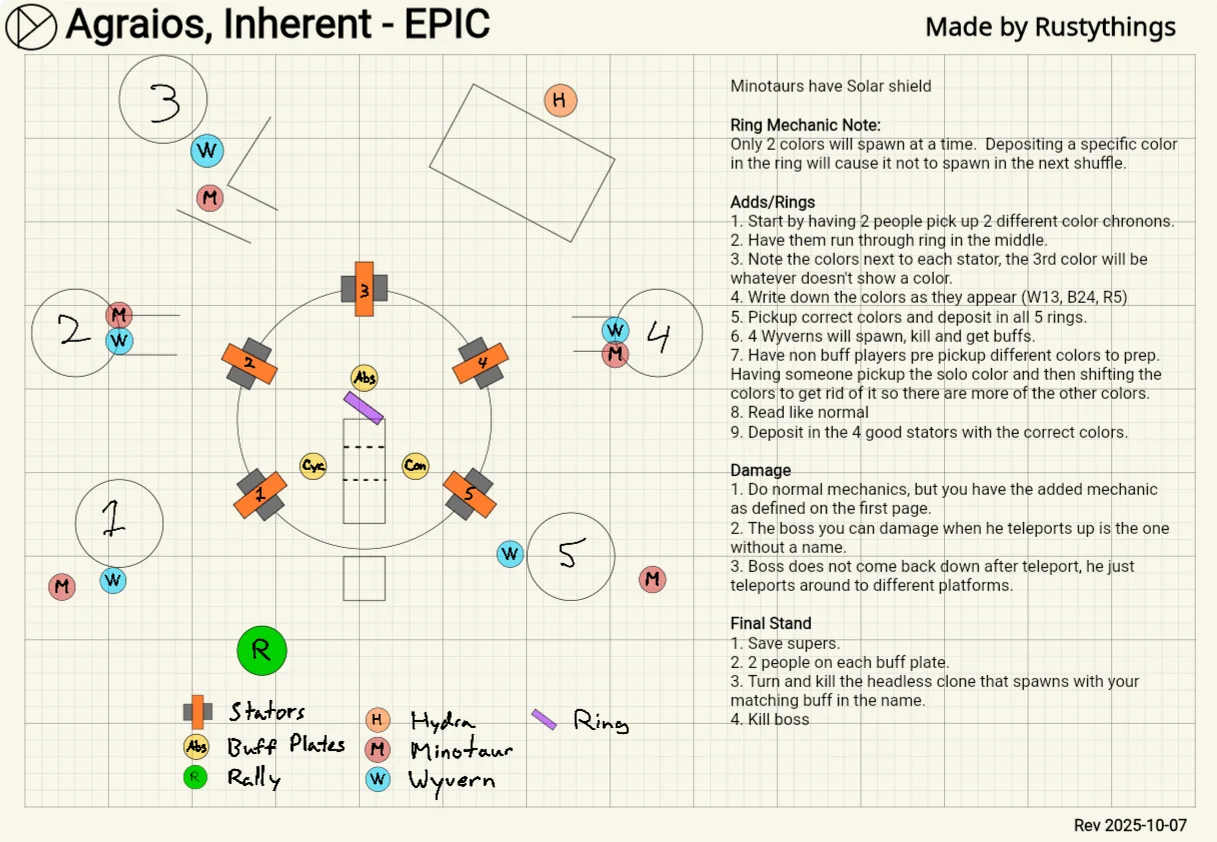
Change One: Chronon Canisters
In the Epic version, Cobalt (blue) Chronons are no longer the only Chronons present in the encounter. Cinnabar (red), Antimony (white), and Cobalt (blue) Chronons can all appear, and their types are directly tied to several of the encounter's mechanics. As in the Normal version, Chronons are used to charge the portals. However, each portal is now assigned a specific Chronon type. For example, a portal may have a canister containing a Cinnabar (red) Chronon attached to it. This indicates that the portal can only be interacted with using a Red Chronon.
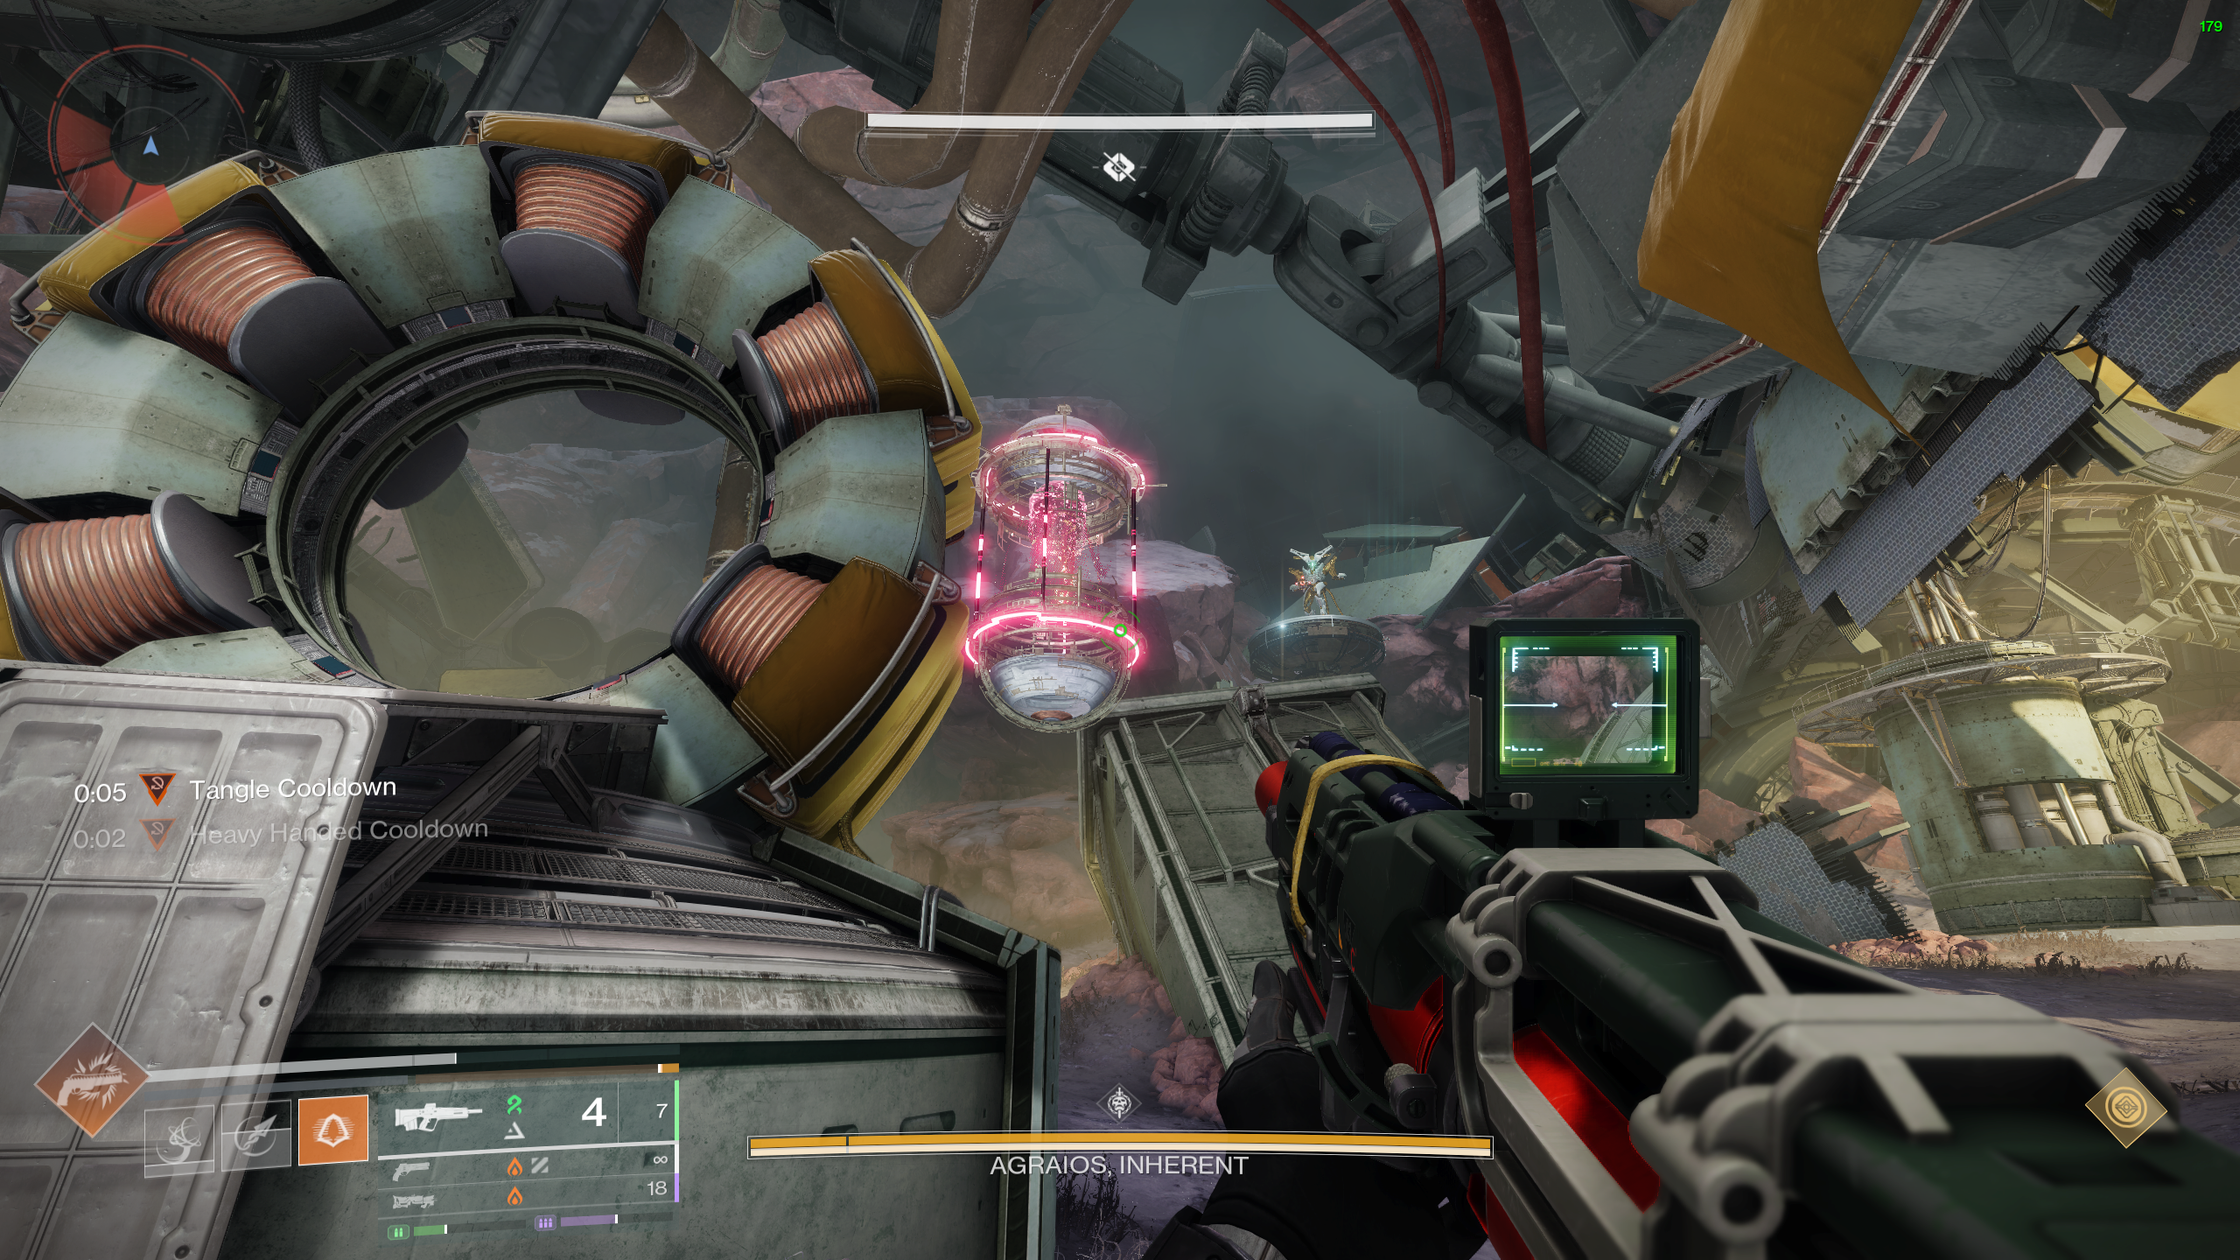
Alignment Pillars
Chronon Canisters are not limited to the portals. They can also be found on the Alignment Pillars used by the Temporality players. An Alignment Pillar may display a canister containing an Antimony (white) Chronon. This provides two important pieces of information:
- The Temporality player assigned to that Alignment Pillar must bring a White Chronon to activate it.
- The Chronon displayed on the Alignment Pillar determines the type of Chronon dropped by the Minotaur that spawns at that location.
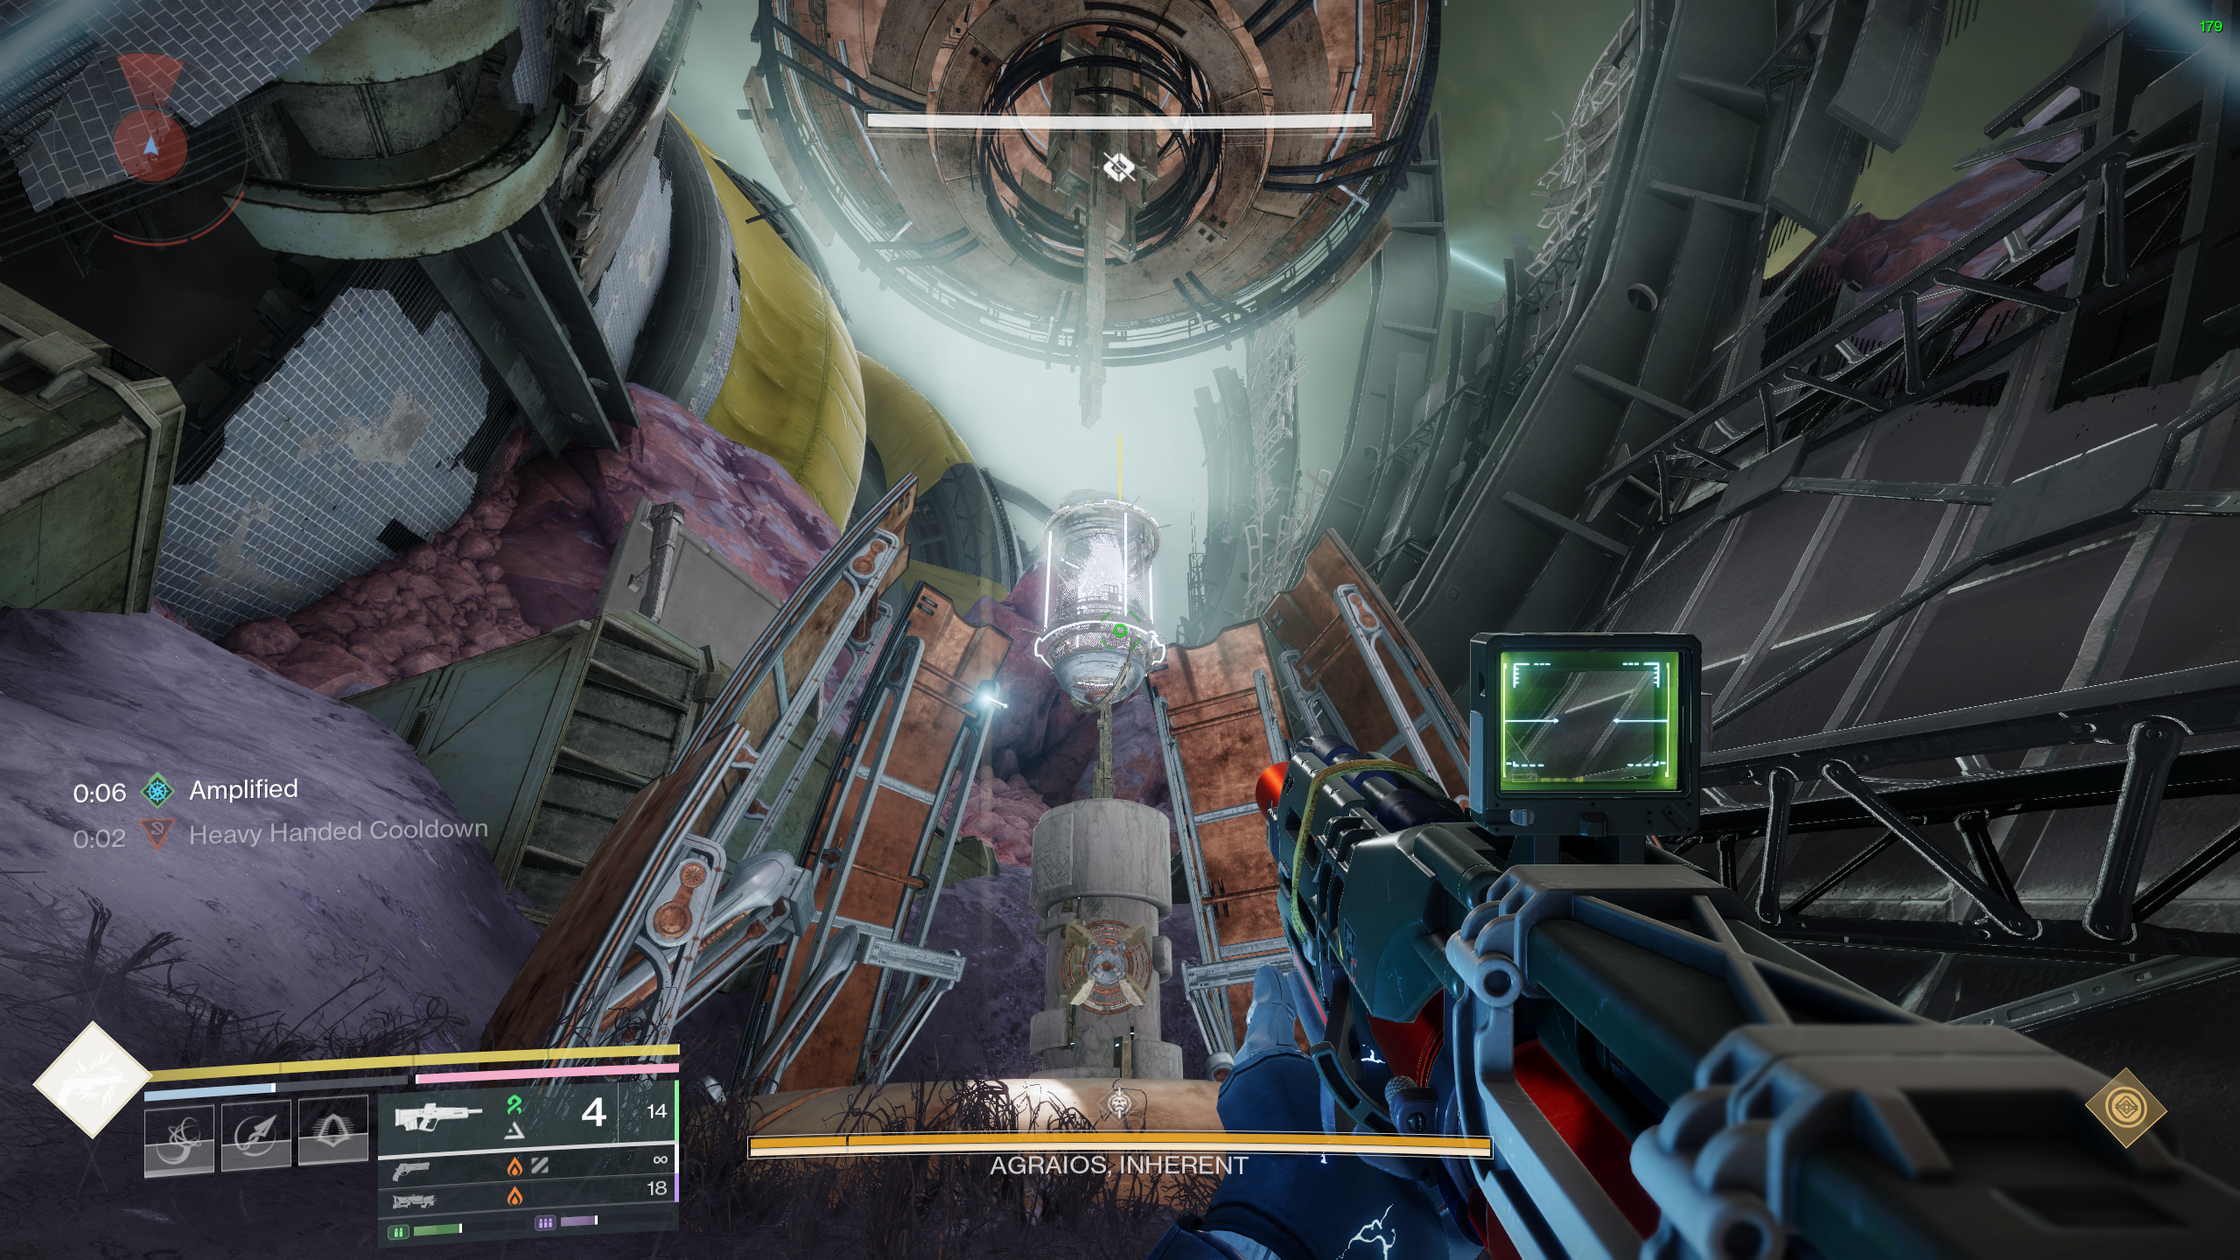
The Chronon type required by each portal is not immediately visible when the encounter begins. To identify which Chronon belongs to each portal, the fireteam must first activate the Chronon Hoop.
Change Two: Chronon Hoop
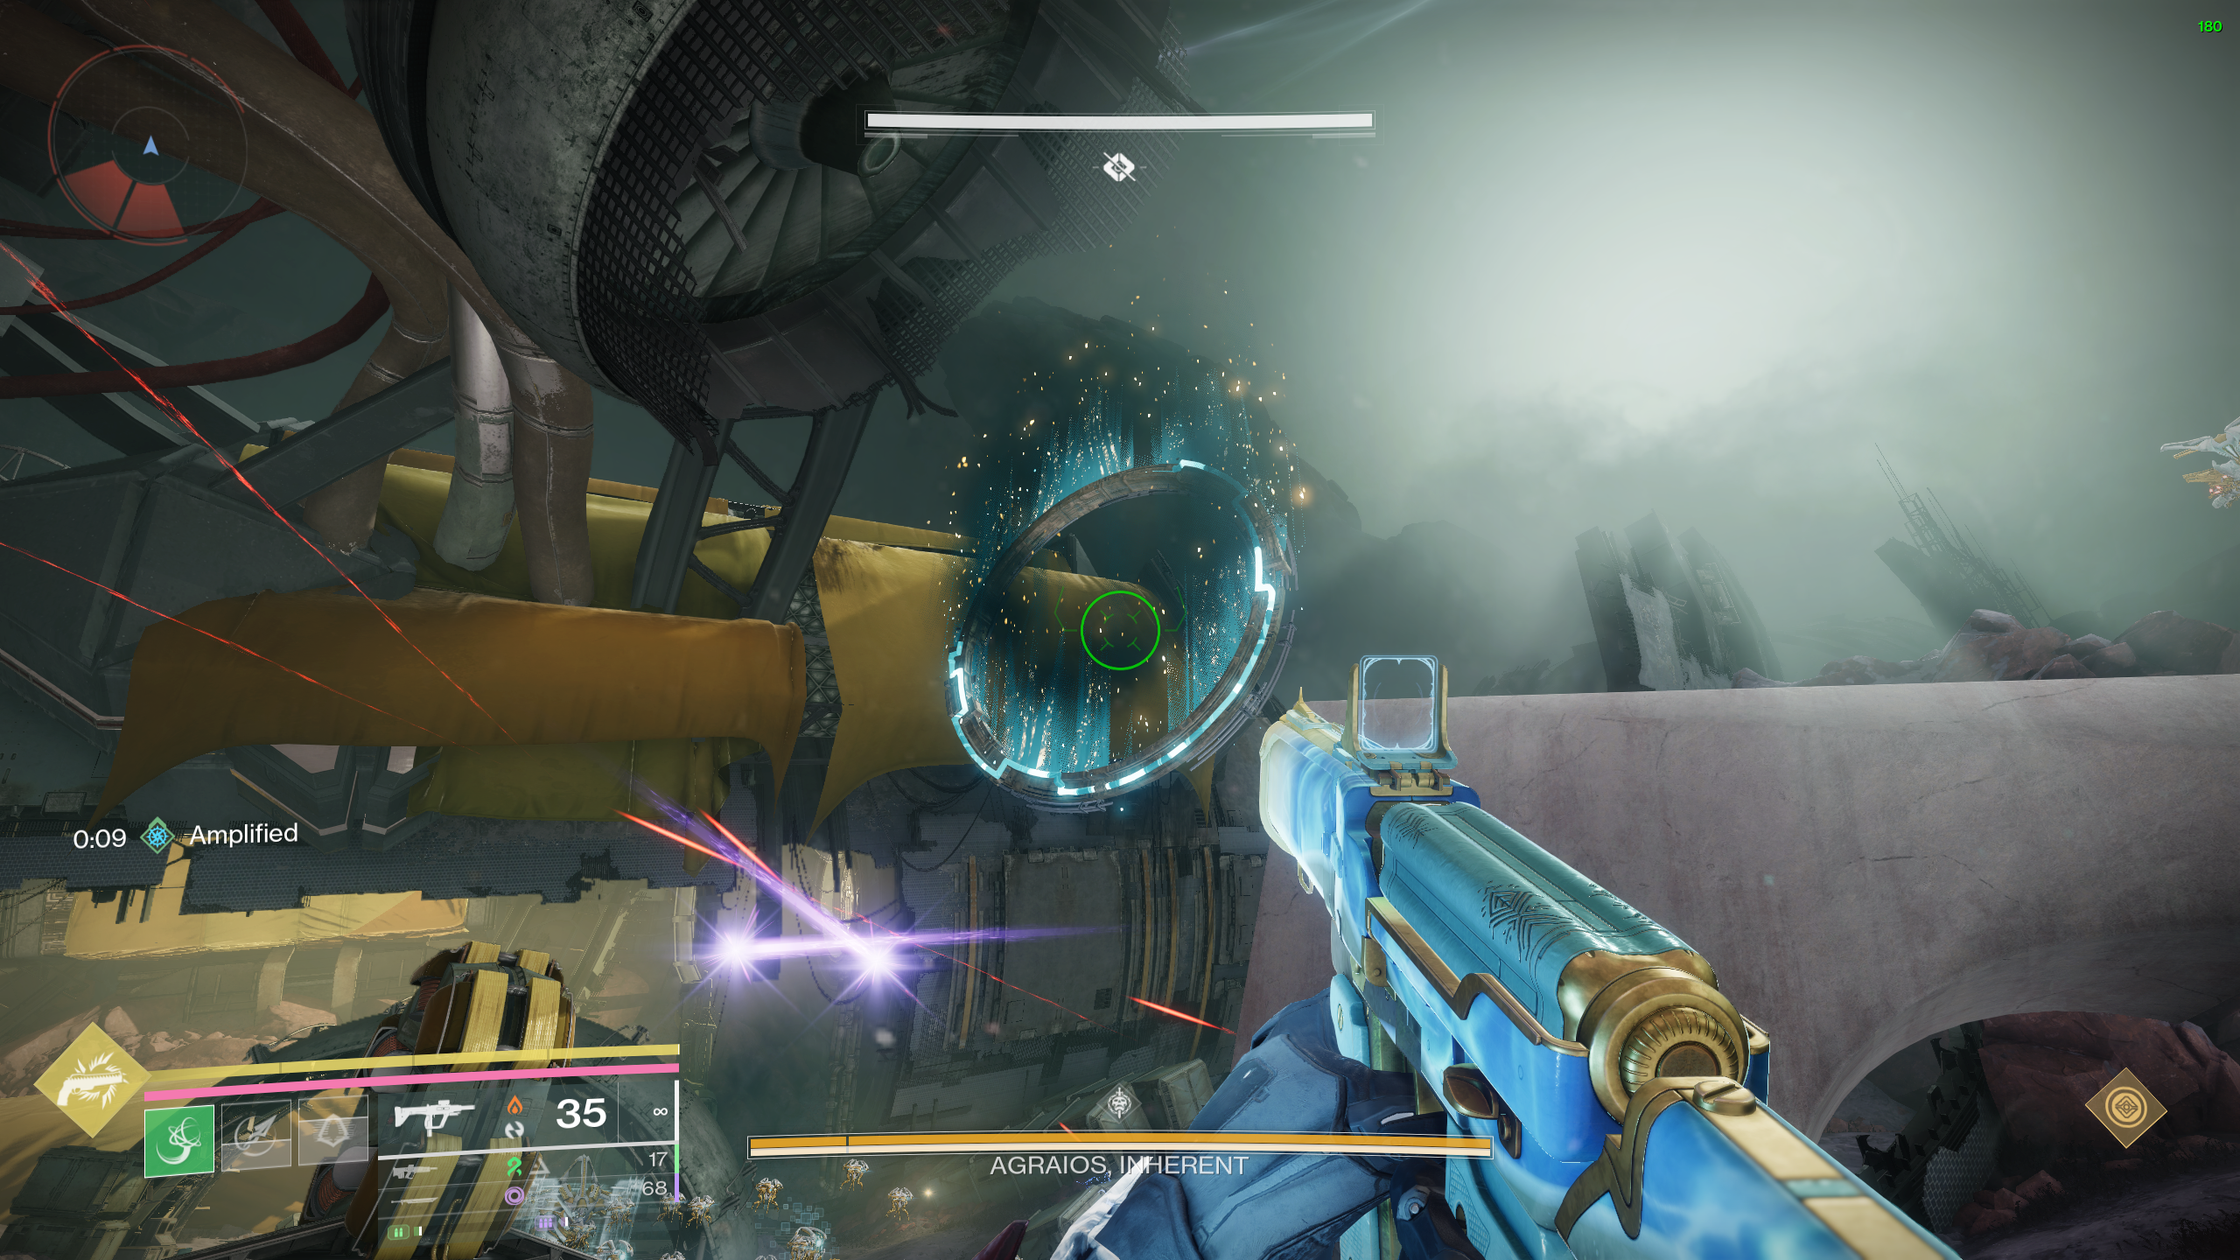
Depositing a Chronon into the hoop will reveal that Chronon's type in the canisters associated with specific portals around the arena. Think of the Chronon Hoop as a scouting tool. It allows the fireteam to determine which Chronon type is required by each portal before attempting to charge or activate it.
The Chronon Hoop can also change the Chronon types assigned to the Alignment Pillars. Jumping through the hoop while carrying any Chronon will cycle the pillar assignments, changing which Chronon type their Minotaurs drop. This is especially useful when a required Chronon type is not currently spawning, allowing the team to cycle the pillars until the needed type becomes available.
For example, if a portal requires a Red Chronon, but none of the active Alignment Pillars are producing Red Chronons, a player can carry a different-coloured Chronon through the Hoop to change the Alignment Pillar assignments. The team can then locate a pillar with the Red Chronon, kill its minotaur and use it to charge the portal.
- You dunk a Red Chronon through the hoop and see the canisters on Portals 3 and 5 are red.
- Next, you dunk a Blue Chronon through the hoop and see the canister on Portal 1 is blue.
- The remaining canisters on Portals 2 and 4 will be automatically white. Because there can only be maximum two portals of the same colour. You do not need to dunk a third time.
Change Three: DPS & Final Stand
Agraios' DPS cycle remains largely unchanged, with the boss teleporting around the arena between damage points. However, in Epic, Agraios will continue teleporting between the various platforms scattered throughout the arena after its initial teleport. This creates a much longer-range DPS phase, making close-range options significantly less effective for most of the encounter. If you are using Thundercrash, be sure to use it at the start of the DPS phase, while Agraios is still within range.
Final Stand
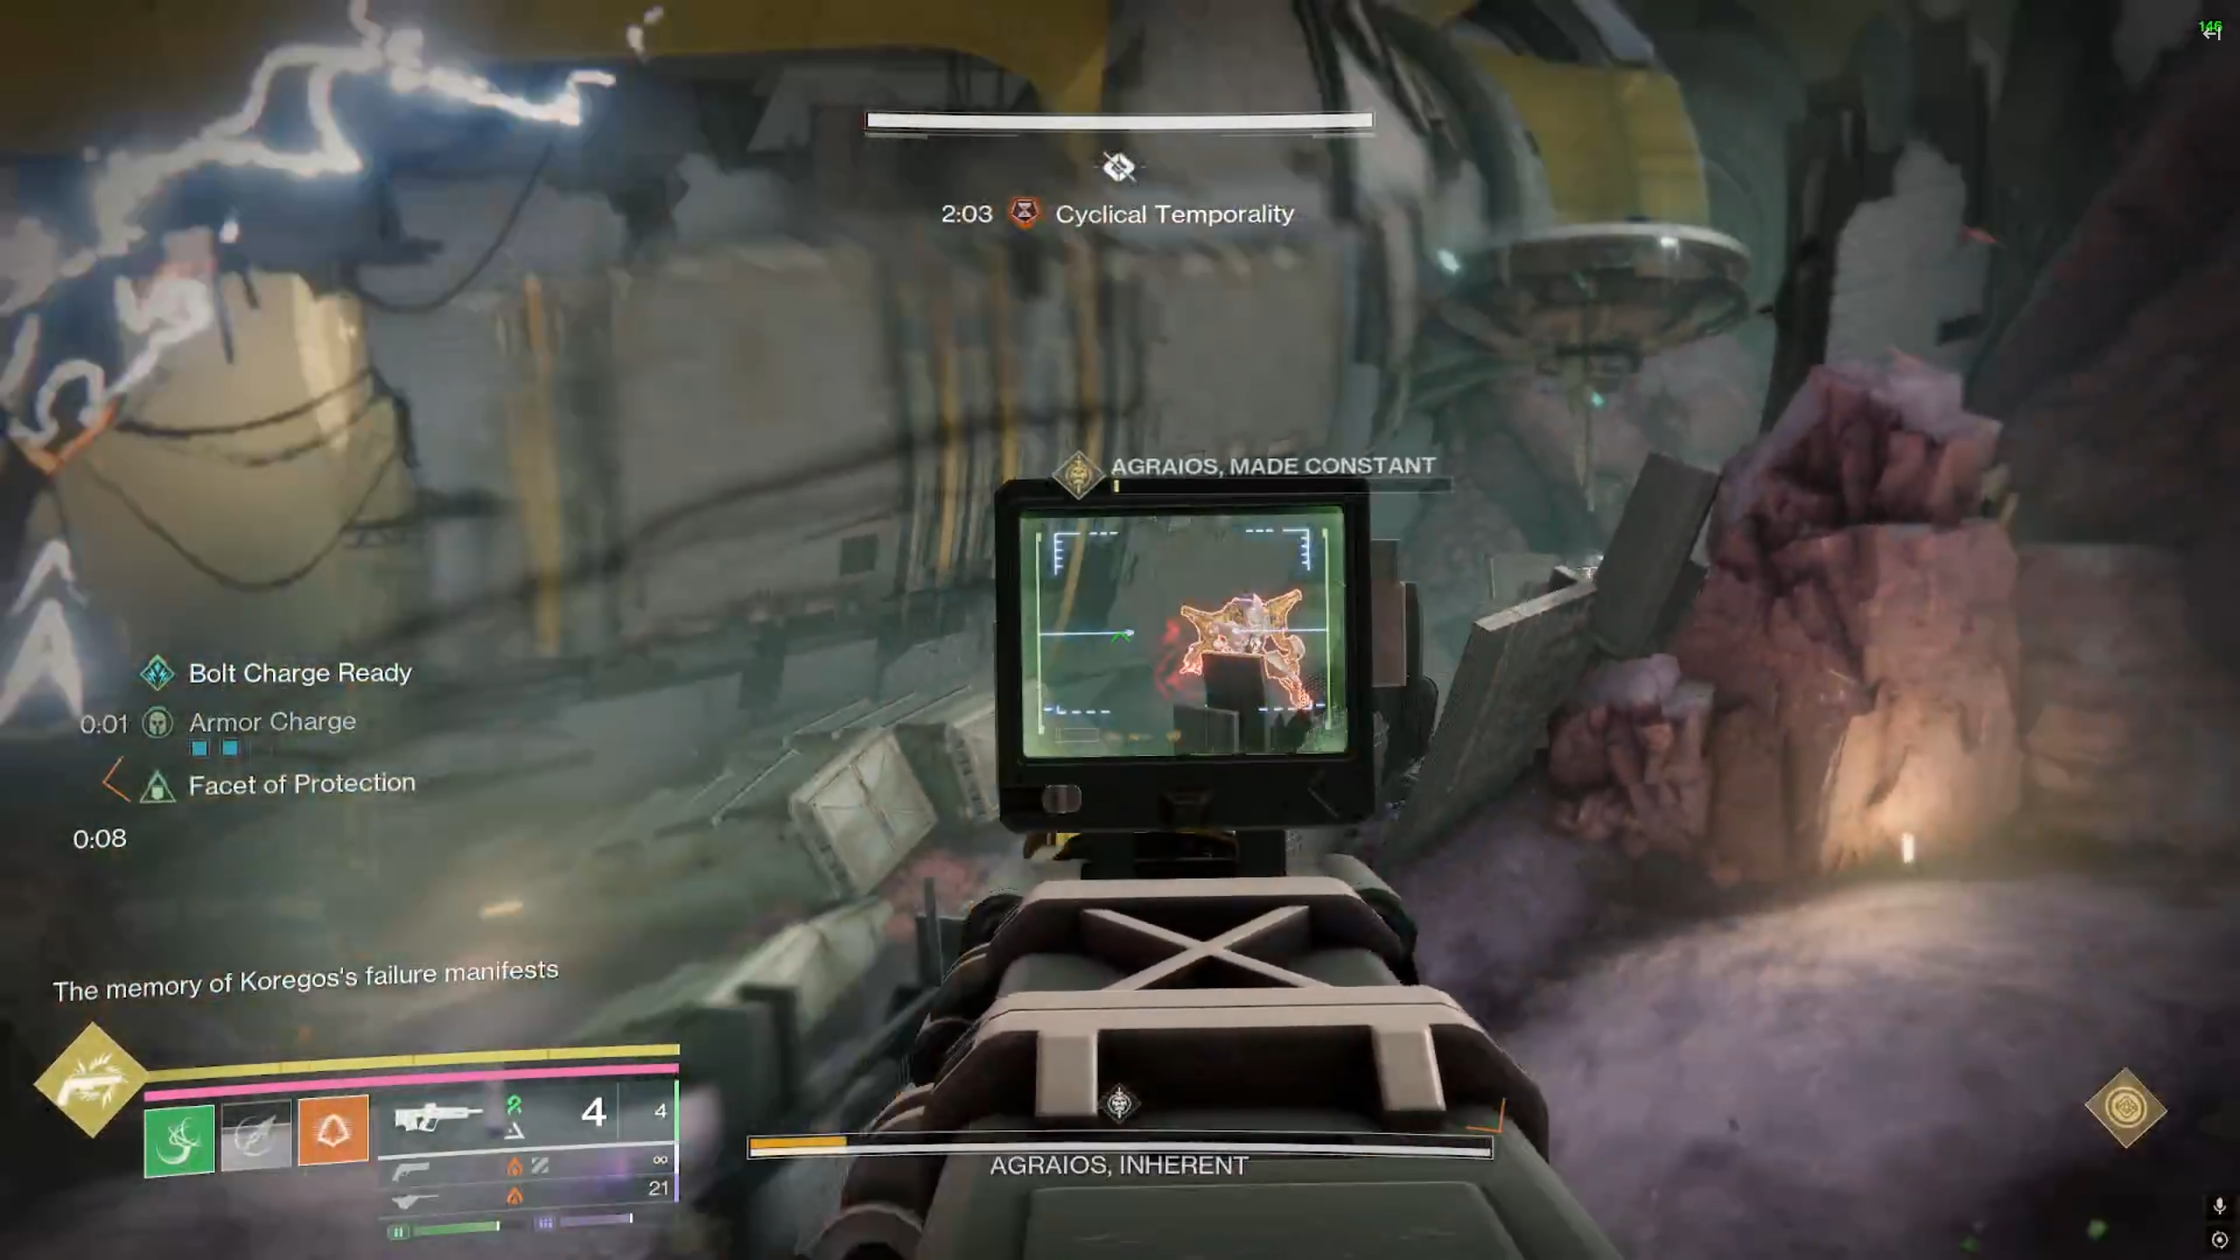
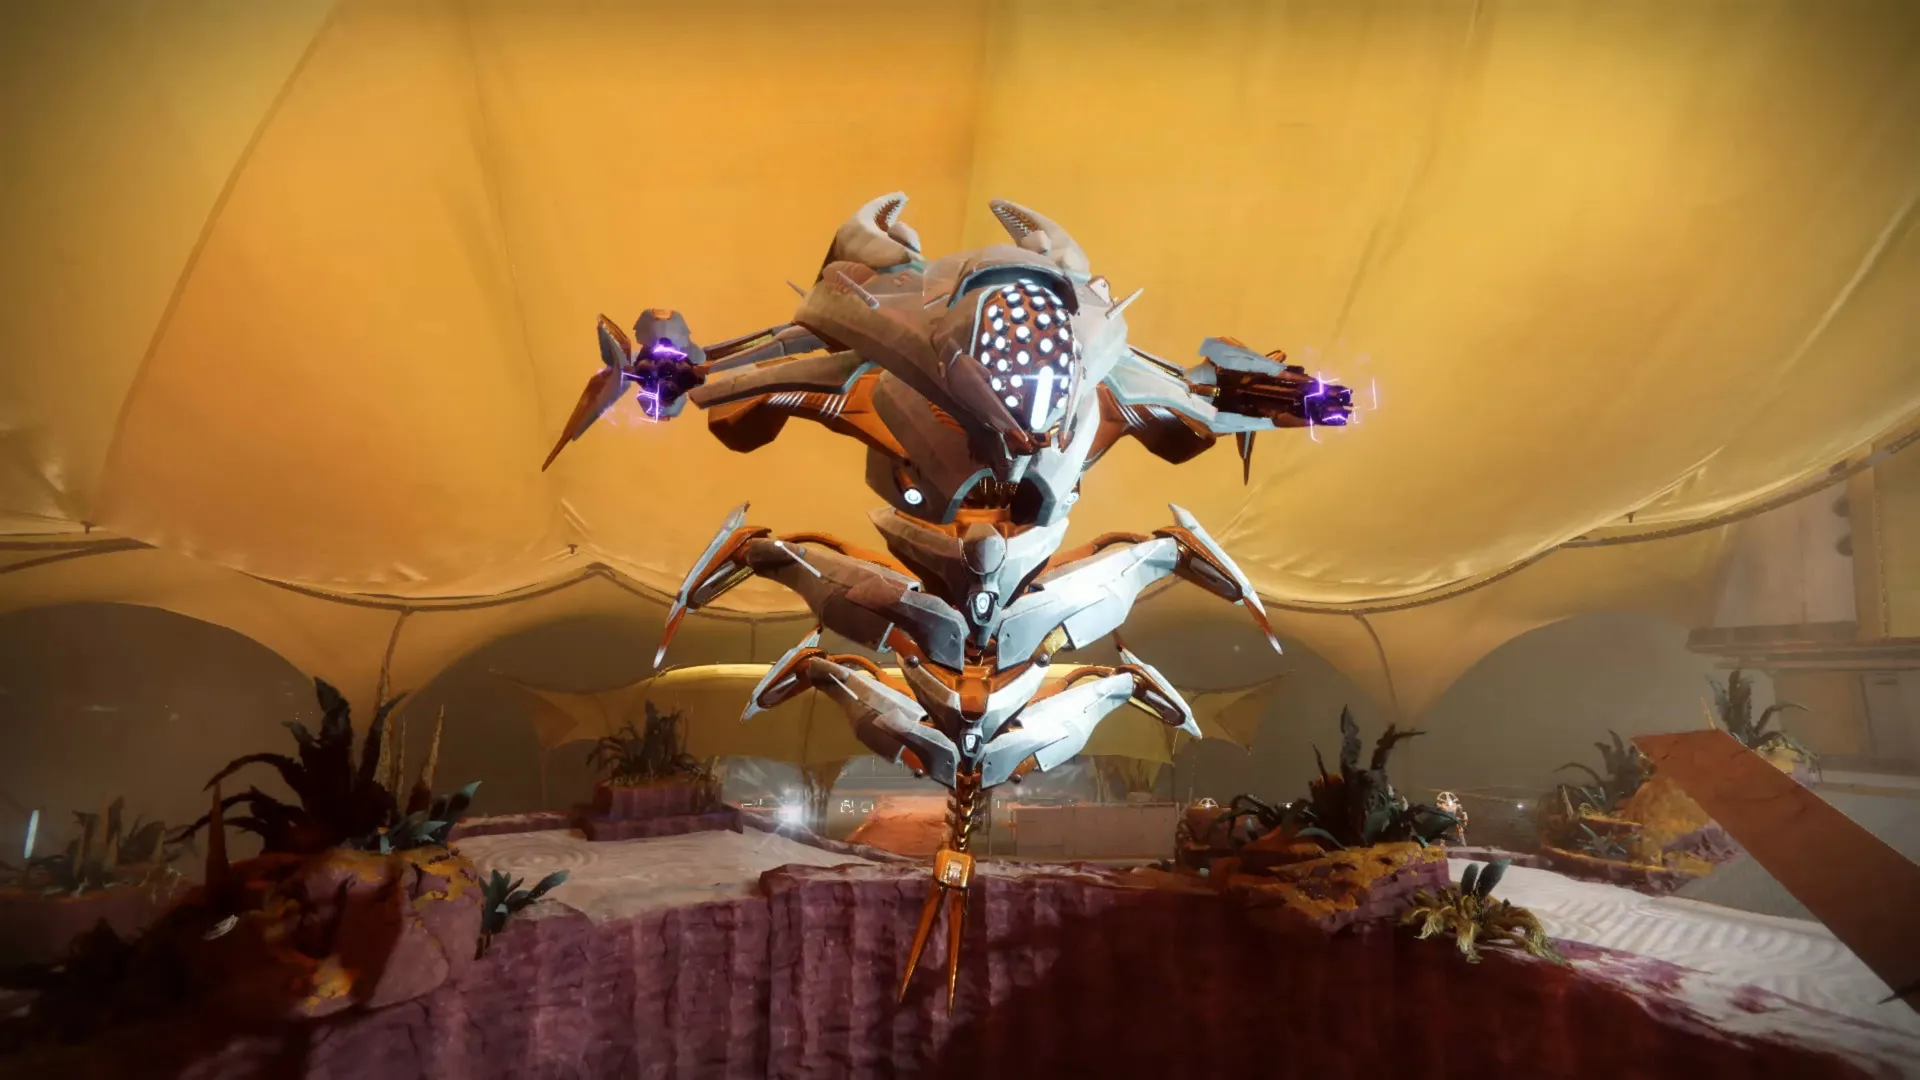
Epic Agraios also introduces a new Final Stand mechanic. Once Agraios reaches its final health threshold, it becomes immune and summons three additional versions of itself: Agraios - Made Constant, Agraios - Made Cyclical and Agraios - Made Absolute.
Each version can only be damaged by players holding the corresponding Temporality. For example, a player holding Cyclical Temporality can damage Agraios, Made Cyclical. Temporality is obtained as normal by having players stand on the plates around the arena. We recommend assigning two players to each plate, with each pair responsible for defeating their corresponding Agraios. Once all three versions have been destroyed, the main Agraios becomes vulnerable again. The fireteam will have a short final DPS window to reduce its health to zero and complete the encounter.
Epoptes, Lord of Quanta
Fallow PavilionRecommended Loadouts:
- Titans: Thundercrash + Cuirass of the Falling Star (More the merrier!) // Bolt Charge.
- Warlock: Well of Radiance + Lunafaction Boots // Nova Bomb + Getaway Artist for ad-clear // Speaker's Sight Build for extra healing // Song of Flame + Sanguine Alchemy.
- Hunter: Golden Gun + Celestial Nighthawk // Tether + Fortune's Favor.
Recommended Weapons:
- Linear Fusion Rifles // Snipers (Refurbished A499, The Supremacy, Succession).
- Rocket Pulse and other ad-clear weapons for ads and cyclops.
- A hit-scan weapon (Auto Rifle, Pulse Rifle) if you are dealing with Epoptes's eyes.
Roles:
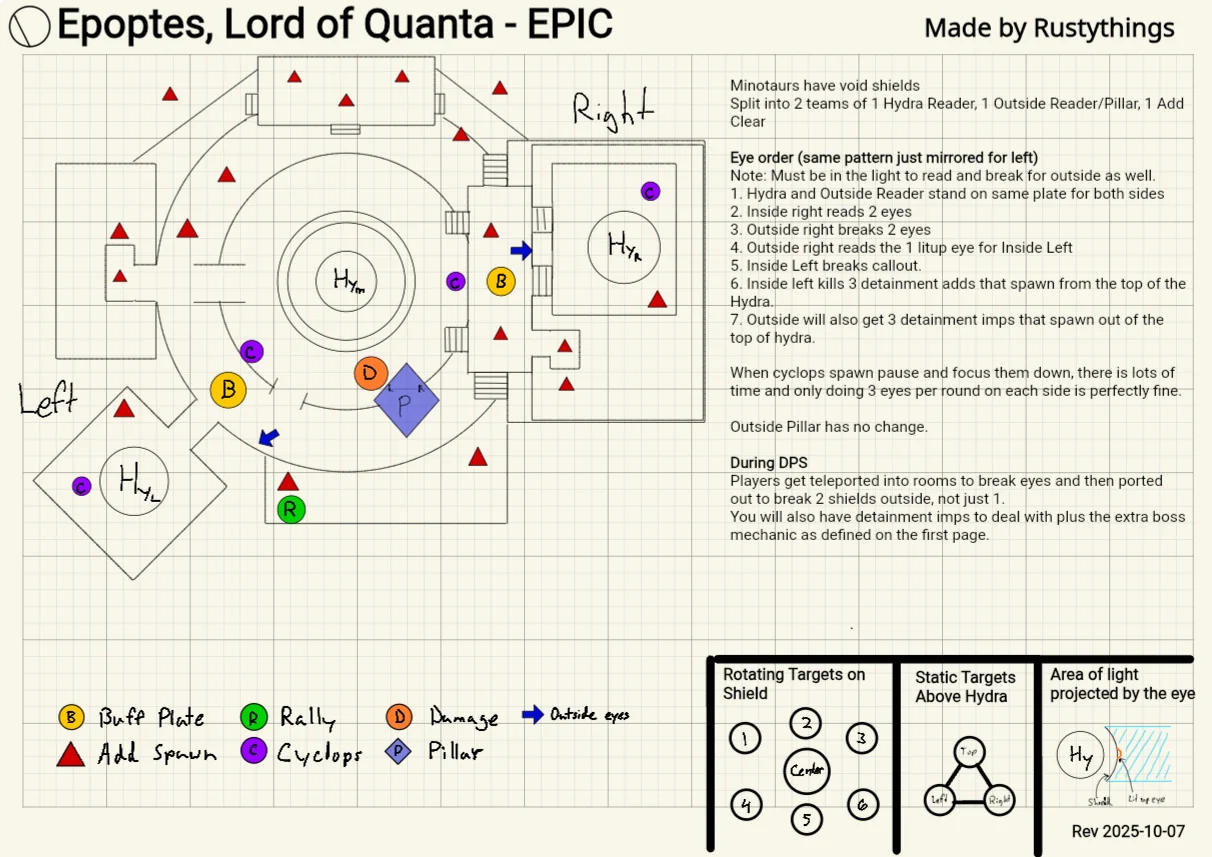
- 2 groups of 3 on each side of the map:
- 1 x Room (Inside) Reader.
- 1 x Ad-clear (Room + Main Arena).
- 1 x Main Arena (Outside) Reader.
Change One: Outside Lenses
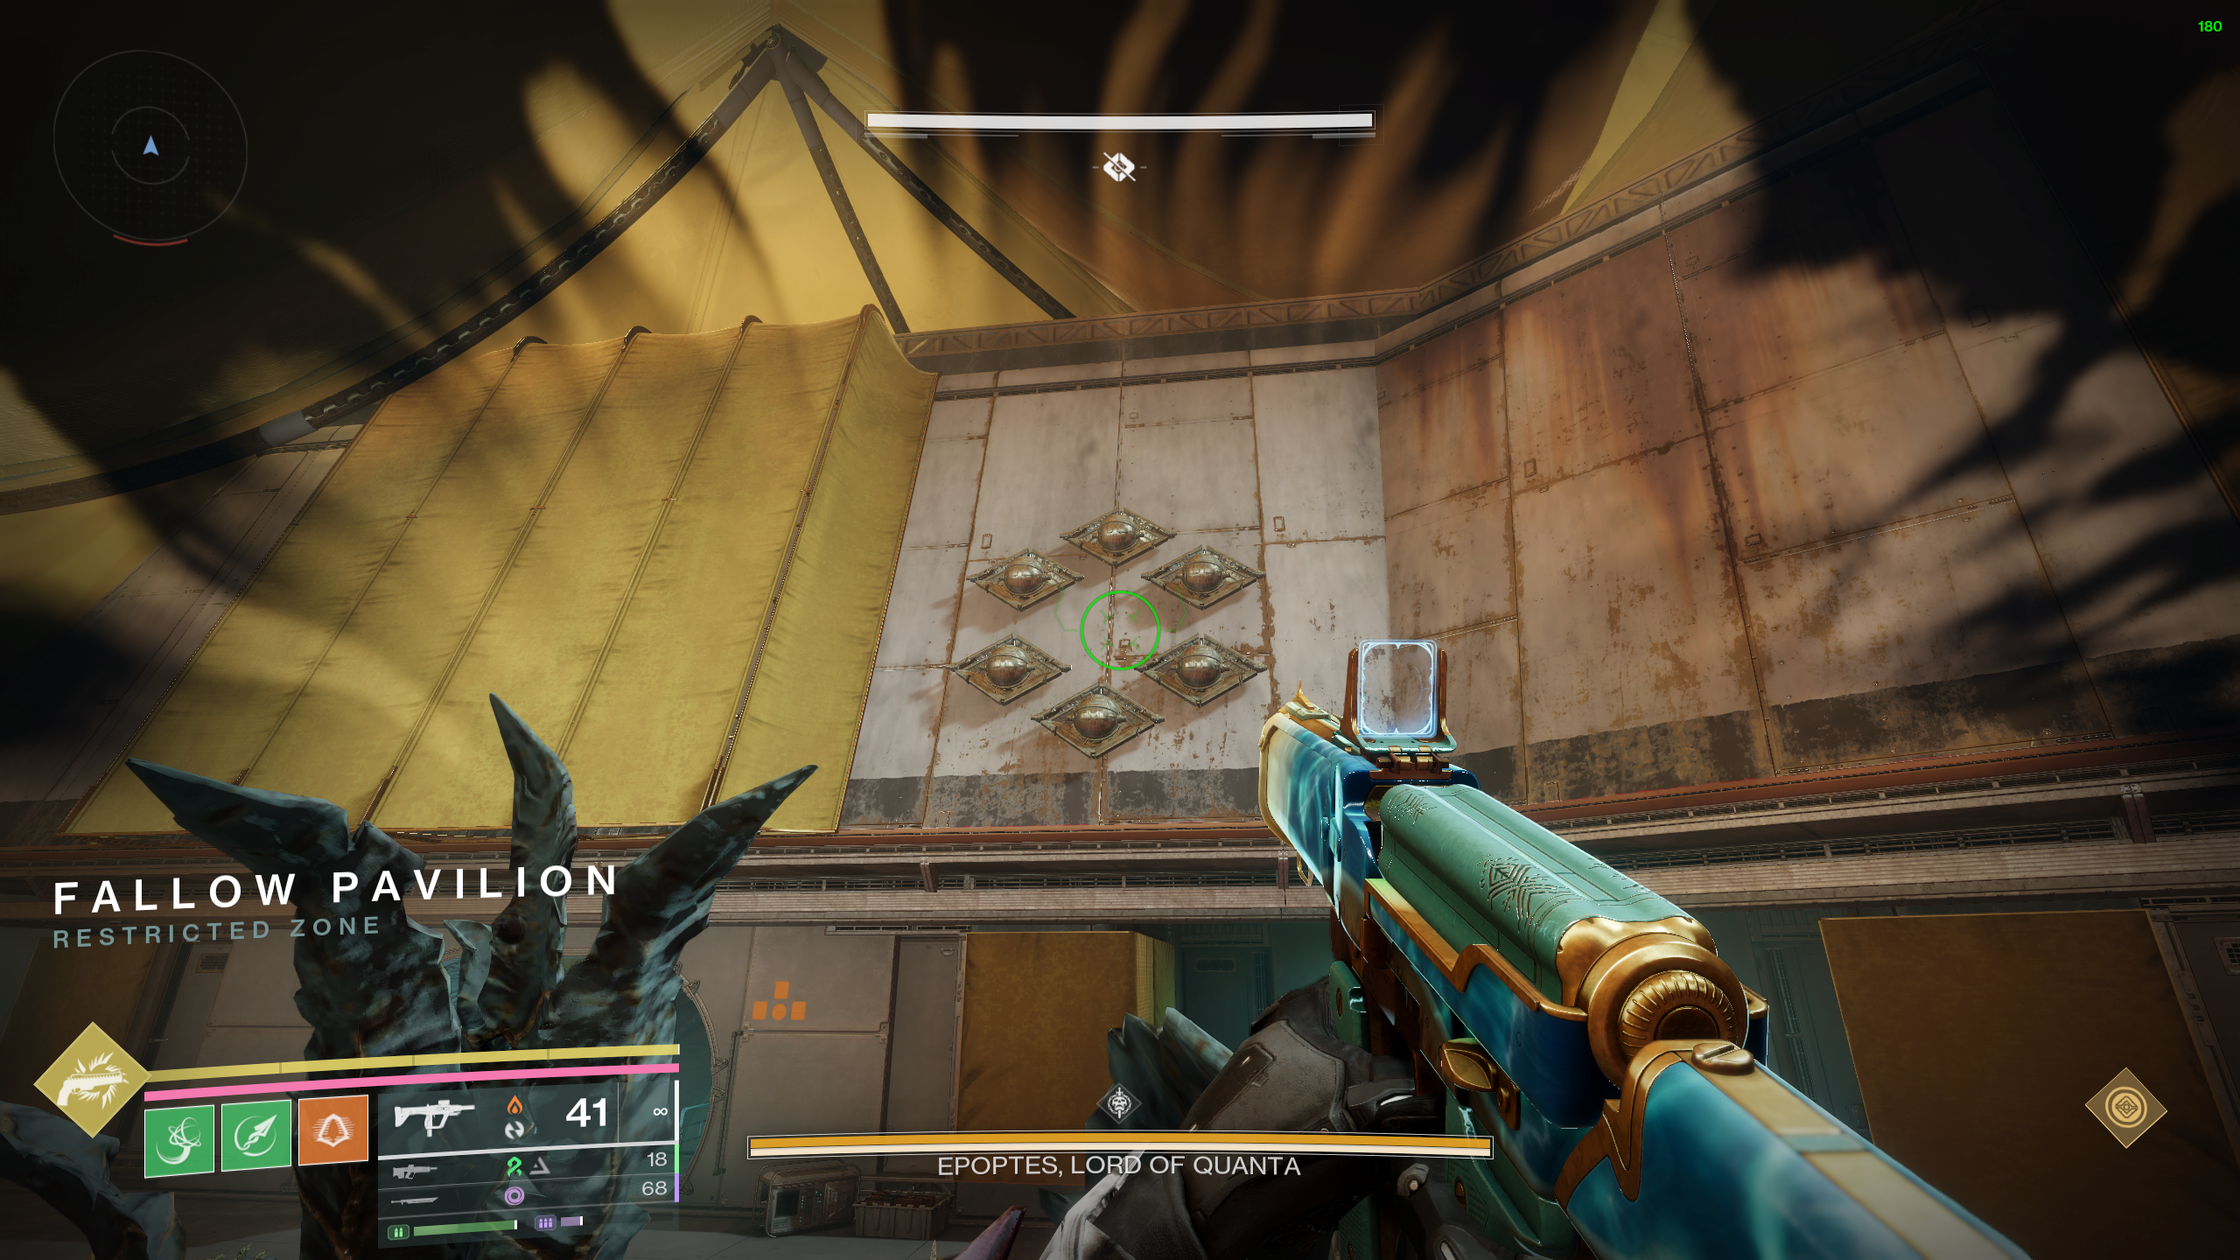
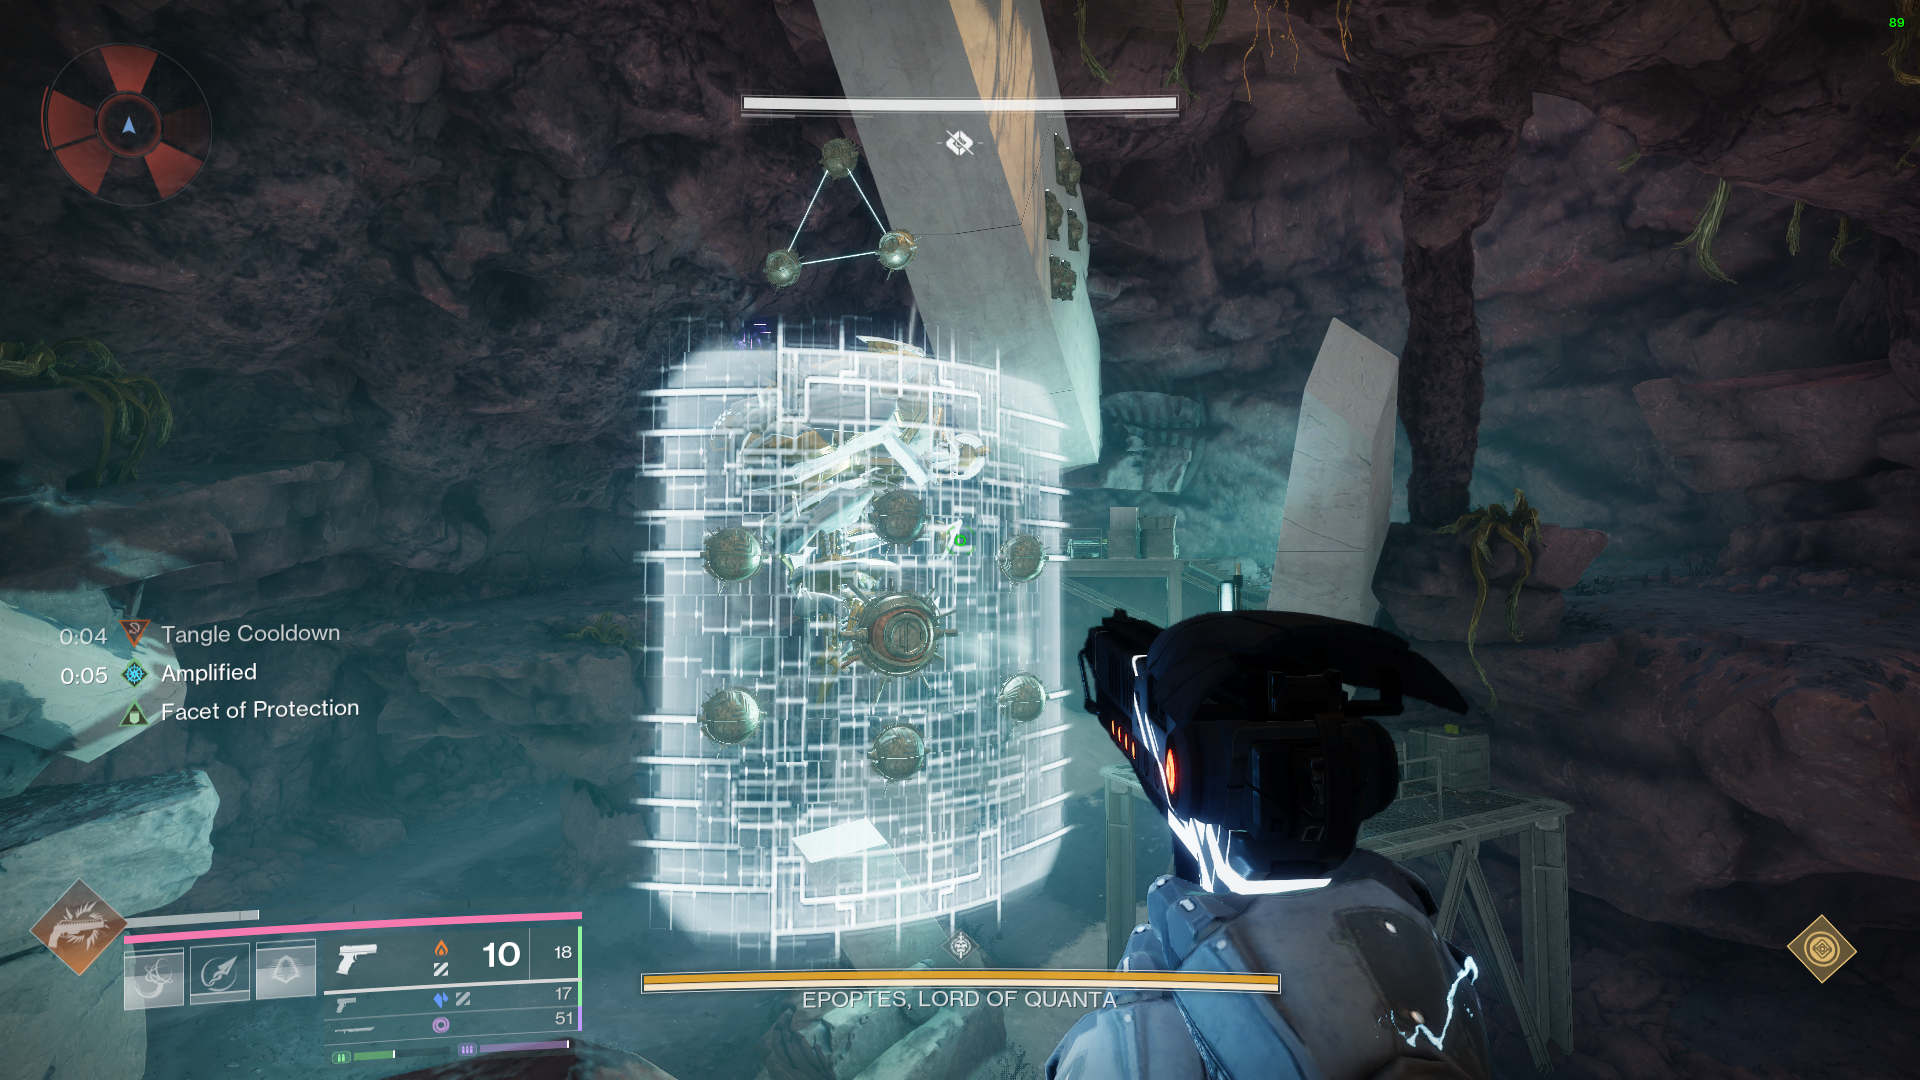
The biggest difference you will notice is the addition of six lenses around the outside of the arena. These lenses act as the middle-man between the Inside players during this phase. In the Normal version, each Inside player simply calls out which lens is glowing to the opposite Inside player. In Epic, two lenses will be glowing at a time, and each Inside player must call both lens numbers to the Outside player on their own side. Keep in mind the outside players still need to be following their respective cones of light from Epoptes throughout the process, as well to deal with the Detainment Seekers and adds that spawn in. The 2 ad-clear players should hop in between the main areas and the rooms to assist with both players.
Once the Inside player has called out both numbers, the corresponding Outside player will shoot those lenses and identify which of the two is actually glowing. The Outside player then calls the glowing lens to the opposite Inside player, who can destroy the corresponding lens in their room.
To simplify the callout flow, think of it as:
Left Inside ? Left Outside ? Right Inside followed by Right Inside ? Right Outside ? Left Inside
Change Two: Detainment Seekers, Cyclops and Inherited Pressure Mechanics
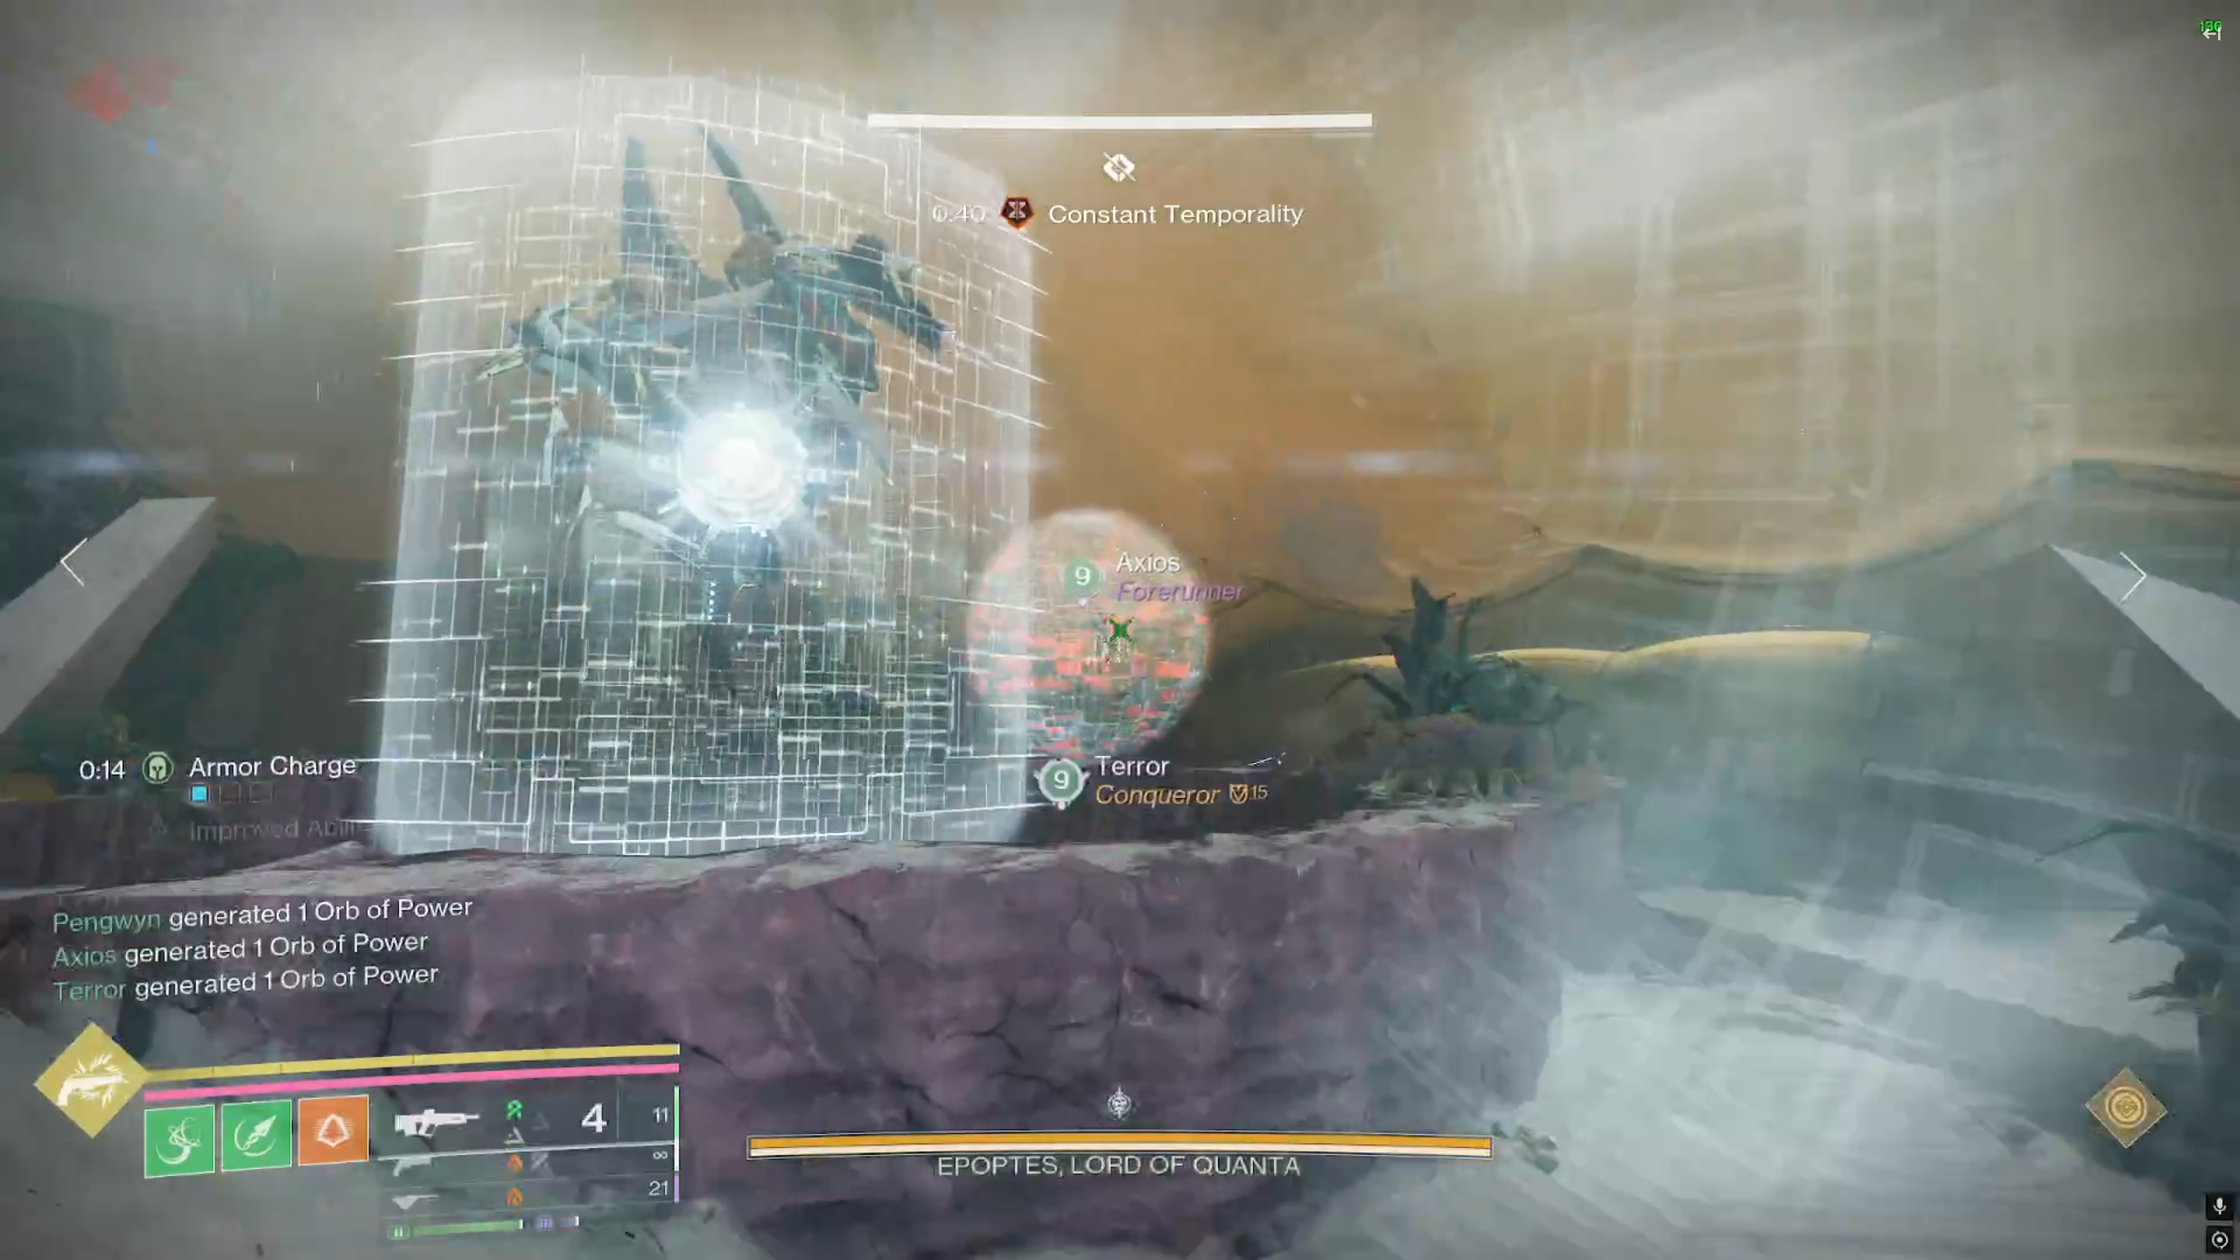
Every time a set of eyes is destroyed by the Inside players, three seekerswill spawn from each Hydra � one from each of the two Mini-Epoptes and one from the main Epoptes in the center. If one of these enemies reaches you, you will be detained. When detained, you will need a teammate to shoot the bubble and free you before you can continue.
Additionally, an extra Cyclops will spawn in each of the side rooms, adding further pressure on the Inside players while they handle the eye mechanic.
Epoptes will also inherit the Pressure mechanics from previously completed encounters. These mechanics will be active both inside the side rooms and during the DPS phase. If Epoptes is the first encounter your fireteam completes, it will inherit Koregos' laser attack. This means the laser mechanic will occur inside the side rooms as well as during DPS, requiring players to remain aware of the additional threat while handling the encounter's other mechanics.
Change Three: DPS
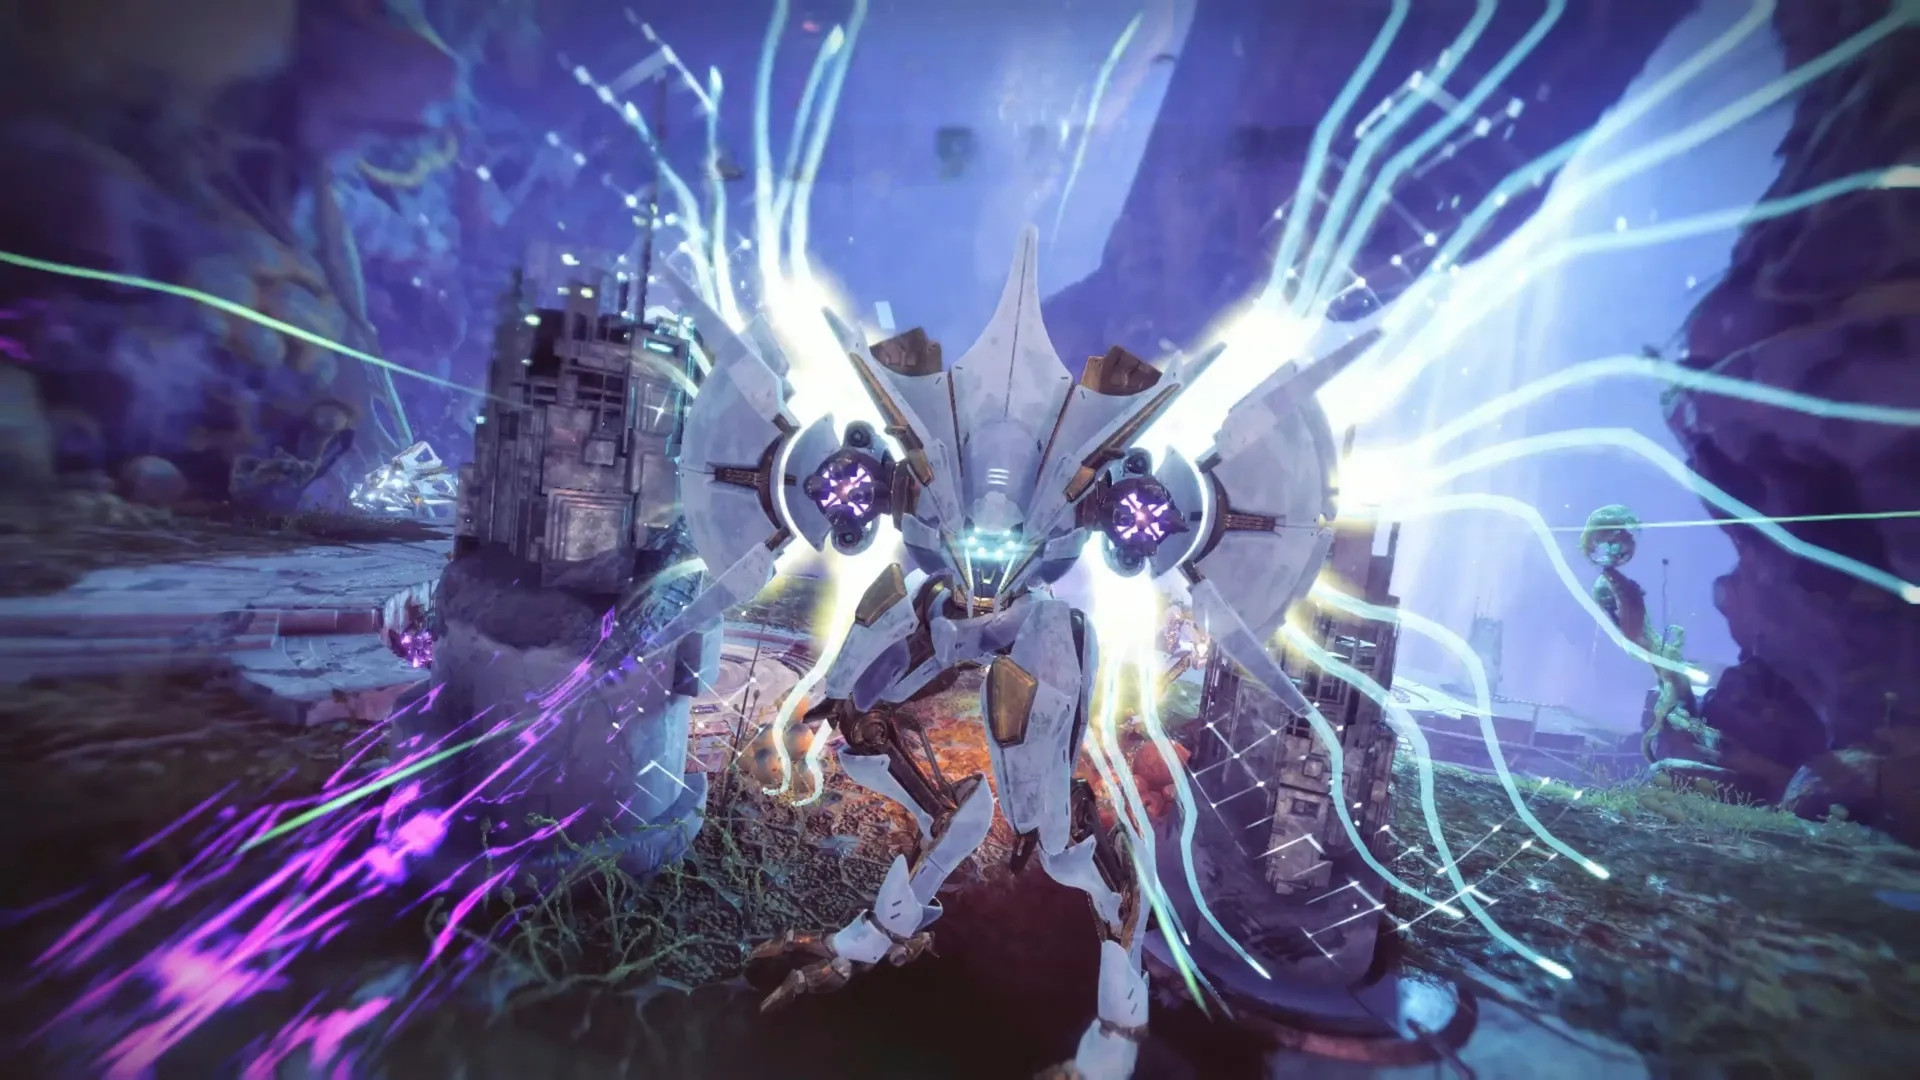
The most noticeable change is that Epoptes now has four spinning shields instead of the usual two. This makes finding safe damage windows slightly more difficult.
The next change is to the "Pulled Through Time" mechanic. During DPS, a random pair of two players are each teleported into the side rooms. Once inside, you must destroy the six outer lenses, followed by the central lens. Successfully completing this mechanic will teleport you back to the main arena. Upon returning, the central lens will glow, indicating that two of Epoptes' spinning shields can now be destroyed. Destroying both shields will successfully extend the DPS phase.
This process will repeat 2 more times, until a total of 6 players have been teleported. As more shields are taken down, DPS will be easier.
Iatros, Inward-Turned
The ChambersRecommended Loadouts:
- Titans: Thundercrash + Cuirass of the Falling Star (More the merrier!).
- Warlock: Well of Radiance + Lunafaction Boots // Song of Flame + Sanguine Alchemy (Run Sanguine Alchemy if you are using a solar weapon for DPS).
- Hunter: Blade Barrage + Shards of Galanor // Tether + Fortune's Favor.
Roles:
- 3 x Builders (Box Shooters).
- 2 x Chronon Collectors.
- 1 x Climber.
Recommended Weapons:
- Prospector // Truth.
- A Song of Flame warlock can run Tractor Cannon and keep igniting the boss so that it doesn't move too much.
- Climbers will have to deal with imp swarms while climbing up the platforms. Rocket pulses/ Rocket sidearms can be used to kill them very fast.
- Other ad-clear weapons to kill ads.
Change One: Chronon Hoop Specification
In Epic Iatros, the Chronon Hoop continuously rotates between the three different Chronon colours. Attempting to dunk an incorrect Chronon into the hoop will instantly kill you. The Temporal Oculus buff (see right) allows players to see which Chronon colour is currently accepted by the Chronon Hoop. This makes managing the hoop's rotation essential, as players must obtain the correct Chronon before attempting a dunk.
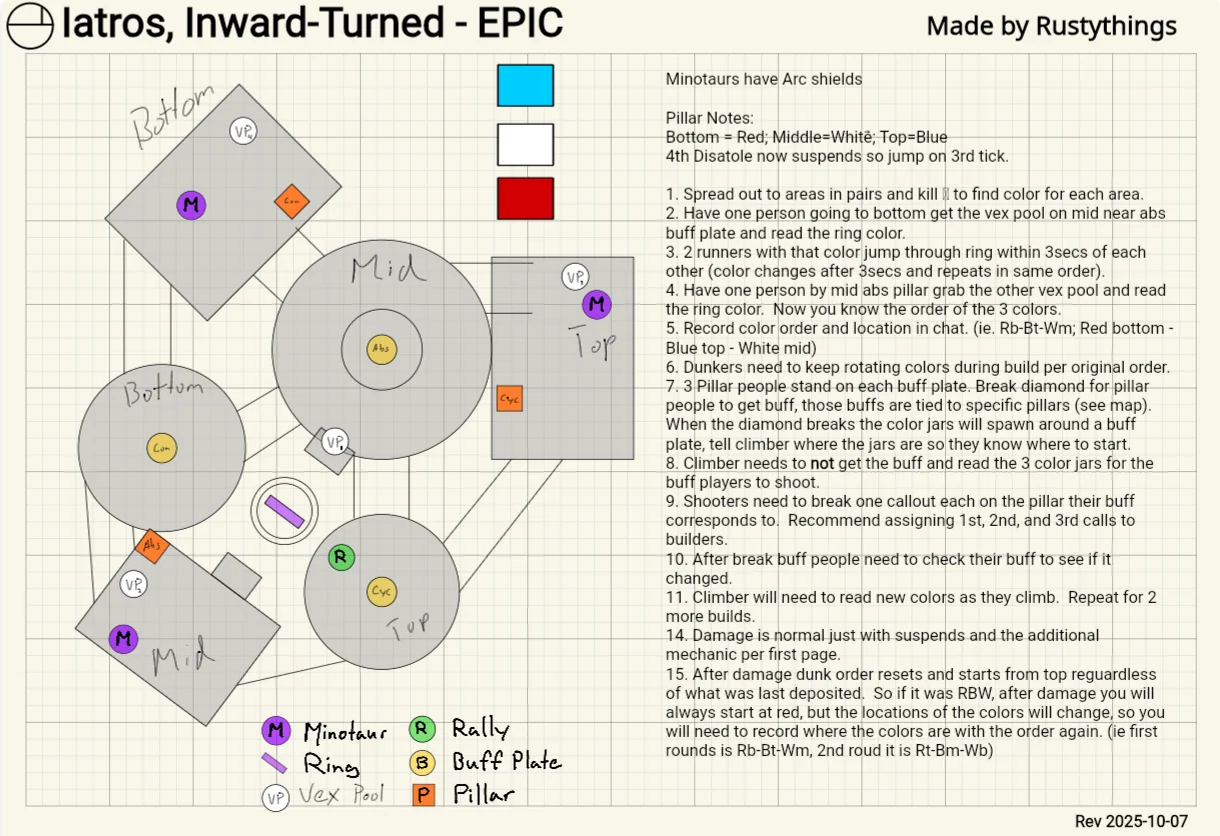
A small change has also been made to how Minotaurs spawn. Instead of spawning in the center of the arena at the beginning of the phase, two Minotaurs will spawn on Top, Middle and Bottom areas each, with each pair of Minotaurs dropping a different Chronon colour depending on their location. Minotaurs spawning from each location will always drop the same Chronon colour. Once you learn which Chronon each location provides and understand the Hoop's rotation, you can establish a consistent rhythm of cycling between the available Chronons and dunking them at the correct time.
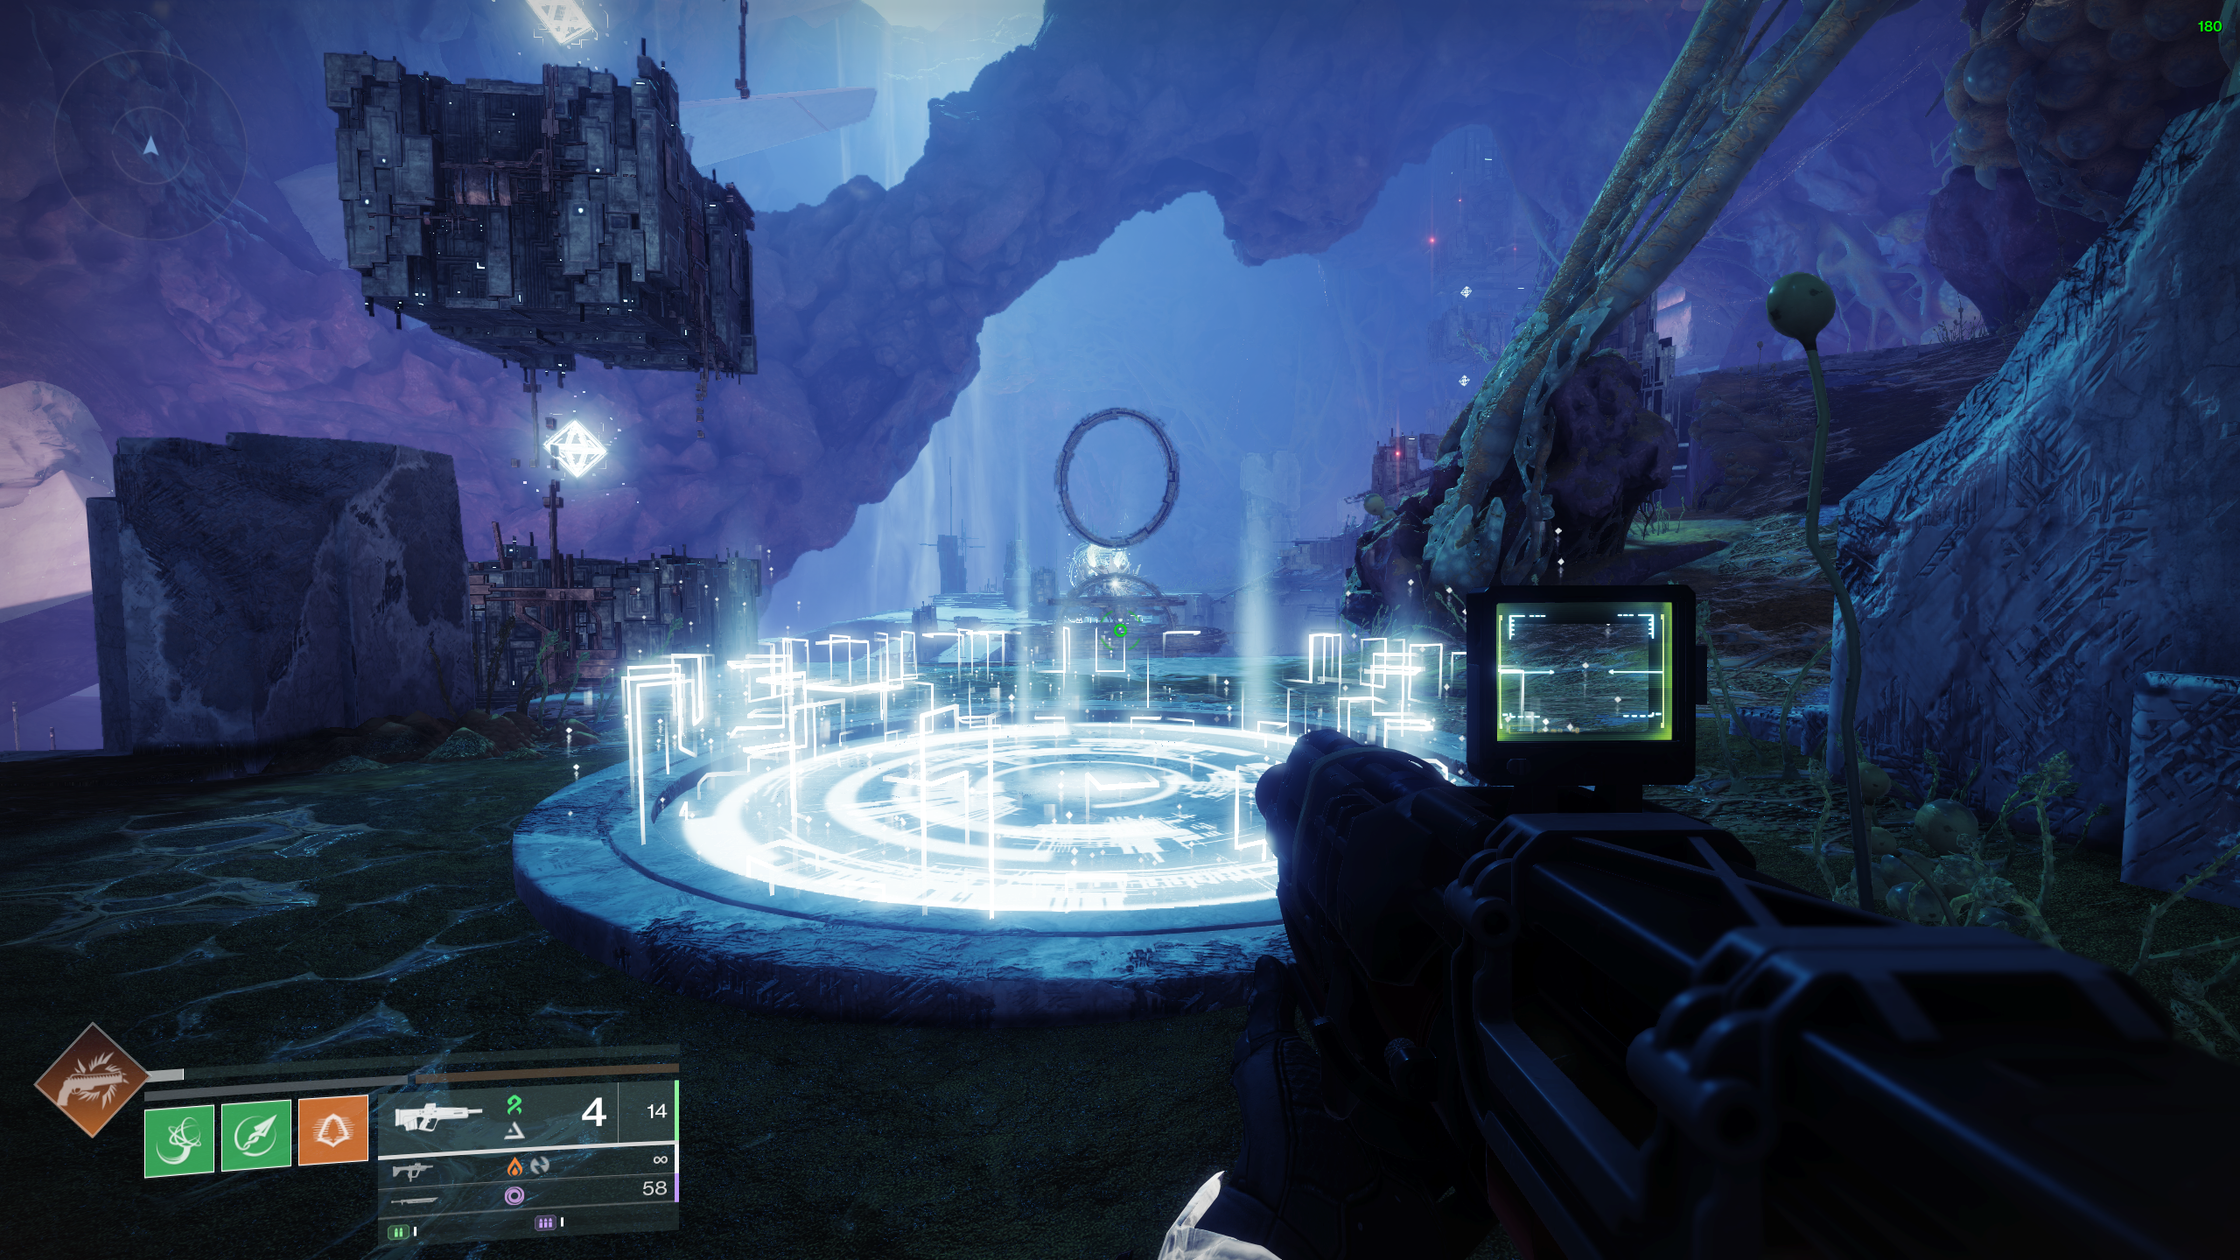
- The first colour that the hoop accepts is also tied to the location of where the climber will start climbing from, and also where DPS will start. For example, if the first colour of the ring is blue, then the climber will start climbing from the blue plate and DPS will also start from the blue plate.
- The order of the ring will reset to the first colour after a DPS phase as well, but the order will still be the same. If you wipe, the order will be changed.
Change Two: Chronon Canisters - Climber's Role
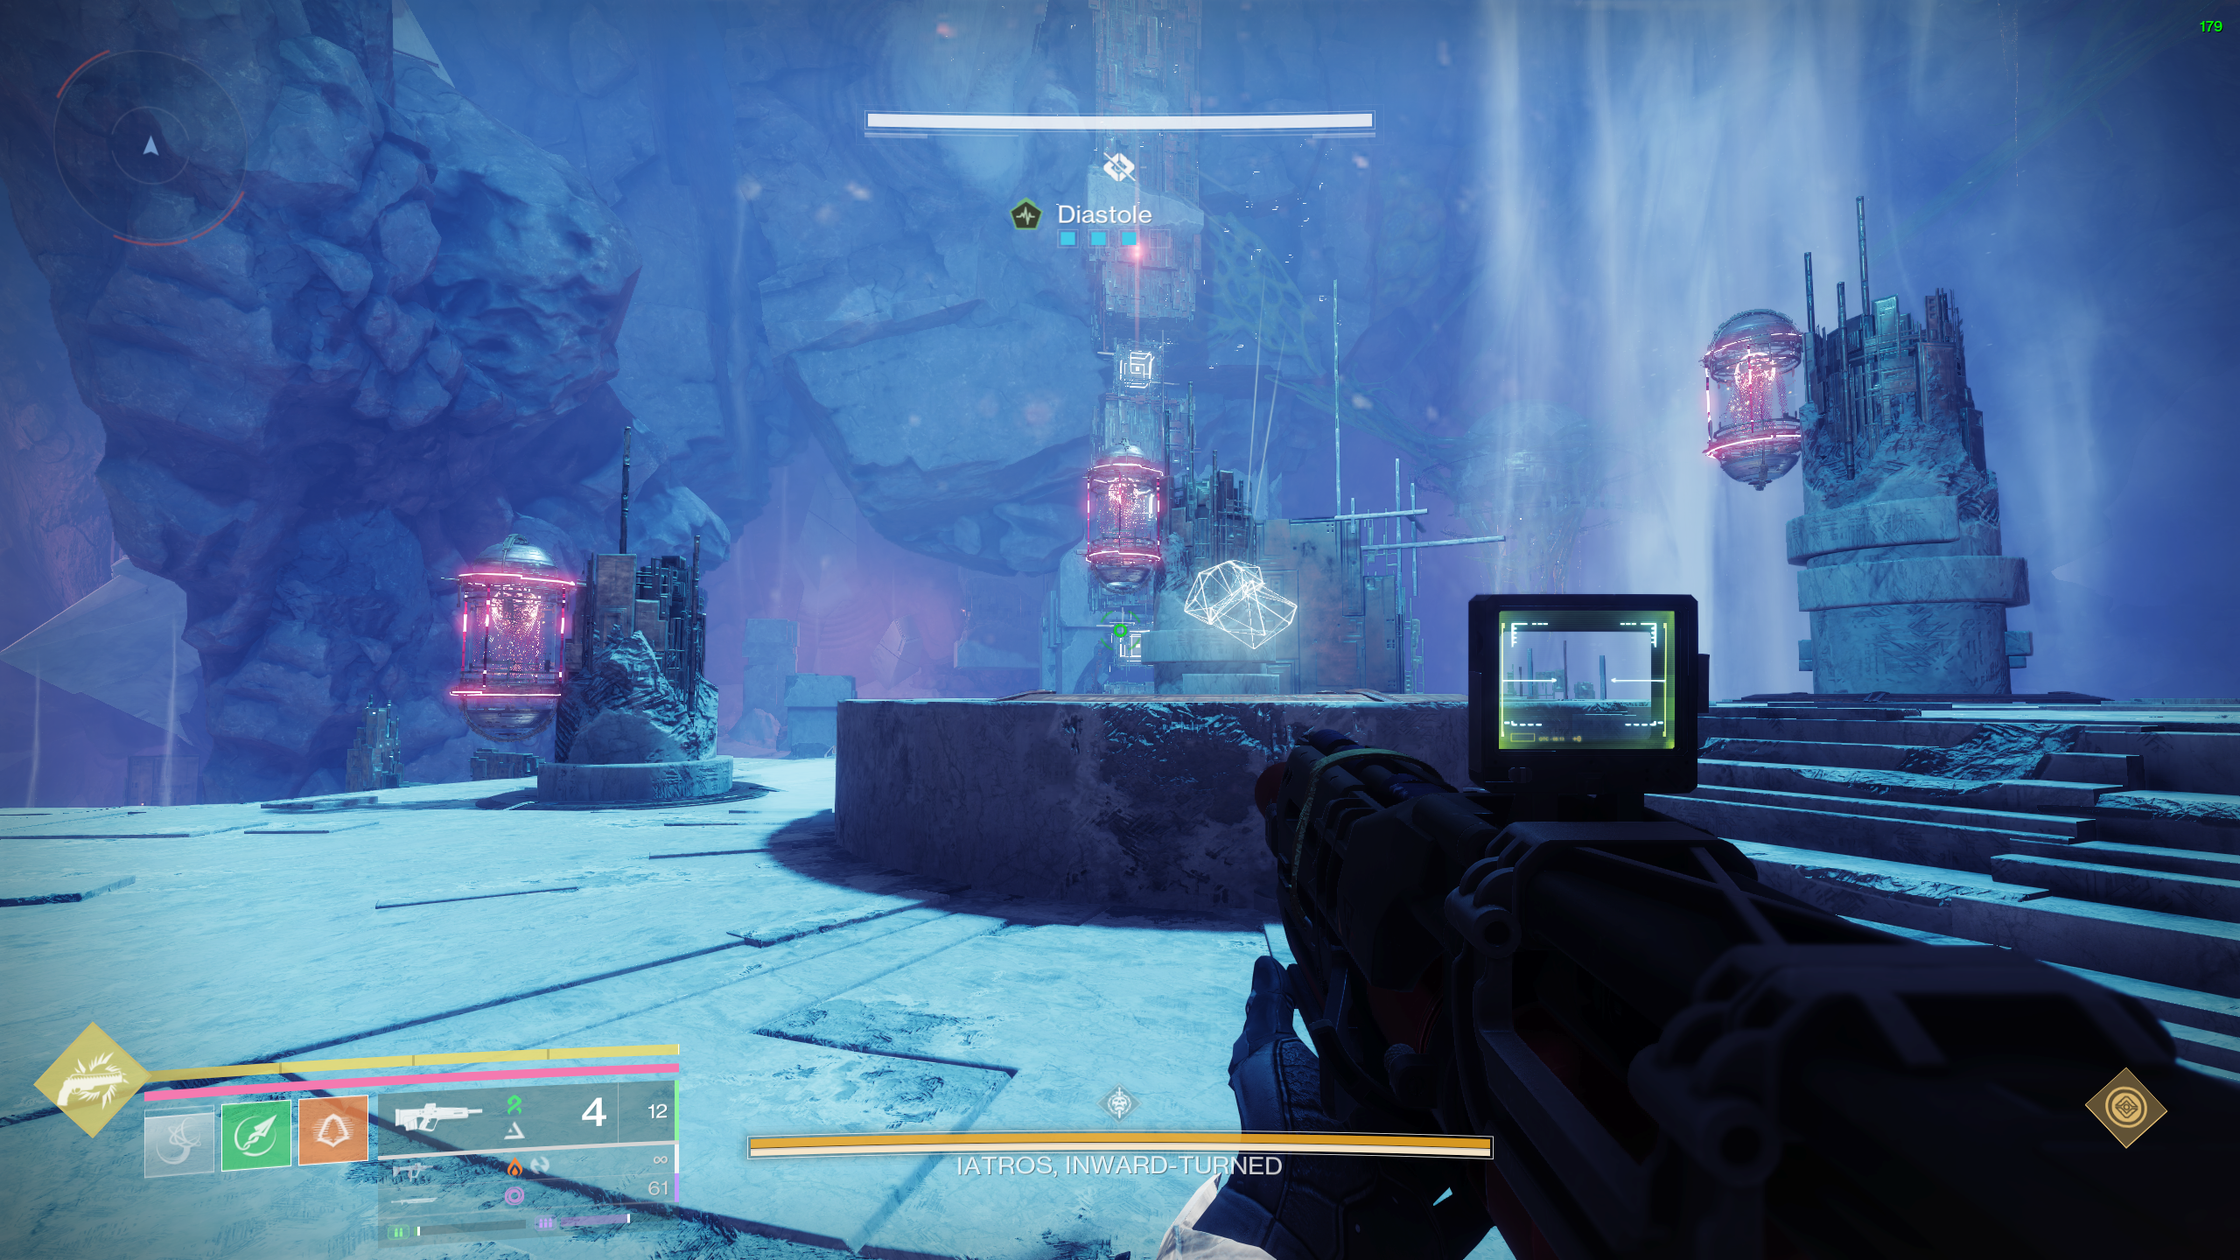
Once the Chronon Hoop has been filled, the Temporality plate used by the Climbers will be surrounded by three Chronon Canisters. Each canister will contain either a Cinnabar (Red), Antimony (White), or Cobalt (Blue) Chronon. The combination is random. You may see three of the same type, two of one type and one of another, or even one of each.
These Chronon Canisters determine the "code" that the Builders must enter when constructing the next platform. Each Chronon type corresponds to a specific tier of the building pillars:
- Cinnabar (Red) Chronon: Bottom Box.
- Antimony (White) Chronon: Middle tier.
- Cobalt (Blue) Chronon: Top Box.
The Climber must relay the colours to the Builders, who will then construct the next 3 platforms in the correct order. When the next platforms are constructed, each platform will contain a canister with a chronon. The jumper will take note of the 3 canisters on the 3 platforms and alert the Builders for the next callout to form the next 3 platforms. This process will repeat until the climber reaches the top and triggers the node to start DPS.
Change Three: Diastole Pillars - Builder's Role
You will no longer be able to damage the cubes on a pillar unless you have the specific Temporality buff associated with that pillar. Each pillar is tied to a specific Temporality:
- Absolute Temporality: Left (Red) Pillar.
- Contact Temporality: Middle (Blue) Pillar.
- Cyclical Temporality: Right (White) Pillar.
All Builders must obtain their Temporality by standing on the plates located near their respective pillars. Additionally, each time a set of cubes is successfully destroyed, all three Builders may receive a new, random Temporality that they did not have previously. This means the Builders will need to rotate between the 3 pillars when they destroy their cubes.
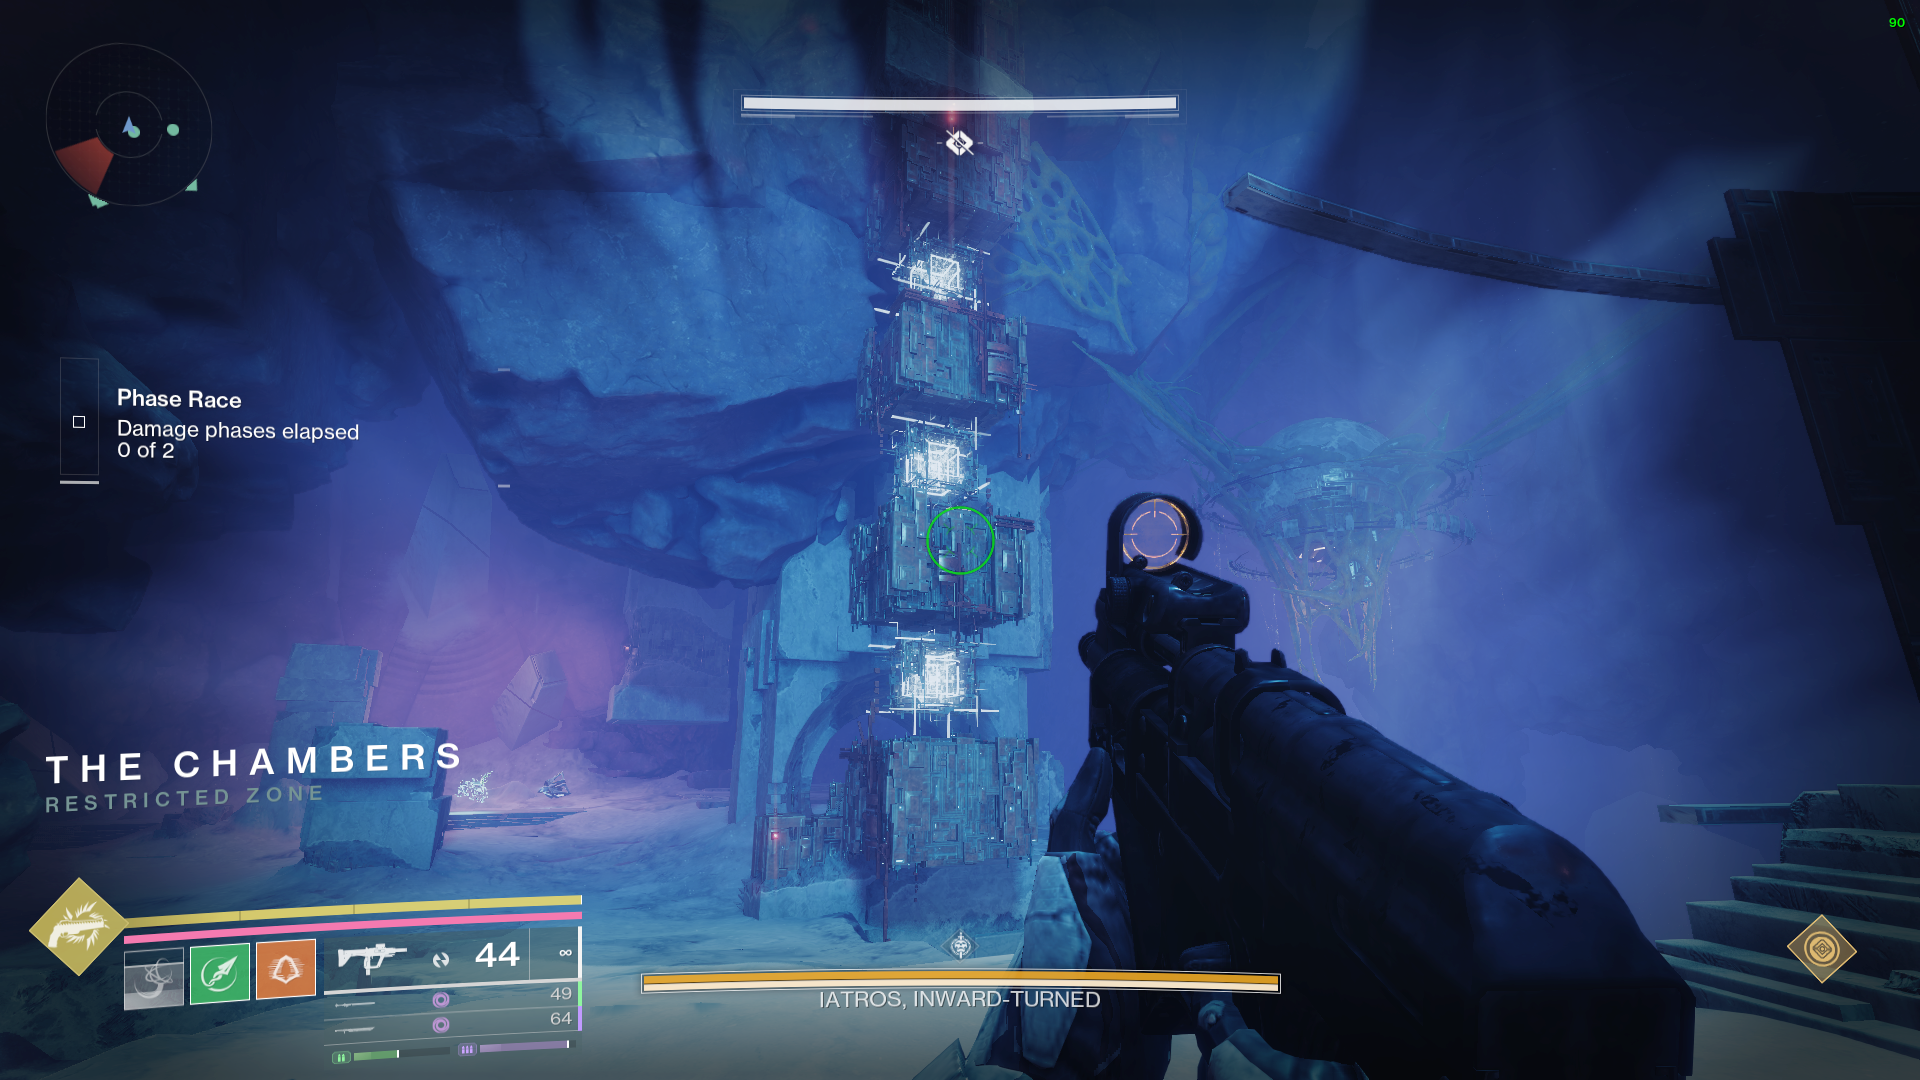
And to top it off, the Builders are not shooting the cubes from bottom to top like Normal Desert Perpetual. The cubes they are shooting depends on the colour of the chronons in the 3 canisters called out by the Climber. For example, if the Climber calls out two Red Chronons and one Blue Chronon, two Builders must shoot the bottom cube of their respective pillars, while the remaining Builder shoots the top cube.
| Climber Callout | Upper Shooter shoots: | Bottom Shooter shoots: | Flex Shooter shoots: |
|---|---|---|---|
| Red, White, Blue | Top Box | Bottom Box | Middle Box |
| Blue, Blue, White | Top Box | Middle Box | Top Box |
| Red, White, Red | Middle Box | Bottom Box | Bottom Box |
| White, White, Blue | Top Box | Middle Box | Middle Box |
| Red, Red, Red | Bottom Box | Bottom Box | Bottom Box |
Koregos, Fractured in Time
The KernelRecommended Loadouts:
- Titans: Thundercrash + Cuirass of the Falling Star (More the merrier!).
- Warlock: Well of Radiance + Lunafaction Boots // Speaker's Sight for extra healing // Needlestorm + Mataiodoxia.
- Hunter: Golden Gun + Celestial Nighthawk // Tether + Fortune's Favor.
Recommended Weapons:
- Truth // Still Hunt // Hezen Vengeance // One Thousand Voices // Parasite
- For Timeline 4: Refurbished A499, Izanagi's Burden
- Other ad-clear weapons to kill ads and Cyclops.
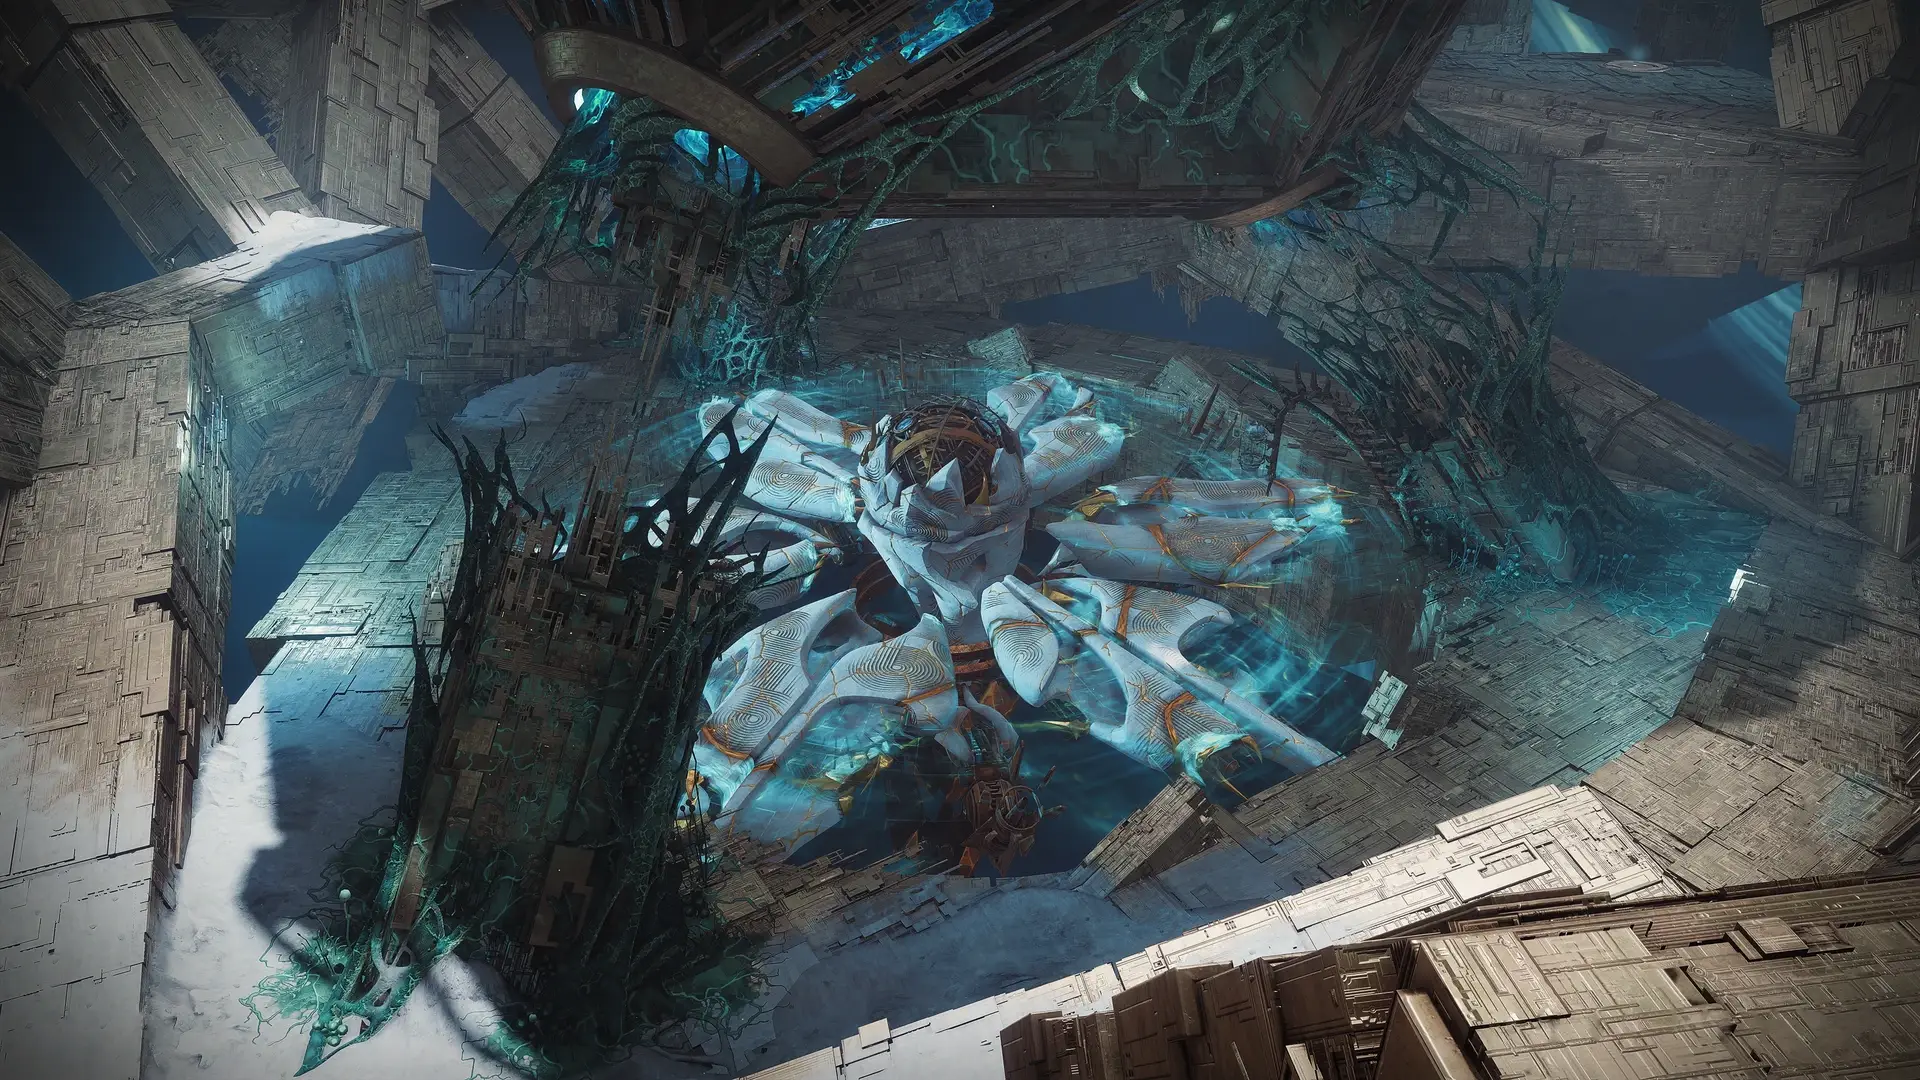
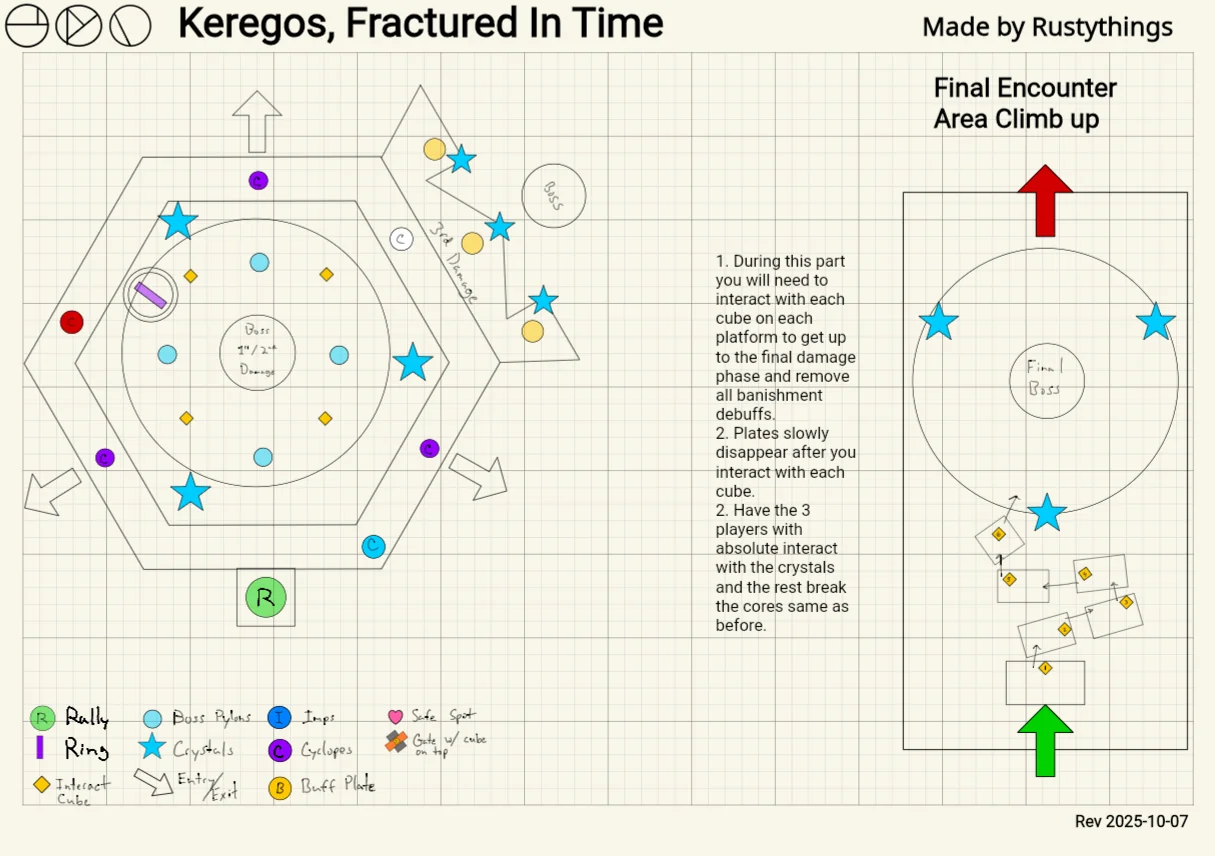
Epic Koregos is probably the most unique boss fight in the game, it consists of 5 phases, or rather 5 timelines, and each one sends you back to the start of the encounter as Koregos rewrites its own timeline. Three portals ring the arena, each tied to one of the raid's earlier bosses (Epoptes, Agraios, Iatros), and each portal room holds a Temporality plate granting one of three buffs: Absolute, Constant, or Cyclical. Which portal is "active" and linked to the big crystal changes each phase, and the order is set by the sequence you killed the three bosses in during the earlier encounters.
Core Mechanics
Change One: Banishment
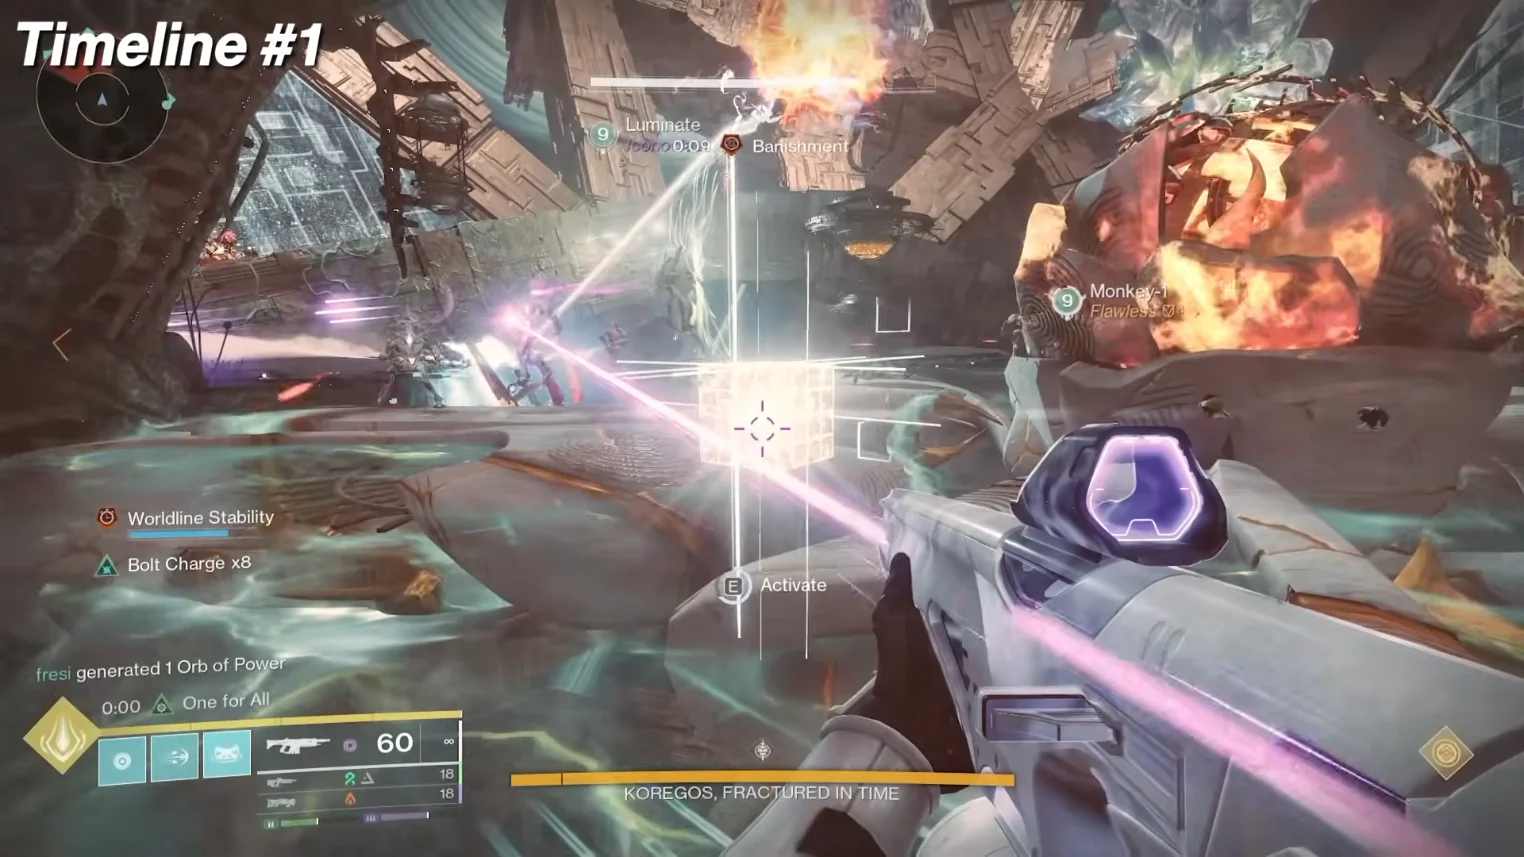
At the start of every timeline, a pair of players gets banished (30-second death timer). Once you have it, check whether the linked portal to the Temporal Locus is open. If it is, enter it. If it is sealed, clear it by interacting with one of the small Vex cubes near Koregos in the center. Only bother with the middle cubes if the crystal-linked portal is still sealed — a new portal only opens once the previous banished pair has cleared their own debuff.
Change Two: Temporal Locus (Crystal)
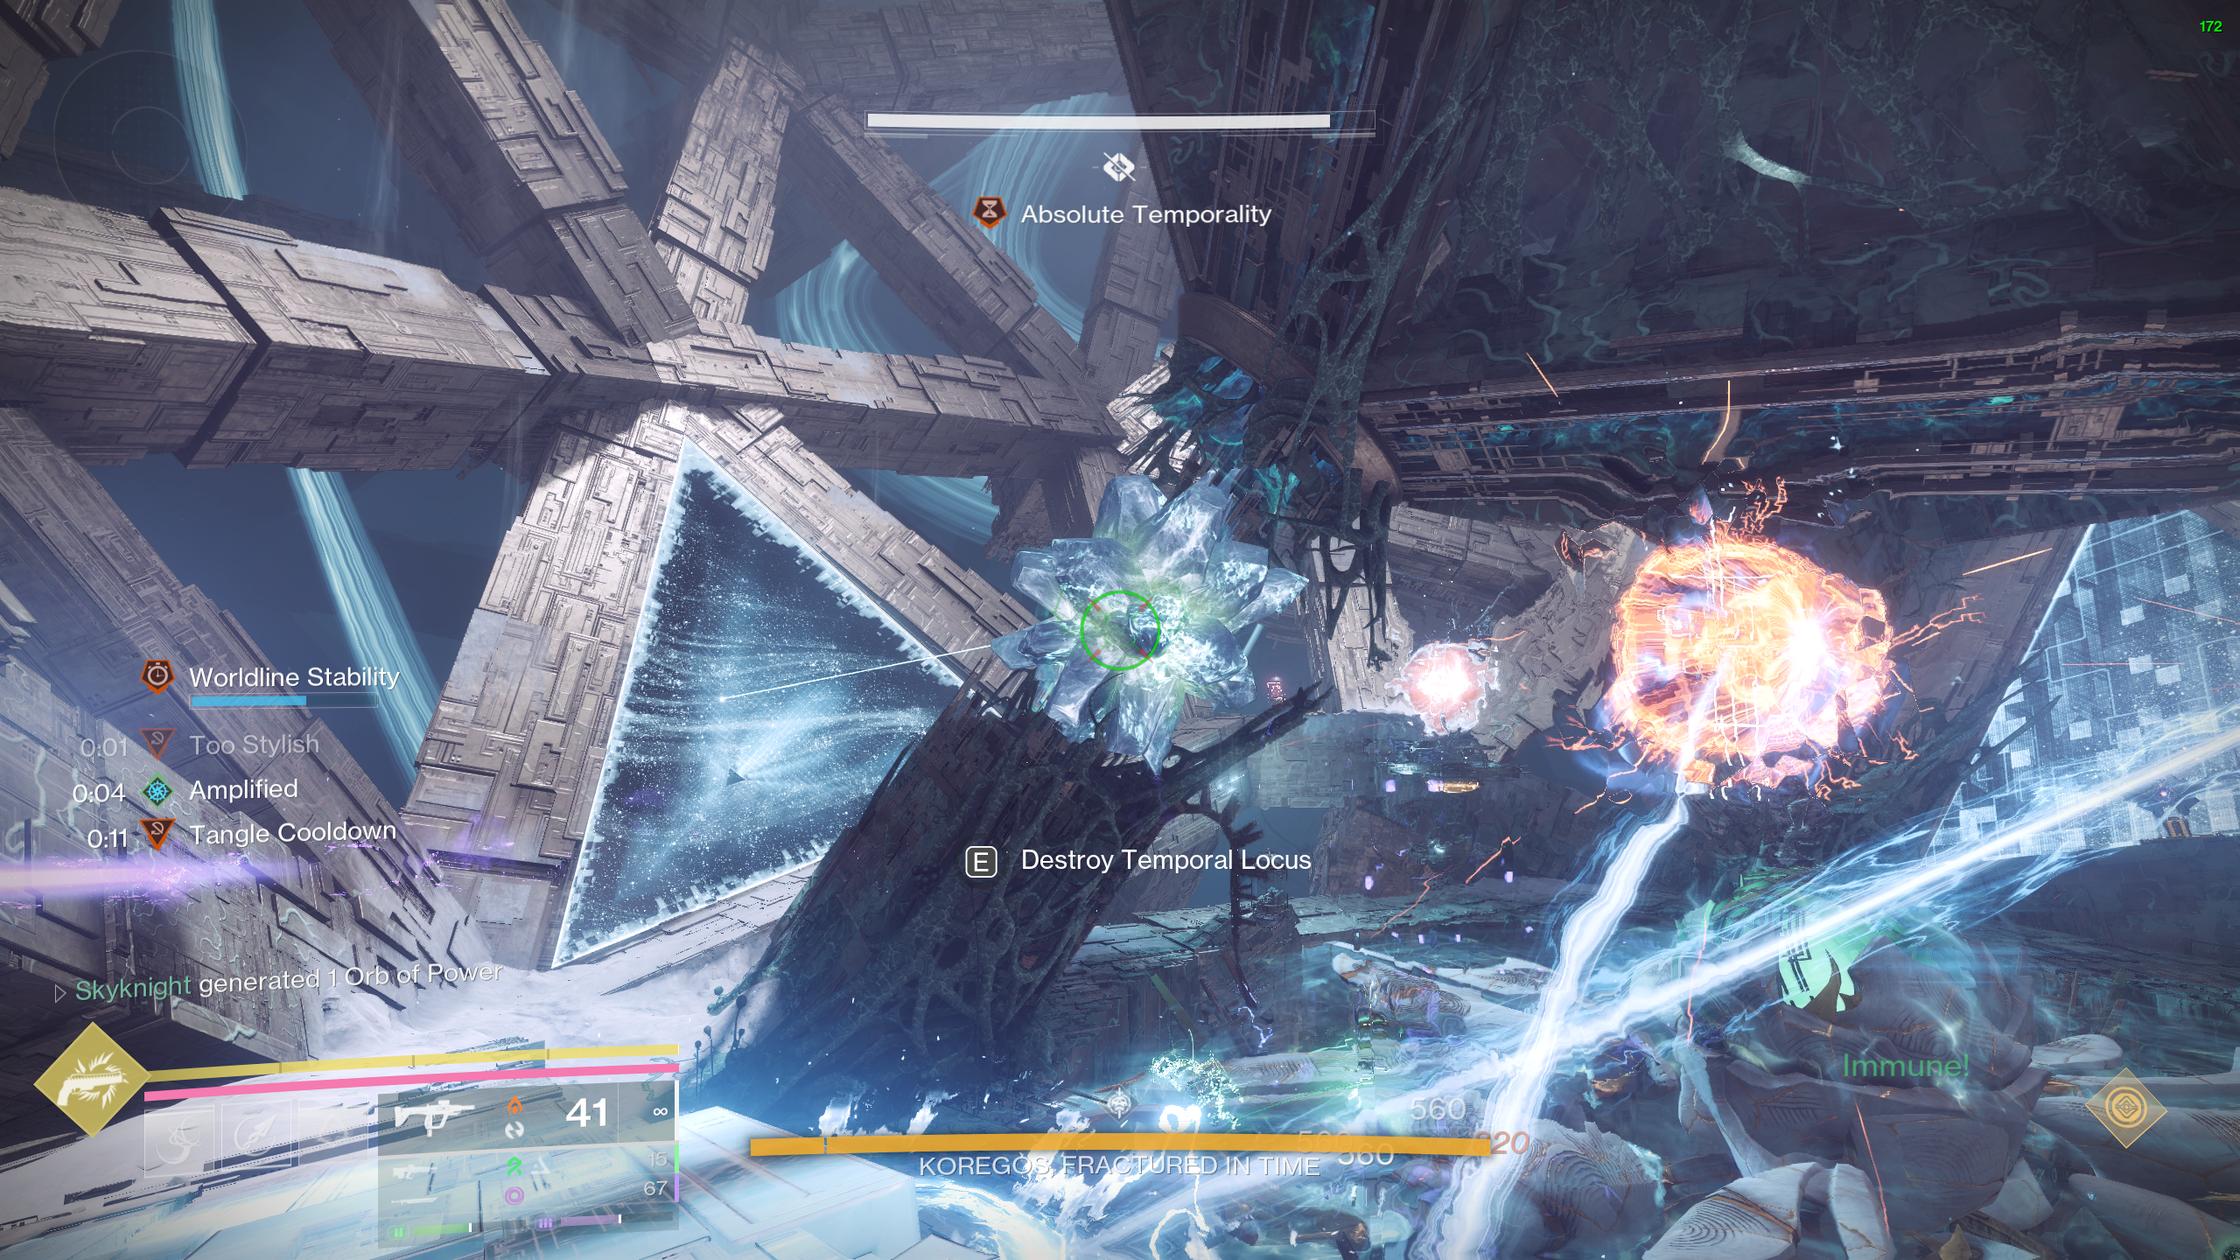
The big crystal tethered to the active portal. When a player gets banished, look at the crystal and portal linked to it. If it not sealed, enter it. If it is sealed, interact with the vex cubes in the central main arena.
After the minigames, a player holding a Temporality buff can destroy from range by interacting with it (aim for the crystal's center with clear line of sight — the angle can be finicky). This is what "binds" your team to the current worldline; destroying it is what stops the Worldline Stability timer from wiping you and instead teleports you into the next phase.
Change Three: Chronon Canisters
Around the mid-to-late part of each early phase (~25 - 30% Stability remaining), the prompt "Koregos's new worldline approaches the point of crystallization" appears and the canisters around the arena reveal the needed Chronon color. Note it down — you'll need to align to a matching canister and dunk four of that color into the Hoop the following phase to spawn that phase's mini-boss.
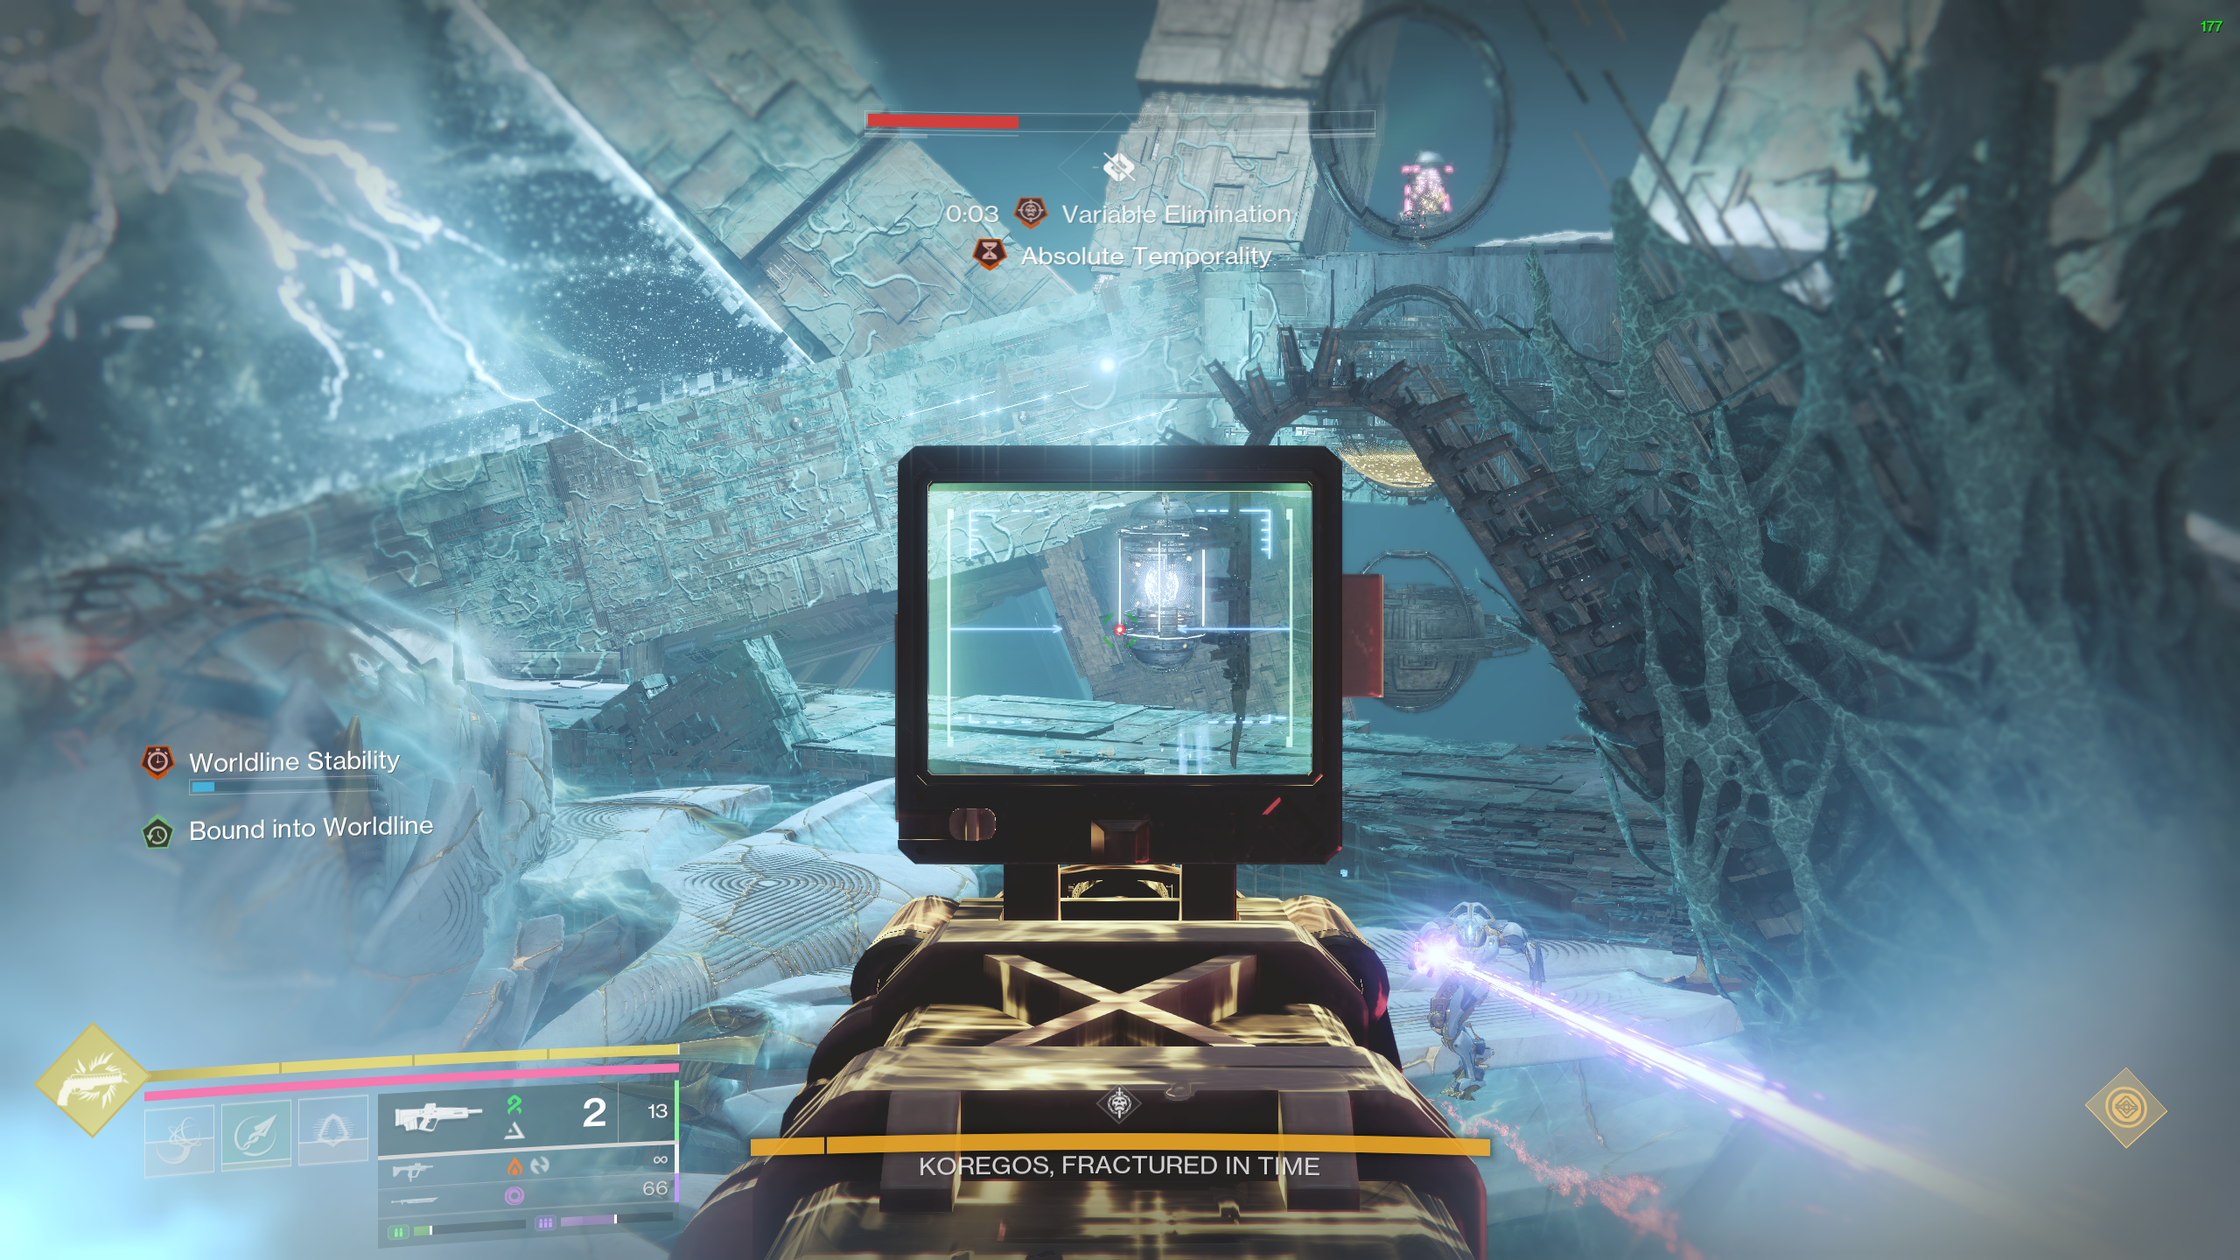 Before the timeline resets, take note of the chronon colour in
the central area.
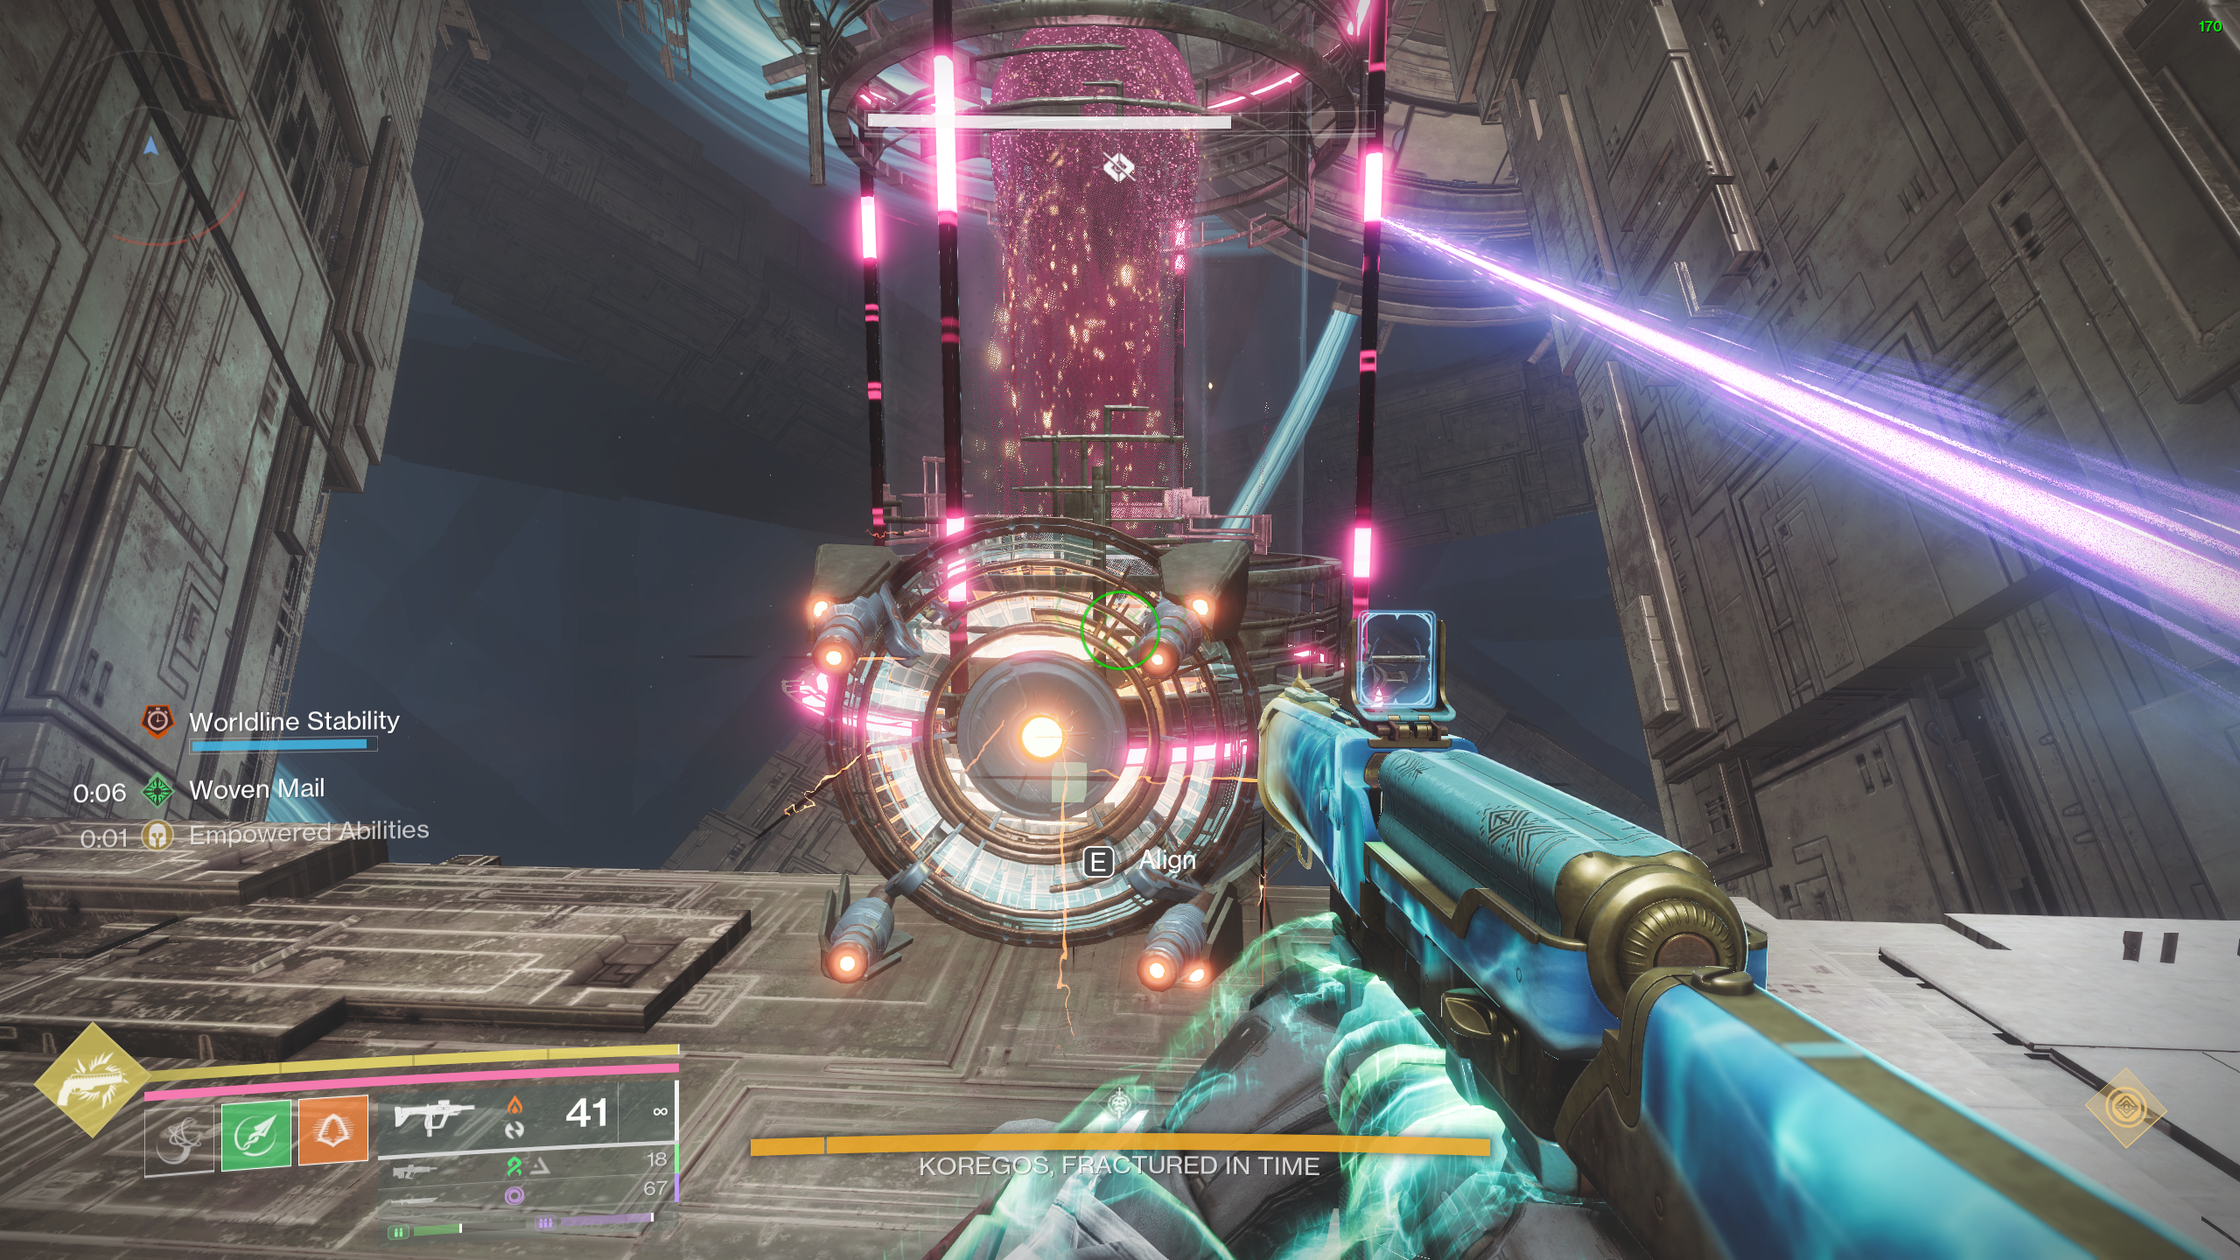 In the next timeline, align with the correct chronon
canister.
Portal Minigames
The minigames begin from Timeline 2 onwards. Using the information gathered from the previous timeline, one player must align with the correct canister in the current timeline. The Chronons that spawn will then match the aligned colour and are used to fill the hourglass in the main arena.
How do you start the minigame?
Once all 6 players have gotten rid of their Banishment debuff (4 players will interact with the vex nodes in the main arena, 2 players will have gone through the portal to one of the minigame arenas), a special Imp called a Harbinger of Burdens will spawn in the minigame arena. The 2 players inside the portal must defeat this Imp. Killing it will spawn a Wyvern in the main arena called Time's Burden. Defeating the Wyvern will drop 4 Chronons matching the aligned colour. Take these Chronons and deposit them into the hourglass. Repeat this cycle of killing Imps and Wyverns until the hourglass is full. Shoot the crystal beneath it, after which the following flavour texts will appear:
"The burden of time seeps through reality"
"The memory of
a failed experiment revives itself"
These messages indicate the start the minigame for the 2 players inside the minigame arena.
Agraios
- One player steps on the plate to receive the buff while the other does not.
- The buffed player calls out which of the three glowing eyes beneath the boss is illuminated, while the unbuffed player shoots the corresponding eye.
- Repeat this process for all three eyes, making sure to break line of sight from Variable Elimination between each callout. Once all three eyes have been destroyed, defeat the boss and exit.
Epoptes
- One player steps on the plate to receive the buff while the other does not.
- The buffed player observes Epoptes's light and calls out the two portals marked with blue rings.
- The unbuffed player does the same. There will be one portal in common between both players. The unbuffed player will interact with the Vex node above this common portal.
- Once the correct portal has been identified, the buffed player standing in Epoptes's light will shoot the eye on its shield to destroy it and make it vulnerable to damage. Defeat the boss and exit.
Iatros
- One player steps on the plate to receive the buff while the other does not.
- Neither player needs the buff for this minigame. However, at least one player will need the buff to break the Temporal Locus after exiting, so we recommend having one player with the buff and one without.
- Either player can break a Vex cube when it reaches its 4th pulse of Diastole. Stand beneath the cube you intend to break to prevent both players from attempting to break the same one. Each successful break spawns three Detainment Seekers.
- While a failed or late break causes the outside hourglass to drain faster. If the hourglass empties, you will lose the Diastole debuff, and breaking the cubes will no longer have any effect until it is restored.
- Keep the Imp swarm under control outside so your team can continue killing the Wyvern and depositing Chronons.
- Complete three synchronized breaks to make Iatros vulnerable, then defeat the boss and exit.
Congrats, you've completed your minigame and exited. Now what?
Defeating the mini-boss grants a buff called "Undoing of <Boss Name>". This buff has no immediate effect, but becomes important in Timelines Three and Four, which we will cover below. As soon as the boss is defeated, exit the portal immediately. Have the player with the Temporality buff break the Temporal Locus crystal by interacting with it through line of sight. The unbuffed players can then destroy the core inside the Locus, exposing the boss to damage (except Timeline 1). This damage window is brief and depends entirely on how quickly the minigame was completed, so avoid taking any unnecessary time.
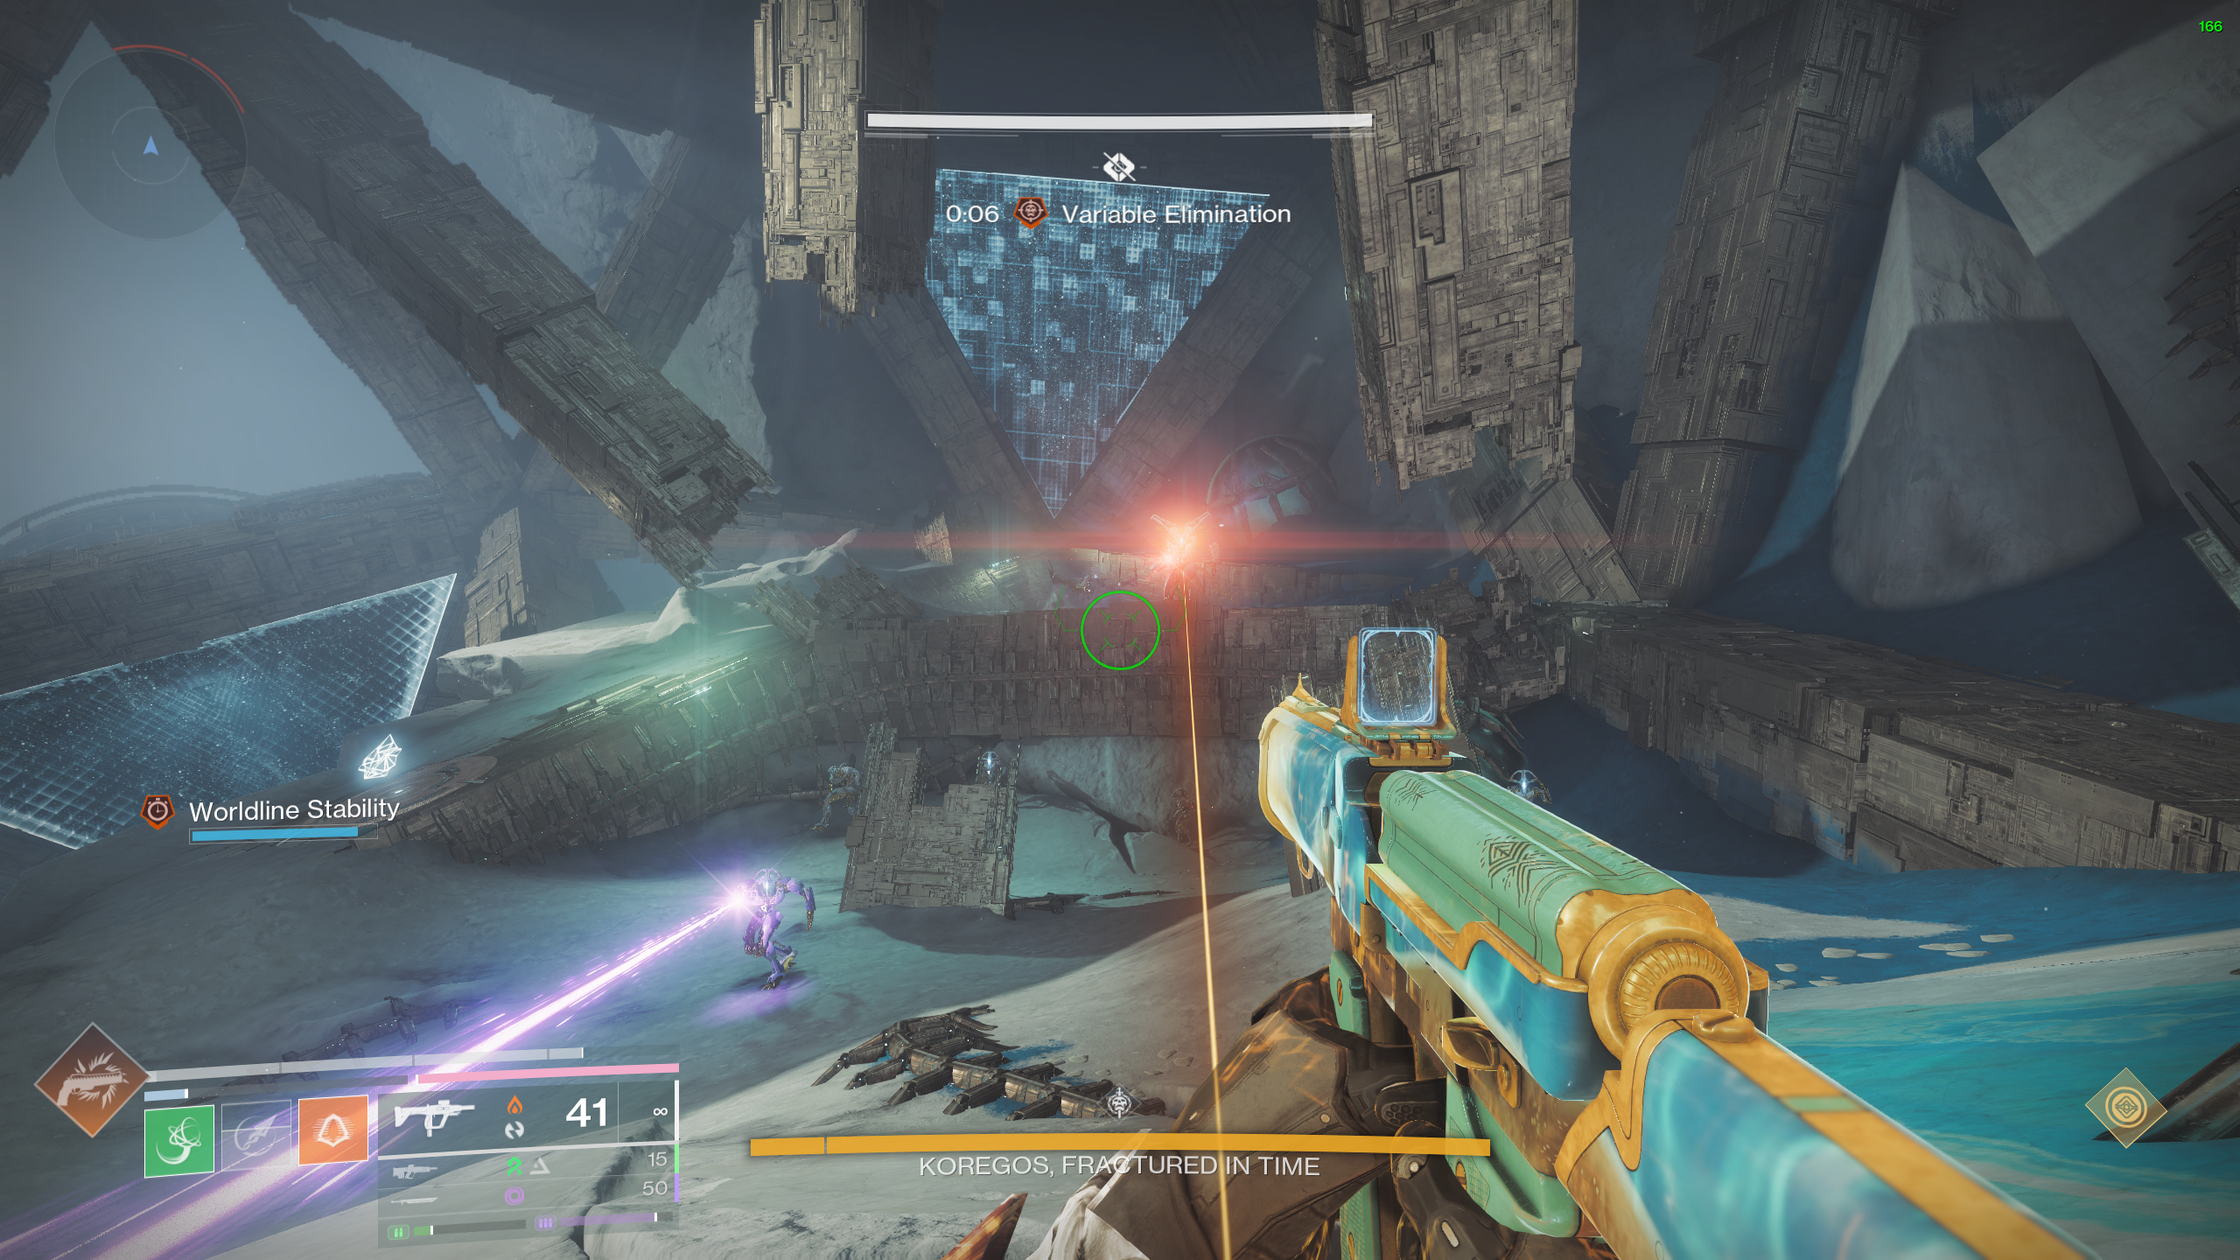 Agraios's Minigame Arena. The three eyes to be shot will spawn
below where he is standing.
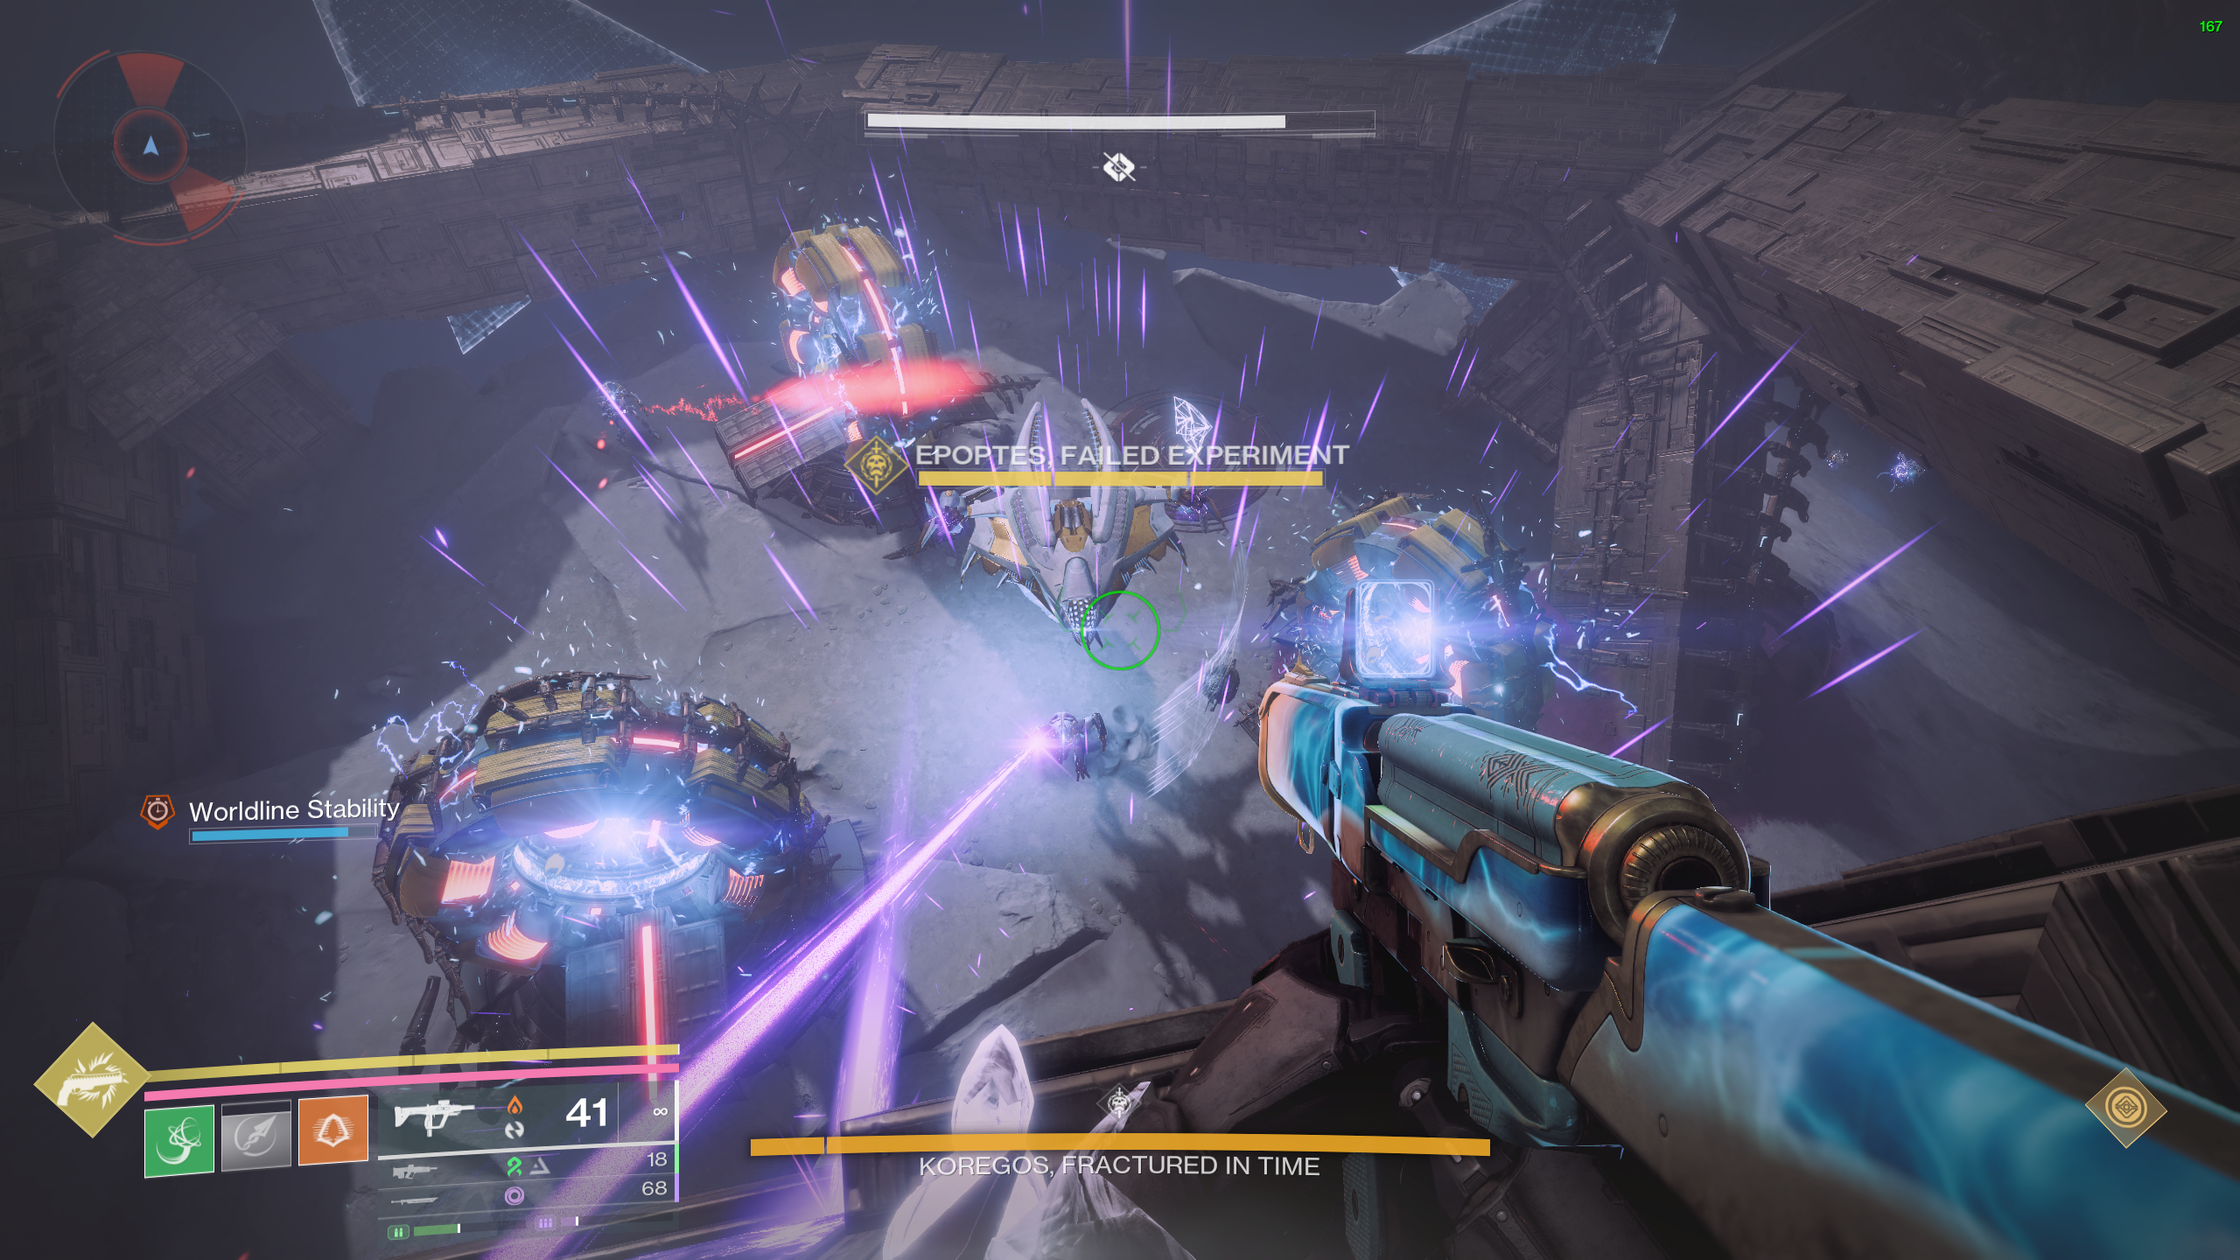 Epoptes's Minigame Arena. The Vex nodes to interact with are
located above the portals.
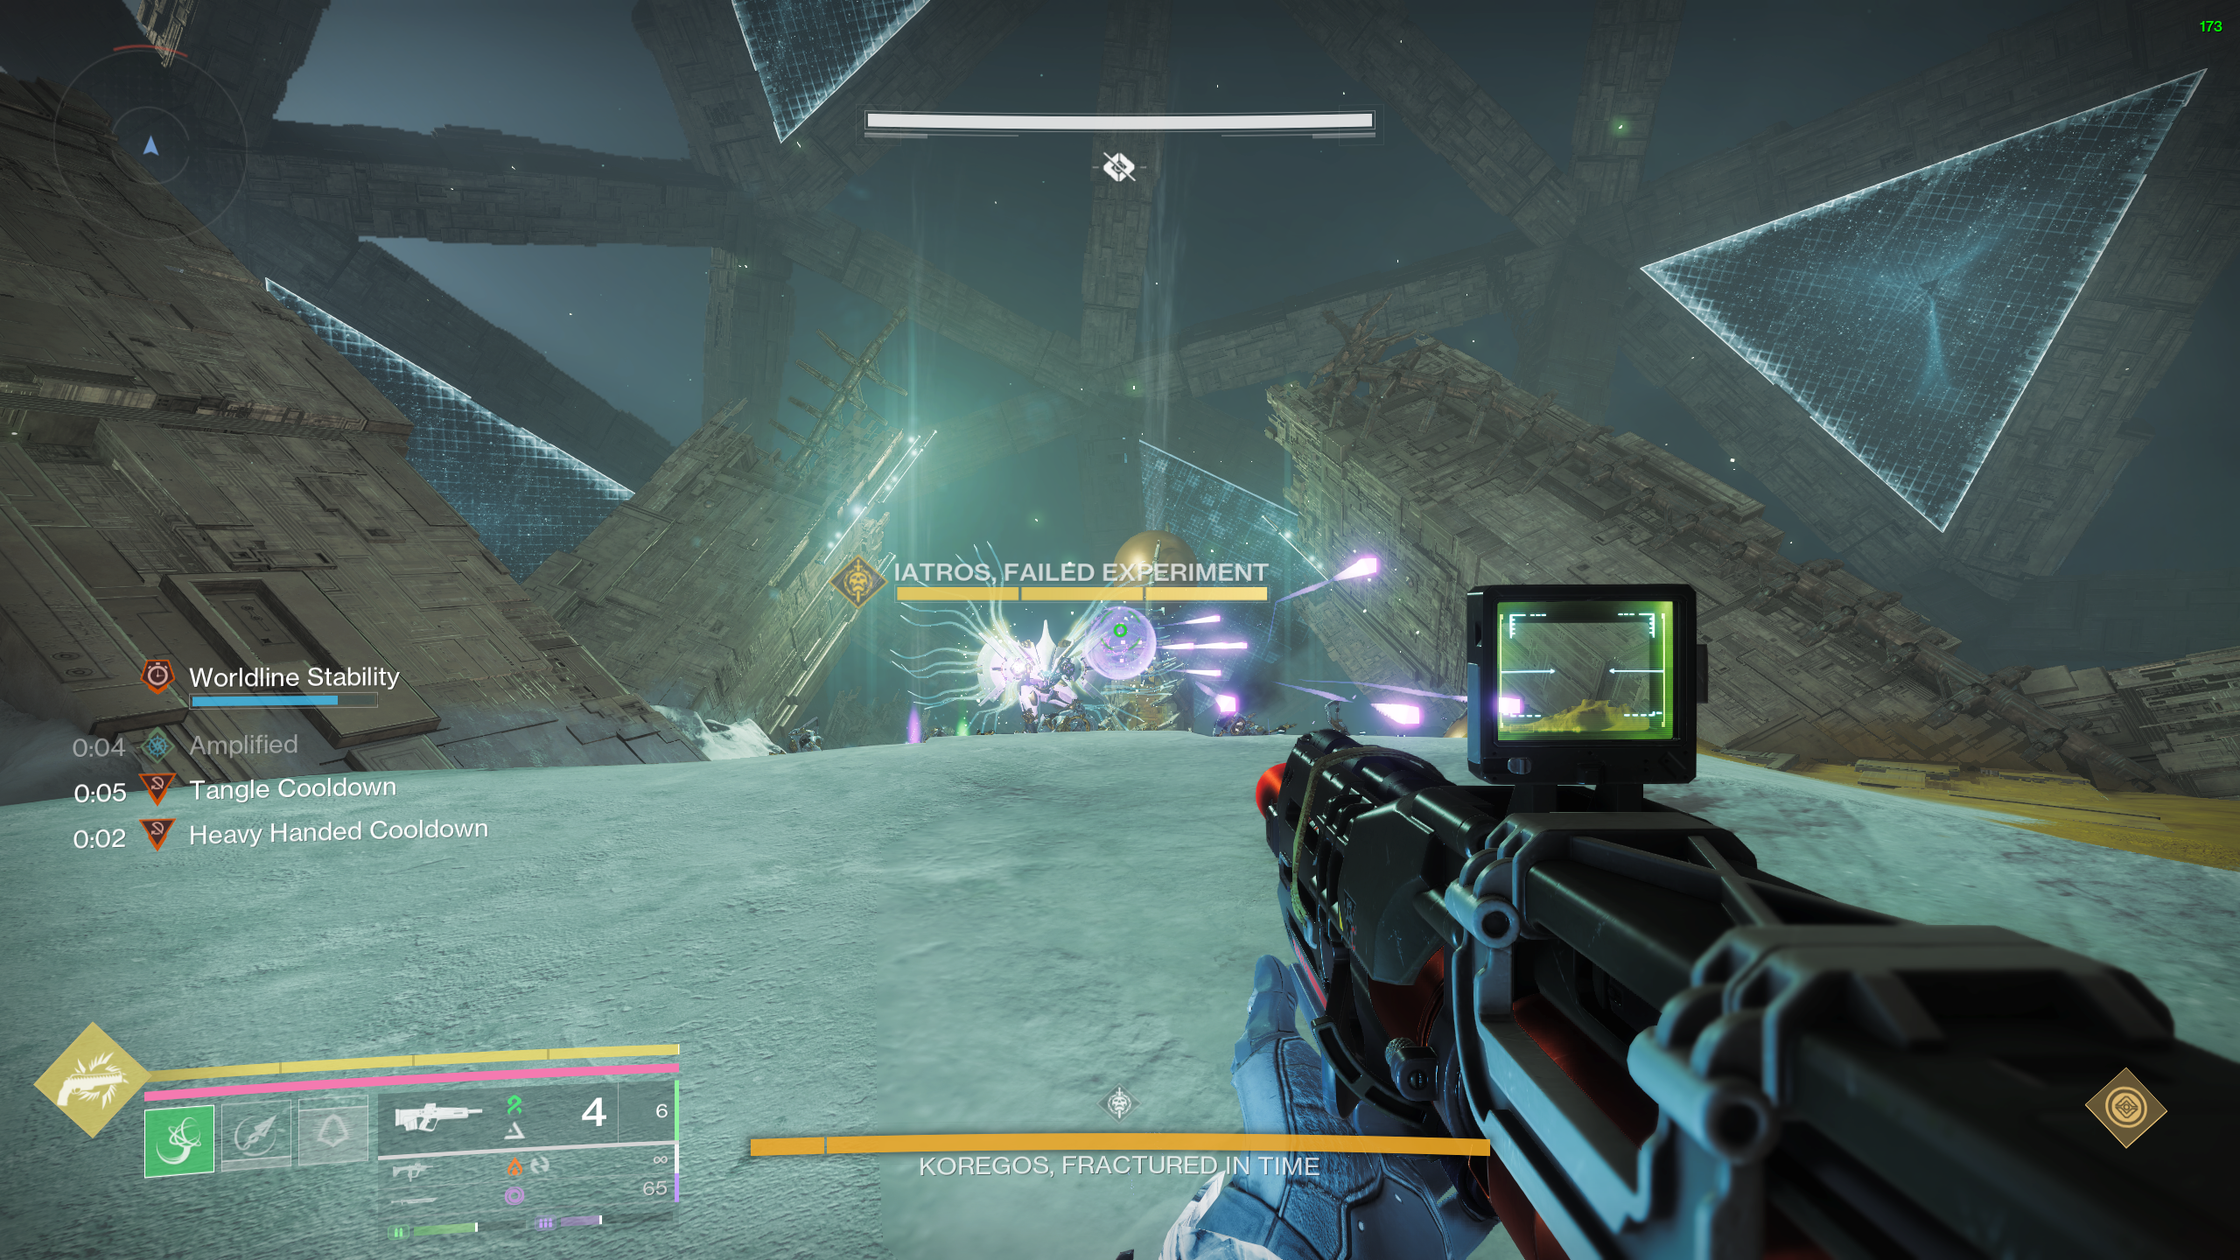 Iatros's Minigame Arena. The cubes spawn in pairs, with one on
the left and one on the right.
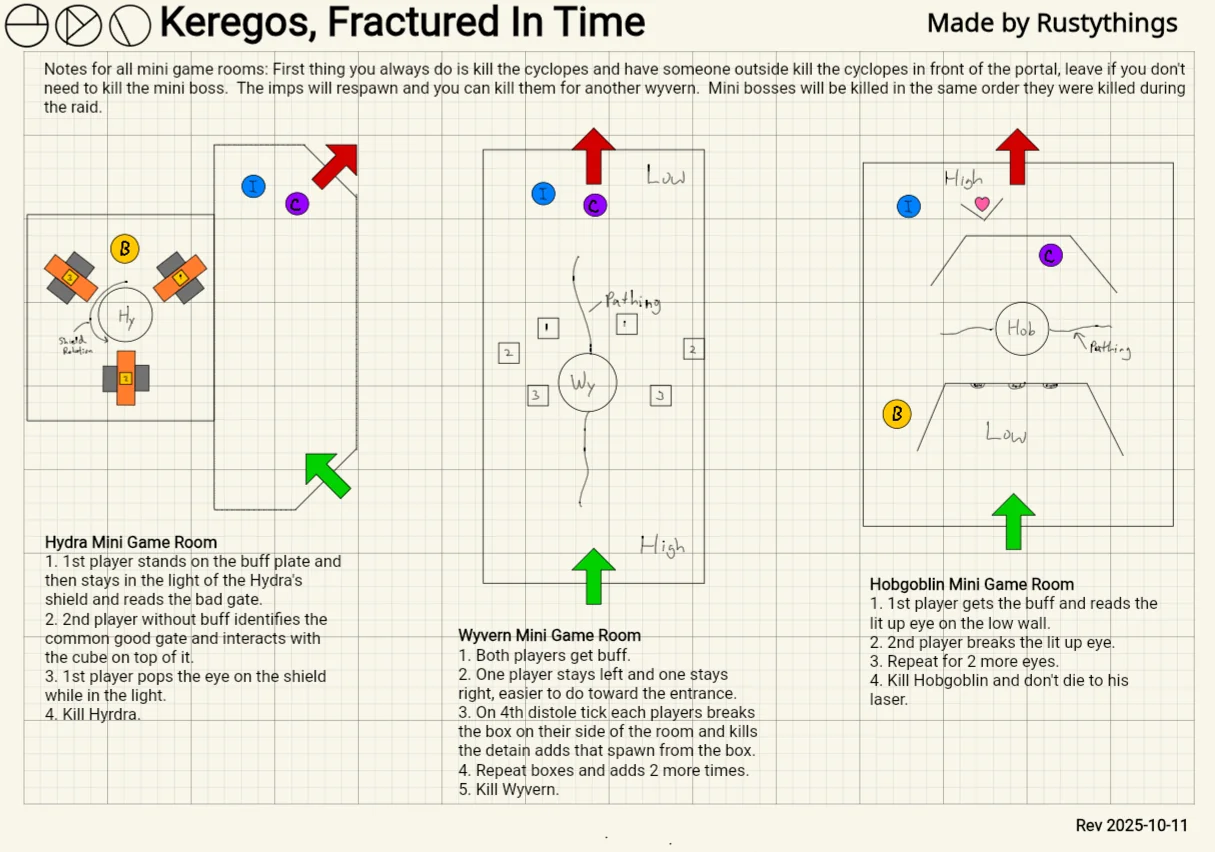
Now that we have covered the core mechanics and portal minigames, we can go through each timeline step by step. Understanding the overall flow will make it much easier to follow how the encounter progresses.
Timeline One: Scouting Phase
- Clear Banishment debuff, 4 players will interact with vex nodes. 2 players will enter the open portal to a minigame arena.
- For the 2 players inside the minigame arena, one grabs the Temporality buff, the other doesn't. No minigame in this timeline, kill the Cyclops and exit. Outside players kill Cyclops too.
- Once outside, Temporality buff player destroys the Temporal Locus crystal. No shooting of the core in this timeline.
- Once Worldline Stability hits ~25 - 30%, the Chronon Canisters in the middle reveals a color, note it down.
- Once Worldline Stability runs out, you will be progressed to Timeline 2.
Timeline Two: First Minigame + DPS
- Align to the Chronon color noted in Timeline 1 at one of the canisters.
- Clear Banishment debuff, 4 players will interact with vex nodes. 2 players will enter the open portal to a minigame arena.
- The 2 players kill the imp swarm ("Harbinger of Burdens") to spawn a Time's Burden Wyvern outside in the main arena.
- Outside 4 players kill the Wyvern for four Chronons of the aligned color and dunk them in the Hoop. Repeat until hourglass under the hoop is filled.
- Once full, shoot the Vex cube under the Hoop, starting the minigame for the 2 inside players.
- Complete your assigned boss's minigame (Epoptes/Agraios/Iatros) and kill it. Kill Cyclops, both inside and outside for the 2 players to leave.
- Player who deals the final blow will have the "Undoing of <Boss Name>" buff.
- Once outside, Temporality buff player destroys the Temporal Locus crystal. Non buffed players shoot the core.
- DPS Koregos in the center. Be careful to avoid pressure mechanics - Diastole, Variable Elimination, Detainment Seekers.
- Take note the new Chronon color during DPS before the timer runs out and you will be progressed to Timeline 3.
Timeline Three: Second Minigame + DPS
- Player with "Undoing of <Boss Name>" kills that specific boss in the main arena, and gets a Temporality buff. Same player destroys the Temporal Locus that has no link to a portal. Non buffed players shoot the core.
- Repeat all steps from Timeline 2. By the end, you should be progressed to Timeline 4.
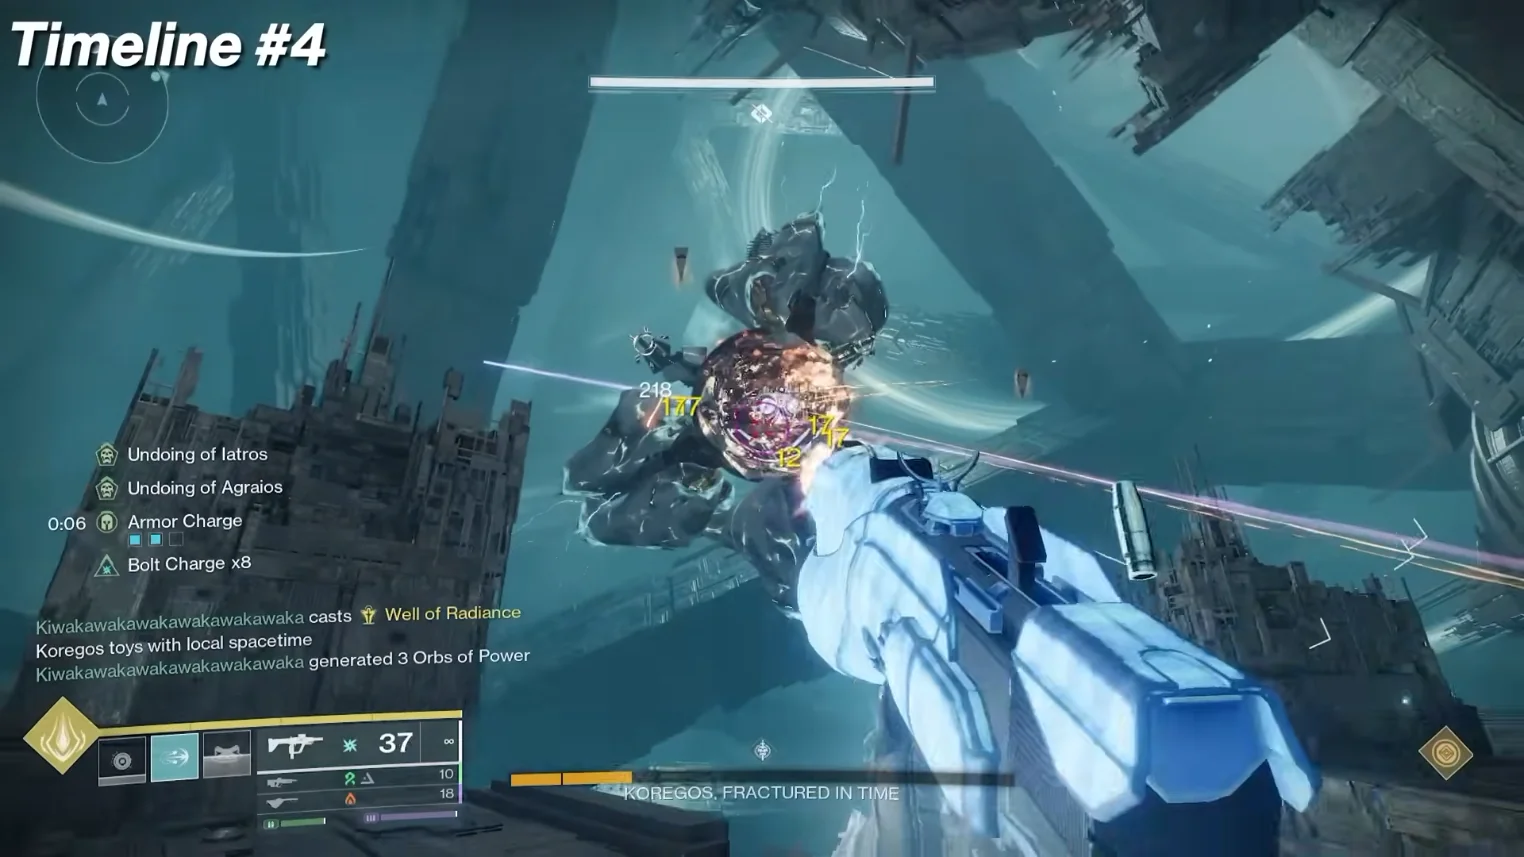
Timeline Four: Third Minigame + Alternate DPS Location
- By Timeline 4, 2 minigames are complete, meaning 2 players will have the "Undoing of <Boss Name>" buff, those 2 players are to kill their specific boss, each to get a Temporality buff, each to destroy a Temporal Locus, non buffed players destroy the 2 cores.
- Repeat Steps 1 to 6 of Timeline 2 to complete the third minigame.
- Once the 2 players are out, the player with the temporality buff will destroy the third and final Temporal Locus, non buff players will destroy the core. Koregos will flee to the open area behind the white alignment canister.
- Split the team into 3 teams of 2. Have 1 player from each pair to stand on the left/mid/right plates simultaneously to grant Absolute Temporality buff to those 3 players. DPS Koregos.
- Watch for Koregos spawning new Temporal Locus on the platforms. The buffed player destroys the crystal, the non-buffed player destroys the core.
- DPS Koregos until the timeline stability runs out, or until you reach final stand, signaling the move into the final timeline.
Timeline Five: Final Stand
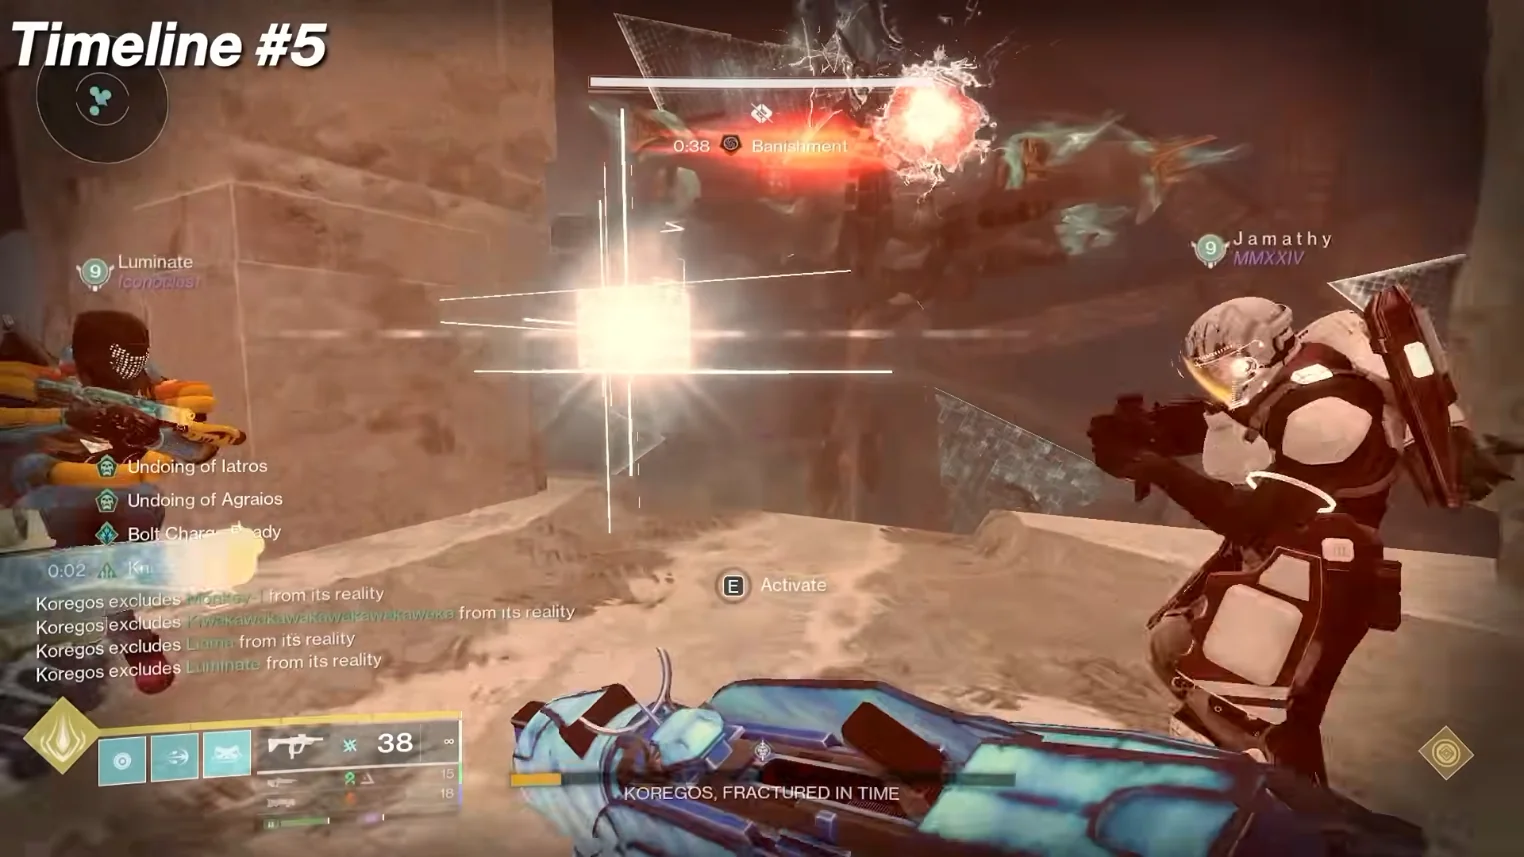
- Kill the lone Harpy over the center hole to unlock the nearest portal.
- Entering banishes 4 random people - clear it by interacting with Vex nodes along the climb (one cube per player, similar to Iatros's climb) to reach Koregos at the top.
- At the top, three Temporal Locus spawn and three random players get Absolute Temporality.
- Buffed players destroy the crystals; unbuffed players shoot the core to make Koregos vulnerable.
- When Koregos goes immune, three more Temporal Locus spawn. Repeat Step 4.
- Hold back big one-shot supers (Thundercrash, Nova Bomb) if the Locus haven't spawned recently, since an immunity phase can waste them.
- Treat the whole timeline as an extended final stand - each Locus cleared extends it, and the boss stops going immune deep enough into its health bar, so don't hoard supers.
- Once Koregos hits zero, back away until "Decoherence Imminent" clears, then exit through the open portal for loot.
Congratulations! You have completed Epic Desert Perpetual!